

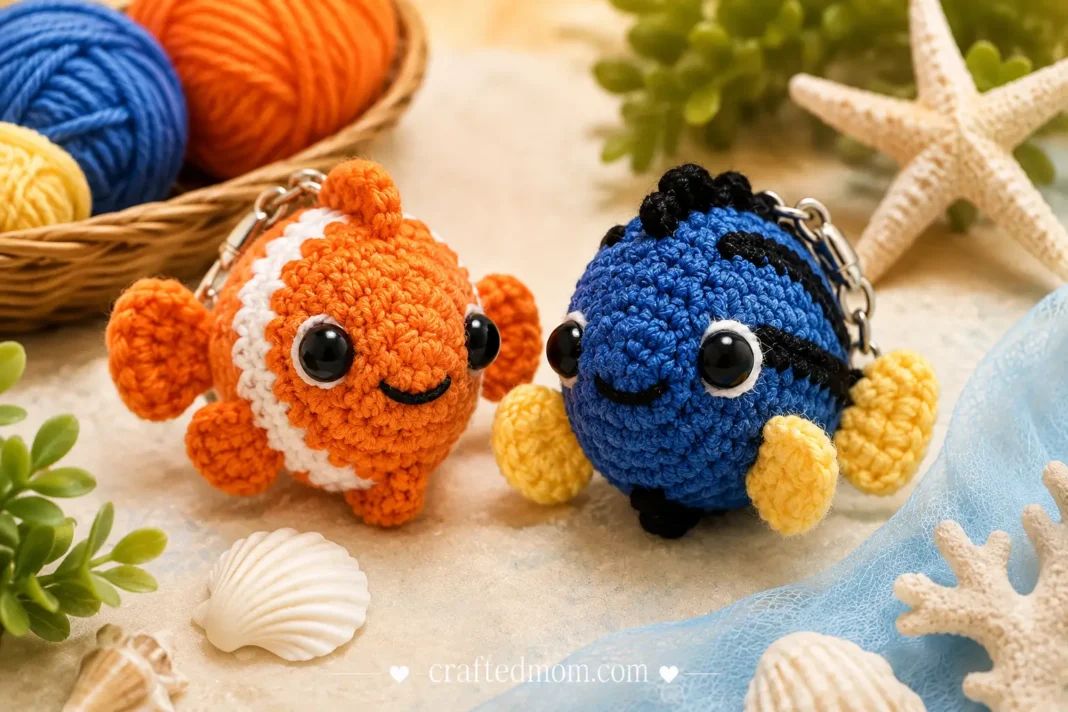
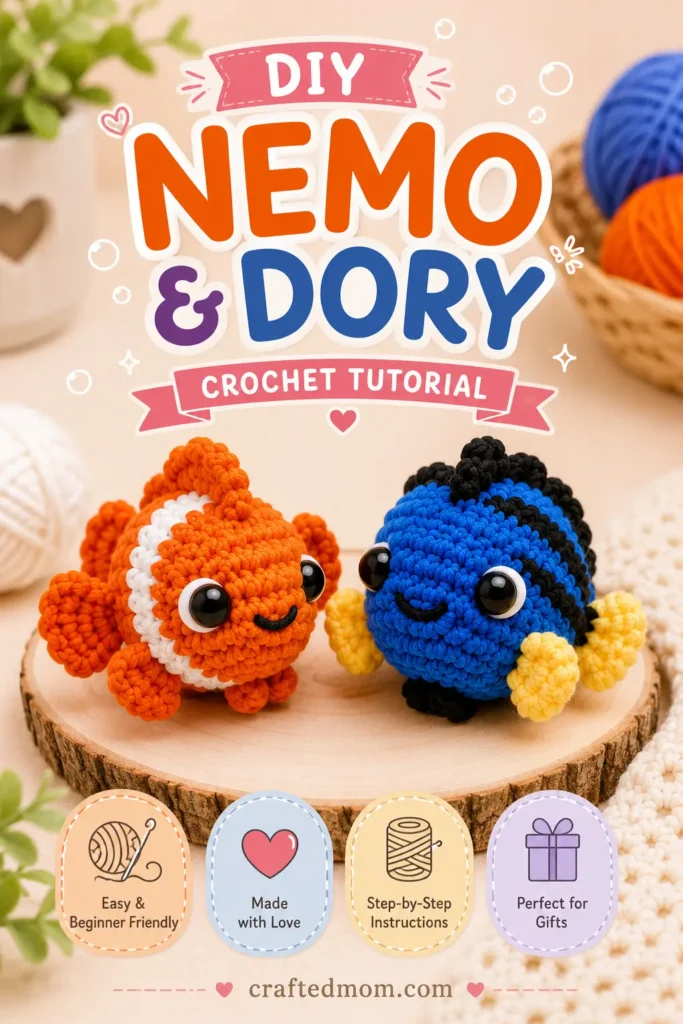
A tiny orange clownfish and a round blue tang are the kind of crochet pair that instantly look like they belong together, especially once the fins, stripes, big eyes, and little smiles go on. This Nemo and Dory Fish Keychain Crochet Pattern uses one shared fish-body construction, so after you understand the first fish, the second comes together much faster.
The clever part is that most of the difference comes from color placement and finishing details rather than learning an entirely new body pattern.
Nemo gets orange and white color changes, orange fins, and thin details around the eyes. Dory keeps the same basic body shape in blue, then gets yellow fins and tail pieces with black accents. Both are small enough to turn into keychains, bag charms, little handmade gifts, or miniature ocean-themed decorations.
The construction is also pleasantly manageable. We begin with a magic ring, gradually increase to form the rounded head and body, crochet several even rounds, decrease toward the back, add stuffing, and then build the tail and fins separately. Once the body is finished, the small decorative details are what really bring each fish to life.
Nemo and Dory Fish Keychain Crochet Pattern at a Glance
| Project Detail | Information |
| Project | Mini Nemo and Dory inspired crochet fish |
| Yarn | 5-ply yarn |
| Crochet Hook | 3.5 mm |
| Eyes | 5 mm eyes |
| Starting Method | Magic ring |
| Main Stitch | Single crochet |
| Other Stitches | Half double crochet, double crochet, slip stitch, increase, decrease |
| Maximum Body Stitch Count | 24 stitches |
| Body Rounds | 13 rounds |
| Nemo Colors | Orange and white, plus thin dark details |
| Dory Colors | Blue, yellow, and black |
| Eye Placement | Between Rounds 5 and 6 |
| Stuffing | Fiberfill |
| Tail | Crocheted onto the closed back |
| Fins | Crocheted separately or directly onto the body |
| Finishing | Embroidery and small color details |
| Keychain Use | Finished fish can be adapted into a bag charm or keychain |
The basic materials include 5-ply yarn, a 3.5 mm hook, stitch marker, 5 mm eyes, scissors, needle, and stuffing.
Materials You’ll Need
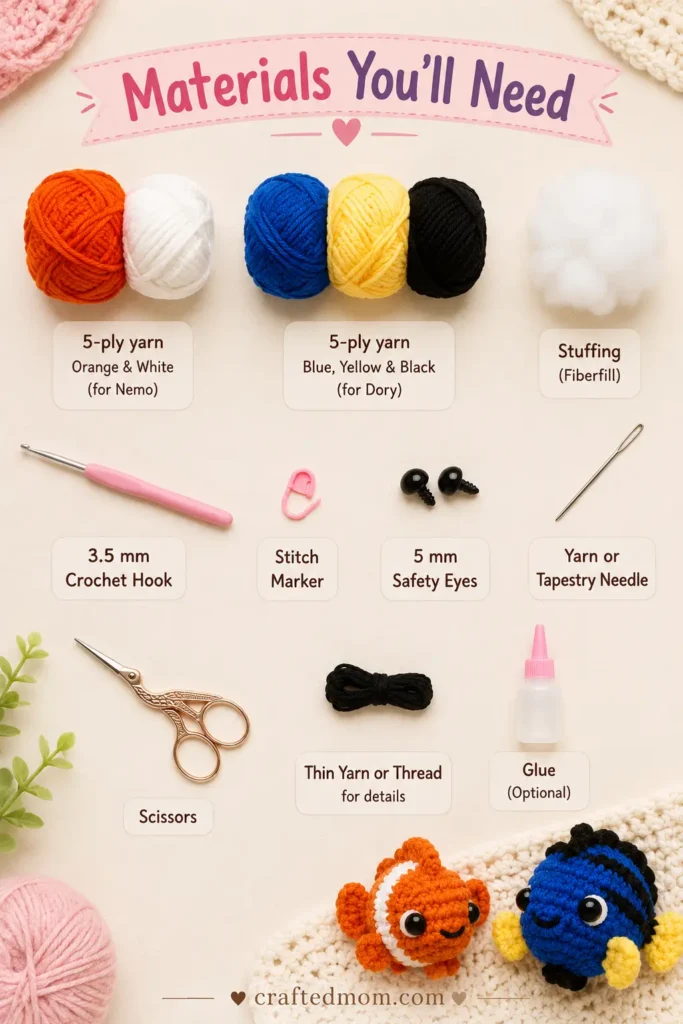
For both fish, gather:
- 5-ply yarn
- 3.5 mm crochet hook
- Stitch marker
- Yarn or tapestry needle
- Scissors
- Fiberfill stuffing
- 5 mm eyes
- Thin yarn or thread for facial and stripe details
- Glue, optional, if using glue-on eyes or attaching a fin that way
For Nemo
Use:
- Orange yarn
- White yarn
- Thin black or dark yarn/thread for facial details
For Dory
Use:
- Blue yarn
- Yellow yarn
- Black yarn
- Thin black yarn or thread for the body markings
The body pattern is the same for both fish. Nemo uses color changes during several rounds, while Dory can be crocheted through those same rounds without changing the main body color.
If you’re making these for very young children rather than as decorative keychains, embroidered eyes are safer than small plastic eyes.
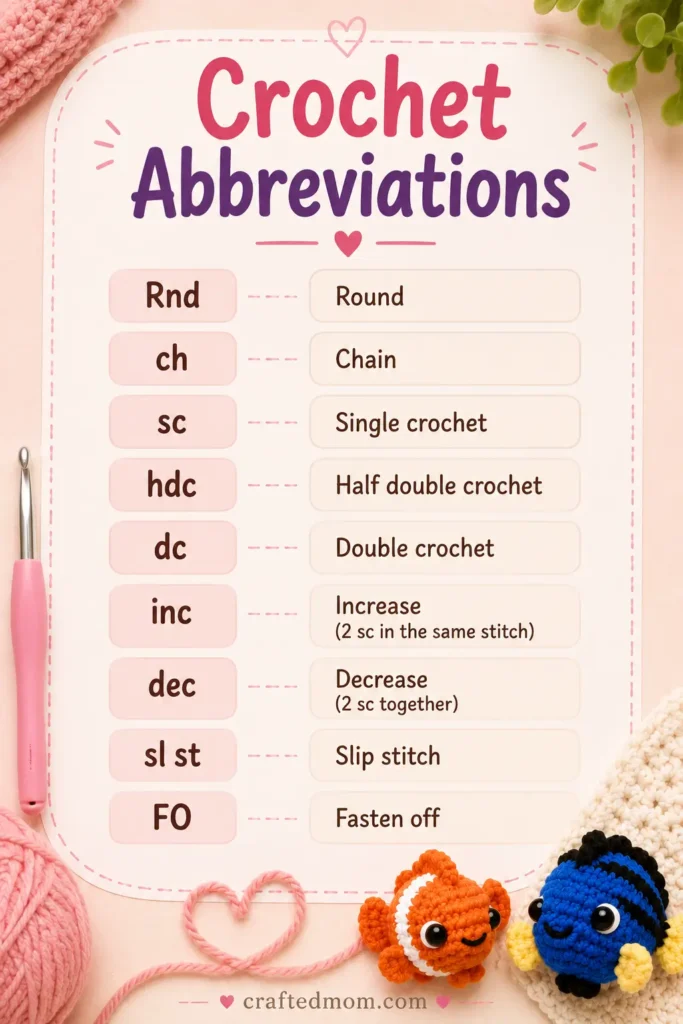
Crochet Abbreviations
| Abbreviation | Meaning |
| Rnd | Round |
| ch | Chain |
| sc | Single crochet |
| hdc | Half double crochet |
| dc | Double crochet |
| inc | Increase |
| dec | Decrease |
| sl st | Slip stitch |
| FO | Fasten off |
An increase means working 2 single crochets into one stitch.
A decrease combines 2 stitches into 1.
Before You Start
Both fish share the same body shaping.
The main difference is color:
Nemo: orange, white, orange, white toward the closing end.
Dory: follow the same rounds and stitch counts while keeping the body in blue instead of making Nemo’s color changes.
The body reaches a maximum of 24 stitches, stays at that width for several rounds, and then gradually decreases toward the tail.
Keep a stitch marker in the first stitch of every round. These pieces are small, and losing one stitch can noticeably change the final shape.
How to Crochet the Fish Body
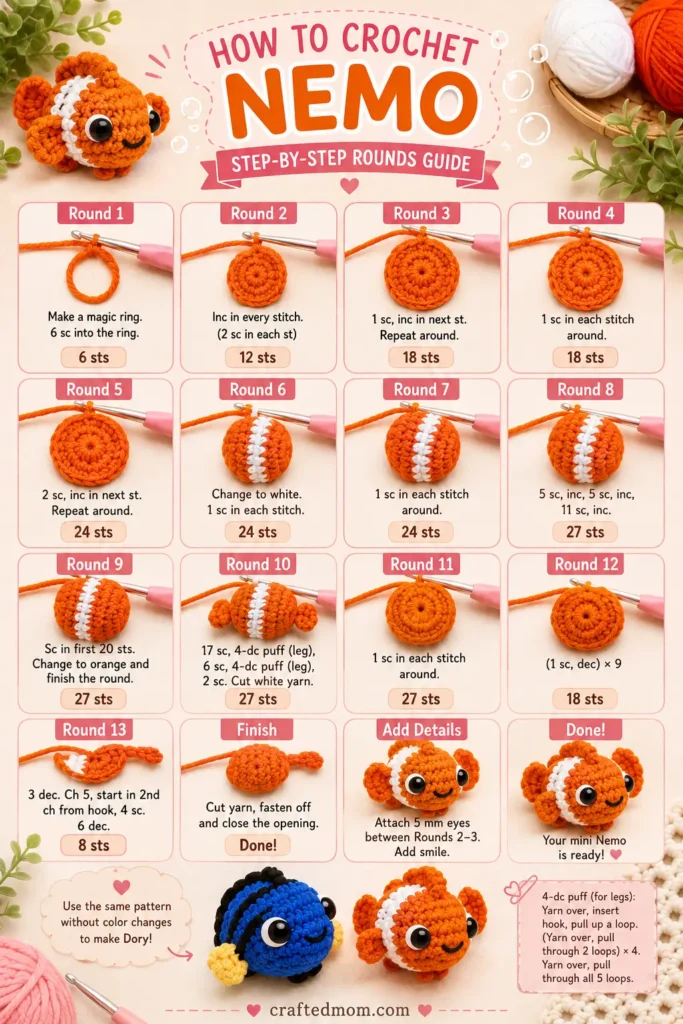
Start with your main color.
For Nemo, begin with orange.
For Dory, begin with blue.
Round 1
Make a magic ring.
Work:
6 sc into the magic ring
Pull the tail to close the center.
Stitch count: 6
Round 2
Work:
inc × 6
Place your stitch marker in the first stitch.
Stitch count: 12
Round 3
Work:
(1 sc, inc) × 6
Repeat around.
Stitch count: 18
The first three rounds increase the body from 6 stitches to 12 and then 18.
Round 4
Work:
18 sc
There are no increases.
Stitch count: 18
Round 5
Work:
(2 sc, inc) × 6
That means:
1 sc in each of the next 2 stitches, then 2 sc in the following stitch
Repeat around.
Stitch count: 24
For Nemo, we’ll change to white at the end of this round.
For Dory, continue in blue.
Change to White for Nemo
When you reach the final stitch of Round 5, do not complete the last single crochet entirely with orange.
Insert the hook and pull up a loop.
Before finishing the stitch, bring in the white yarn and use it to complete the final pull-through.
Your working color is now white.
For Dory, skip the color change and continue with blue.
Round 6
For Nemo, use white.
For Dory, continue in blue.
Work:
24 sc
Stitch count: 24
Round 7
Work:
24 sc
Stitch count: 24
For Nemo, change back to orange while completing the final stitch of Round 7.
For Dory, keep using blue.
Round 8
For Nemo, use orange.
Work:
24 sc
Stitch count: 24
For Dory:
24 sc in blue
Round 9
Repeat:
24 sc
Stitch count: 24
Nemo now has two orange rounds following the two white rounds.
Begin Shaping the Back of the Fish
Round 10
Work:
(2 sc, dec) × 6
Stitch count: 18
For a neat decrease, insert your hook through the front loops of the next 2 stitches, then complete 1 single crochet through them together.
Repeat the sequence around:
2 sc, dec
Round 11
Work:
18 sc
Stitch count: 18
If you’re using safety eyes, now is a good time to add them before the opening becomes smaller.
Add the Eyes
Place the eyes:
between Rounds 5 and 6
The project uses:
5 mm eyes
If you’re using glue-on eyes, you can wait until the fish is completely crocheted before attaching them.
Change Color Again for Nemo
At the end of Round 11, change from orange to white while finishing the final stitch.
Dory stays blue.
Round 12
Work:
(1 sc, dec) × 6
Stitch count: 12
For Nemo, use white.
For Dory, continue in blue.
Stuff the Fish
Add fiberfill before the opening becomes any smaller.
Use small amounts at a time.
The body should look plump and rounded, but you don’t need to pack the stuffing so tightly that the stitches stretch open.
For Nemo, you can cut the unused orange yarn after the white section is established.
Round 13
Repeat:
1 sc, dec
around the remaining stitches.
Stitch count: 8
A regular decrease can be easier here because the opening is now small.
Insert your hook into the next stitch and pull up a loop.
Do the same in the following stitch.
You will have three loops on your hook.
Yarn over and pull through all three loops.
When Round 13 is complete:
1 sl st into the next stitch
Then:
ch 1
Fasten off.
The main fish body is finished.
Crochet Nemo’s Tail
Use orange yarn.
For Dory, use yellow yarn for this same tail construction.
Position the fish so the color-change seam stays centered underneath.
Attach your yarn at the back opening by inserting the hook through stitches from both sides.
Chain:
ch 1
Now work single crochets through the two sides together, closing the remaining opening as you go.
When needed, insert the hook through a stitch on the front and the corresponding stitch on the back, then make a single crochet through both layers.
Shape the Tail
After joining the back:
ch 2
Turn your work.
Work double crochets into the joined stitches to create the fan-shaped tail.
The shaping uses a regular double crochet followed by paired double crochets worked into the next stitches.
Finish with:
ch 2
Then:
1 sl st
Finish with:
ch 1
Cut your yarn.
Secure the tails and hide them inside the fish.
For Dory, repeat this section using yellow instead of orange.
Crochet the Side Fin
This small fin is made separately.
Use orange for Nemo and yellow for Dory.
Make a slip knot.
Chain:
ch 3
In the third chain from the hook, work:
3 dc
Then:
ch 2
Make:
1 sl st into the same stitch
Finish with:
ch 1
Fasten off.
Leave the tails long enough for attachment.
Attach the Side Fin
Position the fin along the body near the white section on Nemo.
Pull the two tails through the body using a crochet hook or needle.
Tie them securely together inside the fish and hide the ends.
You can also attach the fin with glue if you prefer.
For Dory, repeat the fin in yellow.
If small character accessories are your favorite part of crochet, the Baby Chicks and Ducks with Hats Crochet Pattern is another fun project built from simple pieces that gain personality through finishing details.
Crochet Nemo’s Small Top Fin
Use orange yarn.
Flatten the fish slightly so you can identify the center line along the top.
Attach the yarn where you want the smaller fin.
Chain:
ch 1
In the next stitch, work:
3 hdc
Then:
ch 1
Work:
1 sl st into the next stitch
Finish:
ch 1
Fasten off.
Hide the tails inside the body.
Repeat the same small-fin construction on the underside of Nemo.
Crochet Nemo’s Larger Fin
Attach orange yarn beside the smaller fin.
Chain:
ch 1
In the next stitch:
2 hdc
In the following stitch:
2 hdc
Then:
1 sc in the next stitch
Finish with:
1 sl st in the next stitch
Then:
ch 1
Fasten off.
Hide the yarn tails.
Repeat this larger fin along the underside so Nemo has corresponding upper and lower fins.
Those small and large fins help break up the round body and give the finished fish a much more recognizable silhouette.
Add Nemo’s Facial Details
Use thin dark yarn or thread.
Add a small curved smile.
You can also work thin details around the eyes to define the face.
Secure every thread carefully and hide the ends inside the body.
Keep these details small. On a miniature amigurumi fish, one extra stitch can noticeably change the expression.
Finish the Dory Variation
Dory uses the same main body construction, but you do not make Nemo’s orange-to-white color changes.
Keep the body blue through the corresponding rounds.
Then add:
- Yellow tail
- Yellow side fins
- Black body details
- Black stripe accents
The same small side-fin pattern used for Nemo can be repeated in yellow for Dory.
Add Dory’s Black Body Fin
Use black yarn.
Attach the yarn along the body.
Chain:
ch 1
Work:
7 sc across the body
These stitches are made by piercing into suitable body stitches as you move across the surface.
After the seventh single crochet:
1 sl st into the next stitch
Then:
ch 1
Fasten off.
Hide the yarn ends inside the body.
Add Dory’s Black Lines
Use black yarn or thin thread.
Add:
2 black lines on each side
Secure the yarn and hide the ends inside the fish.
The contrast between the deep blue body, black accents, and bright yellow fins is what separates Dory visually from Nemo even though they share the same core construction.
Turn the Fish Into Keychains
Once the fish are fully assembled, you can use them as miniature decorations on their own or add a keychain attachment.
For a keychain version, attach your keychain hardware securely near the top or back of the finished fish using a strong loop of yarn or appropriate hardware.
Because no specific keychain hardware or attachment method is specified in the pattern itself, choose an attachment that fits the hardware you already have rather than altering the crochet body instructions.
If you’re building a whole collection of small crochet bag accessories, the Nemo and Dory Fish Keychain Crochet Pattern would pair nicely with the Dress Up Leggy Frog Bag Friend Crochet Pattern. For another compact ocean-themed project, the Whale Drawstring Pouch Crochet Pattern or Pufferfish Drawstring Pouch Crochet Pattern would also fit naturally.
Tips for Cleaner Nemo and Dory Fish
Keep the Seam Underneath
When working Nemo’s color changes, keep the seam positioned along the underside.
This gives you a cleaner visible side and makes it easier to position the tail and fins symmetrically.
Change Yarn Before Completing the Stitch
For a smoother color change, do not completely finish the final single crochet using the old color.
Pull up the loop, introduce the new color, and finish the stitch with that yarn.
Don’t Overstuff
These fish are supposed to stay rounded, but excessive stuffing can stretch the small stitches and make the body look lumpy.
Position Both Eyes Before Securing Them
If you’re using glue-on eyes, place both first and compare the spacing.
The eye position has a big effect on these tiny faces.
Keep Thin Details Thin
Use lightweight yarn or thread for smiles and black markings.
Using the same thickness as the body yarn can make facial details look oversized.
For another small amigurumi project with lots of character packed into a compact design, the Mini Miffy Crochet Pattern or Moo Deng Baby Hippo Crochet Pattern would make a fun next project.
Two Fish, One Handy Base Pattern
Once you make the first rounded fish body, the second feels surprisingly familiar. That is the nicest part of the Nemo and Dory Fish Keychain Crochet Pattern. You are not learning two completely separate amigurumi constructions, just changing colors, fins, stripes, and facial details to turn the same foundation into two very different little fish.
Make the orange-and-white one first, switch your yarn to blue and yellow for the second, then add a keychain attachment if you want them swimming around on a bag instead of sitting on a shelf.
Frequently Asked Questions
Do Nemo and Dory use the same crochet body pattern?
Yes. Both fish use the same body rounds and shaping. Nemo has several color changes, while Dory keeps the main body in one color.
What yarn is used for the Nemo and Dory Fish Keychain Crochet Pattern?
The materials specify 5-ply yarn. Different colors are used to create Nemo’s orange-and-white design and Dory’s blue, yellow, and black details.
Can I sew the fins instead of gluing them?
Yes. The small fins can be attached using their yarn tails and secured inside the body. Glue is simply another option for attachment.
