

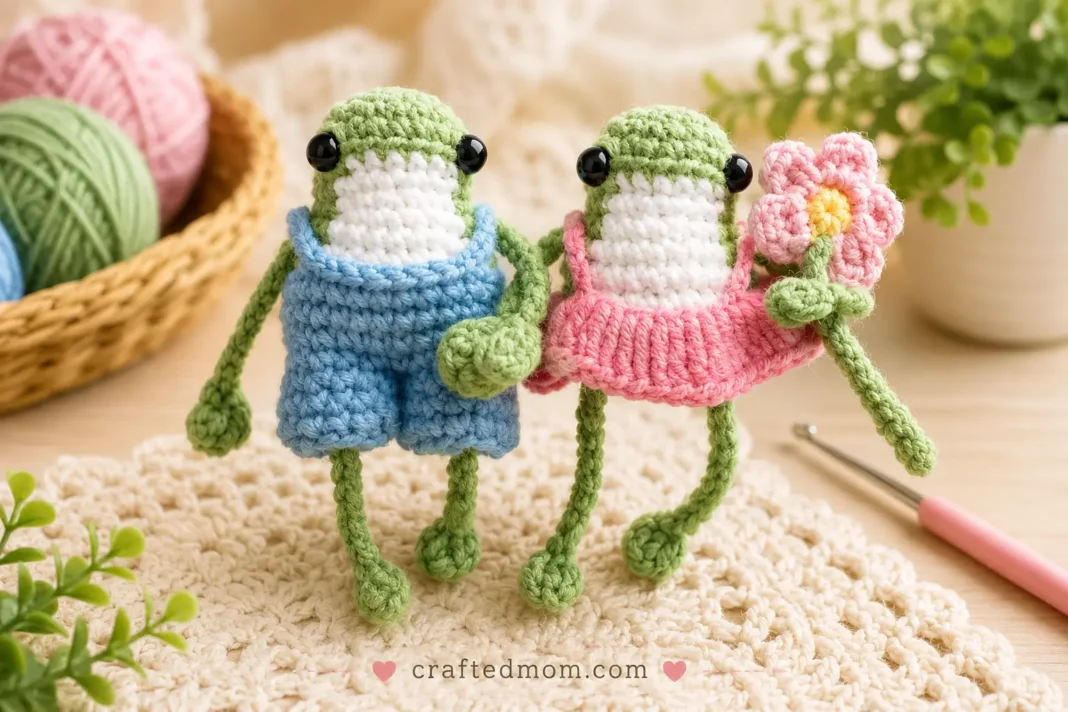
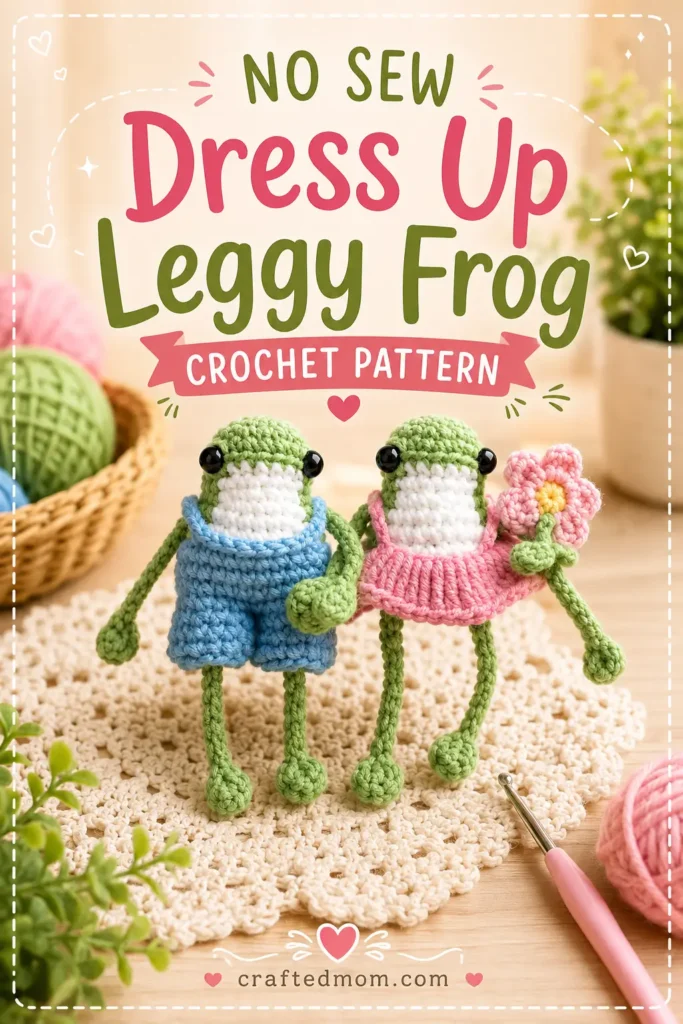
Those extra-long floppy arms and legs are what give this little frog so much personality, but the tiny wardrobe takes it to another level. With the No Sew Dress Up Leggy Frog Crochet Pattern, you’ll crochet a green and white stuffed frog with long chain limbs, then make separate clothing pieces so your frog can switch between sweet pink dress-up style and tiny blue overalls.
The body uses simple amigurumi shaping with a clever white color section across the front. Instead of making the arms and legs separately and sewing them on, the yarn is attached directly to the finished body and the limbs are crocheted in place. That keeps assembly surprisingly light.
Then comes my favorite part: the clothes. The dress has a flared skirt and little shoulder straps, while the overalls are constructed from two small leg sections that are joined before working upward. Both pieces can be put onto the same frog, which makes this project feel like a tiny crochet doll as much as an amigurumi animal.
No Sew Dress Up Leggy Frog Crochet Pattern at a Glance
| Project Detail | Information |
| Project | Dress-up leggy frog amigurumi |
| Yarn | 5-ply yarn |
| Crochet Hook | 3.5 mm |
| Main Frog Colors | Green and white |
| Clothing Colors Shown | Pink and blue |
| Safety Eyes | 5 mm |
| Starting Method | Magic ring |
| Main Stitch | Single crochet |
| Other Stitches | Half double crochet, double crochet, slip stitch |
| Colorwork | Green and white belly section |
| Stuffing | Fiber filling |
| Arms | Crocheted directly onto the body |
| Legs | Crocheted directly onto the body |
| Clothing | Dress and overalls |
| Dress Starting Chain | 25 chains, or enough to fit around the frog |
| Arm/Leg Length | 12-chain foundation |
| Special Technique | Back loop only stitches during the first white section |
The frog begins with a magic ring and increases from 6 to 18 stitches. The body then uses carefully placed green and white color changes to build the contrasting belly directly into the amigurumi rather than attaching a separate white panel.
Materials You’ll Need
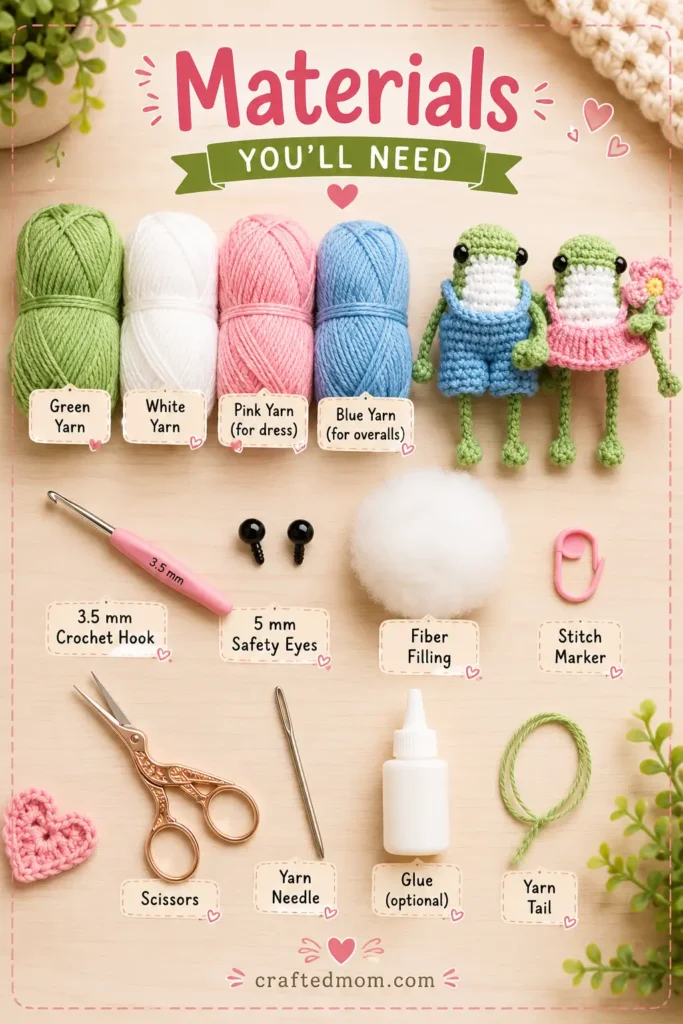
Gather these supplies before you start:
- 5-ply yarn
- Green yarn
- White yarn
- Pink yarn for the dress
- Blue yarn for the overalls
- 3.5 mm crochet hook
- 5 mm safety eyes
- Fiber filling
- Stitch marker
- Scissors
- Yarn needle
- Glue for tidying loose limb ends, if desired
The combination of 5-ply yarn and a 3.5 mm crochet hook keeps the stitches compact enough for a stuffed amigurumi project.
Because the finished frog uses 5 mm plastic eyes, keep in mind that safety eyes are small components. If you’re making the frog for a baby or very young child, embroidered eyes are a safer alternative.
Crochet Abbreviations
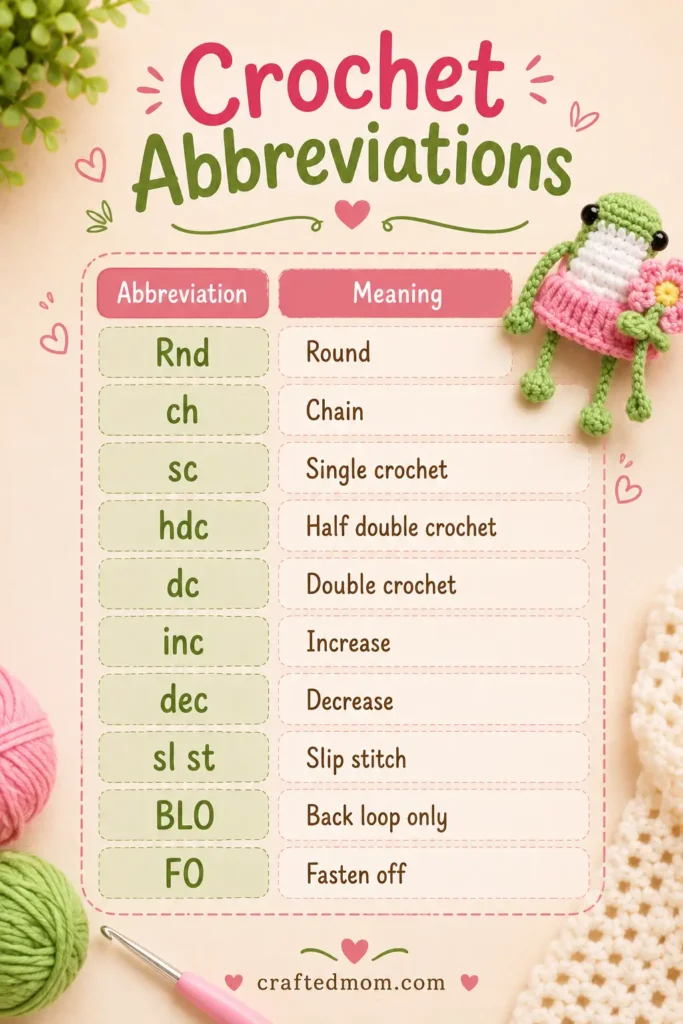
I’ll use standard US crochet terminology throughout this pattern.
| Abbreviation | Meaning |
| Rnd | Round |
| ch | Chain |
| sc | Single crochet |
| hdc | Half double crochet |
| dc | Double crochet |
| inc | Increase |
| dec | Decrease |
| sl st | Slip stitch |
| BLO | Back loop only |
| FO | Fasten off |
An increase means working 2 single crochets into the same stitch.
For the decreases through most of the body, insert your hook through the front loops of the next two stitches and work them together as one stitch.
Before You Begin the Frog
There are two details worth understanding before you start.
First, the frog is worked primarily in continuous rounds, so place your stitch marker in the first stitch of each round and move it upward as you crochet.
Second, the white belly isn’t sewn onto the frog afterward. It is created through color changes while you crochet the body.
The color changes begin in Round 5. The white section grows and changes position as the frog is shaped, so pay close attention to where you switch between green and white.
A clean way to change colors is to begin the final stitch in your current color, stop before completing the last yarn-over, then finish the stitch with the new color.
How to Make the No Sew Dress Up Leggy Frog Crochet Pattern
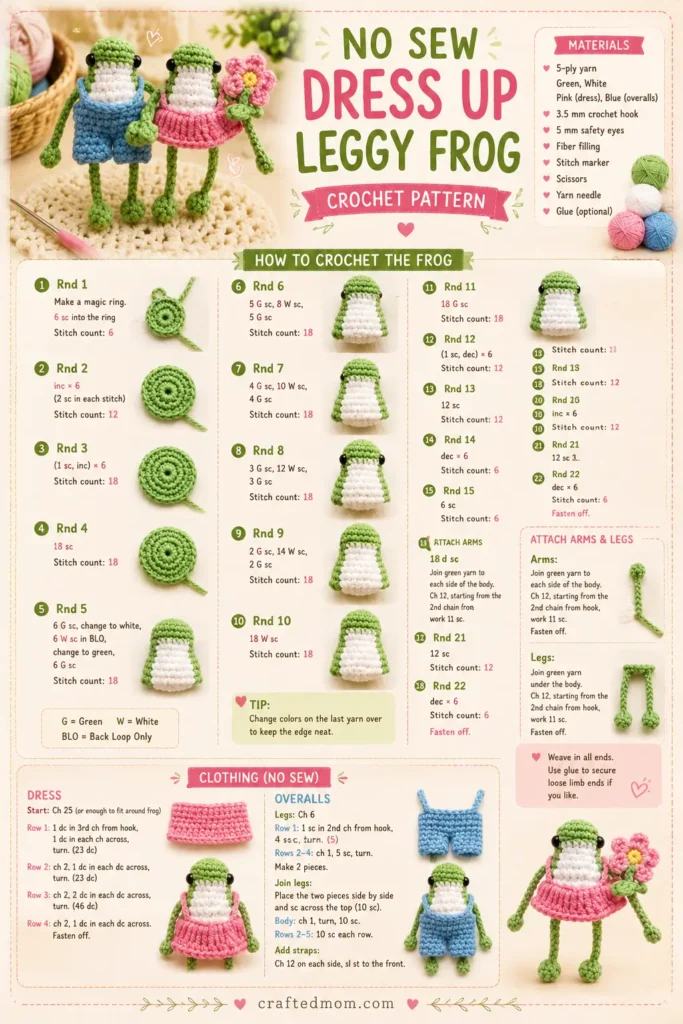
We’ll start at the top of the frog’s head and work downward.
Use green yarn to begin.
Round 1
Make a magic ring.
Work:
6 sc into the magic ring
Pull the tail to close the center.
Stitch count: 6
Round 2
Work:
inc × 6
This means you’ll make 2 single crochets in every stitch around.
Stitch count: 12
Place your stitch marker in the first stitch of the round.
Round 3
Work:
(1 sc, inc) × 6
Stitch count: 18
You should now have a small, flat circle forming the top of the frog’s head.
Round 4
Work:
18 sc
Stitch count: 18
There are no increases in this round. Simply place one single crochet into every stitch.
Create the White Frog Belly
Round 5 introduces the white yarn.
For clarity:
- G = green
- W = white
Round 5
Work:
6 G sc
Change to white.
Then work:
6 W sc in BLO
Change back to green.
Finish with:
6 G sc
Stitch count: 18
Only the six white stitches are worked through the back loops only in this round. The green stitches are regular single crochets.
This little detail is easy to miss, so I would double-check those six white stitches before moving on.
Round 6
The body begins decreasing.
Work the following decrease sequence while maintaining the green and white color sections:
(1 sc, dec) × 6
Stitch count: 12
Continue changing between green and white as needed to keep the belly section centered. The decreases are worked through the front loops of the next two stitches.
You can add the safety eyes after this round if you like, although you still have another opportunity before closing the body.
Round 7
Now increase again:
(1 sc, inc) × 6
Maintain the color placement so the sequence is worked twice in green, twice in white, then twice in green.
Stitch count: 18
Round 8
Work:
(2 sc, inc) × 6
Again, maintain the green, white, green color placement as you work around.
Stitch count: 24
The frog has now widened to 24 stitches.
Rounds 9 and 10
For both rounds, work:
8 G sc, 8 W sc, 8 G sc
Stitch count: 24 per round
The eight white stitches form the front belly panel, with eight green stitches on either side.
Round 11
Begin narrowing the body again.
Work:
(2 sc, dec) × 6
Maintain the green and white sections while completing the decreases.
Stitch count: 18
At the end of this round, you can cut the white yarn because the remaining body is worked entirely in green.
Add the Safety Eyes
If you haven’t already added them, do it now while you can still reach inside the body.
Use:
5 mm safety eyes
Position each eye beside the white facial/belly section and secure the backs firmly inside. The specified eye size is 5 mm.
Check the face from the front before locking the eyes permanently into place.
Round 12
Using green only, work:
(1 sc, dec) × 6
Stitch count: 12
Stuff the Frog
Before working the final round, fill the body with fiber filling.
Add small amounts at a time and distribute the stuffing through the head and body. You want enough filling to hold the frog’s shape without stretching the stitches apart.
Round 13
Work:
dec × 6
Stitch count: 6
For this final decrease round, you can either use the front-loop decrease method from the previous rounds or work through both next stitches before completing the decrease. Six decreases close the remaining opening.
Leave a long yarn tail.
Thread it through your yarn needle, pass it through the remaining stitches, and pull the opening closed.
Secure the yarn and hide the end inside the body.
Crochet the Frog’s Long Arms
Now the frog starts getting that wonderfully lanky shape.
Instead of making an arm separately, attach the green yarn directly to a stitch on the side of the body.
Make:
ch 12
Then work into the third chain from the hook:
1 hdc
Next:
ch 2
Work:
1 sl st into the same stitch
Then:
ch 1 and FO
Weave in the end.
The little cluster at the end of the chain creates the frog’s rounded hand.
Crochet the Long Legs
The legs use the same pattern as the arms.
Attach green yarn directly to a stitch at the bottom of the body.
Work:
ch 12
In the third chain from the hook:
1 hdc
Then:
ch 2
Make:
1 sl st in the same stitch
Finish with:
ch 1 and FO
Repeat until the frog has 2 arms and 2 legs.
Because the limbs are crocheted directly from the body, you don’t have four separate pieces waiting to be sewn on afterward.
If small yarn tails remain visible around the attachment points, they can be tidied and secured. Glue is used for this finishing detail, but keep it neat and minimal.
At this stage, your plain leggy frog is complete.
You could stop here, but the tiny clothes are really what give this project its dress-up personality.
If you like characters with interchangeable accessories, the Penguin with Hats Crochet Pattern is another fun project to pair with this one.
Crochet the Pink Frog Dress
The dress begins with a chain long enough to wrap around the frog.
Start with:
ch 25
The fit matters more than blindly following the number, so check the chain around your frog’s body. If needed, adjust the chain length until it wraps comfortably around.
Once you’re happy with the fit:
ch 1
Make sure your chain is not twisted.
Join to the first chain with:
sl st
Now:
ch 2
Crochet the Flared Skirt
Work:
2 dc into each chain around
Putting two double crochets into each chain creates the fuller, flared shape of the little dress.
Once you’ve worked all the way around, join with a slip stitch into the second beginning chain or into the first double crochet.
Then:
ch 1 and FO
The main skirt is complete.
Add the Dress Straps
Put the dress onto your frog so you can position the straps properly.
Place two stitch markers along the front, around the white belly area.
Check the back as well. The dress seam should sit approximately in the center back before you make the straps.
Attach your yarn at the first marked position.
Work:
ch 9
Bring the chain toward the back and attach it with:
1 sc at the back
Turn your work.
Make:
ch 9
Bring this chain back toward the front and join it at the second marked position with:
sl st
Then:
ch 1 and FO
Weave in the ends.
Your little frog now has a dress with two delicate shoulder straps.
You can leave the dress simple or pair it with a small crocheted accessory. The long arms make this frog especially charming when holding a tiny flower or similarly lightweight decoration.
Crochet the Frog Overalls
The blue overalls use a completely different construction.
You’ll begin by making two separate small leg pieces.
First Overall Leg
Start with:
ch 10
Join the first and last chain with:
sl st
Be careful not to twist the chain.
Overall Round 1
ch 1
Work:
10 sc
Stitch count: 10
Place a stitch marker in your first single crochet.
Overall Round 2
Work:
10 sc
Stitch count: 10
Overall Round 3
Work:
10 sc
Stitch count: 10
Then:
ch 1 and FO
Set the first piece aside.
Second Overall Leg
Repeat the exact same construction:
- ch 10
- Join with sl st
- Round 1: 10 sc
- Round 2: 10 sc
- Round 3: 10 sc
This time, do not cut the yarn after Round 3.
We’re going to use the working yarn to join the two pieces.
Join the Overall Legs
Bring the first piece beside the second.
Overall Round 4
Insert your hook into a stitch on the first piece and work a single crochet to join them.
Place your stitch marker in that first joining stitch.
Work:
10 sc around the first piece
Then:
10 sc around the second piece
The intended total is:
Stitch count: 20
The stitch count here is flexible. The construction specifically allows you to compensate in the following round if your joining point leaves you with a slightly different total.
That makes this section forgiving, especially if joining two tiny tubes neatly takes you an extra stitch.
Overall Round 5
Work around using:
2 sc, inc
Repeat this sequence around.
If you reach the end and only have two stitches remaining, work one single crochet in each.
If the overalls still look too small for your frog, you can add 2 additional increases during this round.
Fit matters here because the clothing needs to slide onto the frog.
Overall Rounds 6 and 7
Work:
1 sc in every stitch around
Repeat for both rounds.
There are no additional increases in these two rounds.
Try the overalls on your frog before making the straps.
Add the Overall Straps
With the overalls positioned on the frog, make a slip stitch in the next stitch.
Then:
ch 9
Attach the chain at the front with:
1 sc
Continue making slip stitches along the front until you reach the other side of the white belly area.
Make:
1 sc in the next stitch
Then:
ch 9
Bring the strap toward the back and attach it with:
sl st
Finish with:
ch 1 and FO
Weave in the yarn ends.
Your tiny overalls are finished.
Dress Up Your Leggy Frog
Now you can choose between the flared pink dress and the little blue overalls.
The exaggerated limbs are especially fun because they stay visible beneath the clothing. Instead of covering the frog’s personality, the outfits make those long legs look even more playful.
You can also make additional clothing pieces in different colors using the same construction.
For another frog-themed project with a practical twist, the Frog and Bear Wallet Crochet Pattern would fit nicely alongside this one. If you enjoy the long-limbed style specifically, try the Dress Up Leggy Frog Bag Friend Crochet Pattern next.
And for another project that minimizes assembly, the No Sew Octopus and Jellyfish Crochet Pattern is a natural follow-up.
Tips for Cleaner Color Changes
The green and white colorwork is probably the part that requires the most attention.
When you’re about to change colors, don’t finish the final stitch completely with the old yarn. Work the stitch until the final yarn-over, then use your new color to pull through the remaining loops.
Keep the unused yarn relaxed.
If you pull it too tightly behind the work, the white belly can become narrower and the body may pucker.
It’s worth checking your stitch count at the end of each colorwork round. A missed stitch is much easier to fix immediately than several rounds later.
Getting the Clothes to Fit
The dress instructions give you a starting chain of 25, but the fit around your actual frog is the important part. The chain can be adjusted until it wraps around the body properly.
The overalls also allow some flexibility. If they’re too snug after joining the two leg pieces, additional increases can be added during Round 5.
This little bit of adjustability is useful because crochet tension varies from person to person.
Keep the Long Limbs Even
All four limbs use the same 12-chain construction, so counting carefully helps keep them visually balanced.
If one arm ends up noticeably shorter, check that you made the full 12 chains before creating the little end shape.
Because the limbs are attached directly to the body, I also recommend checking their placement from the front before finishing the ends.
Your Dress Up Leggy Frog Is Finished
The plain frog is sweet on its own, but slipping those tiny overalls over the dangling green legs or adding the flared dress completely changes its personality. That’s what makes the No Sew Dress Up Leggy Frog Crochet Pattern more than a basic amigurumi project. You end up with one little frog that can keep getting new looks whenever you’re in the mood to crochet another miniature outfit.
Once you’ve mastered the color-changing belly and direct-to-body limbs, the construction also opens up plenty of possibilities for making your own frog color combinations and matching wardrobes.
Frequently Asked Questions
Is the No Sew Dress Up Leggy Frog Crochet Pattern completely no sew?
Most of the construction avoids sewing separate body parts because the arms and legs are crocheted directly onto the body. The final six-stitch body opening, however, is closed using a yarn needle.
Why are some white stitches worked in the back loop only?
The six white stitches in Round 5 are specifically worked BLO, while the surrounding green stitches are worked normally. Keep this distinction when following the pattern.
Can I adjust the dress size?
Yes. Start with 25 chains, but check the chain around your frog before joining. You can adjust the number of chains so the dress fits your particular tension and finished frog.
