

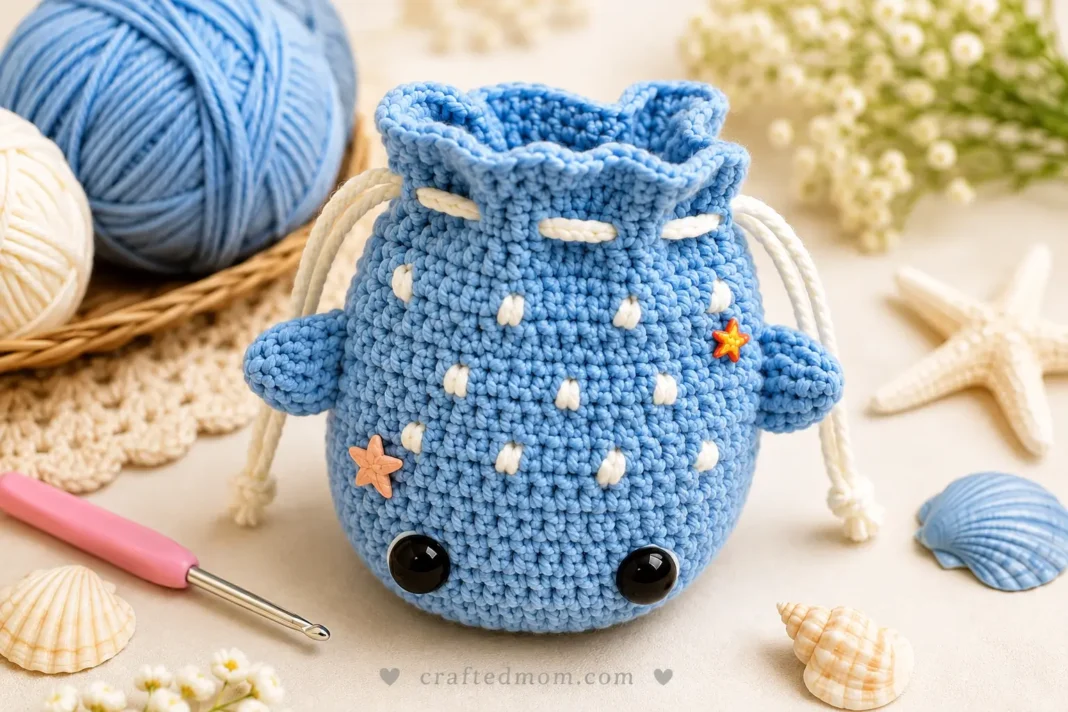
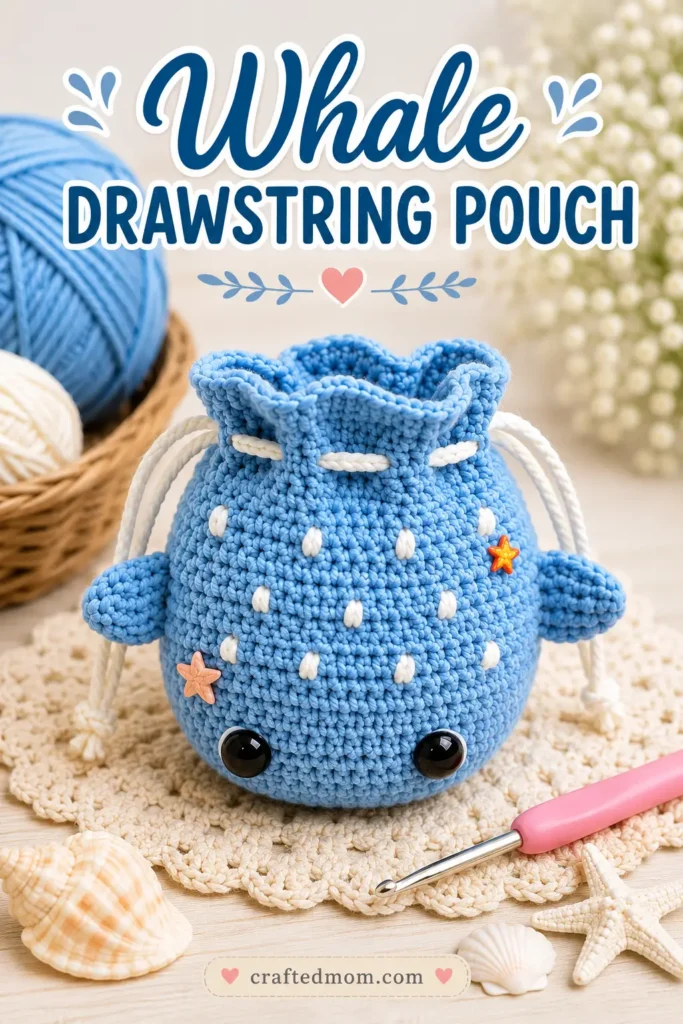
A rounded little whale that can actually hold your small essentials is already charming, but the drawstring opening, tiny side fins, embroidered white spots, and optional star decorations give this one even more personality. The Whale Drawstring Pouch Crochet Pattern turns a simple oval crochet base into a functional whale-shaped pouch that can also hang from a tote or bag as an ocean-themed charm.
Instead of adding a zipper, the top of the whale closes with a crocheted drawstring threaded through evenly spaced openings. That keeps the construction surprisingly straightforward. Most of the pouch is made with double crochet, while the fins are worked separately from small magic rings and sewn onto the sides.
The whale pictured here uses blue yarn with white embroidered spots, large black eyes, and little decorative stars. You can keep those extra embellishments simple or customize them once the basic pouch is complete.
Whale Drawstring Pouch Crochet Pattern at a Glance
| Project Detail | Information |
| Project | Crochet whale-shaped drawstring pouch |
| Main Yarn | 5-ply cotton yarn |
| Crochet Hook | 3 mm |
| Eyes | 10 mm |
| Starting Method | Slip knot and foundation chain |
| Foundation Chain | 12 chains |
| Main Stitch | Double crochet |
| Main Body Rounds | 11 rounds before drawstring holes |
| Drawstring Hole Pattern | 2 sc, ch 2, skip 2 |
| Fin Construction | Magic ring, 2 rounds |
| Number of Fins | 2 |
| Fin Placement | Around Rounds 7 and 8 |
| Drawstring | About 60 chains or longer |
| Decorative Details | White embroidered spots, optional beads or decorative pieces |
| Closure | Crocheted drawstring |
| Construction | Oval pouch worked in joined rounds, separate fins sewn on |
The pattern uses a 3 mm crochet hook with 5-ply cotton yarn and 10 mm eyes. The size can be adjusted by changing the starting chain and using a compatible hook for your chosen yarn.
Materials You’ll Need
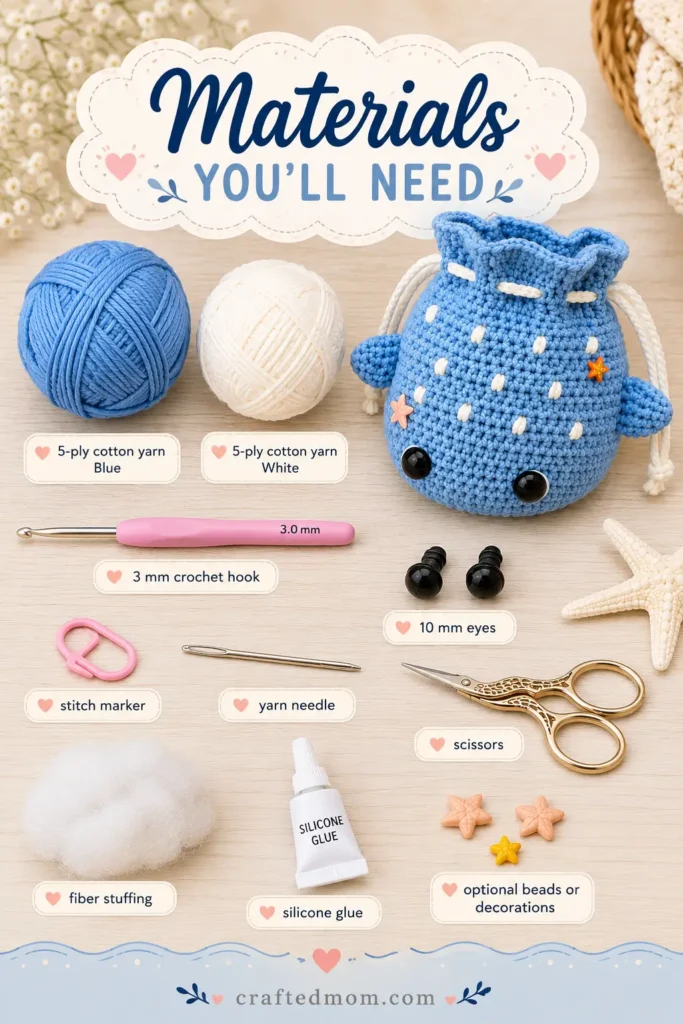
Gather:
- 5-ply cotton yarn
- 3 mm crochet hook
- 10 mm eyes
- Stitch marker
- Yarn needle
- Scissors
- Silicone glue for attaching the eyes
- Optional small beads, stars, or similar decorations
The white yarn doesn’t require much. It’s mainly used for the scattered spot embroidery and can also be used for the contrasting drawstring.
If you’re making the pouch for a young child, I would replace glued plastic eyes and small decorative pieces with embroidered details.
Crochet Abbreviations
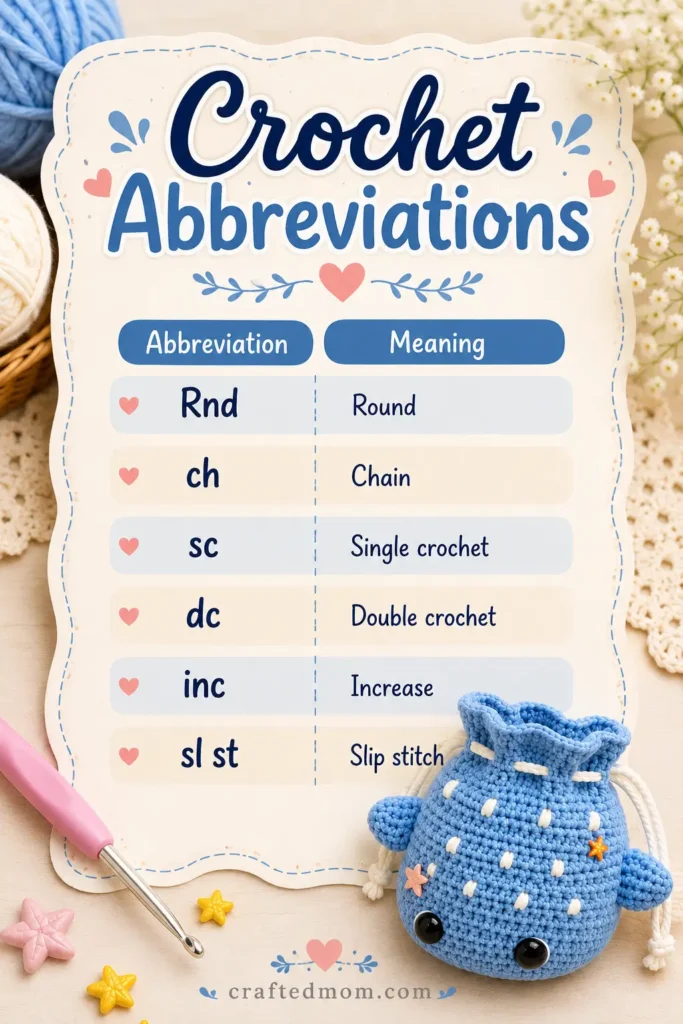
This pattern uses standard US crochet terminology.
| Abbreviation | Meaning |
| Rnd | Round |
| ch | Chain |
| sc | Single crochet |
| dc | Double crochet |
| inc | Increase |
| sl st | Slip stitch |
A dc increase means working 2 double crochets into the same stitch.
How the Whale Pouch Is Constructed
The whale starts differently from a typical round amigurumi project.
Instead of a magic ring, the main body begins with:
ch 12
Double crochet stitches are worked along one side of that chain, around the end, and then back along the opposite side. This creates an oval base.
The first three rounds contain increases around the curved ends.
Rounds 4 through 11 are much simpler because the stitch count stays even while the pouch grows upward.
After Round 11, a row of chain spaces is created for the drawstring.
A decorative ruffled edge is then added above those openings.
Two separate fins are crocheted and sewn around Rounds 7 and 8.
Finally, the eyes, white whale spots, drawstring, and optional embellishments are added.
How to Crochet the Whale Drawstring Pouch
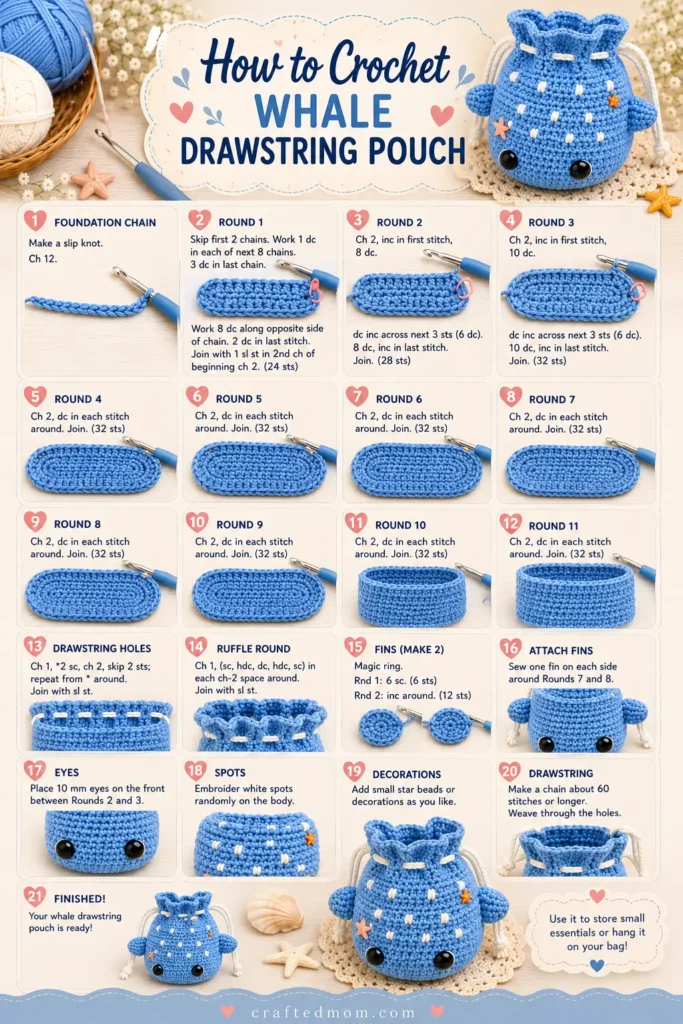
Use your main whale color.
Foundation Chain
Make a slip knot.
Chain:
ch 12
If you want a larger pouch, the starting chain can be increased. The rest of the shaping will need to follow the longer foundation accordingly.
Crochet the Oval Base
Round 1
Skip the first 2 chains.
Starting in the third chain from the hook, work:
1 dc in each chain until you have made 8 dc
When you reach the final chain, work:
3 dc into the same last chain
Place a stitch marker in the first of those 3 double crochets.
Do not turn.
Rotate the foundation chain so you can work along the opposite side.
Work:
8 dc along the second side of the foundation chain
When you reach the final stitch at the other end, work:
2 dc into that stitch
Join the round with:
1 sl st into the second chain of the beginning ch 2
The oval shape is now established.
Round 2
Chain:
ch 2
Work an increase in the first stitch:
2 dc in first stitch
Then work:
8 dc
When you reach the marked curved end, you’ll work increases across the 3 stitches there.
Work:
dc inc × 3
That gives you 6 dc across those 3 stitches.
Place your marker again in the first stitch of this increased section if it helps you keep track of the curve.
Continue:
8 dc
You should now reach the final 2 stitches.
Work:
dc inc in each of the final 2 stitches
Join:
sl st into the second chain of the beginning ch 2
Round 2 continues building the oval while keeping the middle sections relatively straight.
Round 3
Chain:
ch 2
At the first curved end, work:
1 dc, dc inc
Then work:
8 dc
At the opposite curved end, repeat:
(1 dc, dc inc) × 3
Then continue:
8 dc
Across the remaining curve, repeat:
1 dc, dc inc
until you reach the end of the round.
Join with:
1 sl st into the second chain of the beginning ch 2
After this round, the oval base is wide enough and the increasing portion is complete.
Build the Sides of the Whale
Now the pattern becomes much easier.
Round 4
Chain:
ch 2
Work:
1 dc in every stitch around
Join with:
1 sl st into the second chain of ch 2
Rounds 5 to 11
Repeat Round 4.
For each round:
ch 2
1 dc in every stitch around
Finish with:
sl st into the second chain of the beginning ch 2
Continue until you have completed Round 11.
At this point, you should have a soft oval pouch shape with enough height for the whale body.
The long uninterrupted double crochet section is also where the fins, eyes, and decorative spots will eventually sit.
Make the Drawstring Holes
After Round 11, we’ll create evenly spaced openings around the top.
Start with:
ch 1
Work:
2 sc
Then:
ch 2
Skip:
2 stitches
Repeat around:
2 sc, ch 2, skip 2
Continue the same sequence until you reach the beginning.
If the stitch count doesn’t allow one last complete repeat, simply join at the beginning rather than forcing another opening.
Finish with:
1 sl st into the first sc or beginning chain
These chain spaces become the holes for threading the drawstring.
Crochet the Ruffled Whale Tail Edge
The upper edge has a soft ruffled shape rather than a plain straight finish.
For a normal ruffle, repeat:
dc inc in first stitch, 1 dc in next stitch
Continue:
(dc inc, 1 dc) around
Join with:
1 sl st into the second chain of the beginning ch 2
If you want the edge much fuller, you can work a double crochet increase into every available stitch instead.
The more increases you add, the stronger the ruffle becomes.
When you’re happy with the edge:
Chain 1.
Cut the yarn.
Fasten off and weave the end inside the pouch.
The main whale body is finished.
Crochet the Whale Fins
The two fins are worked separately.
Make 2 identical pieces.
Fin Round 1
Make a magic ring.
Chain:
ch 2
Work into the ring:
5 dc
Pull the magic ring closed.
Fold or curve the small piece slightly so you can reach the beginning.
Join with:
1 sl st into the second chain
If that chain is difficult to find because the piece is so small, joining into the first double crochet is also workable here.
Fin Round 2
Chain:
ch 2
Work:
dc inc in every stitch around
This means:
2 dc into each stitch
At the end of the round:
Stitch count: 10 dc
Join with a slip stitch.
Leave a long yarn tail for sewing.
Repeat the same steps to make the second fin.
Shape the Fins
After fastening off, tuck the short starting tail inside the fin.
Gently press or fold the outer end so the fin has a slightly pointed appearance rather than staying perfectly round.
Don’t overflatten it. The small curved shape fits the whale body nicely.
Sew the Fins Onto the Whale
Position one fin on each side of the pouch.
The fins are attached around:
Rounds 7 and 8
Use the long yarn tail from each fin and sew securely through the fin edge and the whale body.
Try to position the two fins at roughly the same height.
A small difference won’t ruin the whale, but I would check them from the front before tying the yarn permanently.
Once secure:
- Knot the yarn
- Weave in the ends
- Hide the remaining tails inside the fins or pouch
The separate fins make this pouch feel much more like a little whale rather than simply an oval drawstring bag.
If you like ocean-themed crochet projects, the Pufferfish Drawstring Pouch Crochet Pattern pairs especially well with this one. The Nemo and Dory Fish Keychain Crochet Pattern is another fun option for building a small sea-creature crochet collection.
Add the Whale Eyes
Turn the pouch inside out so you can work from the wrong side when needed.
The eyes are positioned around:
Rounds 2 and 3
Use:
10 mm eyes
The eyes are attached with silicone glue in this version.
Before gluing anything, place both eyes loosely against the pouch and check the spacing.
Once you’re happy with the placement, secure them.
Because these are small plastic pieces, they are better suited to decorative projects for older children and adults. For a young child’s pouch, embroidered eyes are the safer alternative.
Embroider the White Whale Spots
Thread your needle with white yarn.
Attach the yarn securely from the inside of the pouch.
Turn the whale right side out.
Now embroider short white spots over the blue body.
The placement doesn’t need to follow a strict stitch chart.
A tidy approach is to add roughly 3 or 4 spots in a visual row, then vary the spacing as you continue across the body.
The spots should look scattered rather than perfectly geometric.
You can keep them mainly across the upper body, place a few near the fins, or spread them more evenly.
Once you’re satisfied:
Turn the pouch to the inside.
Secure the white yarn.
Weave in the end.
These little spots are a simple detail, but they change the whale dramatically. Against blue yarn, they create an ocean-speckled look without adding another complicated crochet piece.
Make the Drawstring
Using your contrasting yarn, make a slip knot.
Chain:
ch 60
You can make the chain longer if you want a longer strap.
After reaching the desired length:
Chain 1 more.
Cut the yarn.
Pull the tail through to fasten off.
Thread the Drawstring Through the Pouch
Using a yarn needle, feed the chain through the drawstring holes made above Round 11.
Move in and out through each chain space until the cord travels all the way around the pouch.
Once the two ends meet, tie them together.
Trim excess yarn if necessary.
A single drawstring works well and is easier to use.
You can also use two drawstrings if you prefer a two-sided closure, but one is the simpler option.
Pulling the cord gathers the ruffled upper edge and closes the whale pouch.
Loosen it again to open the pouch.
Add Optional Ocean Decorations
Once the functional parts are complete, you can add small decorative pieces.
The blue whale can be embellished with:
- Tiny star decorations
- Small beads
- Additional embroidered spots
- Contrasting stitches
- Other lightweight ocean-themed accents
Keep these additions modest so they don’t interfere with opening and closing the pouch.
A few stars scattered between the white spots work especially well because the base already has plenty of texture from the double crochet stitches.
If you’d rather keep the pouch completely crochet-based, simply skip the extra embellishments. The eyes, fins, spots, and ruffle provide plenty of detail on their own.
Using the Whale as a Bag Charm
The drawstring makes the pouch functional, while the longer cord can also make it easy to attach to a tote or other bag.
Because the pouch is soft and lightweight, it works nicely for small everyday items rather than heavy objects.
You could use it to hold lightweight accessories, small craft items, or other little things you want to keep together.
For another character-style pouch, try the Moo Deng Hippo Pouch Crochet Pattern. If you prefer something that transforms into a larger carrying bag, the Strawberry Pouch Market Bag Crochet Pattern has a completely different construction with a hidden mesh bag inside.
Tips for Keeping the Oval Shape Neat
The first three rounds are the most important shaping rounds.
The two long sides should remain fairly straight while the increases cluster around the curved ends.
If your oval starts looking uneven, check three things:
- Make sure you didn’t accidentally add increases along the straight sections.
- Keep the three-in-one and increase groups centered around the ends.
- Join each round consistently into the second beginning chain.
Once you reach Round 4, no more shaping increases are needed through Round 11.
That means the pouch should naturally rise upward instead of continuing to spread outward.
Tips for the Drawstring Holes
The repeating sequence is:
2 sc, ch 2, skip 2
Those skipped stitches create the actual openings.
Keep your chain 2 sections relaxed. If you pull them very tightly, threading the finished chain cord through the openings becomes unnecessarily difficult.
If the final repeat doesn’t fit perfectly, don’t squeeze extra stitches into the round. Finish cleanly at the beginning.
Tips for Sewing the Fins
The fin placement is around Rounds 7 and 8.
Pinning or holding both fins in place before sewing the first one completely can help with symmetry.
I also like to look at the whale from the front rather than only from the side. The fins can look level individually but still appear uneven when viewed together.
Once you’re satisfied, sew them securely and hide the yarn tails inside.
Tips for Customizing the Whale Drawstring Pouch Crochet Pattern
There are several easy ways to make the project look different without changing its main construction.
You could use:
- Light blue with white spots
- Dark blue with pale blue spots
- Gray and white
- Pink with white details
- Cream with blue embroidery
The pattern also allows a larger pouch by beginning with more than the standard 12 chains.
Just remember that changing the starting chain affects the overall dimensions, so your later straight sections will contain more stitches as well.
The drawstring can also be made longer than 60 chains if you want more room for tying or hanging.
Your Whale Drawstring Pouch Is Finished
Once that last cord is threaded through the openings, the shape finally comes together. The curved crochet body becomes a little whale, the fins stick out from the sides, the ruffled top gathers closed, and the scattered white spots break up all that blue in just the right way.
The Whale Drawstring Pouch Crochet Pattern is especially fun because the character details don’t get in the way of the useful part. You still end up with a real pouch that opens and closes, but it looks like a tiny whale hanging from your bag instead of an ordinary drawstring case.
Frequently Asked Questions
What yarn is used for the Whale Drawstring Pouch Crochet Pattern?
The pattern uses 5-ply cotton yarn for the whale.
How many rounds are in the main whale body?
The main pouch is worked through Round 11 before the drawstring-hole section is added.
Where should I sew the whale fins?
Sew the two fins around Rounds 7 and 8 on opposite sides of the body.
