

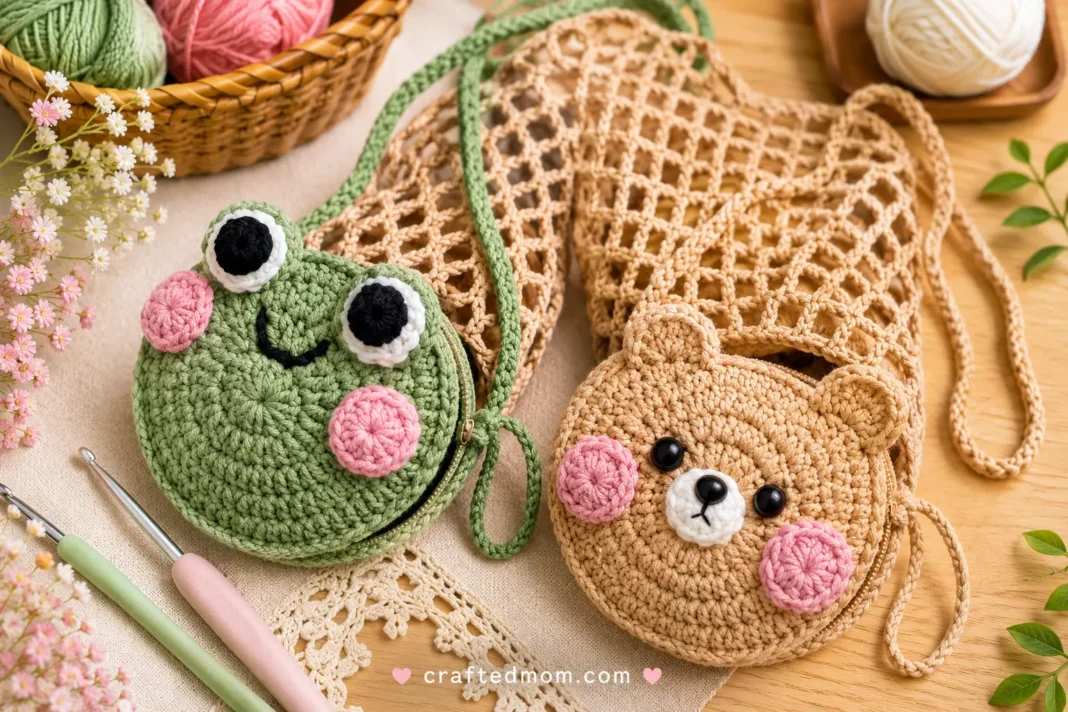
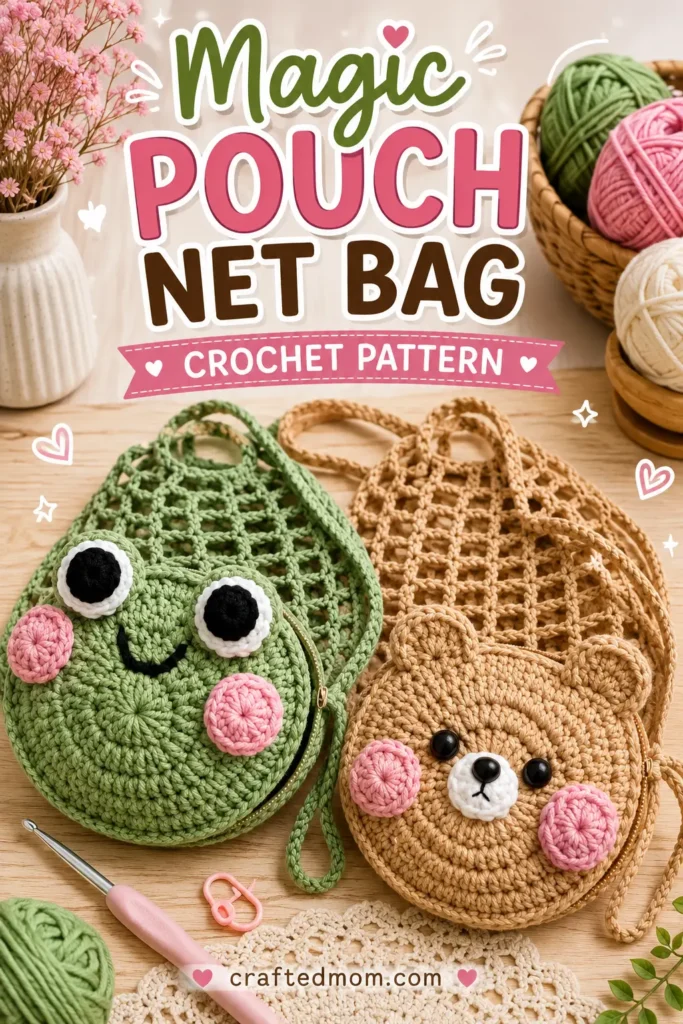
At first, it looks like a little round frog or bear pouch hanging quietly from a bag. Then you open it, pull from inside, and an entire stretchy mesh tote appears. That hidden transformation is the charm of this Magic Pouch Net Bag Crochet Pattern, because the decorative pouch is actually part of the bag itself, not just a separate case you have to remember to carry. When the net is no longer needed, it folds right back inside and becomes a compact crochet character again.
You can make the pouch as a green frog with oversized crochet eyes and pink cheeks or as a neutral bear with rounded ears, a small muzzle, and black eyes. Both use the same general circular construction, while Round 4 creates either the frog’s raised eye shapes or the bear’s ears.
The hidden net grows directly from the joined pouch pieces. You work an open chain-and-double-crochet mesh for several rounds, finish the upper edge with single crochet, and then add two handles. You can even adjust the mesh spacing and handle length if you want a roomier market-style bag.
Magic Pouch Net Bag Crochet Pattern at a Glance
| Project Detail | Information |
| Project | Character pouch that opens into a crochet net bag |
| Versions | Frog or bear |
| Yarn | 4- or 5-ply milk cotton / cotton yarn |
| Crochet Hook | 3.5 mm |
| Starting Method | Magic ring |
| Main Stitches | Double crochet, half double crochet, single crochet |
| Other Techniques | Increase, triple crochet, slip stitch, BLO, chains |
| Base Pieces | 2 circular pouch sections |
| Main Base Count | 36 dc after Round 3 |
| Round 4 Feature | Frog eyes or bear ears |
| Small Pouch Strap | ch 7 |
| Long Pouch Strap | ch 50 |
| Standard Mesh Space | ch 3, skip 2, dc |
| Larger Mesh Option | ch 4, skip 1, dc |
| Mesh Length Shown | About 11 rounds |
| Standard Bag Handles | ch 20 each |
| Adjustable Handle Length | Yes |
| Bear Eyes | 10 mm glue-on eyes |
| Assembly | Crochet pieces joined with single crochet |
The pattern begins with two shaped circular sections, joins them only around part of the edge, and uses the remaining opening as the place where the net bag emerges.
Materials You’ll Need
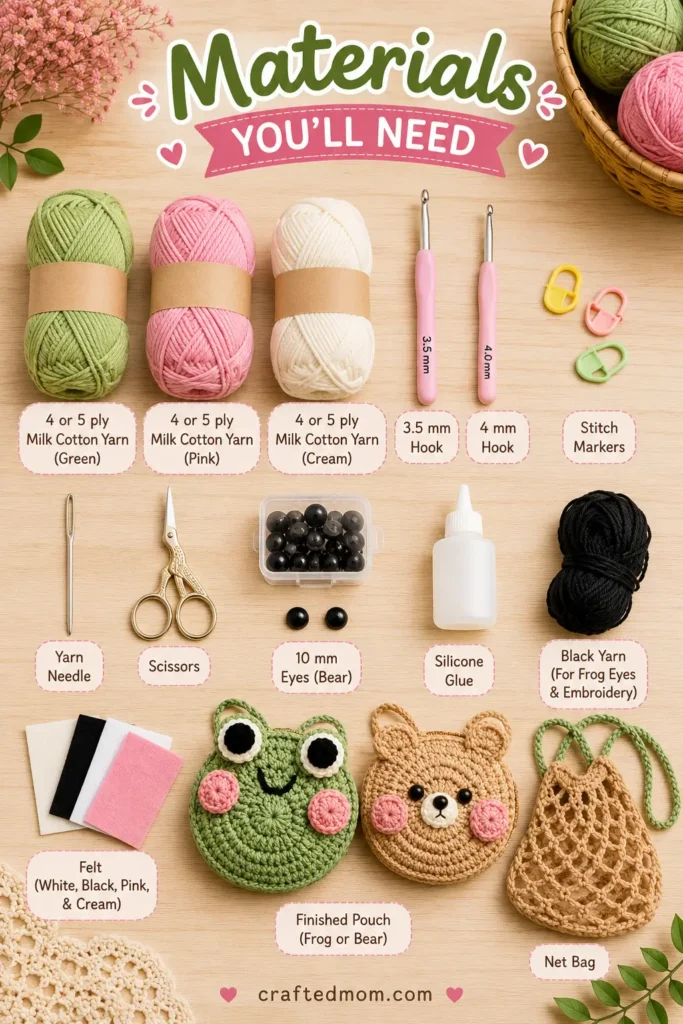
Gather the following:
- 4- or 5-ply milk cotton or cotton yarn
- 3.5 mm crochet hook
- Yarn needle
- Scissors
- Stitch markers
- Yarn colors for the character you want to make
- Black yarn for frog eye centers and facial embroidery
- Pink yarn for cheeks
- White yarn for frog eye bases
- 10 mm eyes for the bear
- Silicone glue if using glue-on eyes
For the frog version, a soft green works nicely for the pouch, with white and black for the eyes and pink for the cheeks.
For the bear, use your preferred bear color with pink cheeks and a lighter muzzle.
The bear’s black eyes are 10 mm and are attached with glue rather than inserted as safety eyes.
If you’re making the finished project for a young child, embroidered facial features are preferable to glued plastic pieces.
Crochet Abbreviations
| Abbreviation | Meaning |
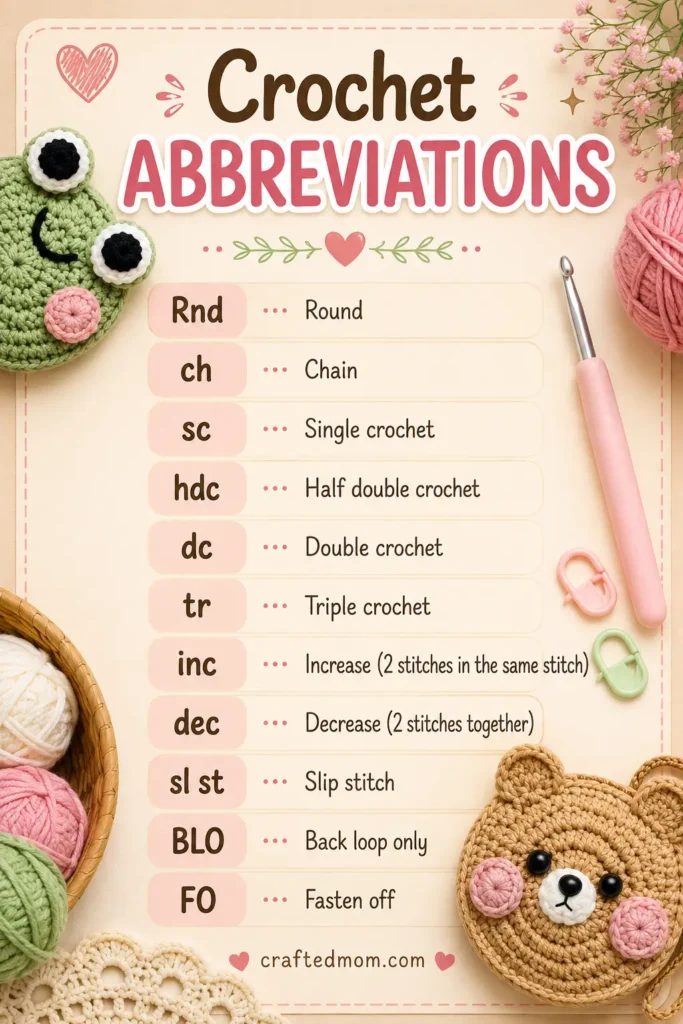
| Rnd | Round |
| ch | Chain |
| sc | Single crochet |
| hdc | Half double crochet |
| dc | Double crochet |
| tr | Triple crochet |
| inc | Increase |
| sl st | Slip stitch |
| BLO | Back loop only |
| FO | Fasten off |
An increase means working 2 stitches into the same stitch.
The turning ch 2 used at the beginning of several rounds is part of the setup for the new round.
How to Crochet the Magic Pouch Net Bag Crochet Pattern
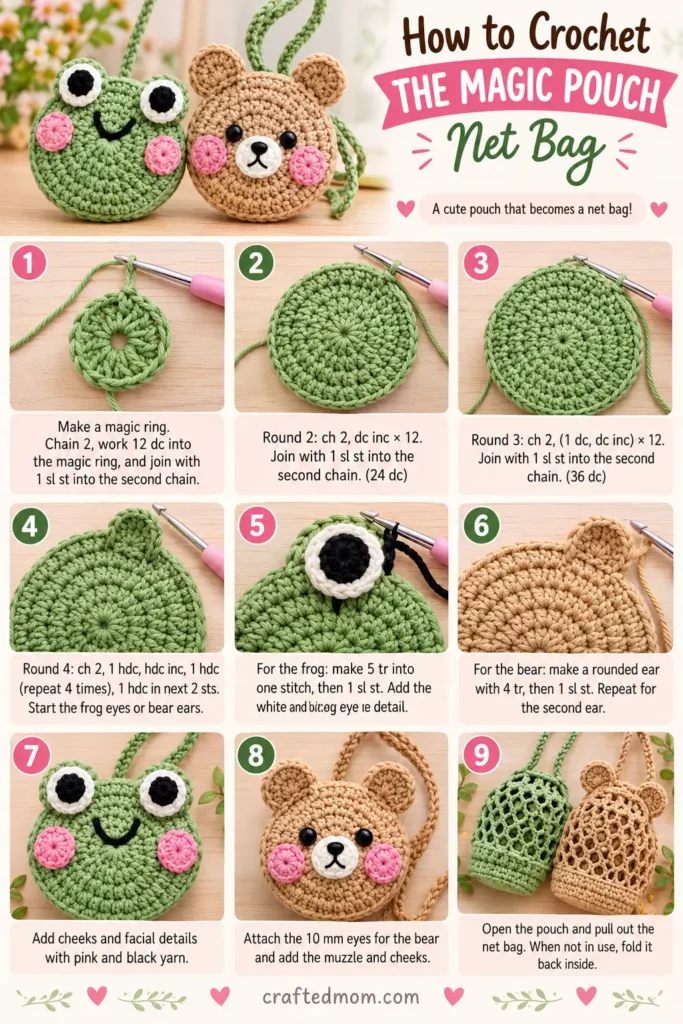
We begin with the first circular character piece.
The early rounds are the same whether you’re making the frog or the bear.
Round 1
Make a magic ring.
Chain:
ch 2
Work:
12 dc into the magic ring
Pull the yarn tail to close the center.
Join with:
1 sl st into the second chain of the beginning ch 2
If the beginning chain is difficult to identify, you can join into the first double crochet instead.
Stitch count: 12 dc
Round 2
Chain:
ch 2
Work:
dc inc × 12
A double crochet increase means:
2 dc in each stitch
Continue around.
Stitch count: 24 dc
At the end, skip the extra stitch left beside the starting chain and join with a slip stitch into the second chain of the beginning ch 2.
Round 3
Chain:
ch 2
Work:
(1 dc, dc inc) × 12
Continue around.
Stitch count: 36 dc
Join at the end with:
1 sl st into the second chain of the beginning ch 2
At this stage, the pouch base is still a mostly flat circle.
Round 4 is where it starts getting its frog or bear personality.
Round 4: Shape the Frog Eyes or Bear Ears
Chain:
ch 2
Begin with the following repeat:
1 hdc, hdc inc, 1 hdc
Repeat this sequence:
4 times
An hdc increase means:
2 hdc in the same stitch
After completing the four repeats, work:
1 hdc in each of the next 2 stitches
Make the First Raised Eye or Ear
Yarn over twice.
Work:
5 tr into the same stitch
These five triple crochets create the rounded raised section.
Then:
skip 1 stitch
Work:
4 sc
Now:
skip 1 stitch
In the next stitch, work:
5 tr
You now have two raised sections, which become either:
- Frog eye bumps
- Bear ears
Finish Round 4
After the second raised section, work:
1 hdc in each of the next 2 stitches
Then repeat:
1 hdc, hdc inc, 1 hdc
a total of:
4 times
Join the round with a slip stitch into the second chain of the beginning ch 2.
A total of approximately 50 stitches is given for this shaped round.
Round 5: Create the Fold
Chain:
ch 2
Now work:
1 dc BLO in every stitch around
Instead of inserting the hook beneath both loops at the top of the stitch, work only through the back loop.
Join with:
1 sl st
Working this round through the back loops leaves the front loops visible and helps the circular piece bend upward.
Once Round 5 is complete, fold the crochet slightly so it begins to resemble a shallow dish or tray.
This little structural change is what gives the finished character pouch more depth instead of leaving it completely flat.
Round 6: Add the Small Loop
Chain:
ch 2
Work normal double crochet stitches:
1 dc in every stitch
Continue until you reach the center area between the two eyes or ears.
Now make the small hanging loop:
ch 7
Attach the chain back to the same area with:
1 sl st
Continue working:
1 dc in every remaining stitch
Join the round.
Then:
ch 1
Fasten off and weave in the ends.
Your first pouch section is complete.
Crochet the Second Pouch Piece
For the second section, repeat:
Rounds 1 through 4
You do not repeat Rounds 5 and 6 on this piece.
During Round 4, after completing the first raised ear or eye area, work only:
2 sc
Then stop before continuing the normal Round 4 sequence because this is where the longer strap will be placed.
Add the Long Strap
Chain:
ch 50
Before attaching it, check carefully that the chain is not twisted.
Then work:
1 sc into the next stitch
And:
1 sc into the following stitch
Continue the remainder of Round 4 normally.
Fasten off and weave in the ends.
You now have:
- One deeper front piece with a small loop
- One flatter back piece with a long 50-chain strap
Before joining them, we’ll finish the character’s face.
Crochet the Pink Cheeks
Make 2.
Using pink yarn:
Make a magic ring.
Chain:
ch 2
Work:
12 hdc into the magic ring
Pull the tail to close the center.
Join with:
1 sl st
Leave a long tail for sewing.
For the bear, this same 12-hdc circle can also be used for the muzzle or nose area.
Crochet the Frog Eyes
For each frog eye, you’ll need a white base and a black center.
White Eye Base
Use the same construction as the cheek:
Make a magic ring.
Chain:
ch 2
Work:
12 hdc
Close the ring and join.
Make 2.
Black Eye Center
Using black yarn:
Make a magic ring.
Chain:
ch 1
Work either:
6 sc
for a smaller center,
or:
8 sc
for a slightly larger center.
Join with:
1 sl st
Leave a long tail for sewing.
Make two black centers and sew one onto each white eye piece.
Then sew the finished eye pieces onto the raised frog eye sections.
Finish the Frog Face
Sew one pink cheek onto each side.
Use black yarn or embroidery thread to add a simple curved smile between the eyes.
Secure the thread carefully and hide the ends inside the pouch.
If you enjoy character crochet projects like this, the Frog and Bear Wallet Crochet Pattern is a closely related option that keeps the frog-and-bear theme but turns it into a different functional accessory.
Finish the Bear Face
For the bear, attach the two pink cheek circles.
Add the muzzle made with the same basic 12-hdc circle.
Then position the 10 mm black eyes.
The eyes are attached with glue.
Add the remaining nose or mouth details as desired based on the bear face construction.
The bear and frog use the same pouch foundation, but these small facial details make the two versions look completely different.
Join the Two Pouch Pieces
Place the two crochet sections together with their right sides facing inward.
Line up the raised eyes or ears.
Mark the joining points around the upper area.
You can count approximately seven stitches from the middle, or simply place your markers near the middle top of the ears or eye sections so the opening remains centered.
Make a slip knot.
Insert your hook through corresponding stitches of both pieces.
Attach the yarn.
Chain:
ch 1
Now work:
1 sc through both layers
Continue joining the two pouch pieces with single crochet until you reach the second marker.
Do not close the entire pouch.
The remaining opening is where the hidden net bag will grow.
Crochet the Hidden Net Bag
Here comes the part that makes the pouch feel like a little crochet magic trick.
Mesh Round 1
Chain:
ch 6
Turn your work.
Then:
skip 2 stitches
Work:
1 dc into the next stitch
Now repeat:
ch 3, skip 2 stitches, 1 dc into the third stitch
Continue this mesh sequence around the available pouch edge.
Work Across the Opening
When you reach the unjoined portion of the pouch, continue onto the first pouch piece.
Chain:
ch 3
Skip 2 stitches.
Then work:
1 dc into the front loop of the next stitch
Across this opening area, work into the front loops.
When you reach the small 7-chain loop, simply skip over it and continue into the next available stitch.
At the end:
ch 3
Join with:
1 sl st into the third chain of the beginning ch 6
The first mesh round is complete.
Mesh Rounds 2 to 11
Start the next round with:
ch 6
Work:
1 dc on top of the next dc
Then repeat:
ch 3, 1 dc on top of the next dc
Continue around.
Repeat this open mesh construction until you have approximately:
11 mesh rounds total
You can add additional rounds if you want a longer net bag.
The mesh naturally stretches when it carries weight, so keep that in mind before adding lots of extra length.
This expanding mesh idea is also what makes the Apple Pouch Water Bottle Holder Crochet Pattern such a fun companion project, since both designs hide a useful openwork section inside a small crochet pouch.
Make a Larger Market Bag Version
If you want larger openings and a roomier bag, change the mesh repeat.
Instead of:
ch 3, skip 2, dc
use:
ch 4, skip 1 stitch, dc into the second stitch
For the larger version, continue using ch 4 in the mesh rounds instead of ch 3.
This gives you wider mesh spaces.
You can also simply add more mesh rounds to increase the bag’s length.
Crochet the Top Edge
Once your mesh is long enough, stop making double-crochet mesh.
Chain:
ch 1
In each chain-3 mesh space, work:
3 sc
Skip the double crochet between spaces and continue into the next chain space.
Repeat:
3 sc in every ch-3 space
around the bag.
If you made the larger ch-4 mesh, work:
4 sc in every ch-4 space
instead.
This converts the loose open mesh into a solid upper edge.
Mark the Handle Positions
Before starting the handle round, identify the pouch’s eye or ear positions so the handles can sit evenly.
Lay the bag flat.
Place stitch markers at the handle attachment points.
The construction uses four marked points, two for each handle.
I recommend taking an extra moment here to compare both sides before continuing. Once the handles are crocheted in, uneven placement is much more annoying to correct.
Crochet the Bag Handles
Join to begin the next round.
Chain:
ch 1
Work:
1 sc in every stitch
until you reach the first marker.
Work a single crochet at the marked stitch.
Then make the first handle:
ch 20
Make sure the chain does not twist.
Attach it at the next marked position with:
1 sc
Continue:
1 sc in every stitch
until you reach the third marker.
Make the second handle:
ch 20
Attach at the fourth marker.
Continue with single crochet until you return to the beginning.
Join with:
1 sl st
Want Longer Handles?
Increase the chain count.
For example, if you choose:
ch 50
for the first handle, make:
ch 50
for the second handle too.
Both handles should contain the same number of chains.
Strengthen the Handles
The final round gives the handles more structure.
Chain:
ch 1
Work:
1 sc in each sc
When you reach the handle chains, switch to:
1 hdc in every chain
So for a 20-chain handle, make:
20 hdc
Continue with single crochet across the solid edge.
On the second handle:
1 hdc in every chain
Then finish the remaining single crochet stitches.
Join with:
1 sl st into the first sc
Fasten off and weave in every end.
Your hidden net bag is complete.
How to Fold the Net Bag Into the Pouch
Push the soft mesh inward through the pouch opening.
Feed it in gradually rather than trying to stuff the entire bag through at once.
Continue tucking the mesh and handles inside until only the frog or bear pouch remains visible.
When you need the tote again, pull the mesh back out through the opening and unfold it.
The pouch stays attached to the bag, so there is no separate storage case to lose. That transformation is the whole point of the design.
For another crochet project that turns from one useful object into another, the Strawberry Pouch Market Bag Crochet Pattern would be a natural project to try after this one.
Tips for a Neater Magic Pouch
Keep the raised ears or frog eyes symmetrical in Round 4. Counting carefully before each group of 5 triple crochets will help both sides line up.
When working Round 5, make sure you really are entering the back loop only. Those unused front loops help create the fold that gives the pouch its shape.
Do not twist either of the chains used for straps.
That applies especially to:
- The ch 50 pouch strap
- The ch 20 bag handles
While working the mesh, crochet the double crochet stitches directly above the previous round’s double crochets. This keeps the openings vertically aligned.
And before adding extra mesh rounds, remember that an open crochet net stretches noticeably when loaded.
More Functional Crochet Projects
The Rose Bouquet Coaster Crochet Pattern takes the transformation idea in a completely different direction by turning decorative crochet into something practical.
For animal-themed storage projects, the Pufferfish Drawstring Pouch Crochet Pattern and Whale Drawstring Pouch Crochet Pattern also fit nicely into the same collection.
Small Pouch, Surprisingly Big Secret
Fold the handles inward, tuck the mesh away, and the entire tote seems to disappear behind a frog smile or a pair of bear ears. Pull it back out, and suddenly that tiny accessory is ready to carry much more than its compact size suggests.
That unexpected change is what gives the Magic Pouch Net Bag Crochet Pattern its personality. You are not just crocheting a pouch and not just making a mesh tote. Both pieces are designed to stay together, so the storage pouch becomes part of the finished bag instead of one more thing to keep track of.
Frequently Asked Questions
What yarn should I use for the Magic Pouch Net Bag Crochet Pattern?
Use 4- or 5-ply milk cotton or cotton yarn. A cotton-style yarn works well for the combination of the solid pouch and open mesh bag.
How many mesh rounds should I crochet?
The standard version uses approximately 11 mesh rounds. You can add more rounds if you want the net bag longer.
How do I make the net bag bigger?
Use ch 4 instead of ch 3, skip only one stitch, and work the next double crochet into the following stitch. You can also add additional mesh rounds.
