

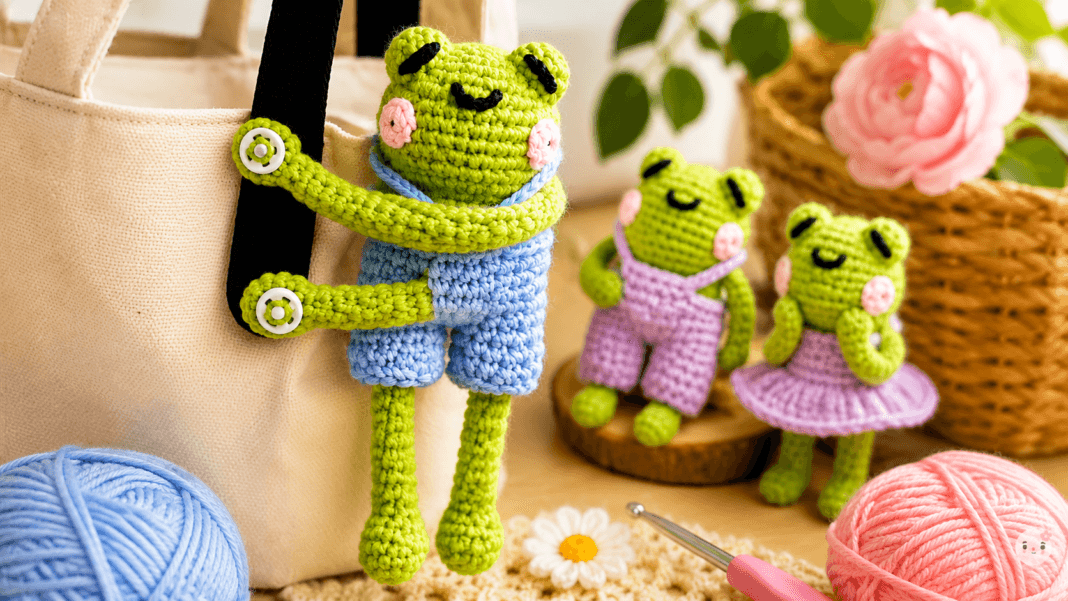
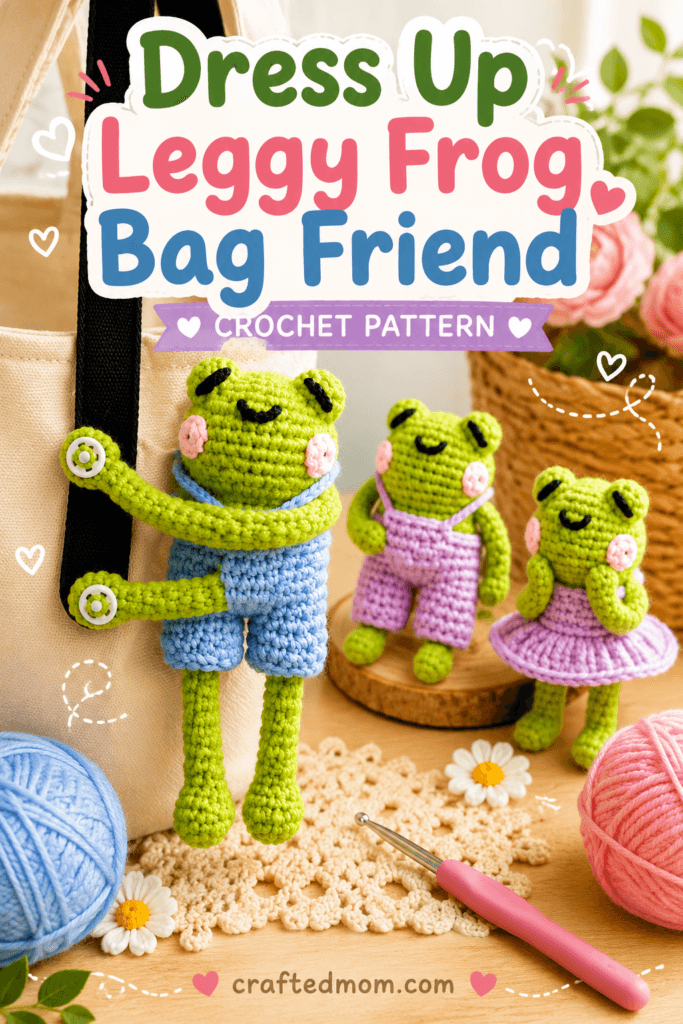
Those extra-long arms are not just there for the floppy frog look. Add small press buttons to the hands and this Dress Up Leggy Frog Bag Friend Crochet Pattern can actually wrap around a tote strap, come off again whenever you want, and change into a completely different little outfit before its next outing.
Between the dangling legs, pink cheeks, tiny overalls, removable skirt, and sleepy embroidered face, there is a lot of personality packed into one small crochet frog.
The main frog is worked in green 5-ply milk cotton with a 3.5 mm crochet hook. Its simple body is crocheted first, then the rounded eyes, long arms, shorter legs, blush pieces, and facial details are added separately. The clothes come last, which means you can keep making new colors and styles without having to crochet another frog.
The removable clothing is especially fun here. You can make short overalls, extend the legs into trousers, or switch to a little skirt with straps. The optional fasteners on the hands turn the finished frog into a removable bag companion instead of a permanently sewn-on charm.
Dress Up Leggy Frog Bag Friend Crochet Pattern at a Glance
| Project Detail | Information |
| Project | Dress-up leggy frog bag friend |
| Yarn | 5-ply milk cotton |
| Crochet Hook | 3.5 mm |
| Main Frog Color | Green |
| Clothing Color Shown | Purple, with other colors possible |
| Blush Color | Pink |
| Starting Method | Magic ring |
| Main Stitch | Single crochet |
| Other Stitches | Chain, double crochet, slip stitch, increase, decrease |
| Body | Worked in continuous rounds |
| Arms | 2, worked through Round 12 |
| Legs | 2, worked through Round 10 |
| Eyes | 2 separate crochet pieces |
| Cheeks | 2 separate crochet pieces |
| Clothes | Removable overalls, trousers, or skirt |
| Optional Bag Attachment | Small press buttons sewn to the hands |
| Stuffing | Fiberfill or scrap yarn |
| Sewing | Required for assembly |
Materials You’ll Need
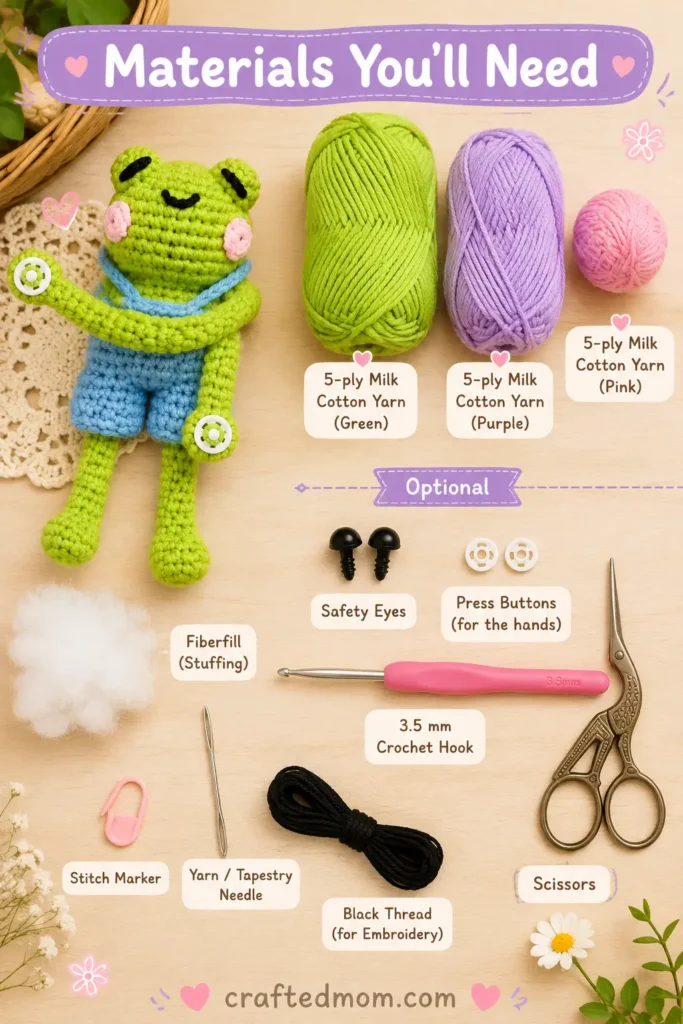
Gather:
- 5-ply milk cotton yarn
- 3.5 mm crochet hook
- Black thread for the facial embroidery
- Stitch marker
- Scissors
- Yarn or tapestry needle
- Fiberfill or scrap yarn for stuffing
- Optional safety eyes
- Optional press buttons for the hands
You can substitute a different yarn if you use a crochet hook that suits its thickness. The original material combination uses 5-ply yarn with a 3.5 mm hook.
If this frog will be handled by a very young child, embroidered facial details are preferable to small detachable pieces. Press buttons also need to be attached very securely.
Crochet Abbreviations
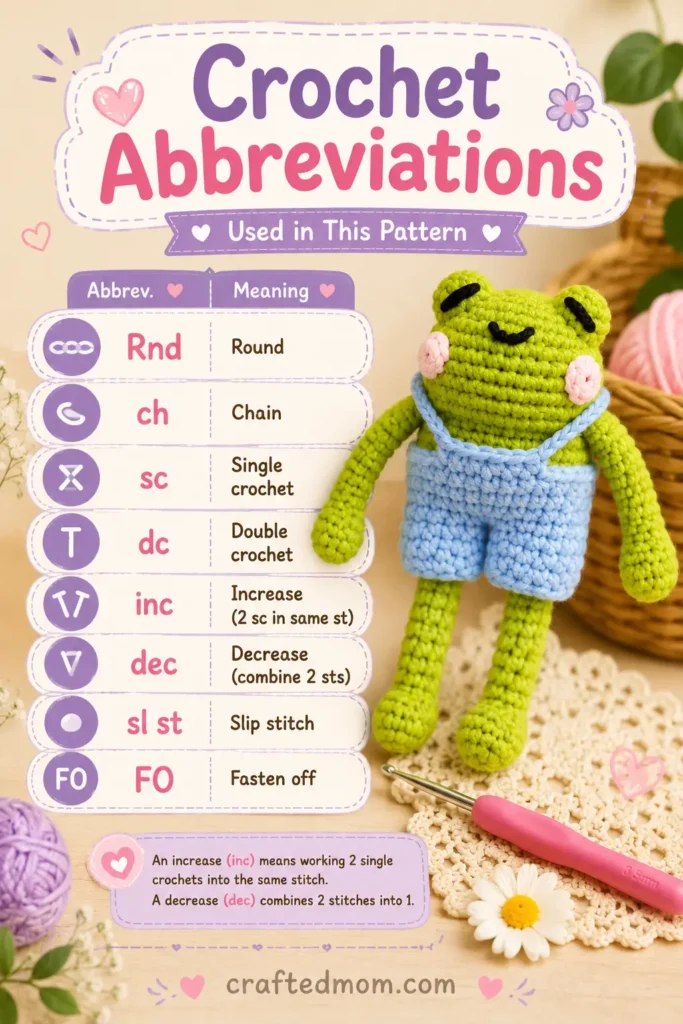
| Abbreviation | Meaning |
| Rnd | Round |
| ch | Chain |
| sc | Single crochet |
| dc | Double crochet |
| inc | Increase |
| dec | Decrease |
| sl st | Slip stitch |
| FO | Fasten off |
An increase means working 2 single crochets into the same stitch.
A decrease combines 2 stitches into 1.
Before You Start
The project is made in several parts:
- Crochet and stuff the frog body.
- Make two rounded eye pieces.
- Crochet two long arms and two slightly shorter legs.
- Sew the limbs and eyes onto the body.
- Embroider the face.
- Crochet two pink cheek pieces.
- Make removable overalls or trousers.
- Make a separate mini skirt.
- Add optional press buttons to the hands.
Keep your stitch marker beside the first stitch of each body round. The body includes a long stretch of plain single crochet, so marking the beginning makes counting the rounds much easier.
How to Crochet the Dress Up Leggy Frog Bag Friend Crochet Pattern
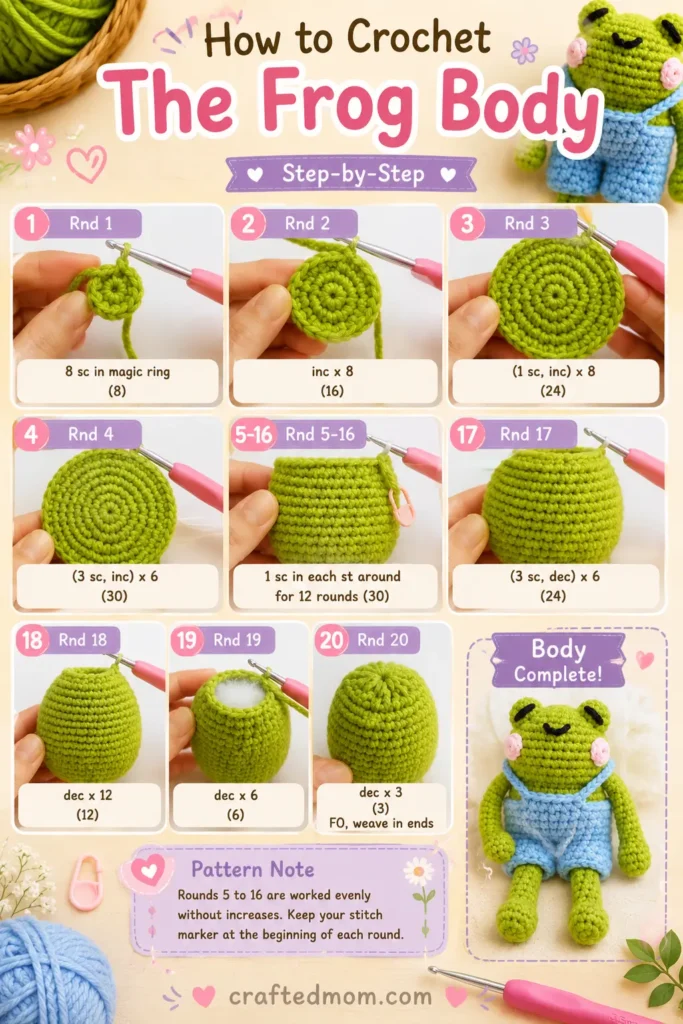
Crochet the Frog Body
Use green yarn.
Round 1
Make a magic ring.
Work:
8 sc into the magic ring
Pull the yarn tail to close the center.
Stitch count: 8
Round 2
Work:
inc × 8
Place your stitch marker in the first stitch.
Stitch count: 16
Round 3
Work:
(1 sc, inc) × 8
Repeat the sequence all the way around.
Stitch count: 24
Round 4
Work:
(3 sc, inc) × 6
Stitch count: 30
The body expands from 8 stitches to 16, 24, and finally 30 stitches across the first four rounds.
Rounds 5 to 16
Work:
1 sc in every stitch around
Repeat for:
12 rounds total
Keep your stitch marker beside the beginning of the round as you go.
Pattern Note
There is a numerical conflict in this section: Round 4 finishes with 30 stitches, while the later shaping also works naturally from the wider body, but a count of 13 stitches is associated with Rounds 5 to 16.
For that reason, the supported construction instruction here is to continue single crocheting evenly around without increases through Round 16 rather than changing the body shape to 13 stitches.
Round 17
Work:
(3 sc, dec) × 6
Stitch count: 24
You can make the decrease by pulling up a loop from each of the next 2 stitches and then pulling through all 3 loops on the hook.
Another option is to insert the hook through the front loops of the next 2 stitches and complete a single crochet through them together.
Round 18
Work:
(1 sc, dec) × 6
A final stitch count of 16 stitches is given for this round.
Pattern Note
The stated repeat and stated stitch count do not fully reconcile with the preceding 24-stitch round, so check your work carefully here rather than forcing extra decreases or inventing additional stitches.
Once the final shaping is complete:
FO, leaving a long tail for sewing.
Stuff the Frog
Fill the body with:
- Fiberfill
- Scrap yarn
Shape the body as you stuff rather than packing everything tightly into one spot.
Thread the long tail onto your tapestry needle.
Close the opening by sewing through a front loop on one side and then through a corresponding front loop on the opposite side.
Continue across the opening.
Secure the yarn and hide the tail inside the body.
Crochet the Frog Eyes
Make 2.
Eye Round 1
Make a magic ring.
Work:
6 sc
Stitch count: 6
Eye Round 2
Work:
(1 sc, inc) × 3
Stitch count: 9
Eye Round 3
Work:
9 sc
Stitch count: 9
Fasten off and leave a long tail for sewing.
Repeat Rounds 1 through 3 for the second eye.
Position both rounded pieces at the top of the frog’s body and sew them securely in place.
Hide the yarn ends inside the body.
Crochet the Long Frog Arms
Make 2 arms.
Arm Round 1
Make a magic ring.
Work:
6 sc
Rounds 2 to 12
Work:
6 sc in every round
The piece may look flat during the first rounds. Push the beginning upward slightly so it starts forming a narrow tube.
Continue until Round 12.
Fasten off and leave a long tail.
Crochet the Frog Legs
Make 2 legs.
Leg Round 1
Make a magic ring.
Work:
6 sc
Rounds 2 to 10
Work:
6 sc in every round
Fasten off and leave a long tail.
The arms are intentionally 2 rounds longer than the legs, which gives the frog that exaggerated dangling shape.
Sew on the Arms and Legs
Position the arms approximately:
2 rounds below the eyes
Sew one arm on each side.
Place the legs:
at the bottom of the body
Sew both securely.
Before weaving in your ends, check that the arms hang at roughly the same height and that the legs sit evenly underneath the body.
Embroider the Frog’s Face
Use black thread and a needle.
Add the simple eye details and curved mouth.
You can also use safety eyes instead of embroidered eye details if you prefer.
I recommend positioning the facial details first before pulling the thread tight. Tiny changes in eye and mouth placement can completely change the frog’s expression.
Crochet the Pink Cheeks
Make 2.
Use pink yarn.
Make a magic ring.
Work:
6 sc
Join with:
1 sl st into the first sc
Fasten off, leaving a long sewing tail.
Place one cheek beneath each eye and sew them securely onto the body.
At this point, the frog itself is finished.
Now it needs clothes.
Crochet the Removable Frog Shorts
The overalls begin with two separate small tubes.
First Shorts Leg
Make a slip knot.
Chain:
ch 12
Make sure the chain is not twisted.
Join to the first chain with:
1 sl st
Round 1
Work:
12 sc
Place your stitch marker in the first stitch.
Stitch count: 12
Round 2
Work:
12 sc
Round 3
Work:
12 sc
Fasten off.
Second Shorts Leg
Repeat:
ch 12
Join with a slip stitch.
Then work:
Rounds 1 to 3: 12 sc
Do not cut the yarn after finishing the second piece.
Want Trousers Instead?
Continue both separate leg pieces for a few extra rounds before joining them.
You can extend each leg to around:
Round 6
The important part is making both pieces the same length.
Join the Shorts Legs
Round 4
Insert your hook into any stitch of the first leg piece.
Work a single crochet to connect the two tubes.
Then work:
12 sc around the first piece
Continue around the second piece:
12 sc
Stitch count: 24
The two small tubes have now become one pair of shorts.
Round 5
Work:
(3 sc, inc) × 6
Stitch count: 30
Rounds 6 to 8
Work:
1 sc in every stitch around
After Round 8, the shorts body is complete.
Add the Overall Straps
Chain:
ch 15
Put the shorts onto the frog before continuing. This makes positioning much easier.
Bring the chain toward the front.
Work:
6 sc across the center front
Make sure those six stitches sit roughly in the middle.
Then make the second strap:
ch 15
Bring it toward the back.
Attach it with:
1 sl st
Finish with:
ch 1
Cut the yarn and weave in the ends.
The overalls can now be slipped on and off the frog.
This dress-up construction is what makes the project different from the No Sew Dress Up Leggy Frog Crochet Pattern, which is a good related project if you want another version of the same playful character idea.
How to Crochet the Mini Skirt
The skirt begins with a foundation chain sized directly around the frog.
Make enough chains to:
wrap comfortably around the frog’s body
Do not twist the chain.
Join the first and last chains with:
1 sl st
Skirt Round 1
Chain:
ch 2
Work the following repeat around:
1 dc, dc inc
A double crochet increase means:
2 dc in the same stitch
Continue around.
If you want a very short skirt, you can stop after this round.
Join with a slip stitch.
Skirt Round 2
For a slightly longer skirt:
ch 2
Then work:
1 dc in every stitch around
No increases are made in this round.
Join with:
1 sl st
Cut the yarn.
Add the Skirt Straps
Make a slip knot and attach the yarn to the skirt.
Chain:
ch 15
Put the skirt on the frog.
Bring the strap toward the front.
Work the center single crochet section just as you did for the overalls.
Then:
ch 15
Bring the second strap toward the back.
Attach with:
1 sl st
Positioning the skirt on the frog while adding the straps makes it much easier to keep the front centered.
Now the frog can switch between its overalls and skirt whenever you want.
For another tiny project built around playful accessories, the Penguin with Hats Crochet Pattern would fit nicely alongside this one.
Turn the Frog Into a Bag Friend
This is my favorite detail in the whole project.
Use small press buttons that can be snapped together and pulled apart.
Sew one half of the fastener securely onto one frog hand.
Sew the matching half onto the other hand.
Wrap the frog’s long arms around a tote strap and press the hands together.
Now the frog can hang from the bag without being permanently attached.
When you want to move it:
- Open the fastener.
- Remove the frog.
- Change the outfit if you like.
- Wrap the arms around another strap.
- Snap the hands together again.
If you do not have press buttons, you can sew the hands together around the tote strap, but the frog will no longer be easily removable.
If you enjoy crochet projects with a practical little twist, the Apple Pouch Water Bottle Holder Crochet Pattern and Magic Pouch Net Bag Crochet Pattern are both fun projects to try next.
Outfit Ideas for Your Leggy Frog
Once you have the basic clothing construction figured out, changing the colors is easy.
You could make:
- Blue overalls
- Purple shorts
- Pink skirt
- Pastel trousers
- Matching seasonal outfits
- Several skirts in different colors
You can also extend the individual pants legs before joining them if you prefer long trousers.
Because the clothes remain separate from the frog, you can keep adding outfits without altering the amigurumi itself.
That same mix-and-match appeal works especially well beside the Baby Chicks and Ducks with Hats Crochet Pattern, where accessories also change the personality of the finished character.
Tips for a Neater Finished Frog
Keep your stitch marker in place during the body rounds. Rounds 5 through 16 are repetitive, so it is much easier to accidentally lose your place there.
Remember the limb difference:
Arms: through Round 12
Legs: through Round 10
When making the shorts, double-check the first chain before joining it into a ring. A twisted chain will make the leg tube awkward.
The same rule applies to the skirt.
Try the clothing on the frog before fastening off the straps. It is much easier to correct an off-center strap while the yarn is still attached.
Finally, sew the press buttons firmly. They are functional pieces, not just decoration.
More Small Crochet Projects to Make
For another compact character, try the Mini Miffy Crochet Pattern or Moo Deng Baby Hippo Crochet Pattern.
If you want a small project designed specifically to hang from something, the Nemo and Dory Fish Keychain Crochet Pattern is a natural follow-up.
For something practical with an animal theme, the Frog and Bear Wallet Crochet Pattern or Whale Drawstring Pouch Crochet Pattern would also work well in the same crochet collection.
A Frog With Somewhere to Go
Once the clothes are finished, the frog stops feeling like a single amigurumi project and starts feeling like a tiny character with its own wardrobe. The long arms wrap around a bag strap, the legs dangle underneath, and the press buttons mean you can move it whenever you feel like changing bags.
That is what makes the Dress Up Leggy Frog Bag Friend Crochet Pattern so playful. You get the frog, removable clothes, and a functional way to carry it, while still leaving plenty of room to add more outfits later.
Frequently Asked Questions
What yarn do I need for the Dress Up Leggy Frog Bag Friend Crochet Pattern?
The pattern uses 5-ply milk cotton yarn, with green for the frog, pink for the cheeks, and a separate color for the clothing.
What crochet hook size should I use?
Use a 3.5 mm crochet hook with the 5-ply yarn. If you substitute another yarn, choose a hook suitable for that yarn thickness.
How many rounds are the frog’s arms?
The arms are worked through Round 12, with 6 single crochets in each round after the starting magic ring.
How many rounds are the frog’s legs?
The legs are worked through Round 10. This makes them two rounds shorter than the arms.
