

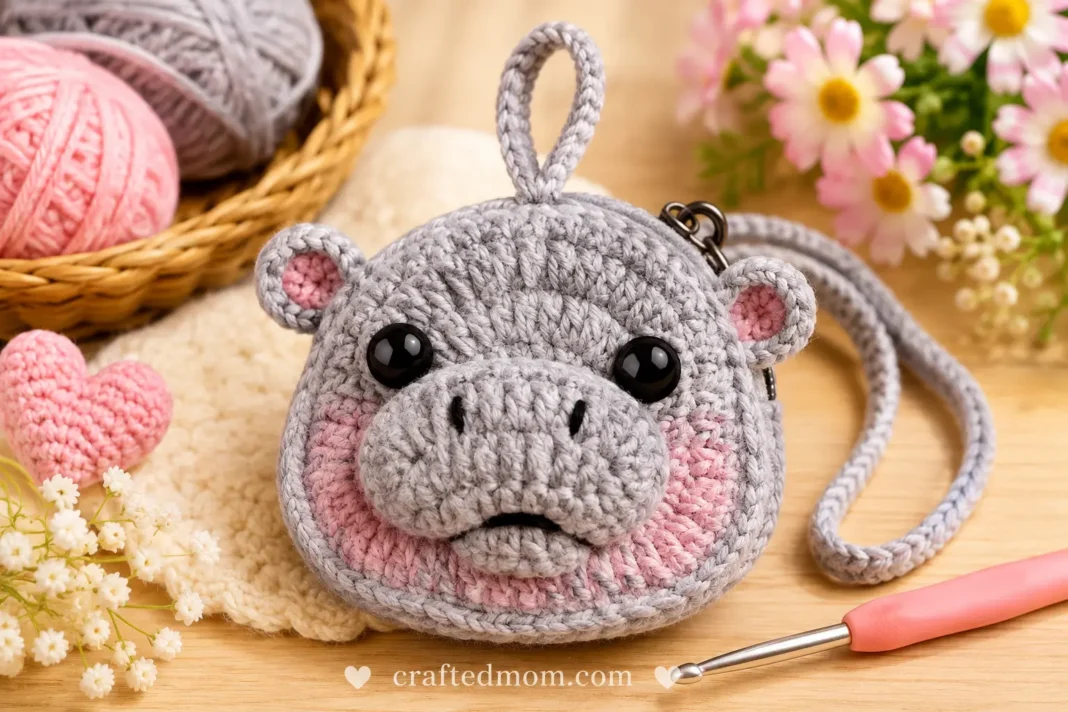
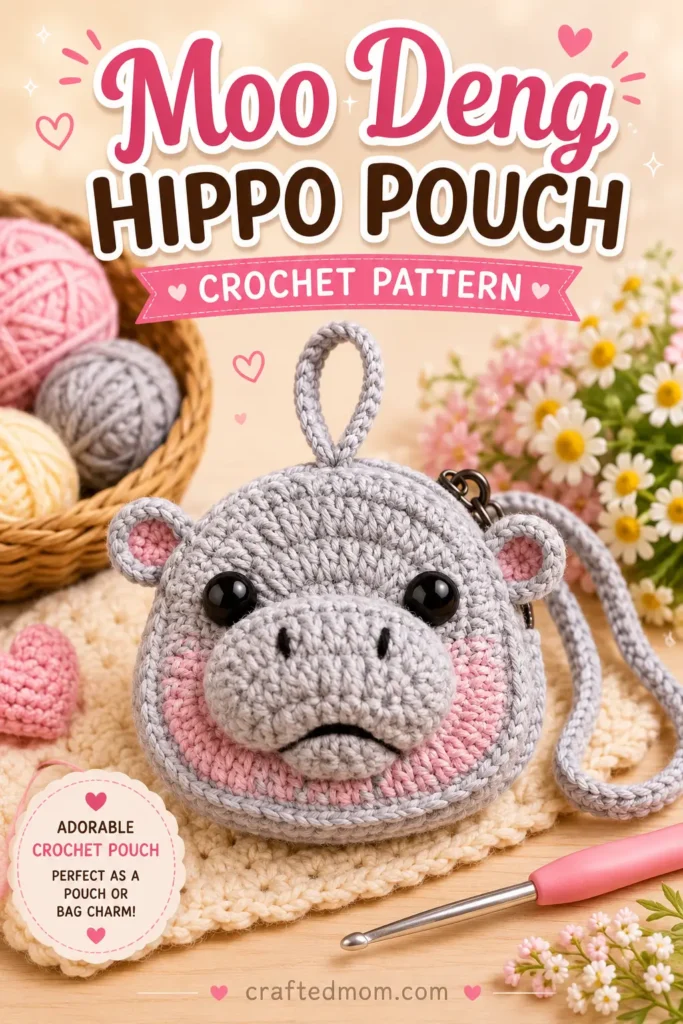
A round gray hippo face with tiny ears, a wide stuffed muzzle, pink cheeks, and that slightly grumpy little mouth is already hard to ignore. Turn it into a pouch with both a short loop and a longer hanging strap, and it becomes even more useful. This Moo Deng Hippo Pouch Crochet Pattern combines a flat circular crochet base with dimensional facial pieces, embroidered details, and a partly joined back so you can actually open and use it as a small bag charm or pouch.
The main pouch begins with a magic ring and expands through double crochet rounds before the fourth round shapes those distinctive cheeks directly into the edge. The muzzle is made separately and lightly stuffed, while the eyes can be crocheted from black yarn or replaced with safety eyes if you prefer. Once the face is finished, a second pouch panel is made, the two pieces are joined with slip stitches, and two different straps are added.
There are quite a few little details packed into this project, but the construction is nicely divided into manageable sections. We’ll make the pouch base first, then the muzzle, mouth, eyes, straps, and finally the ears.
Moo Deng Hippo Pouch Crochet Pattern at a Glance
| Project Detail | Information |
| Project | Crochet hippo face pouch / bag charm |
| Yarn | 4-ply milk cotton yarn |
| Main Yarn Colors | Gray, white, black |
| Crochet Hook | 3.5 mm |
| Starting Method | Magic ring |
| Main Stitches | Double crochet, half double crochet, single crochet |
| Other Techniques | Increase, slip stitch, chains |
| Pouch Panels | 2 |
| Main Base Round 1 | 12 dc |
| Main Base Round 2 | 24 dc |
| Main Base Round 3 | 36 dc |
| Round 4 Feature | Shaped cheeks |
| Short Strap | ch 6 |
| Long Strap | ch 45 |
| Muzzle | Crocheted separately and lightly stuffed |
| Eyes | Crochet eyes or optional safety eyes |
| Blush | Pink eyeshadow or blush |
| Assembly | Slip-stitch joining plus sewing |
| Ears | Crocheted separately and sewn on |
The pouch base reaches 36 double crochets after Round 3, then Round 4 uses a combination of half double crochet, double crochet increases, single crochet, and slip stitches to create the rounded lower cheek shape.
Materials You’ll Need
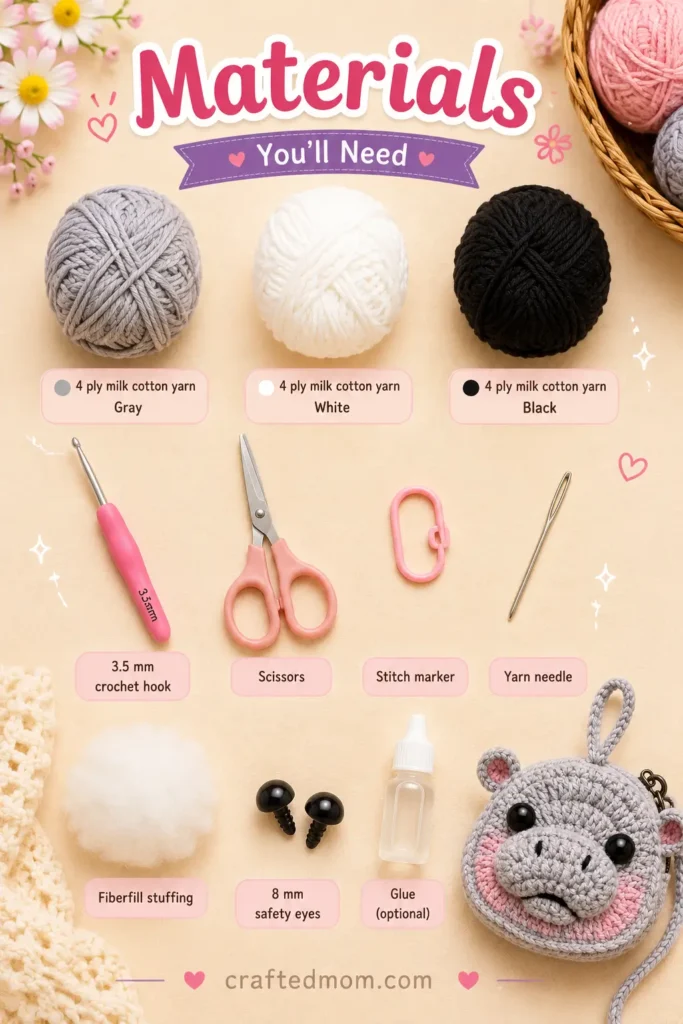
Gather:
- 4-ply milk cotton yarn
- 3.5 mm crochet hook
- Scissors
- Yarn needle
- Pink eyeshadow or blush
- Fiberfill or scrap yarn for stuffing the muzzle
- Optional safety eyes
The black yarn is used for facial details, while white yarn can be used for highlights on the eyes.
Pink eyeshadow or cosmetic blush is applied directly to the cheek area and can also be added inside the ears.
If you use plastic safety eyes, remember that small detachable parts are not appropriate for very young children.
Crochet Abbreviations
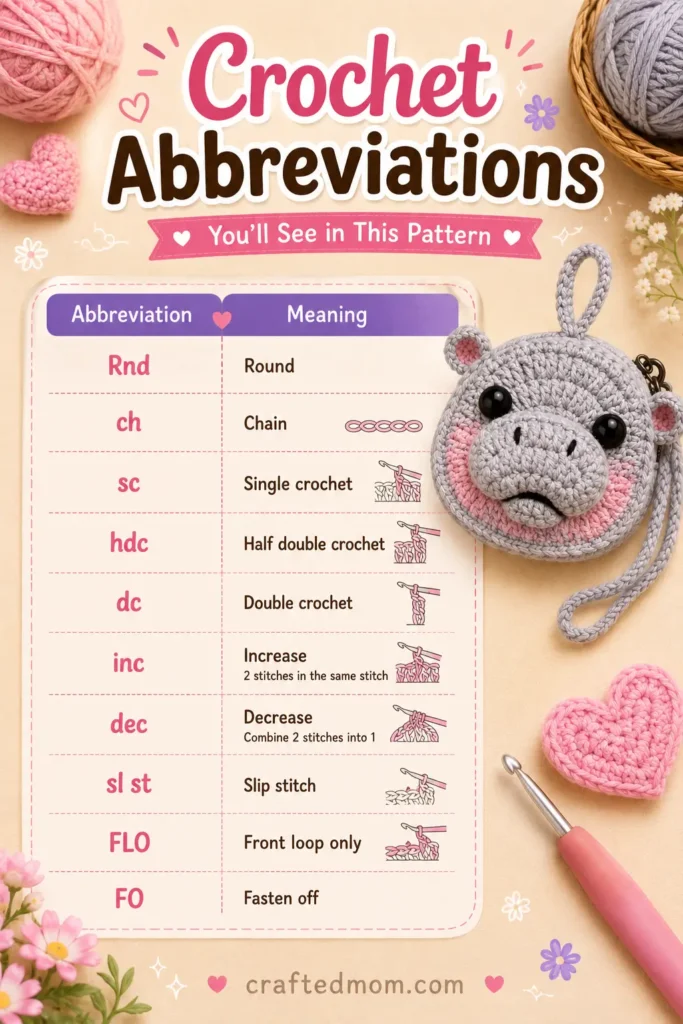
| Abbreviation | Meaning |
| Rnd | Round |
| ch | Chain |
| sc | Single crochet |
| hdc | Half double crochet |
| dc | Double crochet |
| inc | Increase |
| sl st | Slip stitch |
| FO | Fasten off |
A dc inc means:
2 dc in the same stitch
This pattern uses increases heavily in the first few rounds because the pouch is built from a flat circular base.
How to Crochet the Moo Deng Hippo Pouch Crochet Pattern
We’ll begin with the front panel.
Use gray yarn.
Round 1
Make a magic ring.
Chain:
ch 2
Work:
12 dc into the magic ring
Pull the tail tightly to close the center.
Join with:
1 sl st into the second chain of the beginning ch 2
Stitch count: 12 dc
The ch 2 sets up the round, while the 12 double crochets create the first circular section.
Round 2
Chain:
ch 2
Now work:
dc inc × 12
That means:
2 dc in every stitch around
Stitch count: 24 dc
When you return to the beginning, you may see an extra stitch next to the starting chain. Skip that stitch and join with:
1 sl st into the second chain of the beginning ch 2
Round 3
Chain:
ch 2
Work:
(1 dc, dc inc) × 12
Repeat all the way around.
Stitch count: 36 dc
Join with:
1 sl st into the second chain of the beginning ch 2
At this point, the base should still look like a mostly flat circle.
Round 4 changes that by shaping the cheeks.
Round 4: Shape the Hippo Cheeks
Chain:
ch 2
Work:
21 hdc
One half double crochet goes into each of the next 21 stitches.
Now begin the first cheek.
Work:
dc inc × 4
So in each of the next four stitches, make:
2 dc
Then work:
1 dc
followed by:
1 hdc
then:
1 sc
and finally:
1 sl st
That completes one cheek.
Make the Second Cheek
Now reverse that shaping sequence.
Work:
1 sc
Then:
1 hdc
Then:
1 dc
Now work:
dc inc × 4
That means 2 double crochets in each of the next four stitches.
Join the round with:
1 sl st into the second chain of the beginning ch 2
Then:
ch 1
Cut the yarn and hide the tail on the back.
The bottom of the pouch should now have a fuller, rounder hippo-cheek shape instead of being a plain circle.
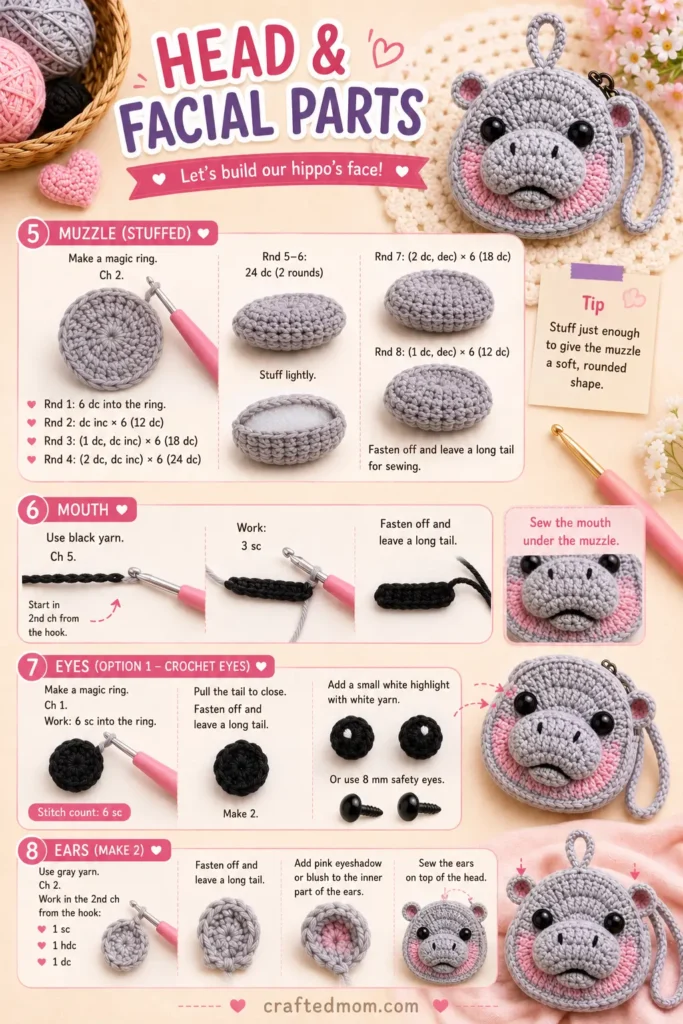
Crochet the Hippo Muzzle
The muzzle is worked separately and then sewn onto the front panel.
Make a slip knot.
Chain:
ch 12
Skip the first:
2 chains
Now work:
1 dc in each chain
until you reach the final chain.
In the final chain, work:
3 dc
This turns the work around the end so you can continue along the opposite side of the foundation chain.
Work Along the Other Side
On the opposite side of the chain, work:
dc inc × 3
That means 2 double crochets into each of the next three stitches.
Then work:
2 sl st
Now repeat:
dc inc × 3
There will be one stitch remaining.
Work:
1 dc
Then join with:
1 sl st into the second chain of the beginning ch 2
Shape the Top of the Muzzle
Chain:
ch 1
Work:
3 hdc
Then:
3 dc
Then:
3 hdc
Then:
1 sl st
Leave a long tail for sewing.
Sew and Stuff the Muzzle
Position the muzzle close to the center of the front pouch panel.
Begin sewing around the edge.
Before closing it completely, add a little:
- Fiberfill
- Scrap yarn
inside the muzzle.
The stuffing makes the muzzle stand out from the flat pouch instead of sitting completely flush.
Finish sewing, secure the yarn on the back, and hide the end.
I would keep the stuffing light. The muzzle should look rounded, not overly firm.
Crochet the Small Mouth
Make a slip knot.
Chain:
ch 6
Skip the first chain.
Work:
1 sc in the second chain
and:
1 sc in the third chain
Now work:
1 dc
There should be two chains remaining.
Work:
1 sc in each of those final 2 chains
Leave a long tail for sewing.
Sew this tiny mouth just below the large muzzle.
The slight downward curve is what gives the hippo that serious little expression.
Add the Pink Blush
Use pink eyeshadow or blush.
Apply it:
- Along the rounded cheek areas
- Between the muzzle and mouth
- Under the mouth
You can build the color gradually instead of applying a heavy amount all at once.
The pink shading helps the cheeks stand out from the gray body.
This is also one of the small details that makes the pouch visually different from a plain animal-face crochet pouch.
Add the Nose Details
Use black yarn to embroider the small vertical nostril details onto the muzzle.
Secure the yarn tails together on the back or inside of the muzzle and hide them neatly.
A short black yarn detail can also be added between the muzzle and mouth later if you want a deeper shadow effect.
Crochet the Eyes
You have two options:
- Use safety eyes
- Crochet the eyes using black yarn
If you want the crochet version, follow this construction.
Crochet Eye
Make a slip knot using black yarn.
Chain:
ch 3
Skip the first chain.
In the second chain, work:
1 sc
In the final chain, work:
3 sc
Now continue on the opposite side of the chain.
Work:
1 sc
Then:
1 sl st
Leave a long tail for sewing.
Make 2 eyes.
Sew each one onto the face above the muzzle.
Add White Eye Highlights
Thread a small amount of white yarn onto your needle.
Add a small white detail to each black eye.
You can also make a tiny white dot to create a shinier, more expressive eye.
If you enjoy making recognizable animal faces, the Moo Deng Baby Hippo Crochet Pattern would pair naturally with this pouch because it turns the same hippo theme into a full amigurumi character.
Crochet the Back Pouch Panel
For the second pouch piece, repeat:
Rounds 1 through 4
using the same pouch-base pattern.
After finishing Round 4, work:
5 sl st
Now place the two pouch panels together with their wrong sides facing inward.
The finished sides should face outward.
Join the Two Pouch Pieces
Insert your hook through corresponding stitches on both panels.
Chain:
ch 1
Now join the panels using:
sl st through both layers
Continue slip stitching around the pouch until approximately:
15 stitches remain unjoined
Leave this section open so the pouch can actually be used.
A project like the Frog and Bear Wallet Crochet Pattern uses a similar idea of turning a character face into something functional rather than purely decorative.
Finish the Opening
Once the main seam is complete, continue making slip stitches only across the top panel.
Work toward the middle of the opening.
When you reach the center, stop for the short strap.
Crochet the Small Strap
Chain:
ch 6
Then work:
1 sl st into the same stitch
This creates a small loop.
Continue working slip stitches around the pouch opening.
The small loop gives you another attachment option in addition to the longer hanging strap.
Crochet the Long Strap
Continue slip stitching until you reach the middle area of the bottom panel.
Now chain:
ch 45
Before attaching it, check carefully that the chain is not twisted.
Join it back into:
the same stitch with 1 sl st
Continue slip stitching until you reach the beginning.
Then:
ch 1
Cut the yarn.
Hide the yarn tails inside the pouch.
The longer strap lets the finished pouch hang from a tote, backpack, hook, or other attachment point.
For another small crochet accessory designed to hang from a bag, the Nemo and Dory Fish Keychain Crochet Pattern is a fun follow-up project.
Crochet the Hippo Ears
Make 2 ears.
Use gray yarn.
Make a slip knot.
Chain:
ch 6
Skip the first chain.
Work:
1 sl st in the second chain
Then:
1 sc
Then:
1 hdc
In the next chain, work:
2 dc in the same stitch
In the final chain, work:
3 sc
Work Back Along the Other Side
Continue on the opposite side of the chain.
Work:
2 dc in the next stitch
Then:
1 hdc
Then:
1 sc
Finish with:
1 sl st
Leave a long tail for sewing.
The sequence mirrors itself around the foundation chain, which gives the ear its rounded shape.
Add Pink to the Ears
Use your pink eyeshadow or blush to tint the center of each ear lightly.
This matches the cheek shading and adds definition without requiring another crochet color change.
Then position one ear on each side of the pouch and sew them securely in place.
Check both sides before tying off so the ears sit at roughly the same height and angle.
Optional Shadow Detail
If you want more definition around the mouth area, apply a small amount of glue between the muzzle and mouth.
Place a short piece of black yarn over that area to create a shadow line.
This is optional, so you can skip it if you prefer an entirely sewn and crocheted finish.
If you use glue, allow it to dry completely before handling or filling the pouch.
Tips for a Cleaner Hippo Pouch
Keep Round 3 Flat
By the end of Round 3 you should have:
36 dc
If the circle begins curling heavily before you reach the cheek shaping, double-check that your Round 2 and Round 3 increases are correct.
Pay Attention to Round 4
Round 4 is not an ordinary even round.
The first 21 half double crochets create the upper portion, while the double crochet increases and shorter stitches shape the cheeks.
That sequence is what gives the base its hippo-face silhouette.
Stuff the Muzzle Before Closing
Once the muzzle is fully sewn down, adding stuffing becomes difficult.
Leave a small opening, add a little fiberfill, then finish sewing.
Keep the Long Strap Untwisted
The 45-chain strap is long enough to twist easily.
Lay the chain flat before attaching it back into the same stitch.
Leave Enough Pouch Opening
Stop joining when approximately 15 stitches remain.
Closing too much of the edge will make the pouch harder to open and use.
More Small Crochet Bag Projects
If you like crochet pieces that are decorative but still useful, the Magic Pouch Net Bag Crochet Pattern hides an entire mesh bag inside a character pouch.
The Apple Pouch Water Bottle Holder Crochet Pattern also transforms from a compact decorative shape into something larger and practical.
For something with a different kind of closure, the Pufferfish Drawstring Pouch Crochet Pattern and Whale Drawstring Pouch Crochet Pattern are other animal-inspired storage projects.
From Flat Circle to Hippo Face
The most satisfying part of this Moo Deng Hippo Pouch Crochet Pattern is watching a fairly ordinary crochet circle gain personality piece by piece. Round 4 gives it cheeks, the stuffed muzzle pushes the face forward, the tiny black mouth creates that unmistakable expression, and the pink shading softens the gray.
Once the ears and straps are attached, it stops looking like a crochet sample and starts feeling like a finished character accessory. And because the back remains partly open, you end up with something you can actually use instead of a purely decorative face.
Frequently Asked Questions
What yarn is used for the Moo Deng Hippo Pouch Crochet Pattern?
The pattern uses 4-ply milk cotton yarn in gray, white, and black.
How many pouch panels do I need?
You need two panels. Both follow Rounds 1 through 4 of the same base pattern before they are joined together.
How big is the opening of the pouch?
The panels are joined until approximately 15 stitches remain open. That unjoined section forms the pouch opening.
