

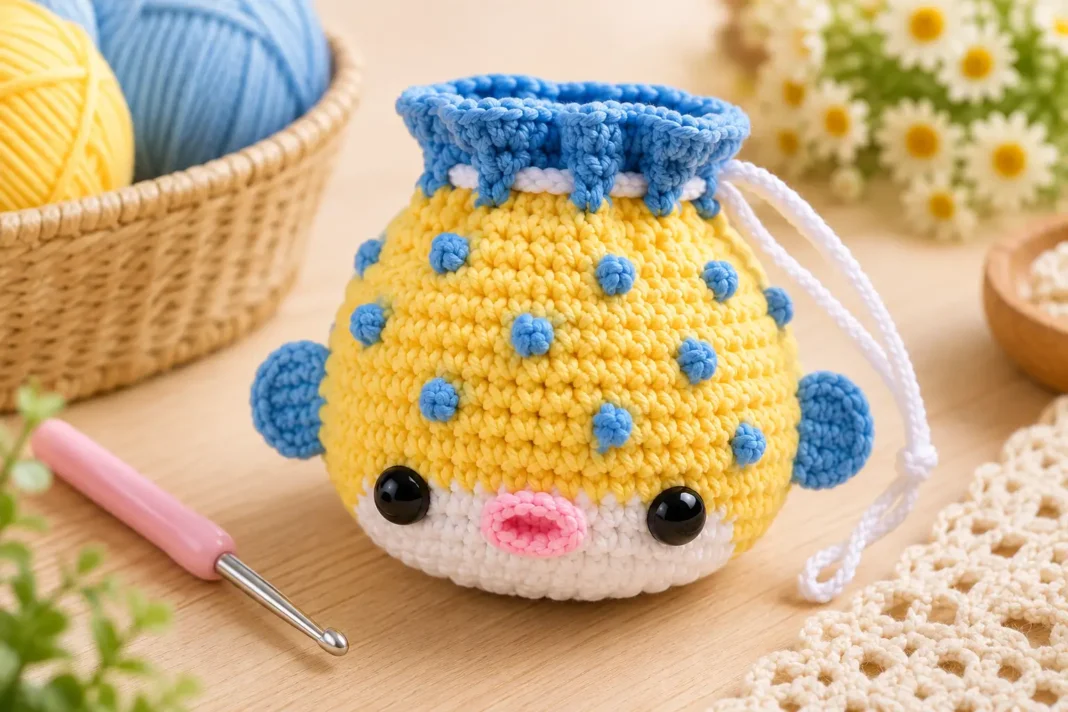
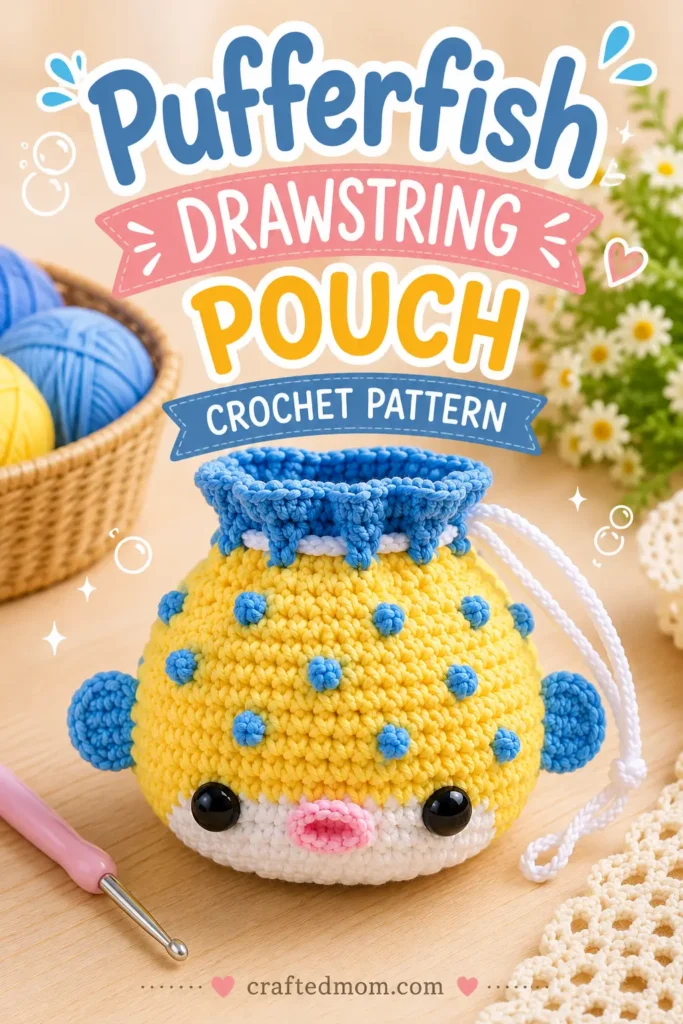
Those little blue bumps are what make this fish impossible to ignore. Instead of crocheting a plain pouch and adding decoration afterward, the spikes are worked right into the body while alternating between yellow and blue yarn. Add oversized eyes, tiny pink lips, fins, and a drawstring at the top, and the Pufferfish Drawstring Pouch Crochet Pattern turns into a surprisingly practical little character pouch.
The construction is especially fun because the pouch changes personality as you work upward. It begins with a white oval base, switches to yellow for the pufferfish body, adds staggered blue spikes every few rounds, and finishes in blue at the opening. A long crocheted chain is woven around the top so the opening can be pulled closed.
I would keep a couple of stitch markers nearby for this one. The individual stitches are basic, but the color changes in the spike rounds are much easier to follow when you can clearly see where your round begins.
Pufferfish Drawstring Pouch Crochet Pattern at a Glance
| Project Detail | Information |
| Project | Pufferfish drawstring crochet pouch |
| Yarn | 5-ply milk cotton yarn |
| Yarn Colors | 4 colors |
| Crochet Hook | 3.5 mm or 4 mm |
| Eyes | 10 mm or 12 mm |
| Main Stitches | Single crochet, double crochet, triple crochet, chain, slip stitch |
| Starting Method | Slip knot and foundation chain |
| Starting Chain | 12 chains |
| Main Body Count | 34 stitches after Round 3 |
| Spike Color | Blue |
| Body Color | Yellow |
| Lower Face Color | White |
| Mouth | Pink crochet chain loop |
| Strap | 70-chain drawstring |
| Fin Placement | Sewn around Rounds 5 and 6 |
| Assembly | Sewing and glue are used |
| Drawstring Method | Woven around the pouch by skipping 2 stitches and passing under 2 stitches |
The pouch uses a 5-ply milk cotton yarn, either a 3.5 or 4 mm hook, 10 or 12 mm eyes, glue, a needle, scissors, and stitch markers. The body begins with 12 chains and grows to 34 stitches before the textured spike rounds are added.
Materials You’ll Need
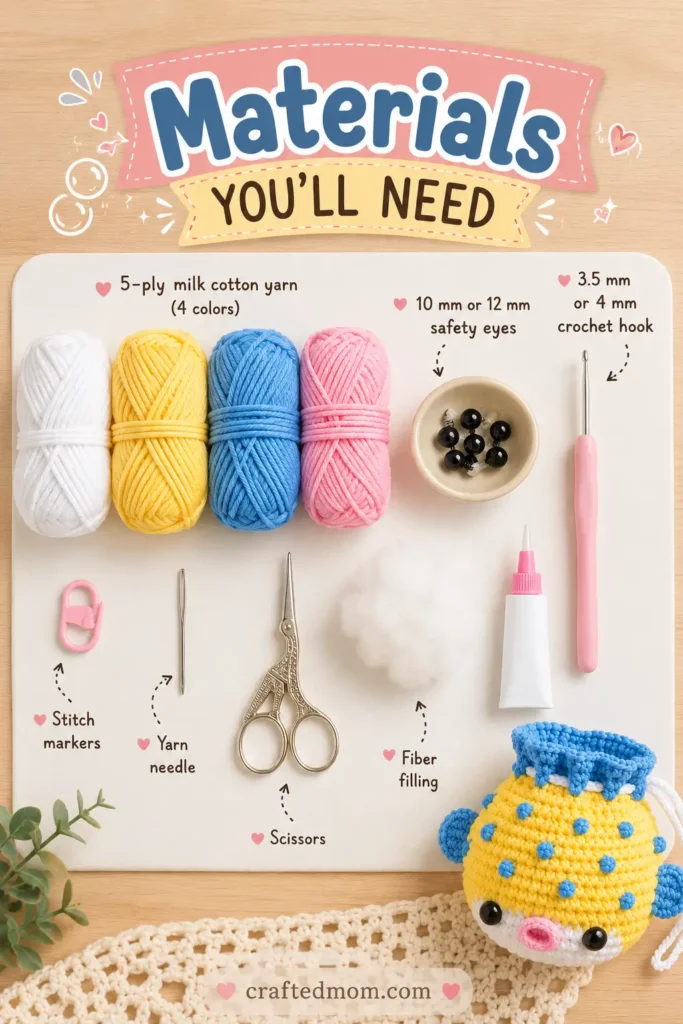
Gather:
- 5-ply milk cotton yarn in 4 colors
- 3.5 mm or 4 mm crochet hook
- 10 mm or 12 mm eyes
- Stitch markers
- Yarn needle
- Scissors
- Multipurpose glue or hot glue gun
There is no stuffing involved here because we’re making an actual pouch rather than a stuffed amigurumi.
If you’re using hot glue, keep fingers well away from the tip and freshly applied glue. The eyes and glued mouth are also small components, so this finished pouch isn’t intended as a toy for very young children.
Crochet Abbreviations
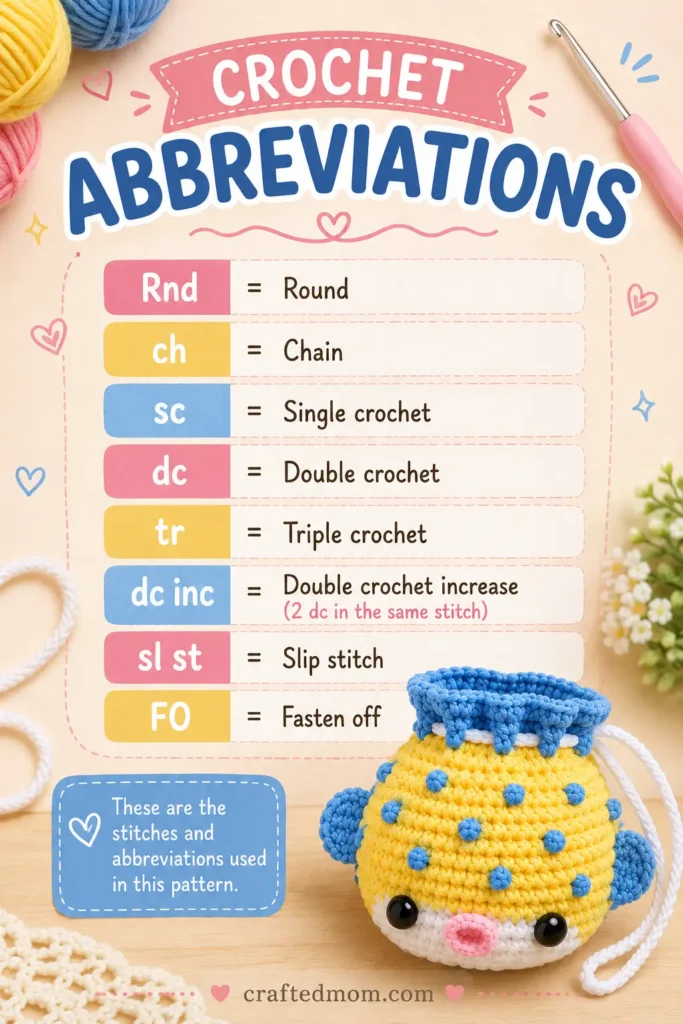
This pattern uses standard US crochet terminology.
| Abbreviation | Meaning |
| Rnd | Round |
| ch | Chain |
| sc | Single crochet |
| dc | Double crochet |
| tr | Triple crochet |
| dc inc | Double crochet increase |
| sl st | Slip stitch |
A dc inc means working 2 double crochets into the same stitch.
The triple crochets are the clever part here. They’re worked in blue and then pushed outward so they become the little raised pufferfish spikes.
Pattern Notes Before Starting
The first several rounds form an oval pouch base rather than a flat circle.
You’ll begin by crocheting along one side of the starting chain, work several stitches into the final chain, then continue along the opposite side. That creates the rounded bottom.
The first two rounds are worked in white.
You’ll change to yellow while joining Round 2, then continue the main body in yellow.
Blue is brought in temporarily for the raised spikes during Rounds 5, 7, and 9. After each blue triple crochet, you switch back to yellow so the rest of the body remains yellow.
Rounds 12 and 13 are worked in blue, forming the upper section of the pouch.
The beginning chains used when starting double crochet rounds function as the setup for the round. Follow the stitch totals given below for the actual body stitches.
How to Crochet the Pufferfish Drawstring Pouch Crochet Pattern
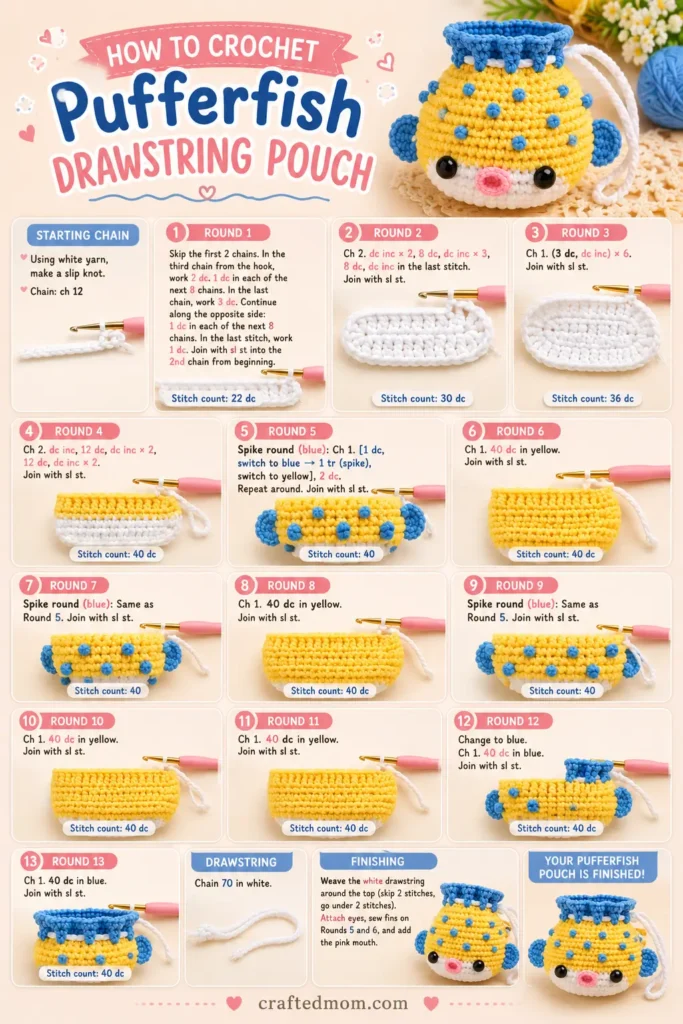
Make the Foundation Chain
Using white yarn, make a slip knot.
Chain:
ch 12
We’re going to crochet around both sides of this chain to build the pouch from the bottom upward.
Round 1
Skip the first 2 chains.
In the third chain from the hook, work:
2 dc
Then work:
1 dc in each of the next 8 chains
You should now have one chain remaining.
In that final chain, work:
3 dc
Do not turn.
Continue along the opposite side of the starting chain.
Work:
1 dc in each of the next 8 chains
In the last remaining stitch, work:
1 dc
Join with a slip stitch into the second chain from the beginning.
Stitch count: 22 dc
You should now have a narrow oval rather than a flat strip.
Round 2
Chain:
ch 2
Work:
dc inc × 2
That means 2 double crochets in each of the first 2 stitches.
Then:
8 dc
Next work:
dc inc × 3
Then:
8 dc
In the final stitch:
dc inc
Before closing the round, prepare the yellow yarn.
Make a slip knot with yellow and use it to complete the joining slip stitch into the second beginning chain.
Stitch count: 28 dc
Your white section is now complete.
Round 3
Using yellow, chain:
ch 2
Work:
(1 dc, dc inc) × 2
Then:
8 dc
Next work:
(1 dc, dc inc) × 3
Then:
8 dc
You should have 2 stitches remaining.
Work:
1 dc, dc inc
Join with a slip stitch.
Stitch count: 34 dc
From this point forward, the pouch maintains 34 stitches through the main body.
You can cut the white yarn because it won’t be needed again.
Round 4
Chain:
ch 2
Work:
34 dc
Join with a slip stitch into the second beginning chain.
Stitch count: 34
At this stage, the pouch should clearly be curving upward rather than continuing to spread outward.
Crochet the Blue Pufferfish Spikes
This is where the little fish starts getting its texture.
The spikes are made from blue triple crochets worked between yellow single crochets.
The trick is changing color during the final part of the stitch so the blue section stays concentrated in the spike.
Round 5
Chain:
ch 1
Begin working single crochets in yellow.
Work:
4 sc
During the fourth single crochet, stop before completing the final yarn-over.
Switch to blue yarn and finish that stitch with blue.
In the next stitch, make a:
1 tr in blue
For the triple crochet:
- Yarn over twice.
- Insert the hook into the next stitch.
- Pull up a loop.
- Yarn over and pull through 2 loops.
- Yarn over and pull through the next 2 loops.
- Before completing the final pull-through, switch back to yellow.
- Finish the last 2 loops using yellow.
Push the blue triple crochet outward slightly. That creates the raised bump.
Continue repeating:
4 sc, 1 blue tr
Change to blue during the fourth sc, work the tr in blue, then change back to yellow during the final portion of the tr.
Continue this sequence around the pouch.
When you reach the end and no longer have enough stitches for another full repeat, work the remaining 4 sc.
Join into the beginning chain with a slip stitch.
Stitch count: 34
Don’t worry if the spikes aren’t sitting perfectly outward yet. You can gently push them into position with your fingers.
Round 6
Chain:
ch 2
Work:
34 dc
Crochet normally into every stitch, including the stitches above the blue triple crochets.
Join with a slip stitch.
Stitch count: 34
Round 7
This second spike round offsets the blue bumps so they sit between the spikes from Round 5.
Chain:
ch 1
Work the first single crochet, changing to blue before completing it.
In the next stitch, work:
1 blue tr
Switch back to yellow before completing the triple crochet.
Next work:
5 sc
Change to blue during the fifth sc.
Then make:
1 blue tr
Switch back to yellow.
From here, continue with the main repeating sequence:
4 sc, 1 blue tr
Keep repeating the sequence around the pouch.
At the end, work the final remaining:
1 sc
Join with a slip stitch.
Stitch count: 34
The staggered placement is what gives the fish its scattered pufferfish texture instead of creating straight vertical rows of bumps.
Round 8
Chain:
ch 2
Work:
34 dc
Join with a slip stitch.
Stitch count: 34
Round 9
Repeat the spike arrangement from Round 5.
Work the same alternating sequence of yellow single crochets and blue triple crochet spikes.
Stitch count: 34
Round 10
Chain:
ch 2
Work:
34 dc
Join with a slip stitch.
Stitch count: 34
Round 11
Repeat:
34 dc
Join with a slip stitch.
Stitch count: 34
At this point, the yellow section of the pufferfish body is complete.
Add the Pufferfish Eyes
The eyes can be positioned around Round 2.
Use either:
10 mm or 12 mm eyes
Place them symmetrically on the white face area.
There isn’t a specific stitch spacing given for the eyes, so I recommend positioning both before permanently securing them. Look at the pouch straight on rather than from above, because the curved body can make one eye appear higher than the other.
Crochet the Pink Pufferfish Mouth
The tiny oval mouth is one of the details that gives this pouch so much personality.
Using pink yarn, make a slip knot.
Chain:
ch 10
Make sure the chain isn’t twisted.
Find the first chain and join with:
1 sl st
This forms a small ring.
Fasten off, leaving the two yarn tails.
Bring the tails toward the back of the mouth and tie them together securely.
Position the mouth between the eyes and attach it using multipurpose glue or a small amount of hot glue.
Once the glue has completely set, use your crochet hook to pull the loose yarn tails into the inside of the pouch.
You can trim them after they’re secured.
Finish the Top of the Pufferfish
Now return to the pouch.
Undo the previous joining slip stitch so you can change to blue yarn.
Attach the blue yarn and use it to make the joining slip stitch.
Round 12
Chain:
ch 2
Work:
34 dc in blue
Join with a slip stitch.
Stitch count: 34
You can cut the yellow yarn now.
Round 13
Chain:
ch 2
Work:
34 dc
Join with a slip stitch.
Stitch count: 34
Chain 1 and fasten off.
Hide the yarn tail inside the pouch.
The blue upper section creates a nice visual finish and also becomes the area through which the drawstring will run.
Crochet the Pufferfish Fins
Using blue yarn, make a slip knot.
Chain:
ch 5
Skip the first 2 chains.
Starting in the third chain from the hook, work:
3 dc
You should now have one double crochet in each of the final 3 chains.
Then:
ch 2
Make:
1 sl st into the same stitch
Fasten off and leave a long yarn tail for sewing.
The same small fin construction can be used for the fins around the pufferfish.
Position the side fin around Rounds 5 and 6 and sew it securely to the pouch.
After attaching it, knot the yarn securely and hide the ends inside.
I would position all of the fin pieces before permanently securing them. The fish looks best when the fins balance the rounded shape rather than all leaning toward one side.
Make the 70-Chain Drawstring
Now we’ll turn the character pouch into a functional drawstring bag.
Using the strap color, make a slip knot.
Chain:
ch 70
Fasten off.
Do not join the chain into a loop.
Thread one end of the chain through your yarn needle.
Starting from the side of the pouch, insert the needle:
under 2 stitches
Pull the chain through, but don’t pull the entire length through the first opening.
Instead, continue until you reach approximately the middle of your 70-chain strap.
From there:
skip 2 stitches, go under 2 stitches
Continue repeating:
skip 2, under 2
around the entire opening.
When you return to your starting position, both strap ends should be accessible.
Tie the two ends together with several secure knots.
Trim excess yarn if needed.
If you want the knot less visible, pull the drawstring around until the knot moves toward the center back of the pouch.
Now pull the strap upward.
The top gathers closed around the blue section, turning the round pufferfish into a little drawstring pouch.
For another project built around a hidden or expandable bag structure, the Magic Pouch Net Bag Crochet Pattern is a fun one to try next. The Whale Drawstring Pouch Crochet Pattern is another good choice if you want to stay with the sea-creature theme.
Tips for Keeping the Pufferfish Shape Neat
Because this project alternates taller triple crochet spikes with ordinary single crochet stitches, the body can look slightly uneven while you’re working a spike round.
That’s normal.
After each spike round, gently push the blue triple crochets outward. The following double crochet round helps stabilize the shape.
I also recommend checking your 34-stitch count after every full double crochet round. Losing or adding a stitch becomes much more noticeable by the time you reach the drawstring opening.
When changing between yellow and blue, don’t pull either strand too tightly. Tight floats or joins can pull the pouch inward around the spikes.
And before gluing the mouth, lay the pouch flat with the eyes facing you. A tiny adjustment in mouth placement can change the whole expression.
If you like functional character crochet, the Apple Pouch Water Bottle Holder Crochet Pattern combines a decorative pouch with a hidden net holder, while the Frog and Bear Wallet Crochet Pattern is another small project that blends a character face with something useful.
Your Little Pufferfish Pouch Is Finished
Once that drawstring pulls the blue opening together, the whole design suddenly makes sense. You get the rounded yellow pufferfish, staggered blue bumps, side fins, oversized eyes, tiny pink mouth, and an actual pouch hidden inside the character shape.
The Pufferfish Drawstring Pouch Crochet Pattern is a nice change from ordinary amigurumi because the finished piece doesn’t just sit on a shelf. You can hang it from a bag, use the drawstring to close it, and still keep all those little details that make a crocheted character fun to create.
Frequently Asked Questions
What yarn is used for the Pufferfish Drawstring Pouch Crochet Pattern?
The pattern uses 5-ply milk cotton yarn in four colors. White, yellow, blue, and pink create the color combination shown here.
Can I use a 3.5 mm crochet hook?
Yes. The pattern allows either a 3.5 mm or 4 mm hook.
How are the pufferfish spikes crocheted?
The spikes are blue triple crochets worked among yellow single crochets. The blue and yellow yarns are switched during the final portion of the surrounding stitches so each bump stays blue.
