

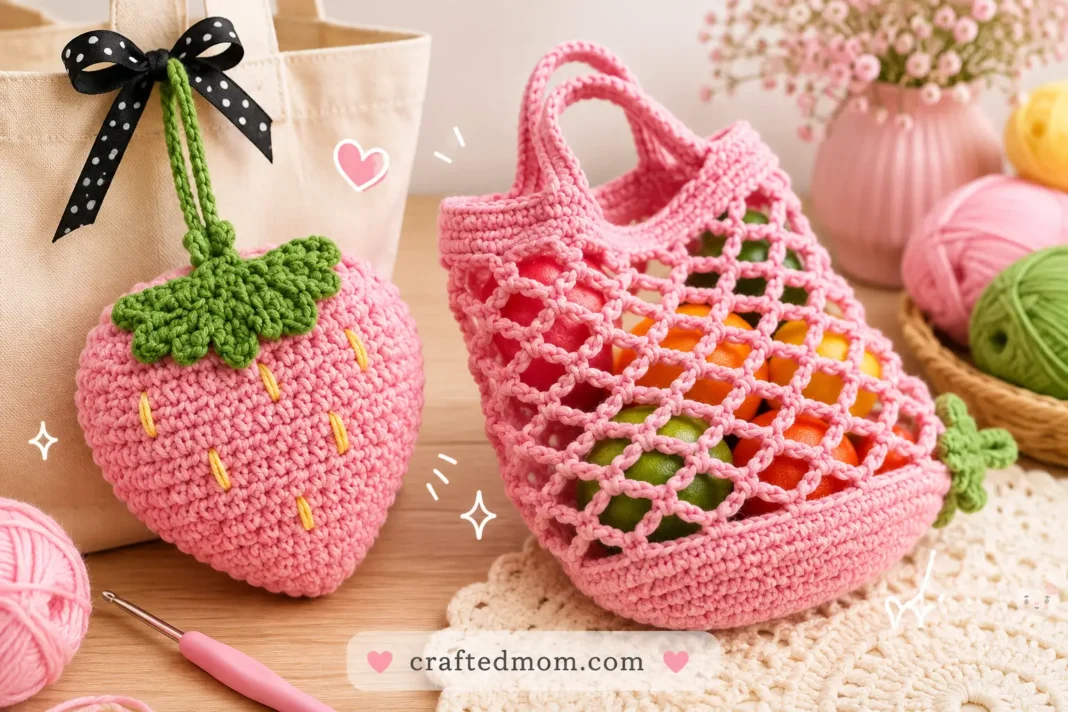
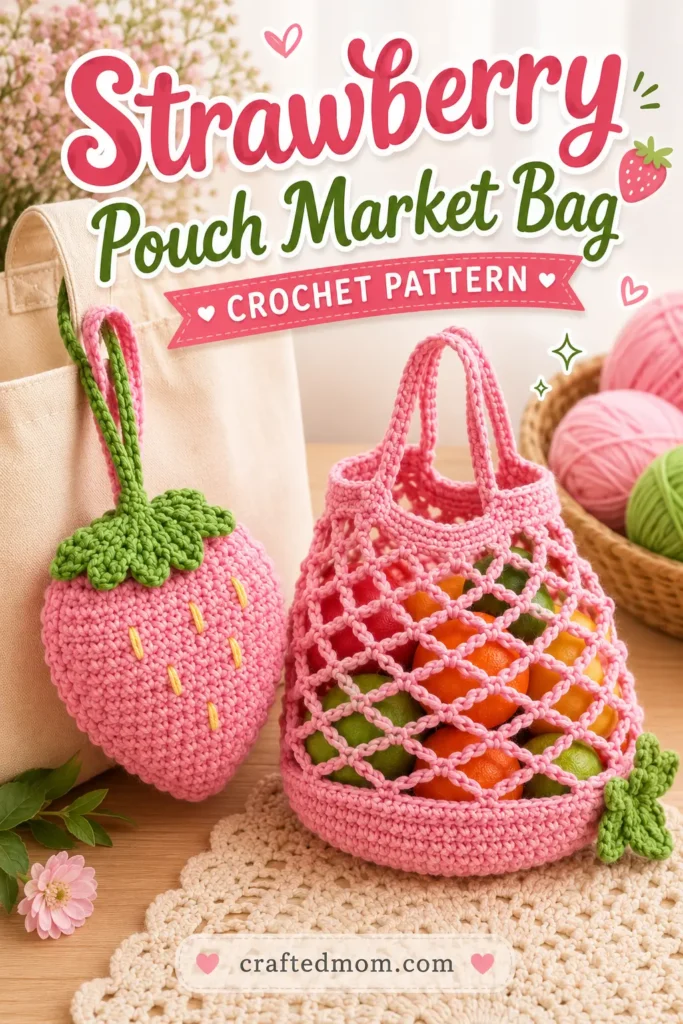
At first glance, it looks like a plump little pink strawberry hanging from a tote bag. Flip it inside out, though, and the whole thing opens into a lightweight mesh bag with handles. That surprise transformation is the best part of this Strawberry Pouch Market Bag Crochet Pattern, because the strawberry is not just decoration. It actually becomes the storage pouch for the net bag itself.
The project starts with two shaped strawberry panels. One becomes the decorative front, complete with embroidered yellow seeds. The second turns into the base for the expandable mesh bag. After the two pieces are joined, the open netting is crocheted directly from the lower section, followed by the bag handles. Finally, a green leaf and hanging straps finish the strawberry so it can be carried as a bag charm when the mesh is tucked away.
The result is a functional crochet project with two very different looks, compact when folded and surprisingly roomy once opened.
Strawberry Pouch Market Bag Crochet Pattern at a Glance
| Project Detail | Information |
| Project | Strawberry pouch that turns into a crochet mesh market bag |
| Yarn | 5-ply milk cotton yarn |
| Crochet Hook | 4 mm |
| Main Strawberry Color | Pink |
| Leaf Color | Green |
| Seed Color | Yellow |
| Main Stitches | Chain, single crochet, half double crochet, double crochet, slip stitch |
| Starting Method | Slip knot and foundation chain |
| Strawberry Pieces | 2 |
| Row 1 Stitch Count | 5 hdc |
| Row 7 Stitch Count | 17 hdc |
| Row 11 Stitch Count | 13 hdc |
| Mesh Chain Length | 7 chains per mesh repeat |
| Bag Handles | 25 chains each, or longer if desired |
| Small Leaf Strap | 7 chains |
| Large Hanging Strap | 45 chains |
| Other Materials | Stitch markers, scissors, yarn needle |
| Construction | Two strawberry panels joined, then mesh worked directly from the lower panel |
| Special Feature | Bag flips inside out and stores inside the strawberry pouch |
The original yarn amount used for this version is about 100 g of 5-ply milk cotton yarn, although a larger grocery-size version would require more yarn.
Materials You’ll Need
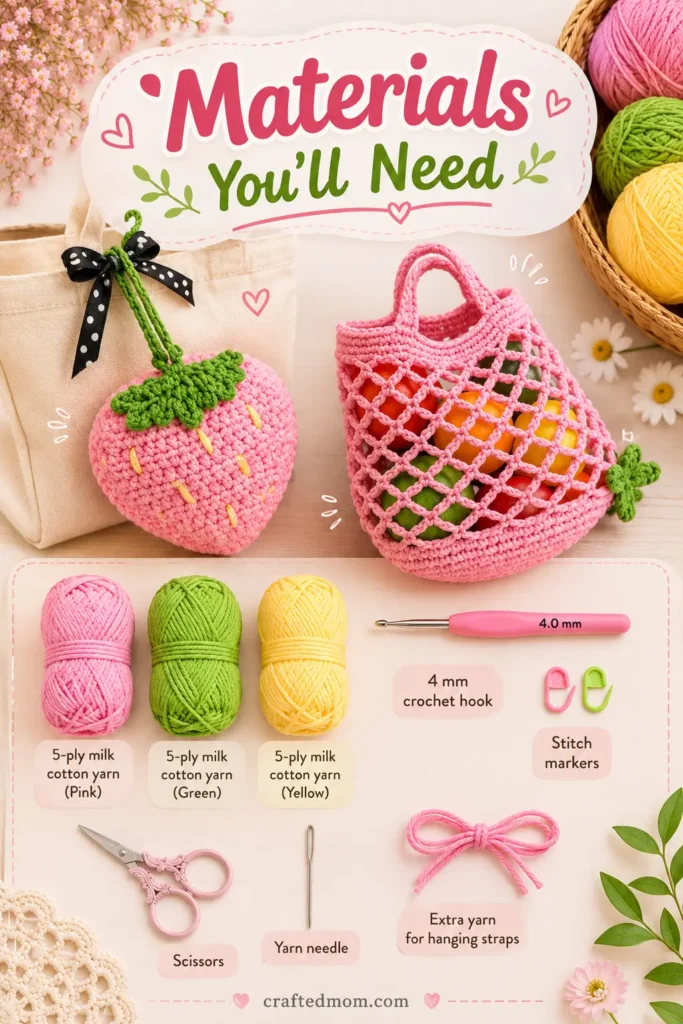
Gather the following supplies:
You’ll also need a small amount of extra yarn for the hanging straps.
The project uses basic crochet stitches, but there are several different construction stages. If you are comfortable with half double crochet, double crochet, single crochet, chains, and slip stitches, the pattern is very manageable.
Crochet Abbreviations
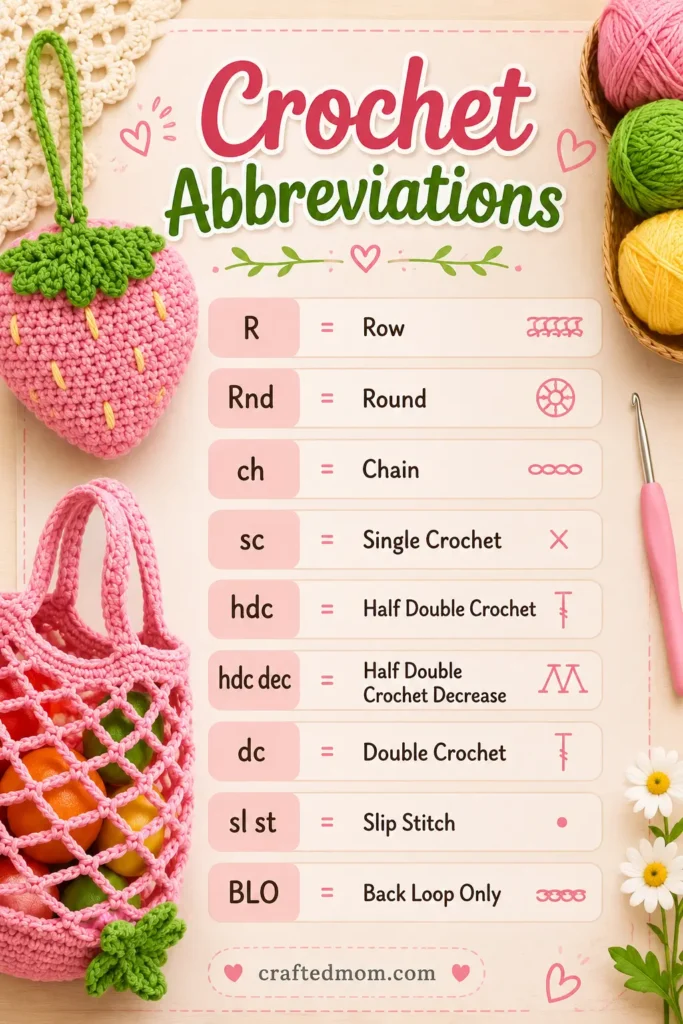
This pattern uses standard US crochet terminology.
| Abbreviation | Meaning |
| R | Row |
| Rnd | Round |
| ch | Chain |
| sc | Single crochet |
| hdc | Half double crochet |
| hdc dec | Half double crochet decrease |
| dc | Double crochet |
| sl st | Slip stitch |
| BLO | Back loop only |
How the Strawberry Pouch Is Built
The construction makes much more sense once you understand the order.
First, we crochet two identical strawberry-shaped panels.
The first one becomes the front piece. It gets the yellow embroidered seeds.
The second one becomes part of the bag structure. After its outer edging is complete, we keep the yarn attached and crochet several rounds of double crochet before joining the two strawberry panels.
Once the pouch opening is established, the mesh bag grows from the lower piece using repeated chain spaces.
After the mesh reaches the length you want, a sturdier upper border and two handles are added.
Then everything is flipped inside out so the strawberry shape returns.
The final details are:
- Green crochet leaf
- Small leaf strap
- Long hanging strap
- Yellow embroidered seeds
That combination gives the finished piece both its strawberry look and its practical hanging function.
How to Crochet the Strawberry Panels
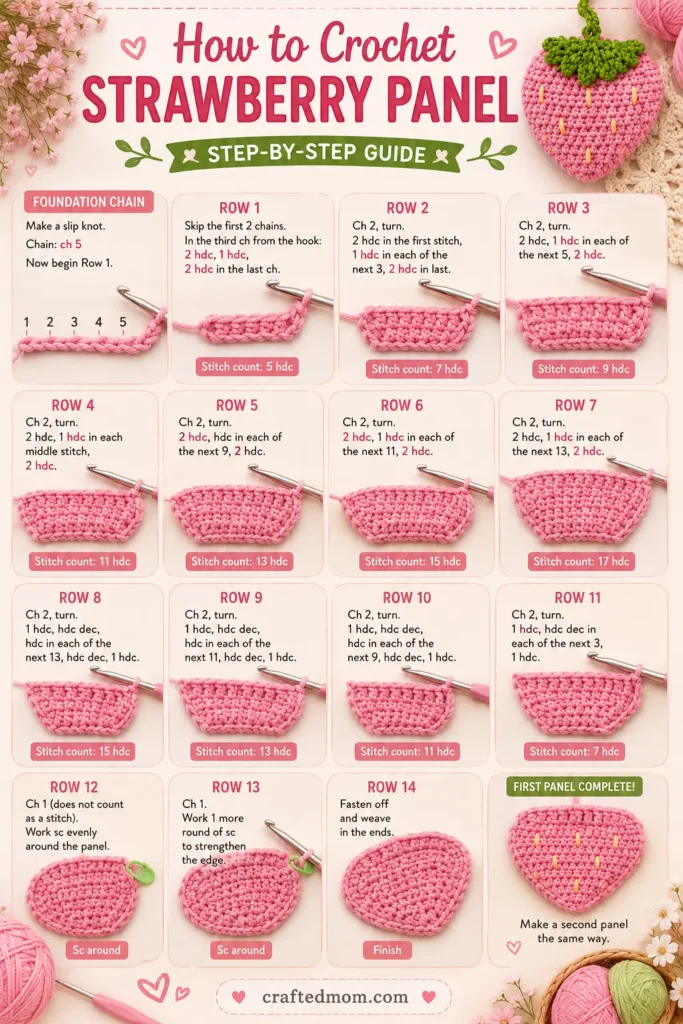
We will make the first strawberry-shaped panel using pink yarn.
Foundation Chain
Make a slip knot.
Chain:
ch 5
Now begin Row 1.
Row 1
Skip the first 2 chains.
In the third chain from the hook, work:
2 hdc
Then work:
1 hdc in the next chain
In the final chain:
2 hdc
Stitch count: 5 hdc
The increase at both ends starts creating the rounded strawberry shape.
Row 2
Chain:
ch 2
Turn your work.
Work:
2 hdc in the first stitch
Then:
1 hdc in each of the next 3 stitches
Finish with:
2 hdc in the last stitch
Stitch count: 7 hdc
Row 3
Chain 2 and turn.
Work:
2 hdc in the first stitch
Then:
1 hdc in each of the next 5 stitches
Finish:
2 hdc in the last stitch
Stitch count: 9 hdc
Row 4
Chain 2 and turn.
Work:
2 hdc in the first stitch
Then work 1 hdc in every middle stitch.
Finish with:
2 hdc in the last stitch
Stitch count: 11 hdc
Row 5
Continue the same increase pattern:
- ch 2
- turn
- 2 hdc in first stitch
- 1 hdc across the middle
- 2 hdc in last stitch
Stitch count: 13 hdc
Row 6
Repeat the same construction.
Stitch count: 15 hdc
Row 7
Again:
- ch 2
- turn
- 2 hdc in first stitch
- 1 hdc in every middle stitch
- 2 hdc in final stitch
Stitch count: 17 hdc
At this point, the strawberry is at its widest.
Row 8
Chain:
ch 2
Turn.
For this row, stop increasing.
Work:
1 hdc in each stitch across
Stitch count: 17 hdc
Row 9
Repeat Row 8.
Chain 2, turn, then:
17 hdc
Stitch count: 17
These two even rows help create the fuller center of the strawberry.
Shape the Top of the Strawberry
Now we’ll begin decreasing.
Row 10
Chain 2 and turn.
Work an hdc decrease over the first 2 stitches.
To make the decrease:
- Yarn over.
- Insert your hook into the first stitch and pull up a loop.
- Insert your hook into the second stitch and pull up another loop.
- Yarn over and pull through all loops on the hook.
Then work:
1 hdc in each middle stitch
Across the last 2 stitches:
1 hdc dec
Stitch count: 15 hdc
Row 11
Chain 2 and turn.
Work:
1 hdc dec over the first 2 stitches
Then:
1 hdc in each middle stitch
Finish with:
1 hdc dec over the final 2 stitches
Stitch count: 13 hdc
The strawberry shape is now clearly visible.
Crochet Around the Strawberry Panel
Chain:
ch 1
Now work single crochet all the way around the outside edge.
Because the side edges are formed by rows rather than clearly defined top stitches, simply insert your hook into the available side spaces and work:
1 sc around the entire edge
Your exact stitch count may differ slightly from another crocheter’s. That’s okay here. The important part is creating a neat, even edging around the strawberry shape.
When you return to the beginning, join with:
1 sl st into the first sc
Chain 1.
Fasten off.
Weave in the yarn end.
Make the Second Strawberry Piece
Repeat every step above to make a second identical strawberry panel.
This time, after finishing the round of single crochet around the edge, do not cut the yarn.
We’ll continue directly into the pouch and bag construction.
Add the Strawberry Pouch Depth
With the yarn still attached to the second panel, chain:
ch 2
Now work double crochet into the back loop only.
Work:
1 BLO dc in each stitch around
When you return to the beginning, join with:
1 sl st into the second beginning chain
Working through the back loop only leaves a visible line of unused front loops. That little ridge gives the strawberry pouch a cleaner edge.
Round 2
Chain 2.
Work:
1 dc in each stitch around
Join into the second beginning chain with a slip stitch.
Round 3
Repeat the same pattern:
ch 2, 1 dc in each stitch around
Join with a slip stitch.
After these rounds, this second strawberry piece should have a shallow bowl or dish-like shape.
Add the Strawberry Seeds
Before joining the two pieces, decorate the flat front panel.
Use two strands of yellow yarn.
Embroider the seeds vertically over the pink strawberry.
The original version uses 6 seeds, but the number can be adjusted visually if you prefer.
Secure the yarn on the wrong side.
Weave in the ends and trim any excess.
I recommend spacing the seeds before fully tightening them so the strawberry doesn’t look crowded on one side.
Join the Two Strawberry Pieces
Turn the bowl-shaped second piece inside out, so the right side faces inward.
Place the flat seeded strawberry panel against it.
The right sides should be facing each other.
Attach the working yarn at a top stitch.
Chain:
ch 1
Now place a stitch marker about 10 to 12 stitches away from your starting point.
That marked space will remain open so the mesh bag can emerge from inside the strawberry.
Begin crocheting the two pieces together.
Work:
1 sc through both panels in each stitch
Continue until you reach the stitch marker.
Also work a single crochet in the marked stitch.
Do not completely close the strawberry.
Now we’re ready to build the net bag from that opening.
Crochet the Mesh Market Bag
Remove the stitch marker.
Before turning your work, mark the first single crochet so you can easily find the start of the mesh section.
First Mesh Round
Chain:
ch 1
Turn.
Then make 6 more chains.
You now have:
7 chains total
For the smaller bag version:
Skip:
3 stitches
Then work:
1 sc in the 4th stitch
Repeat:
ch 7, skip 3 stitches, 1 sc in next stitch
Continue this pattern until you reach the marked area.
If you are making a larger version, the spacing can be changed to:
ch 7, skip 1 stitch, 1 sc in the next stitch
That creates a denser mesh with more repeats around the bag.
Continue working the mesh over the bottom piece only. Leave the seeded strawberry front panel alone.
Keep repeating:
ch 7, skip 3, sc in next stitch
around the bottom piece.
If you reach the beginning without enough stitches for one complete repeat, simply join with a slip stitch.
Continue the Mesh Pattern
The following mesh rounds are worked into the chain spaces rather than into the original base stitches.
Start the Next Round
Make:
3 sl sts, one into each of the first 3 chains
Then work:
1 sc into the 4th chain
Place a stitch marker in that single crochet.
Now repeat:
ch 7
Find the middle of the next chain loop, which is the 4th chain, and work:
1 sc into the 4th chain
Repeat around:
ch 7, 1 sc into the 4th chain of the next loop
When you reach the beginning, chain 7 and join with a slip stitch into the marked single crochet.
To begin the next mesh round:
- Make 3 slip stitches
- Work 1 sc into the 4th chain
- Mark that sc
- Repeat ch 7 and sc into the 4th chain around
This offset joining method keeps the mesh rounds centered and prevents the joining seam from stacking awkwardly.
Continue repeating the mesh rounds until the bag reaches the size you want.
The pattern can be extended considerably. About 15 mesh rounds creates the smaller version, while around 20 rounds or more gives you a longer net bag.
Crochet the Top Edge of the Market Bag
Once you’re happy with the length, stop adding mesh rounds.
Place a stitch marker in the first single crochet.
Now we’ll work into the large chain spaces to create a firmer upper edge.
In the first chain space, work:
2 sc
In each following chain space, work:
5 sc
Continue:
5 sc in each chain space
When you return to the beginning, work:
3 sc in the beginning chain space
Remove the stitch marker.
Then work:
1 sc into the first marked stitch
This evens out the opening before we begin the next round.
Next Edge Round
Chain:
ch 1
Mark this beginning chain.
Work:
1 sc in each stitch around
When you reach the beginning:
sl st into the marked stitch
The top edge should now feel noticeably more stable than the loose mesh below it.
Add the Bag Handles
Chain 1 and mark your starting point again.
Before crocheting the handles, identify four strap positions.
Count about 10 stitches from each side and place markers at the front and back.
You should end up with four marked points, two for each handle.
Work:
1 sc in each stitch
until you reach the stitch just before the first marker.
Now chain:
ch 25
You can make more chains if you want longer handles.
Before attaching, make sure the chain is not twisted.
Attach the handle by working:
1 sc into the stitch next to the next marker
You now have one handle.
Continue single crocheting around until you reach the next handle position.
Chain:
ch 25
Again, make sure the chain is not twisted.
Attach with a single crochet beside the next marker.
Continue:
1 sc in each remaining stitch
Join with a slip stitch into the first single crochet.
Strengthen the Handles
To make the handles sturdier:
Chain:
ch 1
Work:
1 sc in each stitch around
That includes the stitches across both handles.
Join with:
1 sl st into the first sc
One extra single crochet round gives a light handle.
For a thicker handle, additional rounds of single crochet can be added.
When the handles are as thick as you want:
Chain 1.
Fasten off.
Weave in all yarn ends.
At this point, the net bag itself is complete.
If you enjoy these compact projects that hide a second function, the Apple Pouch Water Bottle Holder Crochet Pattern uses a similar transformation idea, while the Magic Pouch Net Bag Crochet Pattern also opens into a functional mesh bag.
Turn the Bag Back Into the Strawberry
Now flip the entire bag inside out.
The mesh will disappear into the strawberry pouch, and the original pink strawberry shape will return.
Tuck the netting and handles neatly inside.
You now have the basic strawberry pouch again, but it still needs the green top and hanging straps.
Crochet the Strawberry Leaf
Using green yarn, make a slip knot.
Chain:
ch 14
Skip the first 6 chains.
Work:
1 sl st into the 7th chain
Now repeat the leaf pattern:
ch 6
Then:
1 sc into the next chain
Repeat:
ch 6, 1 sc into next chain
until you reach the end of the original chain.
This creates the scalloped, pointed leaf structure.
When you reach the end:
Chain:
ch 1
Now work back along the opposite side of the foundation chain.
Work:
1 sc in each of the first 4 stitches
Make the Small Leaf Strap
After those four single crochets, chain:
ch 7
Then make:
1 sl st into the same single crochet where the chain started
This creates a small hanging loop attached directly to the leaf.
Now work:
1 sc in each of the next 3 stitches
Chain 1.
Fasten off, leaving a long tail for sewing.
Sew the Leaf Onto the Strawberry
Position the green leaf across the top of the strawberry.
Use the long green yarn tail to sew it securely into place.
Work in and out through the strawberry stitches and the leaf edge until it feels secure.
Tie off on the inside.
Hide the yarn tail inside the pouch.
The green top completely changes the look of the piece and makes the pink pouch read immediately as a strawberry.
Add the Long Hanging Strap
The final strap lets you attach the strawberry pouch to a tote bag or use it as a bag charm.
Make a slip knot.
Attach the yarn directly to the pouch.
Chain:
ch 45
Make sure the strap is not twisted.
Bring it back to the same attachment point.
Join with:
1 sl st into the same stitch
Chain 1.
Fasten off.
Hide the yarn tails inside the strawberry.
Your Strawberry Pouch Market Bag Crochet Pattern is now finished.
How to Use the Finished Strawberry Pouch
When you want the market bag, open the strawberry pouch and start pulling the mesh outward.
Turn the piece inside out until the netting and handles are fully exposed.
The strawberry body becomes part of the bottom structure of the bag while the mesh expands upward.
When you’re finished using it, reverse the process:
- Turn the bag back toward the strawberry side.
- Tuck the mesh inside.
- Push the handles into the pouch.
- Smooth the strawberry flat.
- Hang it from your tote using the long strap.
The compact shape makes it practical for keeping a reusable bag close by without carrying a loose mesh bag separately.
The Pufferfish Drawstring Pouch Crochet Pattern and Whale Drawstring Pouch Crochet Pattern are also fun choices if you like crochet projects that combine character shapes with useful storage.
Tips for a Cleaner Strawberry Shape
The first seven rows rely on steady increases.
Your stitch counts should be:
- Row 1: 5
- Row 2: 7
- Row 3: 9
- Row 4: 11
- Row 5: 13
- Row 6: 15
- Row 7: 17
Rows 8 and 9 stay at 17 stitches.
Then Rows 10 and 11 decrease to:
- Row 10: 15
- Row 11: 13
Checking these numbers makes a big difference because the strawberry relies on symmetrical shaping.
I would also keep your half double crochet tension fairly consistent. One loose side and one tight side can make the two panels difficult to line up later.
Tips for the Mesh Bag
The mesh is intentionally flexible.
If you’re making the smaller version, use:
ch 7, skip 3, sc in next stitch
For a larger bag, the denser repeat can use:
ch 7, skip 1, sc in next stitch
The length is completely controlled by how many mesh rounds you add.
About 15 rounds makes the shorter version, while 20 or more creates additional length.
The pattern doesn’t require every mesh loop to look absolutely identical. Consistent chain tension matters more than trying to force the loops into a perfect geometric grid.
Tips for the Handles
The base handle length is:
ch 25
But the handles can be made longer by adding more chains before attaching them.
Always check for twisting before joining.
Once the chain is attached, correcting a twist means undoing the handle and trying again, so it’s worth checking carefully first.
You can also work additional single crochet rounds over the handles if you want them thicker.
For another practical crochet bag with a playful shape, the Magic Pouch Net Bag Crochet Pattern pairs nicely with this one.
From Strawberry Charm to Market Bag
The most satisfying moment comes after the very last strap is finished. One second you’re holding a pink strawberry with green leaves and tiny yellow seeds, and the next you’re pulling a full mesh bag out of it.
That practical little trick gives the Strawberry Pouch Market Bag Crochet Pattern much more personality than a standard net bag. It’s compact enough to hang from another bag, decorative enough to look intentional when folded, and useful whenever you need the mesh hidden inside.
Frequently Asked Questions
What yarn should I use for the Strawberry Pouch Market Bag Crochet Pattern?
Use 5-ply milk cotton yarn. The smaller version uses about 100 g, while a larger market bag requires more.
How many strawberry panels do I make?
Make two strawberry-shaped panels. One becomes the seeded front, and the other becomes part of the pouch and bag construction.
How many strawberry seeds should I embroider?
The pattern uses 6 yellow seeds, but you can add more if you prefer a fuller strawberry look.
