

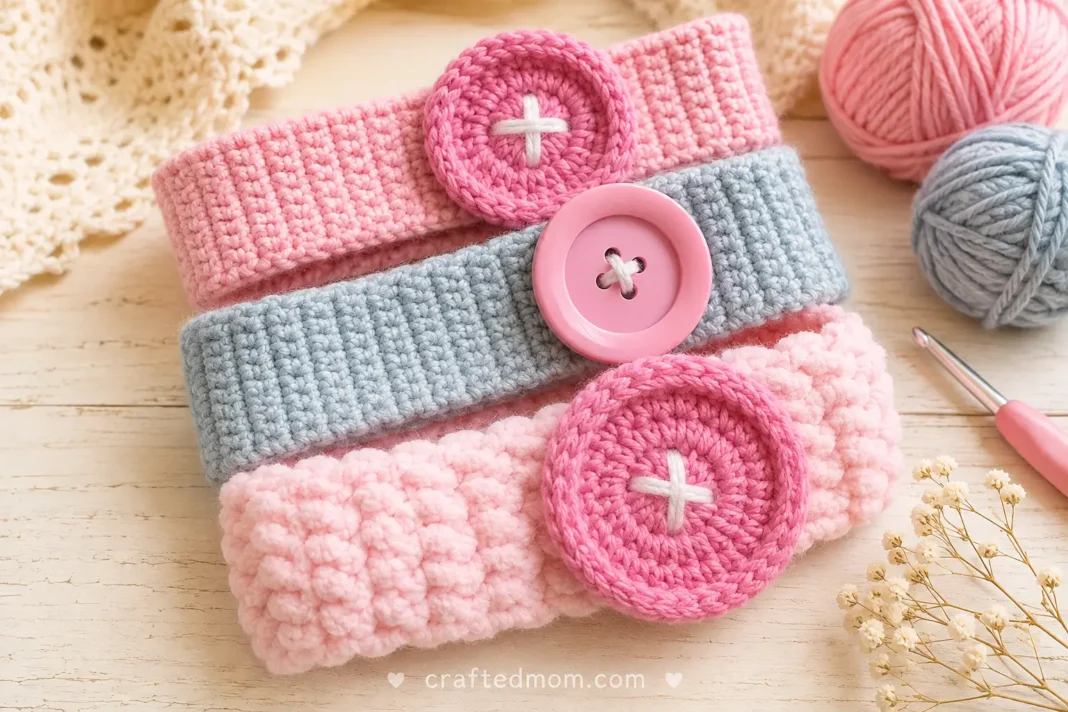
There’s a funny little moment in this project where a plain strip of single crochet suddenly starts looking polished, finished, and almost store-bought. It happens when the oversized button goes on.
That contrast is what makes this Button Headband Crochet Pattern worth making. The headband itself is wonderfully simple, just repeated rows of single crochet worked until the band reaches the right length. Then the button adds all the personality. You can crochet it in two sizes, use a real button instead, or make the whole thing chunkier with plush yarn.
The tutorial also gives you practical sizing guidance rather than locking you into one exact width. The standard version starts with 10 chains and measures about 1.7 inches wide, while the plush version begins with 7 chains and measures about 2 inches wide.
That makes this a nice pattern for beginners who want something more useful than another practice swatch, but still want a project built mostly from familiar stitches.
Button Headband Crochet Pattern at a Glance
| Project Detail | Information |
| Project | Crochet headband with decorative button |
| Standard Yarn | 5-ply yarn |
| Standard Crochet Hook | 3.5 mm |
| Chunky Version | Plush/chunky yarn |
| Chunky Crochet Hook | 5.5 mm or larger |
| Standard Starting Chain | 10 chains |
| Chunky Starting Chain | 7 chains |
| Standard Width | About 1.7 in / 4.5 cm |
| Chunky Width | About 2 in / 5 cm |
| Standard Length | About 18 in / 45 cm |
| Suggested Plush Length | About 20 in / 51 cm |
| Main Stitch | Single crochet |
| Button Stitches | Single crochet, half double crochet, slip stitch |
| Medium Crochet Button | About 2 in / 5 cm |
| Large Crochet Button | About 2.5 in / 6.5 cm |
| Construction | Flat strip joined at the ends, with a separate crochet button |
| Button Options | Medium crochet button, large crochet button, or real button |
The tutorial specifically says the medium crochet button is about the same size as the 2-inch real button, while the larger crochet version measures about 2.5 inches across.
Materials You’ll Need
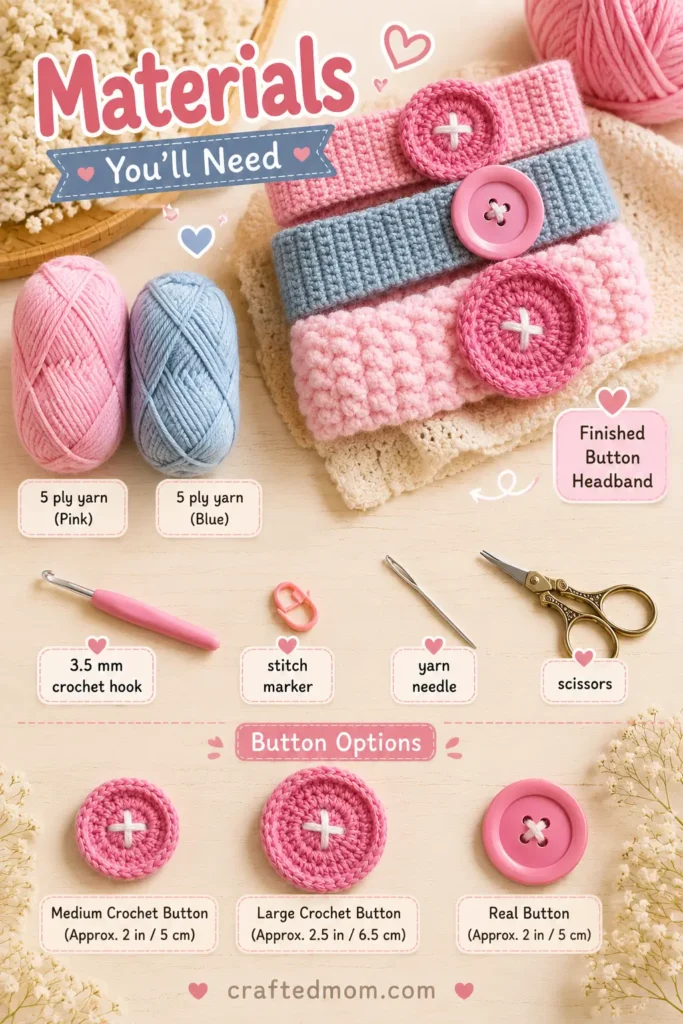
For the regular headband, gather:
For the chunky variation, you can also use:
- Chunky or plush yarn
- 5.5 mm crochet hook or larger
For the button, choose one of these options:
- Crochet a medium button
- Crochet a large button
- Use a real button approximately 2 inches / 5 cm across
The materials shown in the reference image also include the measuring tape, needle, scissors, and stitch marker, so those are all supported by the tutorial visuals.
Crochet Abbreviations
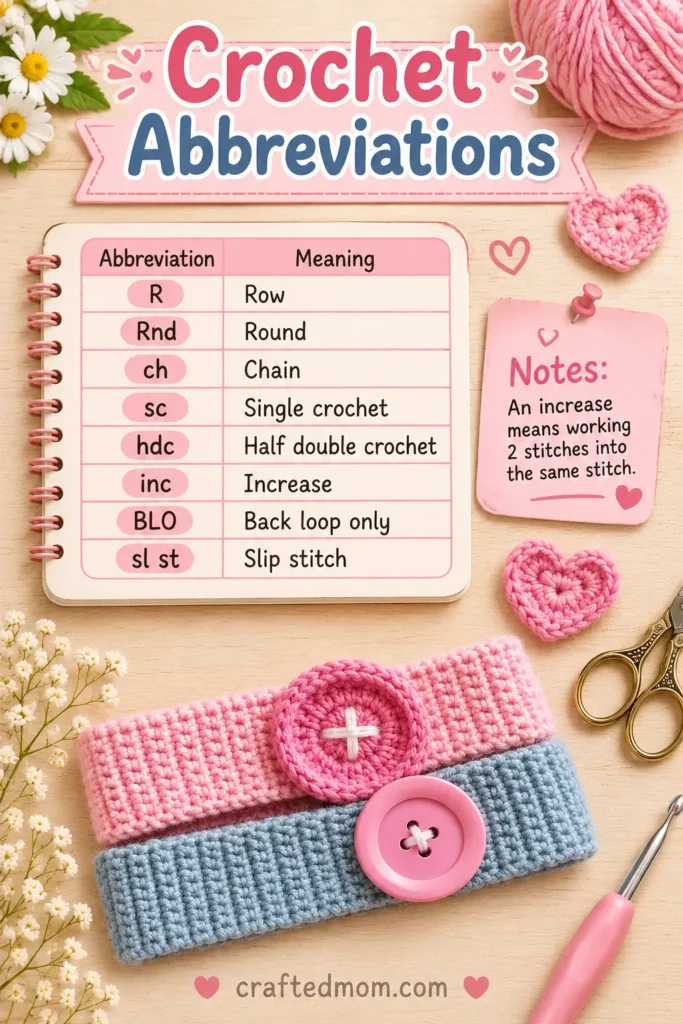
This pattern uses standard US crochet terminology.
| Abbreviation | Meaning |
| R | Row |
| Rnd | Round |
| ch | Chain |
| sc | Single crochet |
| hdc | Half double crochet |
| inc | Increase |
| BLO | Back loop only |
| sl st | Slip stitch |
An increase means working 2 stitches into the same stitch.
Before You Start
The headband and button are made differently.
The headband is worked back and forth in rows.
The crochet button is worked in rounds.
The standard headband begins with 10 chains. Because the first chain is skipped before you start single crocheting, that gives you 9 single crochets across each row.
If you want a wider headband, simply start with more chains. The tutorial gives a clear example: if you start with 15 chains instead of 10, you’ll have 14 single crochets after skipping the first chain.
The most important thing is keeping that stitch count consistent through every row.
How to Crochet the Button Headband
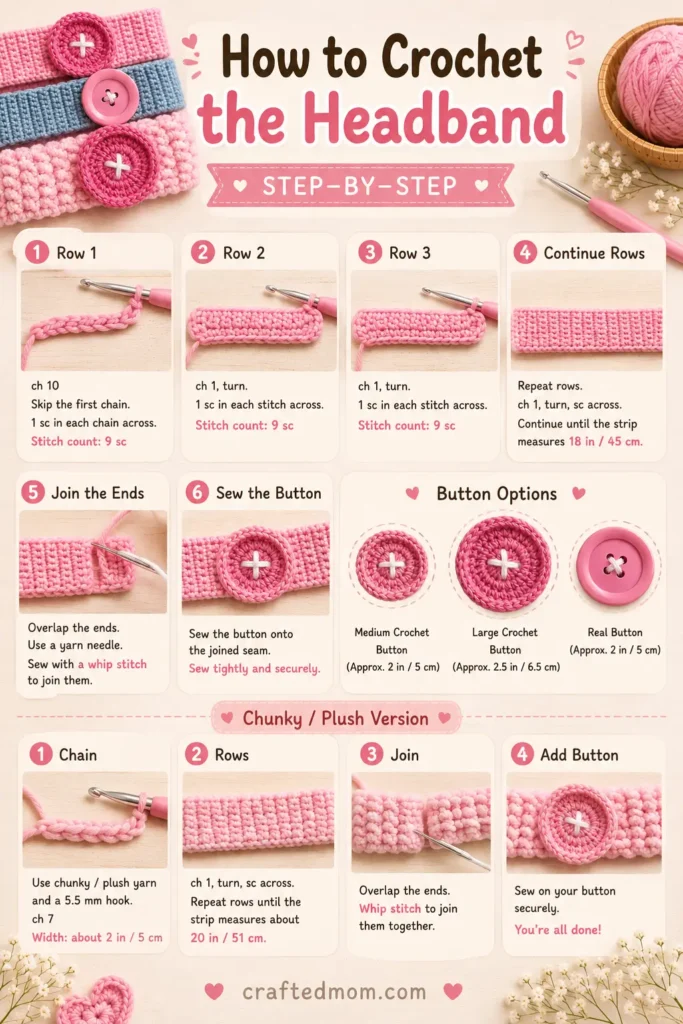
Use 5-ply yarn and a 3.5 mm crochet hook for the standard version.
Row 1
Start with a slip knot.
Then work:
ch 10
This produces a width of approximately:
1.7 inches / 4.5 cm
Skip the first chain from the hook.
Beginning in the second chain, work:
1 sc in each chain across
Because you started with 10 chains and skipped 1:
Stitch count: 9 sc
The tutorial confirms that 10 starting chains give 9 single crochets in Row 1.
If you added more chains for a wider headband, your stitch count will be different.
Row 2
Start with:
ch 1
Turn your work.
Now work:
1 sc in each stitch across
For the standard version:
Stitch count: 9 sc
When inserting your hook into each stitch, you should see the V-shaped top of the stitch sitting over the hook.
Row 3
Again:
ch 1
Turn.
Then work:
1 sc in each stitch across
Stitch count: 9 sc
The tutorial tells you to keep the same number of single crochets from the previous row.
Continue the Single Crochet Rows
From here, repeat the same simple row:
ch 1, turn, sc across
Continue until the strip measures approximately:
18 inches / 45 cm
The tutorial does not give a fixed row count because crochet tension can vary. Instead, it tells you to crochet until you reach the length measurement.
If you fold the strip in half, each half should measure about:
9 inches
That gives you the full 18-inch length.
Don’t Worry If the Band Looks a Little Wonky
The tutorial specifically says it is okay if the headband does not lie perfectly flat.
If the waviness bothers you, a clothes steamer can be used to flatten it.
That step is optional.
Make the Chunky Version
For a plush or chunky headband, switch to:
5.5 mm crochet hook or larger
Start with:
ch 7
The tutorial says this gives a width of about:
2 inches / 5 cm
Then continue with the same single crochet row pattern.
Because plush yarn is less stretchy than cotton yarn, the tutorial recommends working until the headband reaches approximately:
20 inches / 51 cm
instead of 18 inches.
You can still add more foundation chains if you want the chunky version wider.
Join the Headband
Before joining the ends, check one thing:
Make sure the headband isn’t twisted.
Bring the first row and last row together.
Insert your hook through corresponding stitches from both ends.
Work slip stitches across:
sl st through the first and last rows together
Continue until you’ve joined the full width of the band.
The tutorial describes this as a way of sewing the headband together using slip stitches rather than a needle.
Before fastening off, try the headband on.
Check:
- Fit
- Stretch
- Comfort
If you’re happy with it, cut the yarn and pull the tail through.
The tutorial ties the two yarn tails together and then weaves in the ends.
Your basic headband is finished.
Now we get to the button.
Choose Your Button Style
You have three options:
- Use a real button.
- Crochet the medium button.
- Crochet the large button.
The real button shown in the tutorial measures:
2 inches / 5 cm
The medium crochet button is about the same size.
The large crochet button measures:
2.5 inches / 6.5 cm.
Rounds 1 through 3 are the same for both crochet button sizes.
The large button gets an extra Round 4.
How to Crochet the Button
Button Round 1
Make a magic ring.
Then:
ch 2
Place your stitch marker into the second chain.
Work into the magic ring:
7 hdc
Pull the tail to close the center.
Join with:
sl st into the second chain
Stitch count: 7 hdc
The tutorial uses the second chain as the joining point throughout this section.
Button Round 2
Start:
ch 1
Place the stitch marker into that chain.
In the first stitch, work:
2 sc
Then:
ch 2
Skip the next stitch.
In the following stitch, work:
2 sc
Then:
ch 2
Skip the next stitch.
Continue this pattern around.
The round alternates between:
sc increase, ch 2, skip 1
At the end:
ch 2
Then join with:
sl st into the first chain
The chain-2 spaces created here are important because you’ll crochet directly into them during Round 3.
Button Round 3
Start with:
ch 2
Place the stitch marker in the second chain.
Work:
1 hdc in the first stitch
In the next stitch:
2 hdc
Now you’ve reached a chain-2 space.
Into that space, work:
3 hdc
Your repeat is:
1 hdc, hdc inc, 3 hdc in ch-2 space
Repeat the sequence 4 times total.
When finished:
Stitch count: 24 hdc
Join with:
sl st into the second chain.
Now decide whether you want the medium or large button.
For the Medium Button
Stop increasing here.
Skip the large-button Round 4 and move directly to the edging instructions.
For the Large Button
Continue with Round 4.
The transcript specifically tells medium-button makers to jump ahead to the edging rounds after Round 3.
Large Button Round 4
Start:
ch 2
Place your stitch marker into the second chain.
Work:
1 hdc in each of the next 2 stitches
Then:
2 hdc in the next stitch
Repeat:
(2 hdc, hdc inc) × 8
You’re increasing in every third stitch.
When the round is complete:
Stitch count: 32 hdc
Join with:
sl st into the second chain.
The large button is now ready for its edging.
Crochet the Raised Button Edge
The tutorial calls the next section Round 5 for both sizes, even though the medium button skips the previous large-button round.
Start:
ch 2
Now work:
1 BLO hdc in every stitch around
BLO means back loop only.
Normally, you’d insert your hook under both loops at the top of the stitch. Here, insert the hook only under the back loop.
This leaves the front loops visible.
Those front loops will be used in the final round.
For the medium button:
Stitch count: 24 hdc
For the large button:
Stitch count: 32 hdc
Join with:
sl st into the second chain.
Final Button Round
This round creates the defined outer edge.
Insert your hook through:
- The exposed front loop from the previous round
- The corresponding back loop from the BLO half double crochet round
Then work:
1 sl st
Repeat the same process around the entire button.
The tutorial notes that the medium button can feel a little fiddly because the piece is smaller, but the construction is the same.
When you reach the beginning:
Cut the yarn and pull it through.
Make the Button Join Less Noticeable
Thread the yarn tail onto your needle.
Insert the needle through the first slip stitch.
Then insert it into the middle of the last slip stitch.
This helps smooth the seam so the join is less obvious.
Weave in the yarn ends.
Your crochet button is finished.
Attach the Button to the Headband
Position the button on the headband.
The reference images show it sitting toward the side rather than directly in the middle, giving the finished accessory that oversized-button look.
Thread your needle with yarn.
Sew the button securely onto the band.
The tutorial demonstrates attaching the yarn on one side of the headband and sewing the button onto the other.
Once the button feels secure, weave in the remaining ends.
If you prefer the look of a real button, simply use the approximately 2-inch button option instead.
Medium Button or Large Button?
The medium button keeps the headband a little more balanced.
It measures about:
2 inches / 5 cm
The large button makes the decoration much more noticeable.
It measures about:
2.5 inches / 6.5 cm
Since both sizes use the same first three rounds, you can actually wait until Round 3 before deciding whether you want to continue making it larger.
That makes the sizing surprisingly flexible.
Adjusting the Width of the Headband
The easiest adjustment is the foundation chain.
The standard version starts with:
10 chains
But you can add more chains for extra width.
Just remember:
Starting chains minus 1 = single crochets in Row 1
For example:
10 chains = 9 sc
15 chains = 14 sc
The tutorial explicitly explains this relationship.
Keep that stitch count consistent through every row.
Adjusting the Length
For the regular yarn version, work until:
18 inches / 45 cm
For plush yarn, the tutorial recommends:
20 inches / 51 cm
because it does not stretch as much.
I would still check the fit before fastening off the seam, exactly as the tutorial suggests.
If you enjoy small wearable crochet projects, the Baby Luffy Bucket Hat Crochet Pattern would be a natural next project. For something even smaller, the Mini Miffy Crochet Pattern gives you a completely different kind of beginner-friendly crochet break.
Tips for a Cleaner Finished Headband
Keep your row stitch count consistent.
If you accidentally drop a stitch along the edge, the headband will slowly narrow. If you accidentally add one, it can start widening.
Chain 1 before every new row and remember to turn your work.
Before joining the ends, lay the band out and make sure it hasn’t twisted.
For the crochet button, pay attention to the back-loop-only round. Those exposed front loops aren’t decorative leftovers. You need them for the final slip-stitch edging.
And if the medium button feels awkward during that last round, that’s normal. The tutorial specifically warns that the smaller size can feel tighter to work into.
More Crochet Projects to Try
If you like simple crochet pieces that become more interesting through one decorative feature, the Hello Kitty Glasses Holder Crochet Pattern is another playful project that adds character through its face and pink bow.
For something practical rather than wearable, the Apple Pouch Water Bottle Holder Crochet Pattern and Magic Pouch Net Bag Crochet Pattern both combine crochet with a useful everyday function.
Frequently Asked Questions
Is the Button Headband Crochet Pattern beginner-friendly?
Yes. The tutorial specifically says beginners can follow along step by step, and most of the headband is made from repeated single crochet rows.
What crochet hook size do I need?
Use a 3.5 mm crochet hook for the standard 5-ply yarn version. For plush or chunky yarn, the tutorial recommends a 5.5 mm hook or larger.
How long should I crochet the headband?
Work the regular version to about 18 inches / 45 cm. For plush yarn, the tutorial suggests approximately 20 inches / 51 cm because that yarn is less stretchy.
What is the difference between the medium and large crochet buttons?
The medium button measures about 2 inches / 5 cm, while the large button measures about 2.5 inches / 6.5 cm. The larger version includes an extra increase round.
