

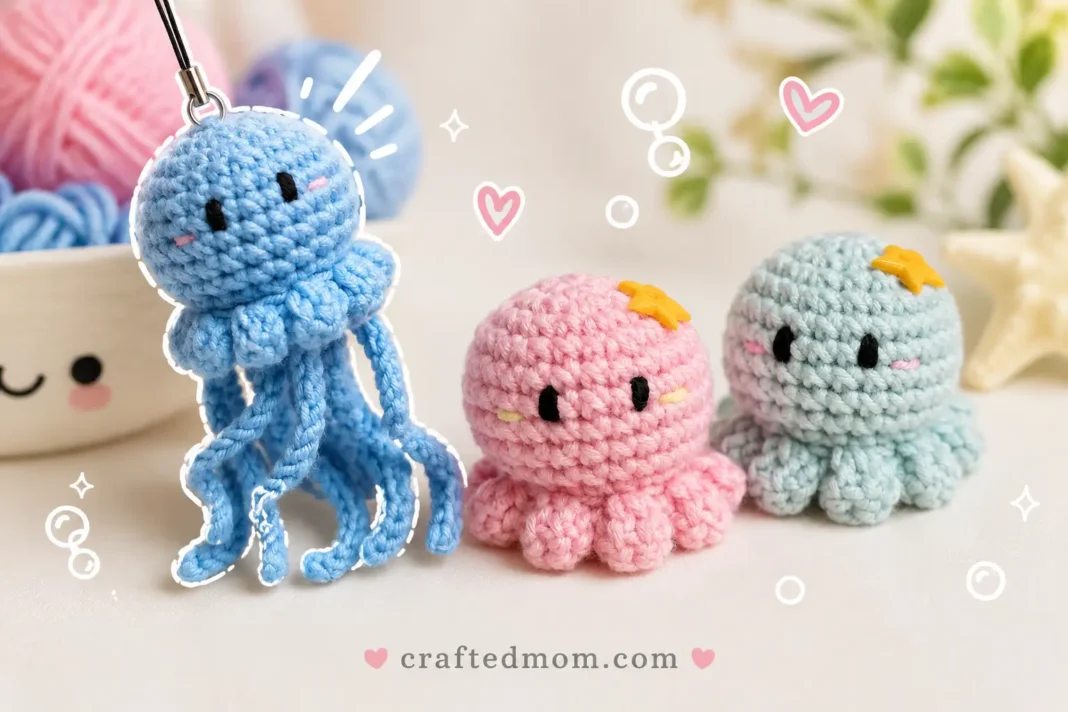
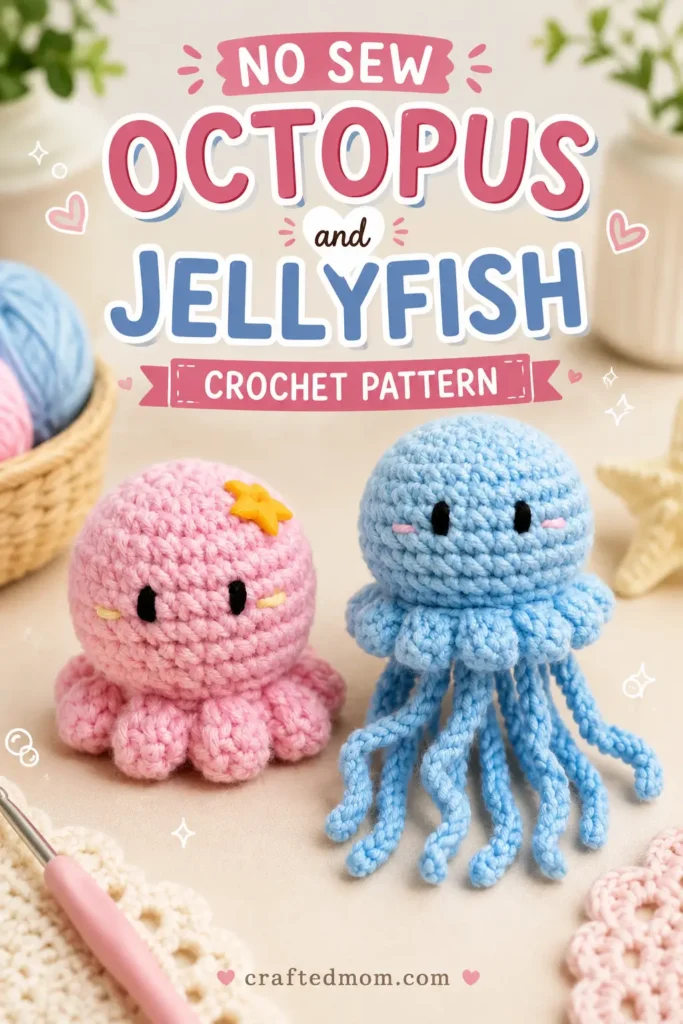
One little round body, two completely different sea creatures. That is the clever part of this No Sew Octopus and Jellyfish Crochet Pattern. Work the same soft, rounded base, then choose your ending: add a ruffled ring of tiny octopus legs, or switch to long dangling chains and turn it into a jellyfish. Even better, the decorative pieces are crocheted directly onto the body, so there is no pile of separate legs waiting to be stitched on afterward.
The body itself is pleasantly straightforward. It begins with a magic ring, increases to 24 stitches, stays at that size for several rounds, and then decreases toward the bottom. Round 11 is especially important because it is worked through the back loops only, intentionally leaving the front loops free. Those exposed loops later become the attachment point for the octopus ruffles.
For the jellyfish, the body stays the same, but instead of stopping with only the ruffled edge, you add seven long chain tentacles underneath. That small change gives the project a completely different silhouette without requiring another body pattern.
No Sew Octopus and Jellyfish Crochet Pattern at a Glance
| Project Detail | Information |
| Project | Mini no-sew octopus or jellyfish |
| Crochet Hook | 3.5 mm |
| Yarn | 5-ply yarn |
| Starting Method | Magic ring |
| Main Stitches | Single crochet, increase, decrease, double crochet, chain, slip stitch |
| Body Maximum | 24 stitches |
| Body Rounds | 12 rounds |
| Special Technique | Back loop only Round 11 |
| Octopus Legs | Crocheted directly into exposed front loops |
| Jellyfish Tentacles | 7 separate 20-chain tentacles attached directly with slip stitches |
| Stuffing | Fiber filling |
| Sewing Required for Legs | No |
| Face | Embroidered eyes and blush |
| Optional Decoration | Star-shaped button attached with glue |
The body increases from 6 stitches to 24 stitches by Round 4, remains at 24 stitches through Round 9, and then decreases to 18, 12, and finally 6 stitches.
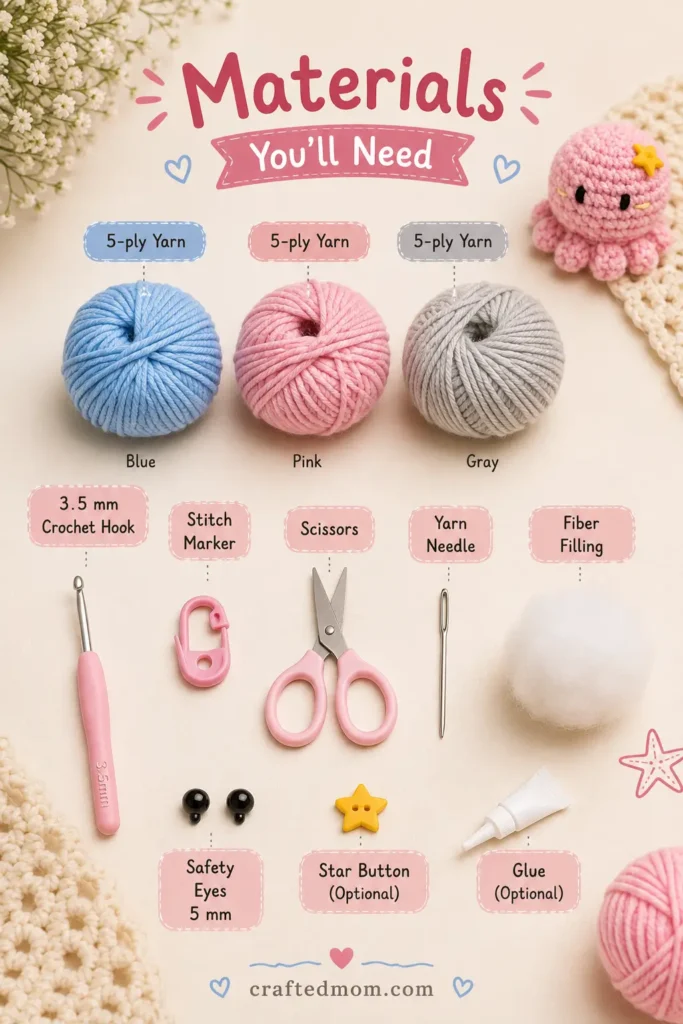
Materials You’ll Need
Gather:
- 5-ply yarn
- Blue, pink, gray, or another color for the body
- Black yarn for the eyes
- Pink yarn for blush
- 3.5 mm crochet hook
- Stitch marker
- Scissors
- Yarn needle
- Fiber filling
- Optional star-shaped button
- Optional all-purpose glue for attaching the star
Because the star button is a small detachable piece, skip it if the finished toy will be given to a baby or young child. Embroidered decorations are the safer choice for that kind of project.
Crochet Abbreviations
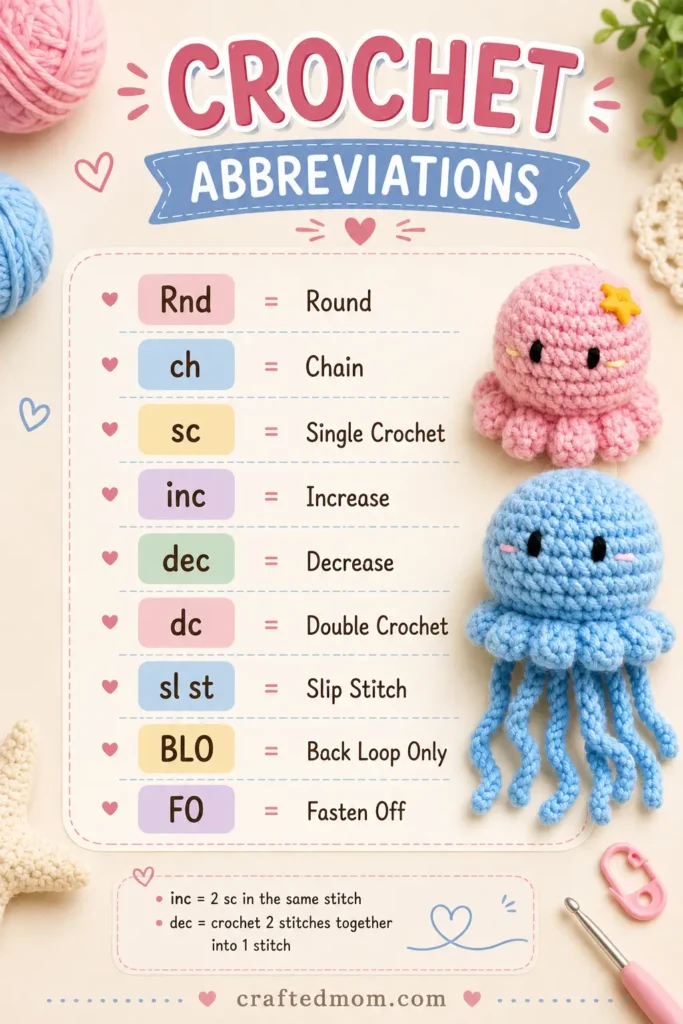
This pattern uses standard US crochet terminology.
| Abbreviation | Meaning |
| Rnd | Round |
| ch | Chain |
| sc | Single crochet |
| inc | Increase |
| dec | Decrease |
| dc | Double crochet |
| sl st | Slip stitch |
| BLO | Back loop only |
| FO | Fasten off |
An increase means:
2 sc in the same stitch
A decrease combines two stitches into one.
This project also uses one round worked in BLO, or back loop only. That detail is not decorative. It deliberately leaves the front loops visible so the octopus ruffle can be added later.
How the No Sew Octopus and Jellyfish Crochet Pattern Works
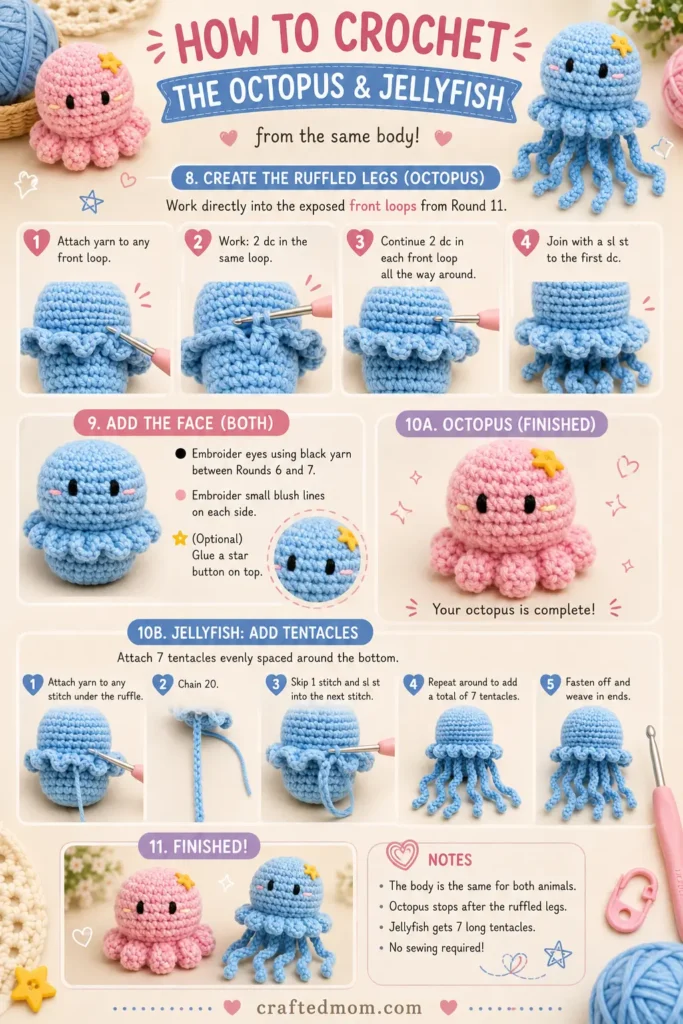
The first part of the project is identical for both animals.
You will crochet:
- One rounded stuffed body.
- A decorative ruffled edge using the exposed front loops from Round 11.
- A face.
- Then, only for the jellyfish, seven long tentacles.
The octopus stops after the ruffled legs are finished.
The jellyfish uses that same body and ruffle, then gains the longer hanging tentacles underneath.
That shared construction is what makes this a convenient 2-in-1 pattern.
Crochet the Body
Choose your main yarn color.
Begin with a magic ring.
Round 1
Work:
6 sc into the magic ring
Place your stitch marker in the first stitch.
Pull the yarn tail firmly to close the center.
Stitch count: 6
Round 2
Work:
inc × 6
That means two single crochets into every stitch from the previous round.
Stitch count: 12
Round 3
Work:
(1 sc, inc) × 6
Repeat the sequence all the way around.
Stitch count: 18
Round 4
Work:
(2 sc, inc) × 6
In other words:
- 1 sc in the first stitch
- 1 sc in the second stitch
- 2 sc in the third stitch
Repeat six times.
Stitch count: 24
The first four rounds create the rounded top of the octopus or jellyfish.
Build the Rounded Sides
Rounds 5 to 9
Work:
24 sc
in every round.
Repeat the same round five times:
- Round 5
- Round 6
- Round 7
- Round 8
- Round 9
Stitch count each round: 24
Move your stitch marker upward as you work.
These plain rounds give the body its soft cylindrical shape rather than continuing to spread outward.
I recommend counting your stitches at least once during this section. It is easy to accidentally add or miss a stitch when several identical rounds are worked one after another.
Begin Shaping the Bottom
Round 10
Work:
(2 sc, dec) × 6
Repeat that sequence six times around.
Stitch count: 18
The body should begin curving inward.
Round 11
This is the most important structural round in the pattern.
Work the entire round through the back loops only.
Work:
(1 sc BLO, dec BLO) × 6
Stitch count: 12
When you look at the outside of the piece afterward, you should see a clear ring of unused front loops.
Do not accidentally crochet through both loops here.
Those exposed front loops become the foundation for the decorative ruffle.
Stuff the Body
After Round 11, add fiber filling.
Stuff the body firmly enough to keep its rounded shape, but not so tightly that the stitches stretch apart.
Pay special attention to the top.
You want it nicely rounded rather than flat.
Close the Body
Round 12
Work:
dec × 6
Stitch count: 6
After completing the last decrease:
ch 1
Cut the yarn, leaving a long tail.
Pull the yarn through to fasten off.
Do not close the remaining opening immediately if you still want to adjust the stuffing.
Once you’re happy with the shape, thread the tail through a yarn needle.
Pass the needle through the remaining stitches.
Pull firmly to close the opening.
Secure the yarn and hide the tail inside the body.
Crochet the Octopus Ruffle
Now find the unused front loops from Round 11.
This is where the little octopus legs are created.
Attach your yarn to one of those exposed front loops using a slip knot.
First Ruffle
Begin with:
ch 2
Then work into the same front loop:
2 dc
Then:
ch 2
Finish with:
1 sl st in the same front loop
Now:
skip 1 front loop
In the following front loop:
sl st
That positions you for the next ruffle.
Repeat the Ruffle
From the new attachment point, repeat:
ch 2, 2 dc, ch 2, sl st in the same front loop
Then:
skip 1 front loop, sl st into the next front loop
Continue around.
You should make approximately:
9 to 10 ruffles
Ten ruffles are used when all available front loops are filled.
Because every second front loop is skipped between ruffles, the edge develops little clustered bumps rather than one continuous flat band.
That is what creates the short, curled octopus-leg appearance.
Finish the Ruffle
When you reach the beginning, make:
sl st into the first ruffle area
Then:
ch 1
Fasten off.
Weave in the yarn ends.
At this point, you have the basic octopus body.
If you are making the octopus version, you can move straight to the face and optional decoration.
If you want the jellyfish, keep going.
Turn the Octopus Body Into a Jellyfish
The jellyfish uses long narrow tentacles beneath the same ruffled edge.
Each tentacle begins with:
20 chains
You will make:
7 tentacles
They are attached directly to the underside of the body, so you still avoid sewing multiple pieces into place.
Jellyfish Tentacle
Make a slip knot.
Chain:
ch 20
Now skip the first chain from your hook.
Beginning in the second chain, work:
1 sl st in each chain
Continue all the way back along the chain.
This creates a thin cord-like tentacle with a little more structure than a plain chain.
Attach the Tentacle
Insert your hook into a stitch on the bottom of the body.
Attach the tentacle with:
1 sl st
Then:
ch 1
Cut the yarn.
Secure the yarn tails and hide them inside the body.
No sewing is needed.
Make the Remaining Tentacles
Repeat until you have:
7 tentacles total
Attach them at different stitches around the underside.
They do not need to form a perfectly measured circle.
A slightly irregular arrangement gives the jellyfish more natural movement.
The long hanging chains contrast nicely with the short ruffled edge, so the two layers remain visually distinct.
Add the Eyes
Use black yarn.
The eyes can be embroidered around the fourth or fifth round above the ruffled section.
A good placement is:
Round 5 above the ruffle
Leave approximately:
3 single crochet stitches between the eyes
That spacing is a preference rather than a structural requirement, so you can adjust the expression slightly if you want.
Embroider a short vertical black eye on each side.
Secure the yarn and hide the ends inside the body.
Because the eyes are embroidered rather than plastic safety eyes, the face stays wonderfully simple.
Add the Blush
Use pink yarn.
Place a small blush stitch immediately beside each eye.
You only need a tiny amount.
One small pink stitch on either side is enough to give the face some color without making it look busy.
Secure the yarn and hide the ends inside the body.
The little pink cheeks are especially nice on blue or gray versions because they add contrast.
Add the Optional Star
A small star-shaped button can be attached near the top of the octopus.
Use a tiny amount of all-purpose glue.
Press the star into position and allow the adhesive to dry completely.
This decoration is optional.
The octopus and jellyfish still look finished without it.
If you’re making the project for a small child, skip the glued button and embroider a star or another simple detail instead.
Octopus or Jellyfish?
The fun part is that you do not have to decide immediately.
Both begin with exactly the same rounded crochet body.
For an octopus, finish the decorative ruffled legs and face.
For a jellyfish, add the same ruffle and then attach the seven 20-chain tentacles underneath.
That means you can crochet several bodies first, then decide later which ones will become octopuses and which ones will get long tentacles.
A group in different pastel colors would make a cute little sea-creature collection.
For another two-character project, the Nemo and Dory Fish Keychain Crochet Pattern uses the same general idea of making coordinating ocean animals in different colors and shapes.
Tips for Getting the Shape Right
Keep Rounds 5 to 9 at 24 Stitches
These rounds create the straight sides.
If you accidentally add increases here, the creature will flare outward.
If you lose stitches, it will taper too early.
Keep each of these rounds at:
24 sc
Do Not Miss the BLO Round
Round 11 must be worked in back loops only.
If you crochet through both loops, you will lose the neat ring of front loops needed for the ruffle.
This is the one round I would double-check before moving on.
Stuff Before Round 12 Gets Too Small
Round 12 reduces the opening to only six stitches.
Add most of your fiber filling after Round 11.
You can make tiny adjustments before closing, but stuffing is much easier while the opening is still wider.
Keep the Ruffle Loose
When working the:
ch 2, 2 dc, ch 2
sections, avoid pulling your tension too tight.
A slightly relaxed tension allows each cluster to puff outward.
Keep the Jellyfish Tentacles Flexible
Slip stitches can become very tight.
If you crochet the 20-chain tentacles too firmly, they may curl or become stiff.
Work them with relaxed tension so they hang naturally.
No-Sew Construction Makes This One Especially Handy
Amigurumi projects often have the same slightly annoying final stage: six tiny pieces are finished, and suddenly you’re spending more time threading a needle than crocheting.
Not here.
The ruffles are made directly onto the body.
The jellyfish tentacles are attached with slip stitches.
The face is embroidered directly onto the head.
The only needle work needed is closing the final body opening and handling simple yarn ends and facial details.
That makes this project particularly nice when you want a small amigurumi without a complicated assembly stage.
If avoiding assembly is what drew you to this pattern, the No Sew Dress Up Leggy Frog Crochet Pattern is another project worth making because it also keeps separate-piece sewing to a minimum.
Ways to Customize Your Sea Creatures
You can change the overall look without changing the stitch pattern.
Try:
- Soft blue for a classic jellyfish
- Pink for a cheerful octopus
- Pale gray for a neutral version
- Lavender or mint for pastel sea creatures
- Contrasting blush
- No star for a minimalist face
- An embroidered star instead of a button
You could also make one octopus and one jellyfish from the same yarn color so they look like a matching pair.
Just avoid changing yarn thickness dramatically unless you’re also prepared for the finished size and fabric density to change.
The 3.5 mm hook and 5-ply yarn combination keeps the stitches close enough for stuffing while still creating a soft amigurumi texture.
Why the Ruffle Matters
At first glance, those small scalloped bumps may look like nothing more than decoration.
They actually do three jobs.
First, they hide the transition where the body begins closing.
Second, they give the octopus its short legs.
Third, they form a finished upper edge around the jellyfish’s longer tentacles.
Because the ruffle is crocheted into the unused front loops, it also stays firmly anchored without sewing.
That small structural choice is really what makes the No Sew Octopus and Jellyfish Crochet Pattern work as a two-in-one design.
Two Sea Creatures From One Tiny Pattern
It is hard not to appreciate a pattern that gives you a choice right at the finish line. Keep the short scalloped ruffles and you have a round little octopus. Add seven dangling tentacles and the same body suddenly reads as a jellyfish.
That versatility, along with the almost completely no-sew construction, is what makes the No Sew Octopus and Jellyfish Crochet Pattern such a handy small project. Once you’ve made the body once, making a second one feels familiar, and changing the color or tentacle style is enough to give each little sea creature its own personality.
Frequently Asked Questions
What crochet hook does the No Sew Octopus and Jellyfish Crochet Pattern use?
Use a 3.5 mm crochet hook with the specified 5-ply yarn.
Why is Round 11 worked in the back loops only?
Working Round 11 in BLO leaves the front loops exposed. Those loops are later used to crochet the octopus’s ruffled legs directly onto the body.
How many ruffles should I make for the octopus?
Work the ruffle repeat approximately 9 or 10 times. Ten repeats can be used if that fills all of the available front loops.
