

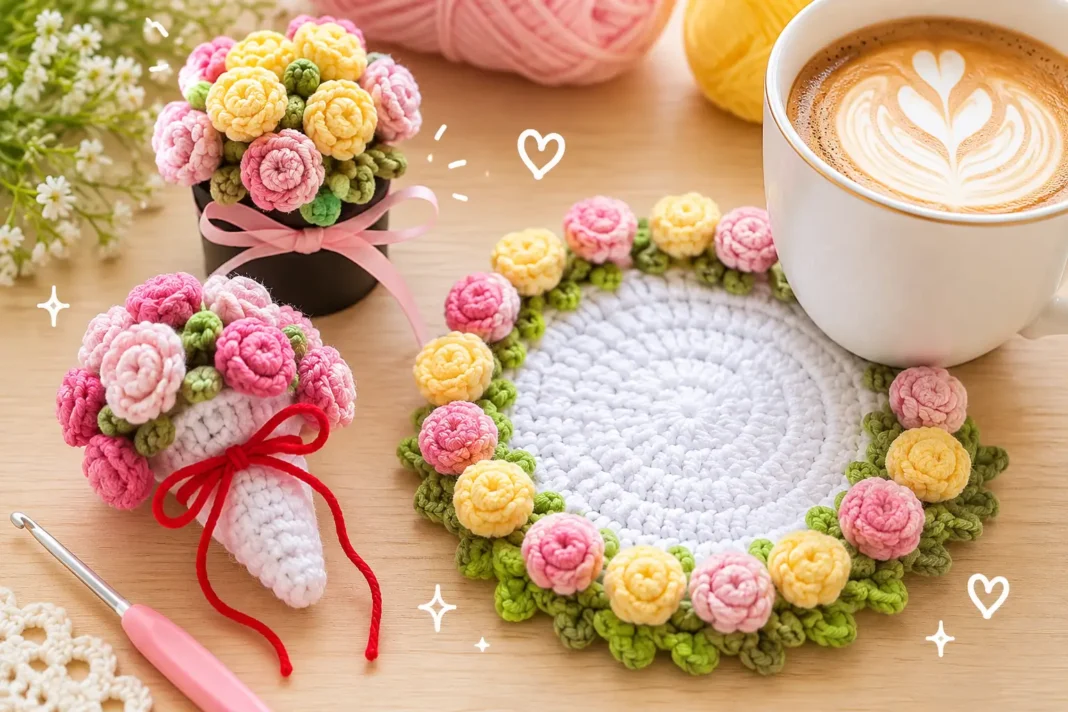
A tiny bouquet sitting on the table is sweet enough, but unfold the flowers and suddenly you have a full round coaster underneath your cup. That little transformation is what makes this Rose Bouquet Coaster Crochet Pattern so clever. The white center becomes the coaster, the green edging creates a leafy border, and the pink and yellow crochet roses gather together when the piece is folded back into bouquet form.
The construction is simpler than the finished project makes it look. We start with a flat circle worked in double crochet, add an open green V-stitch border, crochet tiny leaves directly around the edge, and then build individual roses right onto the coaster.
There aren’t separate flowers to sew on afterward. Each rose begins between two V-stitches, curls into shape, and is secured before you move to the next one. When everything is finished, a strand of yarn gathers the coaster into its bouquet shape and ties into a little bow.
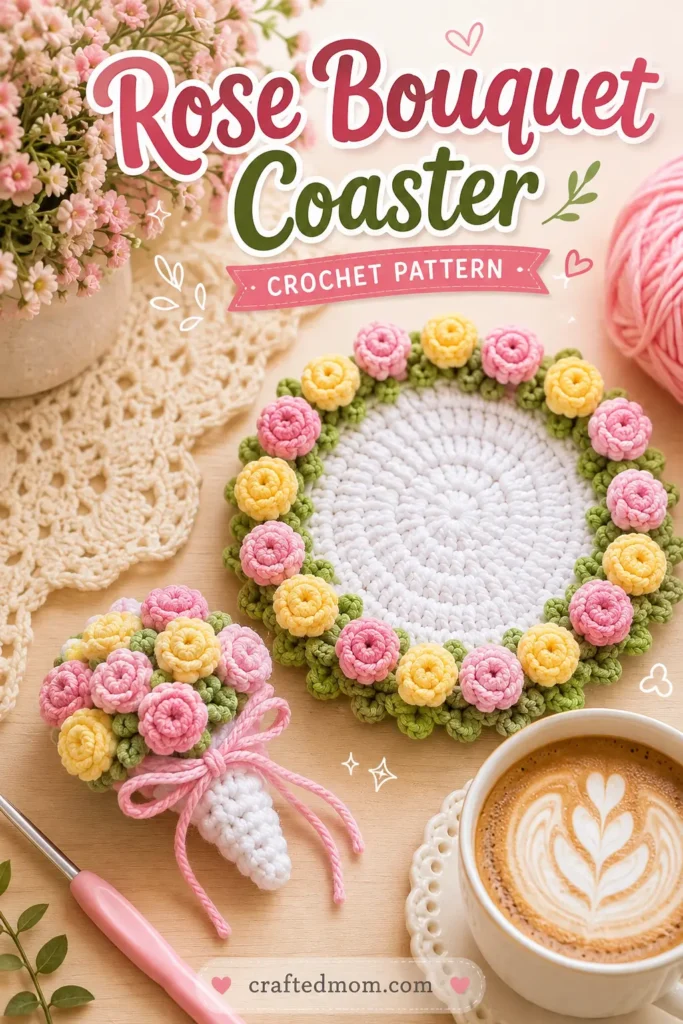
Rose Bouquet Coaster Crochet Pattern at a Glance
| Project Detail | Information |
| Project | Crochet rose bouquet that unfolds into a coaster |
| Yarn | 5-ply yarn |
| Crochet Hook | 3.5 mm |
| Main Colors | White, green, pink, and yellow |
| Starting Method | Magic ring |
| Main Stitches | Chain, slip stitch, single crochet, half double crochet, double crochet |
| Round 1 | 12 dc |
| Round 2 | 24 dc |
| Round 3 | 36 dc |
| Round 4 | 48 dc |
| Green Border | V-stitches |
| Leaves | 2 tiny leaves per V-stitch section |
| Roses | 1 rose between every 2 V-stitches |
| Rose Starting Chain | 7 chains |
| Rose Petals | 2 hdc in each available chain |
| Assembly | Roses are crocheted directly onto the coaster |
| Bouquet Closure | Yarn tied into a ribbon/bow |
| Other Tools | Scissors and needle |
The coaster begins with four rounds of white double crochet, increasing from 12 stitches to 48. Green yarn then creates the leafy border, and the roses are attached around that outer section before the finished circle is gathered into a bouquet.
Materials You’ll Need
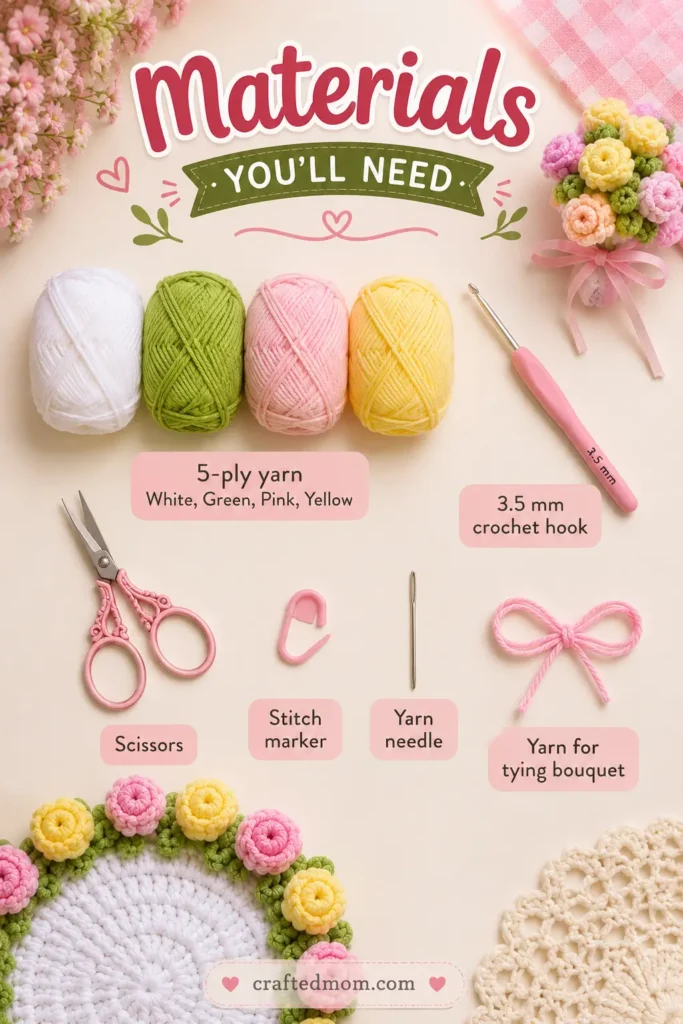
Gather:
- 5-ply yarn
- White for the coaster center
- Green for the leafy border
- Pink for roses
- Yellow for roses
- Yarn for tying the finished bouquet
- 3.5 mm crochet hook
- Scissors
- Yarn needle
The color combination can make this project look surprisingly detailed even though we’re working with a small set of stitches. The white gives the coaster a clean center, green separates that center from the flowers, and alternating pink and yellow roses creates the little bouquet effect.
The needle has an unusual job at the end. Rather than sewing the bouquet permanently closed, it can simply help hold the folded coaster in position while you tie the yarn around it. Then you remove the needle.
Crochet Abbreviations
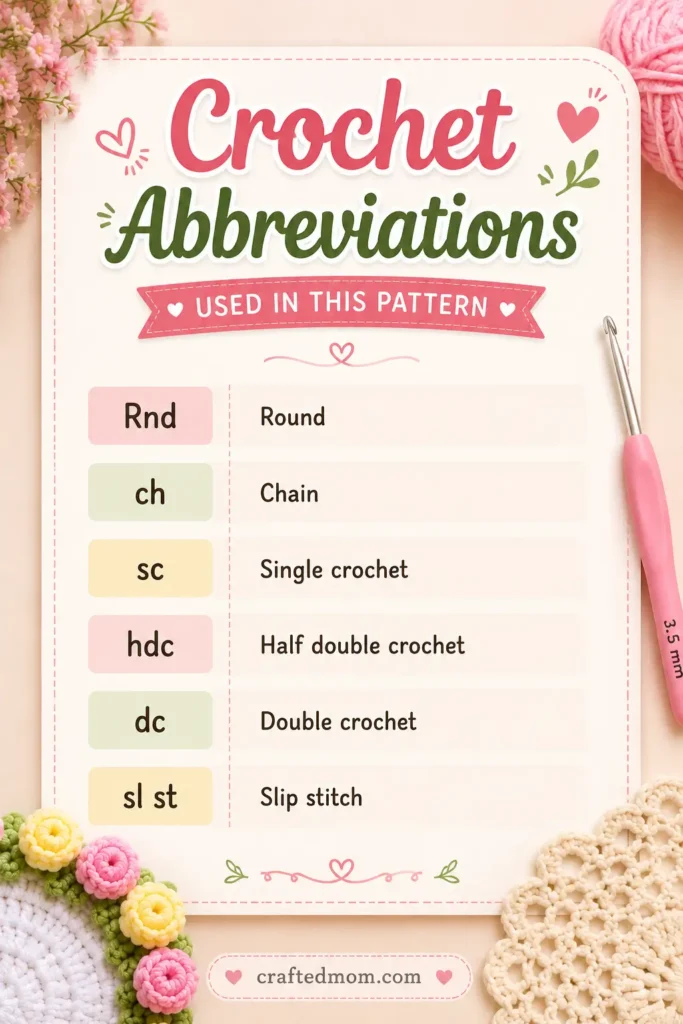
I’m using standard US crochet terminology throughout this pattern.
| Abbreviation | Meaning |
| Rnd | Round |
| ch | Chain |
| sc | Single crochet |
| hdc | Half double crochet |
| dc | Double crochet |
| sl st | Slip stitch |
You’ll also see V-stitch in the instructions.
For this pattern, one V-stitch is:
1 dc, ch 3, 1 dc in the same stitch
The V-stitches create the open green spaces around the coaster where we’ll later add the leaves and roses.
Before You Start
The project is made as one flat circular piece before being transformed into the bouquet.
Rounds 1 through 4 create the white coaster.
Round 5 changes to green and adds the V-stitch border.
The next section adds pairs of tiny leaves around those V-stitches.
After that, the roses are crocheted directly onto the coaster between the V-stitches.
Only when all the crochet work is complete do we gather the circle into its bouquet shape.
I recommend weaving in your yarn ends as you finish each major section. There are several color changes and individual roses in this pattern, so dealing with the tails as you go keeps the back much tidier.
How to Crochet the Rose Bouquet Coaster Crochet Pattern
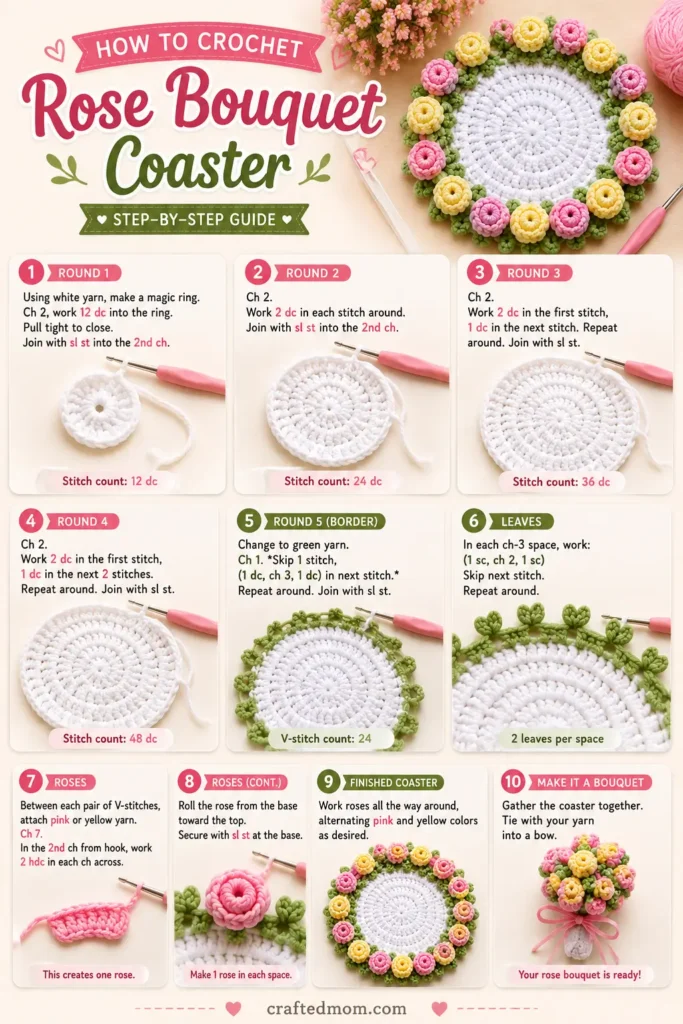
We’ll begin with white yarn and work outward from the center.
Round 1: Make the White Center
Using white yarn, make a magic ring.
Chain:
ch 2
Now work:
12 dc into the magic ring
Once all 12 double crochets are complete, pull the yarn tail firmly to close the center.
Find the second chain from your beginning ch 2 and join with:
1 sl st
Stitch count: 12 dc
You now have the small center circle that will eventually become the middle of the coaster.
Round 2
Chain:
ch 2
Now work:
2 dc in each stitch around
Continue until you have worked the increase into every stitch.
Join the round with a slip stitch into the second chain from the beginning.
Stitch count: 24 dc
You may notice what looks like an extra stitch near the end of the round. Leave that stitch unworked and join into the second beginning chain as instructed.
The circle should already be spreading outward quite quickly.
Round 3
Chain:
ch 2
For this round, repeat:
(1 dc, 2 dc in next stitch) × 12
In other words:
- Work 1 double crochet in the first stitch.
- Work 2 double crochets in the next stitch.
- Repeat that sequence all the way around.
Join with a slip stitch into the second beginning chain.
Stitch count: 36 dc
This gives us another evenly increased round without creating a wavy edge.
Round 4
Chain:
ch 2
Now repeat:
(1 dc, 1 dc, 2 dc in next stitch) × 12
So each repeat uses three stitches from the previous round:
- 1 dc in the first stitch
- 1 dc in the second stitch
- 2 dc in the third stitch
Repeat the sequence 12 times.
Stitch count: 48 dc
We’re now finished with the main white section.
Before joining, prepare your green yarn because we’re changing colors for the border.
Crochet the Green V-Stitch Border
The green border does two jobs. It adds the leafy look around the flowers, but it also creates the spaces we’ll use when positioning the decorative details.
Round 5
Insert your hook into the second beginning chain as though you’re about to make the joining slip stitch, but don’t complete it with white.
Make a slip knot using green yarn.
Place the green loop on your hook and use it to complete the slip stitch.
The green yarn is now attached.
Chain:
ch 5
Then work:
1 dc in the first stitch
Now we’ll begin making V-stitches.
How to Make Each V-Stitch
Skip:
2 stitches
In the third stitch, work:
1 dc, ch 3, 1 dc
All three parts belong to the same stitch.
You’ve now created one green V-stitch.
Repeat around:
skip 2 stitches, (1 dc, ch 3, 1 dc) in next stitch
Continue until you return to the beginning.
Join with:
1 sl st into the beginning ch-5 space
You can now cut the white yarn and weave in its tail.
The green border should look open and slightly lacy compared with the solid white center. Those spaces are important because they’ll become the leafy base beneath our roses.
Crochet the Tiny Green Leaves
Don’t cut the green yarn yet. We’ll use it to make the leaves directly around the V-stitch border.
Each V-stitch receives two tiny leaves.
First Leaf
Chain:
ch 3
Skip the first chain.
Work:
1 sc in the second chain
Then:
1 sc in the next chain
Slip stitch back into the V-stitch.
You have your first tiny leaf.
Second Leaf
Without moving to another V-stitch yet, repeat:
ch 3
Skip the first chain.
Work:
1 sc in each of the next 2 chains
Then make:
1 sl st into the same V-stitch
You should now have two tiny green leaves coming from that V-stitch.
Move to the Next V-Stitch
To travel across the border, make:
1 sl st between the two V-stitches
Then:
1 sl st into the next V-stitch
Now repeat the two-leaf sequence:
ch 3, skip first ch, 2 sc, sl st into V-stitch
Make that sequence twice so you have another pair of leaves.
Continue around the coaster in the same rhythm:
2 leaves, 2 traveling slip stitches, 2 leaves, 2 traveling slip stitches
When you reach the beginning, finish with a slip stitch into an appropriate nearby stitch.
Chain 1 and fasten off.
Weave in the green yarn end.
At this point, the coaster has its complete leafy border. The roses come next.
How to Crochet the Roses
This is my favorite part of the construction because we’re not making a pile of flowers and then trying to figure out where to sew them.
Each rose is crocheted directly between two V-stitches.
Another way to identify the correct position is to look for a spot between four tiny leaves.
You’ll make one rose between every two V-stitches.
Attach the Rose Yarn
Choose your first rose color, such as pink.
Find the stitch between two V-stitches.
Insert your crochet hook into that stitch.
Make a slip knot with the rose yarn and place it onto your hook.
Pull the yarn through to attach it.
Now we’re ready to build the rose.
Crochet the Rose Strip
Chain:
ch 7
Skip the first chain from your hook.
Beginning in the second chain, work:
2 hdc in each chain
Continue placing 2 half double crochets into each available chain.
The extra stitches cause the chain to curl naturally. Don’t try to flatten it. That curling is exactly what we need to form the rose.
Roll the Rose
Once you’ve completed the half double crochets, pull your hook upward slightly so you have room to work.
Roll the curled strip into a little rose shape.
Keep the center fairly snug while allowing the outside portion to open slightly. You don’t need to make every rose identical. A little variation makes the finished bouquet look more natural.
Secure the Rose
Insert your hook back into the working loop.
Now pierce through the rose from the front, passing through the middle and continuing through the back layers.
Make:
1 sl st through the rose
This slip stitch holds the rolled layers together.
Shape the petals gently with your fingers if needed.
Then insert your hook into the stitch where you originally attached the rose yarn.
Make:
1 sl st
Chain:
ch 1
Fasten off.
Secure and hide the yarn tails inside the rose.
Your first flower is finished.
Add the Remaining Roses
Choose your next flower color. The pink and yellow combination works especially well because it gives the bouquet some variation without making the small design feel overly busy.
Move to the next position between two V-stitches.
Repeat the entire rose pattern:
ch 7
Skip the first chain.
Then:
2 hdc in each remaining chain
Allow the strip to curl, roll it into a rose, pierce through the center with your hook, and secure it with a slip stitch.
Slip stitch back into the original attachment point, chain 1, fasten off, and hide the tails.
Continue around the entire coaster, adding:
1 rose between every 2 V-stitches
Alternate your colors however you like within the pink and yellow palette.
When the final rose is secured, your flat coaster is complete.
The flowers now sit around the outer edge with the tiny green leaves filling the spaces underneath them. The white center remains open and flat enough to hold a cup.
If you enjoy projects where the finished crochet hides another practical function, the Apple Pouch Water Bottle Holder Crochet Pattern uses a similar surprise idea, transforming from a little apple into a useful bottle holder.
Turn the Coaster Into a Rose Bouquet
Here’s where the flat floral coaster gets its second identity.
You’ll need:
- A strand of yarn
- A needle or stick
The needle isn’t being used to permanently sew the coaster into bouquet form. It’s simply there to help hold everything in place while you tie it.
Gather the coaster so the flower-covered outer edge folds upward and inward.
As the circle closes, the roses come together at the top and the white center folds underneath, creating the little bouquet base.
Use the needle or stick to help keep the gathered shape in position.
Wrap your strand of yarn around the narrow area beneath the flowers.
Tie it into a bow.
Once the yarn is secure, remove the needle.
Your flat coaster has now become a miniature crochet rose bouquet.
When you’re ready to use it, untie the bow and open the piece back out into its circular coaster shape.
That’s the clever part of the Rose Bouquet Coaster Crochet Pattern. Neither form is just decorative. The flower border makes the open coaster pretty, while that same border becomes the top of the bouquet when everything is gathered together.
Tips for Neater Crochet Roses
The roses are small, so tiny differences in tension can make a noticeable difference in their finished shape.
Don’t pull the starting chain too tightly. You need enough room to work 2 hdc into each chain, and very tight chains can make that frustrating.
Let the half double crochet strip curl naturally as you work. There’s no need to straighten it before rolling.
When forming the rose, start with a tighter center and wrap the remaining crochet around it. Then secure all the layers by passing your hook through the middle.
I also recommend hiding the tails carefully inside the rose rather than trimming them right beside a knot. The flowers will be handled each time you open and close the coaster, so secure finishing matters.
Tips for Keeping the Coaster Flat
The first four rounds use regular increases to build the circular base:
- Round 1: 12 dc
- Round 2: 24 dc
- Round 3: 36 dc
- Round 4: 48 dc
Check those counts before starting the green border.
If you accidentally miss an increase in an early round, the coaster may begin cupping. An extra increase can cause the opposite problem and create rippling.
It’s much easier to fix the stitch count before adding all those little leaves and roses.
The V-stitch border is naturally more textured and open than the white center, so don’t expect the entire floral edge to lie as flat as the center circle.
Choosing Your Rose Colors
Pink and yellow create the bouquet shown in this pattern, with green leaves and a white base.
Because the individual roses are made separately, you can decide how you want to distribute those two colors as you work around the edge. You don’t have to follow a complicated color sequence.
The important construction details stay the same regardless of which of the two rose colors you’re currently using:
ch 7, skip first ch, 2 hdc in each remaining chain
Then roll and secure the flower.
You could also make several matching coasters using different arrangements of the same yarn colors while keeping the construction identical.
Using Your Finished Crochet Coaster
Untie the bow and unfold the bouquet whenever you need the coaster.
The white circular center becomes the main surface, while the green leaves and roses create the decorative outer border.
When you’re finished, gather it again, bring the roses together, and retie the yarn around the base.
It makes the project especially nice for a small handmade display because it doesn’t necessarily need to stay stored flat like an ordinary coaster.
For another floral crochet project, the Strawberry Pouch Market Bag Crochet Pattern keeps the same colorful, practical spirit while giving you a completely different finished function.
And if you enjoy small projects that change form, the Pufferfish Drawstring Pouch Crochet Pattern and Whale Drawstring Pouch Crochet Pattern are useful companions to this one, especially if you’re building a collection of functional crochet pieces rather than traditional stuffed amigurumi.
Your Crochet Roses Have a Little Secret
Closed up, the finished piece looks like a tiny handful of pink and yellow roses with green leaves peeking between the petals and a bow tied underneath. Untie that bow, and the flowers spread around the edge of a completely different project.
That’s what makes this Rose Bouquet Coaster Crochet Pattern worth making. The magic isn’t hidden inside complicated crochet. It comes from a simple circular construction and a clever final fold that gives one handmade piece two completely different looks.
Frequently Asked Questions
What yarn do I need for the Rose Bouquet Coaster Crochet Pattern?
Use 5-ply yarn. The project uses white for the center, green for the leafy border, and pink and yellow for the roses.
How many stitches should I have in the white coaster?
The stitch counts are 12 dc in Round 1, 24 dc in Round 2, 36 dc in Round 3, and 48 dc in Round 4.
How do I make the green V-stitches?
Skip 2 stitches, then work 1 dc, ch 3, 1 dc into the next stitch. Repeat that sequence around the green border.
