

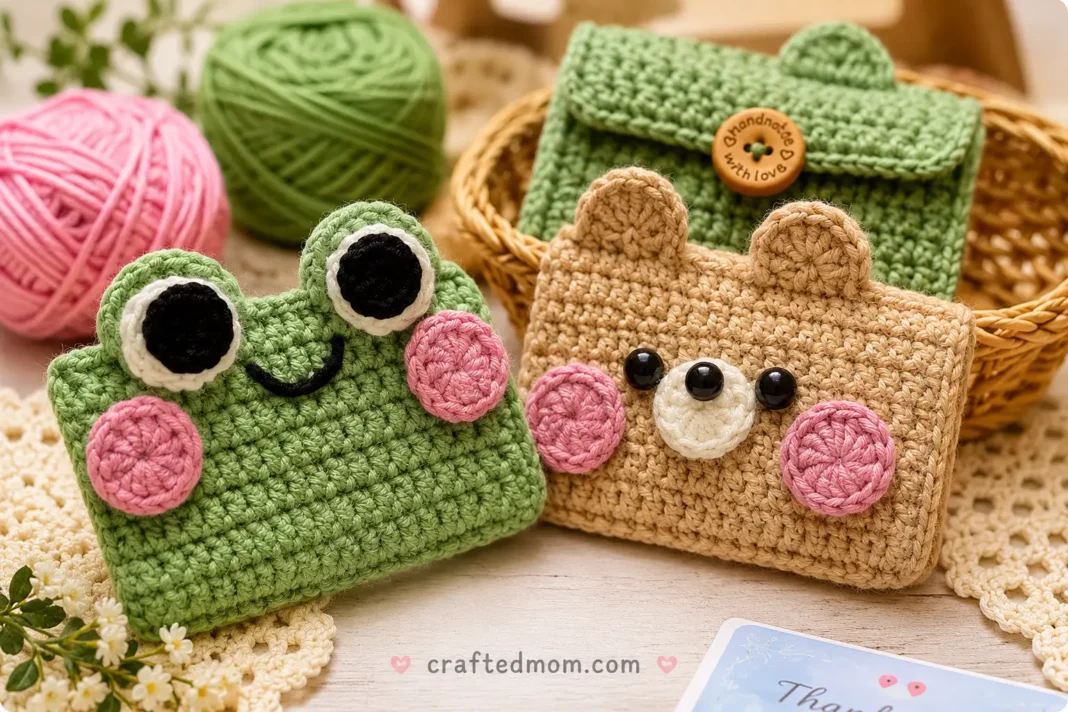
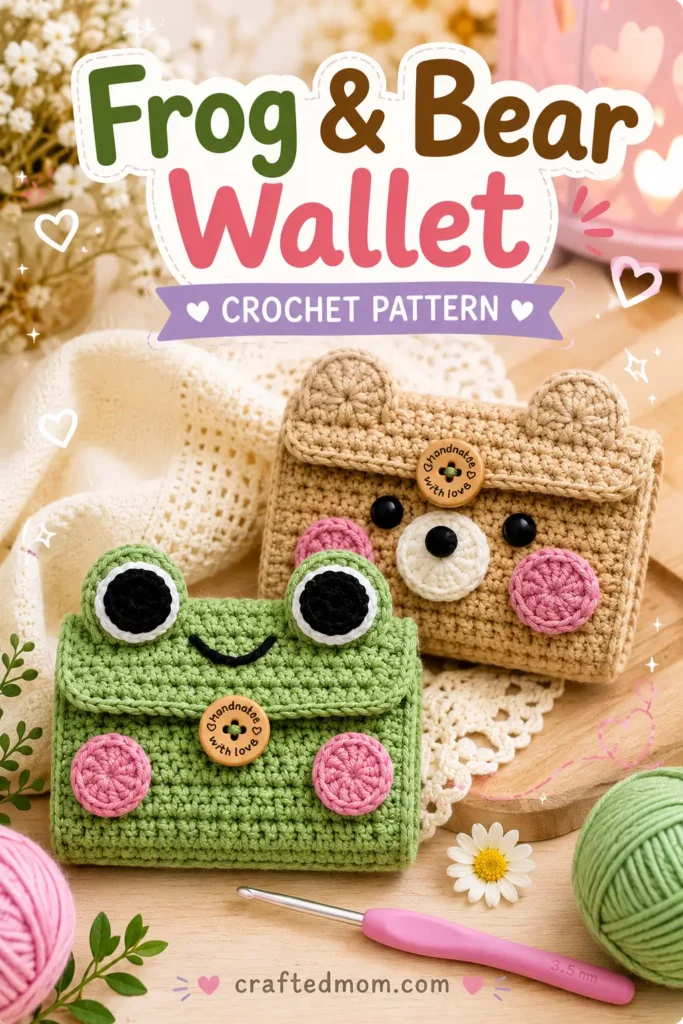
The ears and frog eyes are not separate pieces waiting to be sewn onto this little wallet. They grow right out of the top edge while you crochet, which is what makes this Frog and Bear Wallet Crochet Pattern such a clever small project.
Start with a card-sized pouch, shape either two bear ears or two raised frog eyes directly into the front loops, then use the untouched back loops to build a folding button flap.
The same wallet base works for both characters. The personality comes later. Green yarn, oversized layered eyes, pink cheeks, and an embroidered smile turn it into a frog, while tan yarn, rounded ears, a muzzle, cheeks, and 8 mm eyes create the bear.
I especially like the practical sizing method here. Instead of relying on one fixed finished measurement, you use a card as your guide while crocheting. The starting chain can be adjusted to match the card length, and the number of body rounds can be adjusted for its width.
Frog and Bear Wallet Crochet Pattern at a Glance
| Project Detail | Information |
| Project | Crochet frog or bear wallet/card holder |
| Yarn | 5-ply milk cotton yarn |
| Crochet Hook | 3.5 mm |
| Main Colors Shown | Green, tan, pink, white, black |
| Starting Chain | 18 ch, adjustable to card length |
| Main Stitches | Chain, single crochet, half double crochet, double crochet, slip stitch |
| Construction | Crocheted from the bottom upward into a small pouch |
| Sizing Method | Use a card to check length and width |
| Special Technique | Front loops create ears/eyes, back loops are used for the flap |
| Bear Eyes | 8 mm |
| Closure | Crochet flap with buttonhole and button |
| Face Details | Crocheted circles, glued features, embroidered frog smile |
| Sewing | Needle used for the frog smile |
| Other Materials | Scissors, needle, button, silicone glue |
The main body is worked around both sides of the starting chain, followed by rounds of double crochet. Round 8 uses the front loops to form the bear ears or frog eye bumps, while the back loops from the previous section remain available for the wallet flap.
Materials You’ll Need
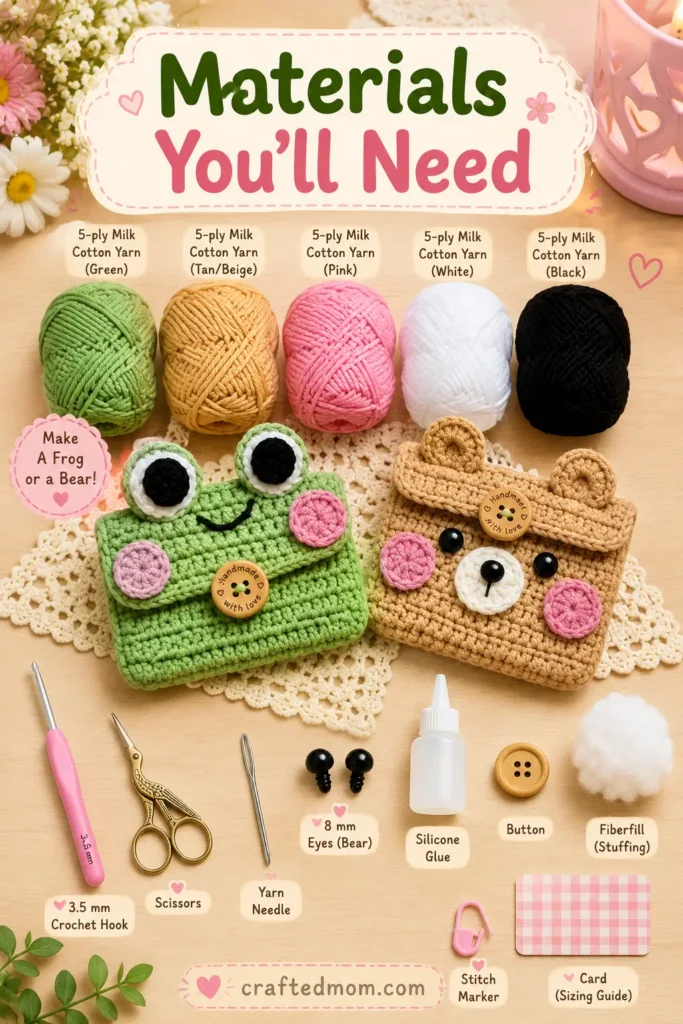
Gather:
- 5-ply milk cotton yarn
- Green for the frog
- Tan or beige for the bear
- Pink for the cheeks
- White for the eye or muzzle details
- Black for the frog pupils and smile
- 3.5 mm crochet hook
- 8 mm eyes for the bear
- Silicone glue
- Button
- Scissors
- Yarn needle
- A card to use as a sizing guide
The 3.5 mm hook is paired with the 5-ply yarn, although another yarn can be used with an appropriately sized crochet hook. The bear version specifically uses 8 mm eyes and glue for attaching them.
Because this wallet uses glued eyes and a button, keep those small parts in mind if you’re making it for a young child.
Crochet Abbreviations
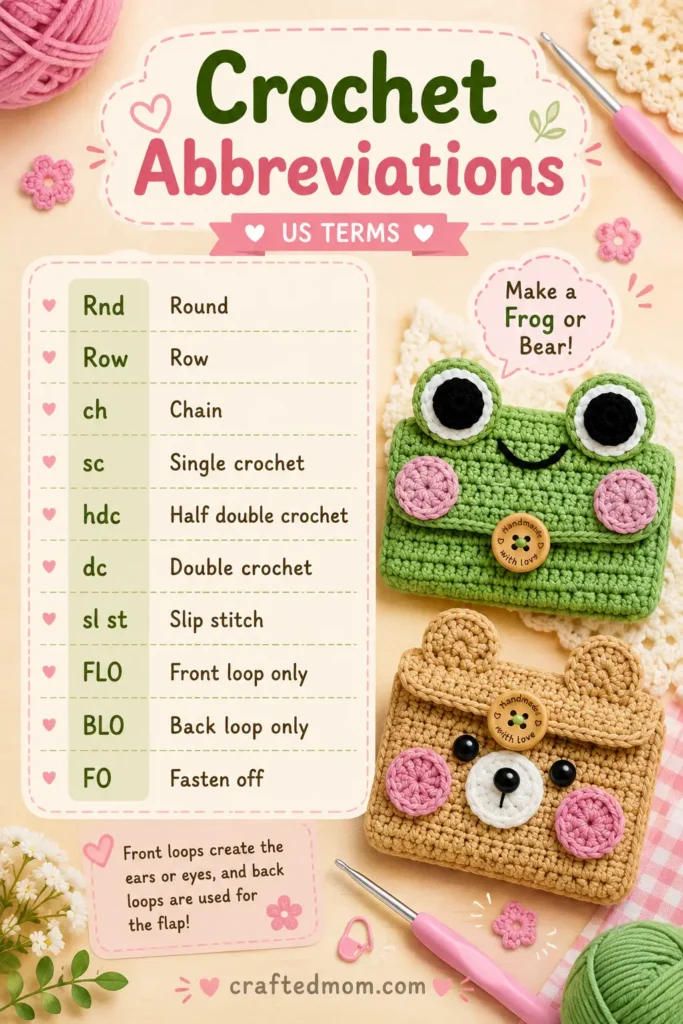
I’m using standard US crochet terminology throughout this pattern.
| Abbreviation | Meaning |
| Rnd | Round |
| Row | Row |
| ch | Chain |
| sc | Single crochet |
| hdc | Half double crochet |
| dc | Double crochet |
| sl st | Slip stitch |
| FLO | Front loop only |
| BLO | Back loop only |
| FO | Fasten off |
Before You Begin
There are two especially useful things to understand before starting.
First, the wallet is designed around the card you want to carry. The pattern starts with 18 chains, but that number can be changed. Your foundation chain should be approximately the same length as your card.
Second, the top edge performs two jobs.
The front loops become the bear ears or raised frog eye sections.
The remaining back loops are then used to crochet the flap.
So when you reach that stage, pay close attention to which loop you’re inserting your hook into.
How to Crochet the Frog and Bear Wallet Crochet Pattern
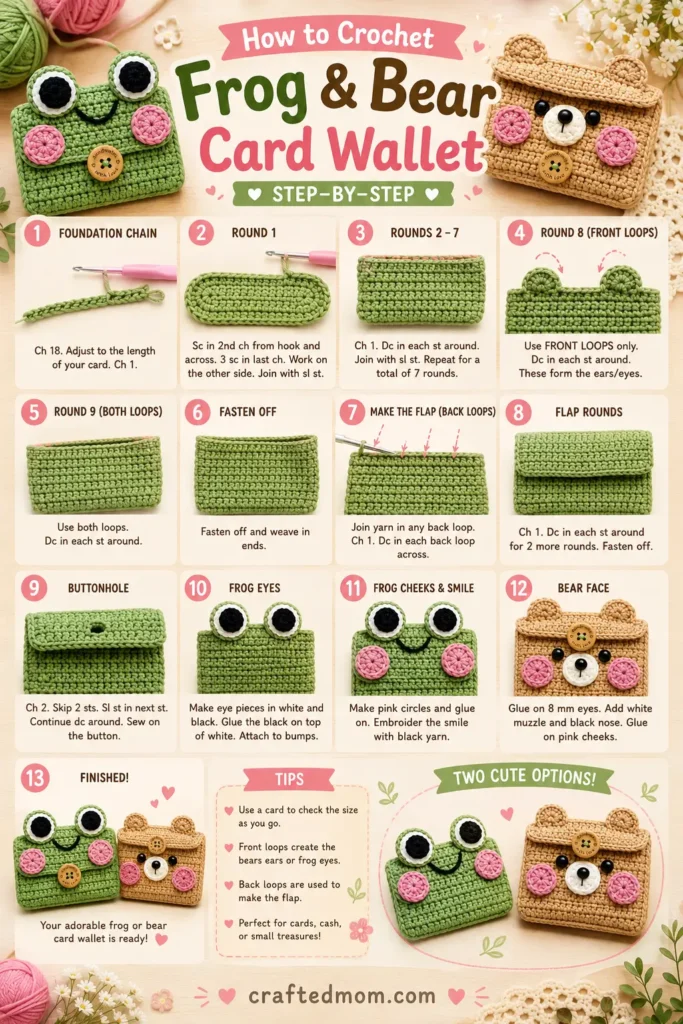
Both versions begin with exactly the same wallet base.
Choose green yarn for the frog or tan/beige yarn for the bear.
Round 1: Make the Foundation Chain
Make a slip knot.
Work:
ch 18
Compare your chain against the length of your card.
If necessary, add or remove chains until the foundation is approximately the same length as the card.
Once you’re happy with the length, work:
ch 1
This extra chain prepares you for the first single crochet.
Skip the first chain from your hook.
Insert your hook into the second chain and make:
1 sc
Place a stitch marker in this first single crochet so you can easily recognize the beginning of the round.
Continue with:
1 sc in each chain
until you reach the final chain.
Turn Around the End of the Foundation
In the final chain, work:
3 sc in the same chain
Those three stitches allow the work to curve around the end instead of stopping like a flat row.
Now rotate your work so you can crochet along the opposite side of the foundation chain.
Work:
1 sc in each available chain on the opposite side
If you’d rather avoid weaving in the starting tail later, you can hold it along the edge and crochet over it as you go.
When you return to the beginning, work:
2 sc in the final stitch
Then join with:
sl st into the marked starting stitch
Round 1 is complete.
You should now have a narrow oval-shaped foundation rather than a flat strip.
That oval is important because the wallet is being crocheted as a pouch rather than as two separate rectangles that need to be sewn together later.
Build the Wallet Body
Round 2
Start with:
ch 2
Now work:
1 dc in each stitch around
A double crochet is made by yarning over, inserting your hook, pulling up a loop, yarning over and pulling through two loops, then yarning over once more and pulling through the remaining two loops.
Continue one double crochet in each stitch around.
At the end, skip the final joining area and locate the second chain of the beginning ch 2.
Join with:
sl st into the second chain
The pouch will already begin folding naturally into its wallet shape.
Round 3
Work:
ch 2
Then:
1 dc in each stitch around
At the end, join with:
sl st into the second chain of the beginning ch 2
You can slide your card inside at this point to check the developing size.
Rounds 4 to 7
Repeat Round 3.
For each round:
ch 2
Work:
1 dc in each stitch around
Join with:
sl st into the second chain of the beginning ch 2
Continue through Round 7.
The seven-round height is not completely fixed. If your card requires a different width, you can adjust the number of repeated rounds to fit it.
This is one of the reasons I would keep the actual card nearby instead of relying only on counting rounds.
By the end of this section, you should have a small rectangular pouch that comfortably holds your card.
Round 8: Crochet the Bear Ears or Frog Eye Bumps
Here is where the two characters begin taking shape.
Round 8 is worked using the front loops only.
The same shaping is used whether you’re making the bear or frog. On the bear, the two raised semicircles become ears. On the frog, they support the large eyes.
First Front-Loop Section
Work:
4 FLO sl st
Now:
skip 1 stitch
Into the next front loop, work:
8 dc in the same front loop
All eight double crochets go into that single loop.
That creates the first rounded ear or eye bump.
Middle Section
After completing the first bump:
skip 1 stitch
Then work:
6 FLO sl st
Now:
skip 1 stitch
Second Ear or Eye Bump
Into the next front loop, work:
8 dc in the same front loop
You now have the second rounded bump.
Then:
skip 1 stitch
Finish with:
4 FLO sl st
The two raised sections should sit across the top edge with a flat section between them.
For the bear, they already resemble little rounded ears.
For the frog, don’t worry if they look plain right now. The layered eye pieces will completely change their appearance.
Crochet the Wallet Flap
Remember those back loops that were left unused?
Now we need them.
Insert your hook back into the working loop.
Work:
ch 2
Turn your work.
You’ll crochet into the available back loops from Round 7, directly behind the decorative front-loop section.
Flap Row 1
Work:
1 dc in each available back loop
Continue until you reach the folded side of the wallet.
Stop there.
This creates the first row of the flap.
Flap Row 2 and Buttonhole
Work:
ch 2
Turn.
Continue with:
1 dc in each stitch
until you approach the center of the flap.
Check the center before creating the buttonhole. I recommend folding the flap over the wallet briefly so you can see where the button will sit.
At the center, work:
ch 2
Then:
skip the middle stitch
Continue:
1 dc in each remaining stitch
to the end.
Those two chains create the opening for the button.
Finish with:
ch 1
Cut your yarn and fasten off.
Weave in the tail.
The main wallet is now finished.
Crochet the Frog Face Pieces
The frog’s face is what really changes this from a plain green pouch into a character wallet.
You’ll make:
- 2 pink cheek circles
- 2 white eye circles
- 2 black pupil circles
- An embroidered black smile
Crochet the Pink Cheeks
With pink yarn, make a magic ring.
Work:
ch 2
Into the magic ring, make:
12 dc
Pull the yarn tail to close the center.
Find the second chain from the beginning ch 2 and join with:
sl st
Then:
ch 1
Fasten off.
Hide the yarn tails on the wrong side.
Make 2 pink circles total.
Crochet the White Eye Pieces
Use white yarn.
Follow exactly the same construction:
Magic ring
ch 2
12 dc into the magic ring
Pull the ring closed.
Join with:
sl st into the second chain of ch 2
Then:
ch 1
Fasten off.
Make 2 white circles.
The cheek circles and white eye pieces use the same 12-double-crochet construction.
Crochet the Black Pupils
Switch to black yarn.
Make a magic ring.
Work:
ch 2
Now make:
10 hdc into the magic ring
To make a half double crochet:
Yarn over, insert your hook into the ring, pull up a loop, yarn over again, then pull through all three loops on your hook.
After all 10 half double crochets are complete, pull the yarn tail to close the ring.
Join with:
sl st into the second chain of the beginning ch 2
Then:
ch 1
Fasten off.
Hide the yarn tails on the wrong side.
Make a second black pupil in the same way.
Assemble the Frog Face
Before gluing anything, place all the pieces onto the wallet.
The white eye circles sit over the two raised eye bumps.
The black circles sit over the white circles, creating those wonderfully oversized frog eyes.
Place one pink cheek toward each side of the face.
I recommend checking the entire expression before reaching for the glue. A tiny change in pupil placement can make the frog look completely different.
Once you’re satisfied, use silicone glue to secure the pieces.
Allow the glue to set properly before handling the wallet too much.
Embroider the Frog Smile
Thread your needle with black yarn or thread.
Embroider a simple curved smile between and below the eyes.
Keep it small so it doesn’t compete with those large eyes and pink cheeks.
After embroidering the mouth, secure the ends and hide them inside the wallet. The needle is only needed for sewing the frog’s smile.
If the frog theme is your favorite part, the No Sew Dress Up Leggy Frog Crochet Pattern is a natural project to make next. For something small that can hang from a bag, the Dress Up Leggy Frog Bag Friend Crochet Pattern is another closely related option.
Finish the Bear Face
The bear uses the same wallet construction, but the face is different.
The two bumps worked into Round 8 become the bear’s ears.
Instead of the oversized frog eyes, use the 8 mm eyes.
The finished bear also has pink cheek circles and a light-colored circular muzzle area, giving the face a completely different expression even though the wallet underneath is constructed the same way.
Secure the facial pieces with silicone glue.
Because placement matters quite a bit on such a small face, arrange everything first and glue only after you’re happy with the spacing.
For another character project with a practical purpose, the Bear and Hello Kitty Glasses Holder Crochet Pattern pairs especially well with this one.
Attach the Button
Close the flap and use the crocheted buttonhole to determine where the button needs to sit on the front of the wallet.
The button can be secured using the yarn tails and your crochet hook.
Pass the tails through the wallet, tie them securely together on the inside, then hide the ends inside the pouch.
Test the closure.
The flap should fold over comfortably and the button should pass through the two-chain opening without pulling the crochet fabric excessively.
If you’re enjoying small functional projects like this one, the Magic Pouch Net Bag Crochet Pattern and Apple Pouch Water Bottle Holder Crochet Pattern are fun ways to keep going with crochet pieces that actually hold something.
Why the Front-Loop and Back-Loop Construction Works So Well
This is probably my favorite technical detail in the pattern.
Instead of crocheting two ears, fastening them off, positioning them, threading a needle, and sewing them onto the wallet, the ears or frog eye bumps are formed directly along the upper edge.
At the same time, the unused back loops remain available for the flap.
So one row effectively becomes the foundation for two different parts of the finished wallet.
That also helps keep the front looking neat because you don’t have seams from attaching the ears afterward.
Adjusting the Wallet to Your Card
The starting 18 chains work for the demonstrated size, but the more useful rule is to match the foundation to your card.
Lay the chain alongside the long edge of the card.
If it’s too short, add chains.
If it’s too long, remove a few.
The same principle applies to the height. Rounds 4 through 7 repeat the same double crochet construction, and the number of rounds can be adjusted according to the card width.
This is better than assuming every card or yarn combination will produce exactly the same dimensions.
Just remember that changing the starting chain will also affect how you position the two ears or frog eye bumps in Round 8. Keep them balanced across the front rather than blindly following the original placement if you’ve significantly changed the width.
Tips for a Neater Finished Wallet
Measure early. Check the foundation chain against your card before beginning the pouch. Fixing the length takes seconds at that stage and becomes much harder later.
Watch your loops in Round 8. The character details use front loops, while the flap uses the back loops. Accidentally crocheting through both loops can interfere with the flap construction.
Check the button before securing it. Fold the flap down and line up the buttonhole first. Then determine the correct button position.
Arrange the face before gluing. Especially with the frog, pupil position has a surprisingly big effect on the expression.
Hide your ends carefully. Since the inside actually holds cards, loose yarn tails can get caught when you’re sliding things in and out.
Other Character Crochet Projects to Try
Once you’ve made one little character accessory, it’s very easy to start imagining an entire collection.
The Penguin with Scarf and Earmuffs Crochet Pattern is a good choice when you want another character with recognizable facial and accessory details.
For something even smaller, try the Mini Miffy Crochet Pattern.
And if you like functional crochet with playful animal shapes, the Moo Deng Hippo Pouch Crochet Pattern keeps that same mix of cute character design and practical storage.
Your Frog or Bear Wallet Is Finished
Now comes the satisfying part: slide a card inside, fold that little character flap down, and fasten the button.
What makes the Frog and Bear Wallet Crochet Pattern especially useful is that you learn one wallet construction but get two very different finished looks. The frog has those wonderfully big layered eyes and pink cheeks, while the bear turns the exact same shaping into rounded ears and a sweet little muzzle.
Once you understand how the front loops form the character details and the back loops become the flap, making another one in a different color should feel much more familiar.
Frequently Asked Questions
What yarn is used for the Frog and Bear Wallet Crochet Pattern?
The pattern uses 5-ply milk cotton yarn. Green, tan, pink, white, and black are used across the two character versions.
What size crochet hook do I need?
Use a 3.5 mm crochet hook with the 5-ply yarn. If you substitute another yarn, pair it with an appropriate hook for that yarn.
Are the frog eyes and bear ears sewn onto the wallet?
The raised eye or ear shapes themselves are crocheted directly into the front loops. The additional frog eye circles are crocheted separately and glued in place.
