

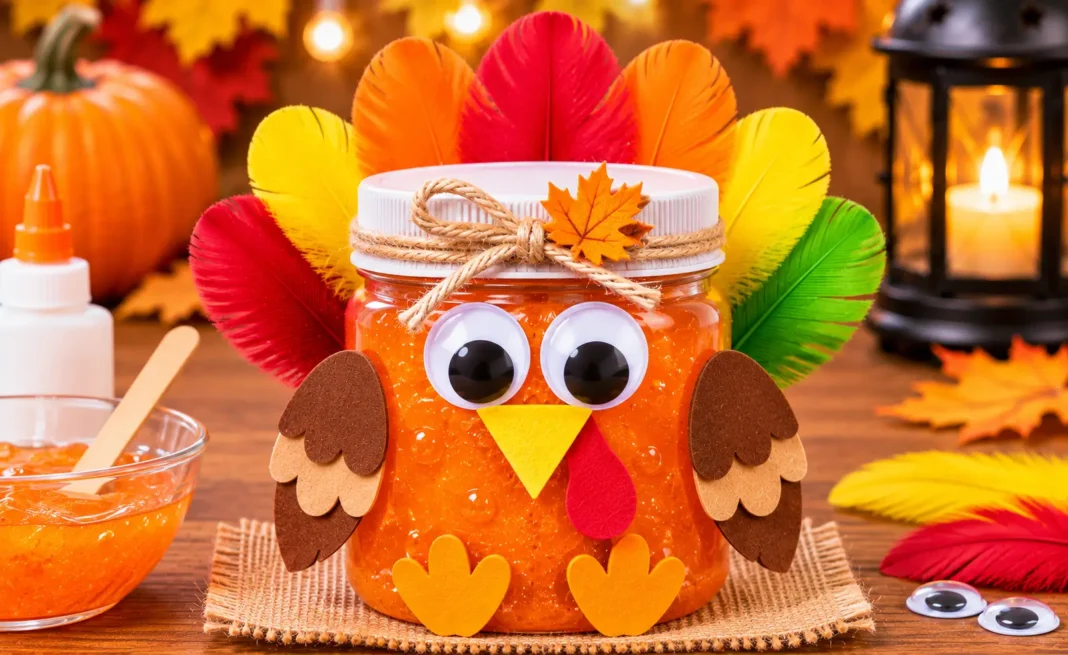
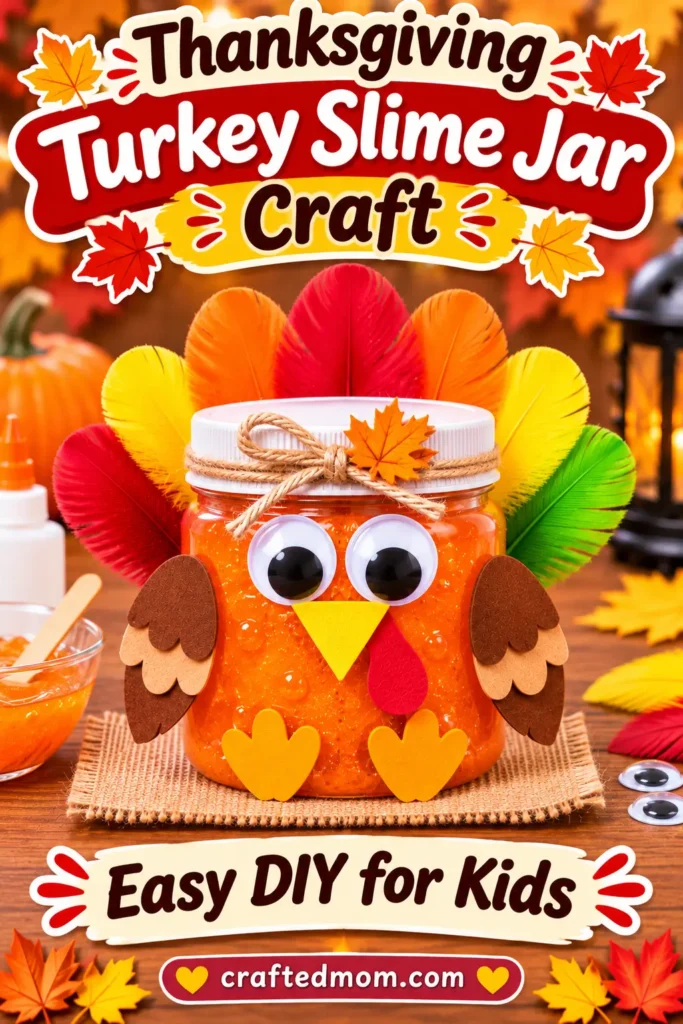
This Thanksgiving turkey slime jar craft combines two activities kids love: making colorful slime and decorating a silly turkey.
You’ll make orange slime using clear school glue and slime activator, then store it inside a plastic jar decorated with colorful feathers, googly eyes, and a felt turkey face.
It’s a playful Thanksgiving project for supervised crafting at home, classroom activities, or holiday parties. Unlike an ordinary turkey mason jar decoration, this one has homemade slime inside that children can take out and play with.
Why You’ll Love This Thanksgiving Turkey Slime Jar Craft
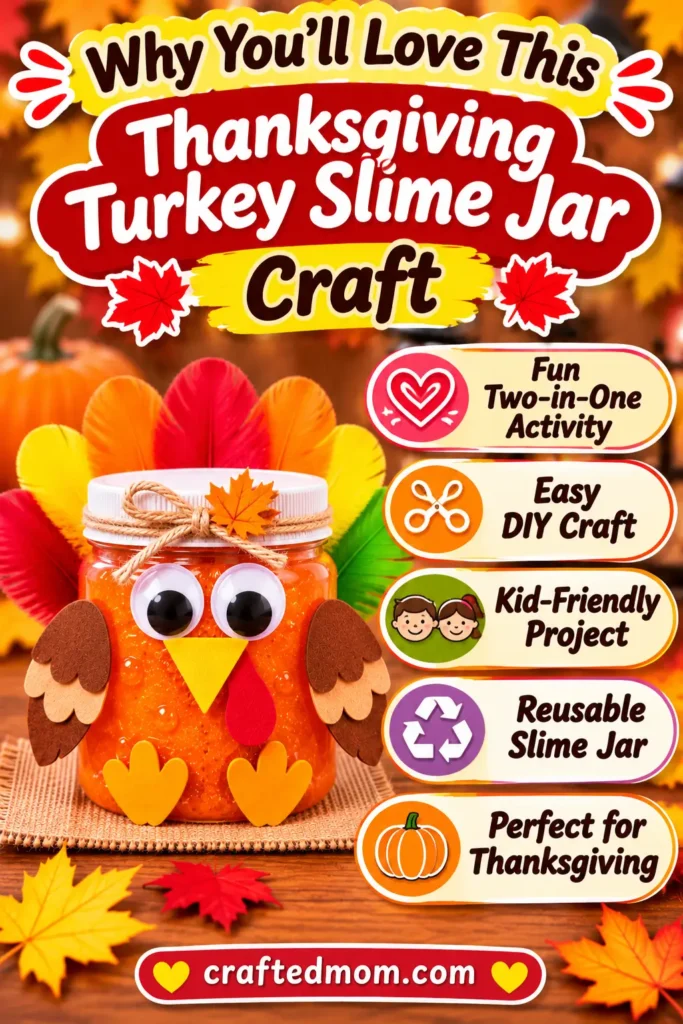
The project has two distinct parts. First, children help mix and knead the orange slime. Then they decorate a reusable plastic container to look like a turkey.
The colorful feathers make the jar festive, while the googly eyes give each turkey a different expression.
Using a leak-resistant plastic jar also makes storage more practical than leaving slime in an open bowl.
Children can choose feather colors and help arrange the face, while an adult manages the activator, cutting, and final assembly.
Supplies You’ll Need
Materials
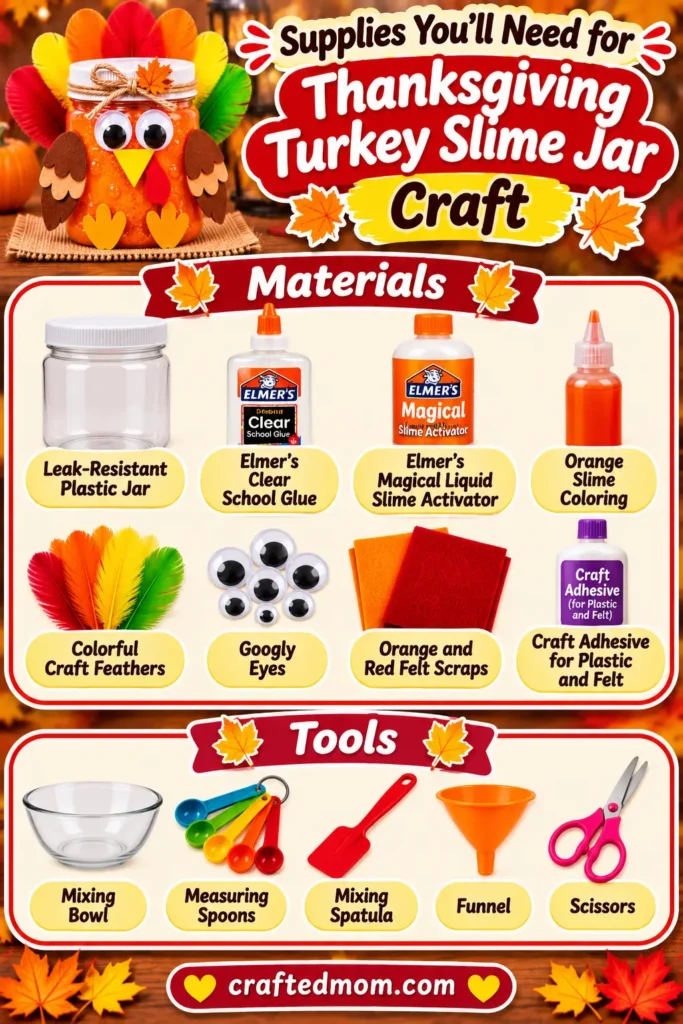
- Leak-Resistant Plastic Jar: For storing the finished slime. Choose a container with a secure lid.
- Elmer’s Clear School Glue: The base ingredient for the orange slime.
- Elmer’s Magical Liquid Slime Activator: Helps transform the glue into slime. Follow the directions for your specific product.
- Orange Slime Coloring: Choose coloring suitable for the slime ingredients.
- Colorful Craft Feathers: Create the turkey’s fan-shaped tail.
- Googly Eyes: Give the turkey its playful expression.
- Orange and Red Felt Scraps: For the beak and wattle.
Additional assembly supply: Craft Adhesive for Plastic and Felt is needed to attach decorations to the outside of the jar. This adhesive isn’t part of the slime mixture.
Tools
- Mixing Bowl: For combining the glue, coloring, and activator.
- Measuring Spoons: For measuring activator according to the product directions.
- Mixing Spatula: For stirring the mixture.
- Funnel: May help transfer softer slime into the storage jar.
You’ll also need scissors for cutting the felt. Use children’s craft scissors with appropriate adult supervision.
Before You Start: Prepare the Slime Jar and Workspace
Cover your work surface and set out the ingredients before beginning.
Check that your plastic jar is clean, dry, and large enough to hold the finished slime without forcing the lid closed.
Keep the decorative supplies away from the mixing area. Feathers, felt scraps, and googly eyes should stay outside the slime rather than becoming part of the mixture.
Important: Elmer’s Magical Liquid has been sold in different formulations. Use the mixing proportions on your specific bottle rather than assuming that one recipe works for every version.
How to Make Thanksgiving Turkey Slime
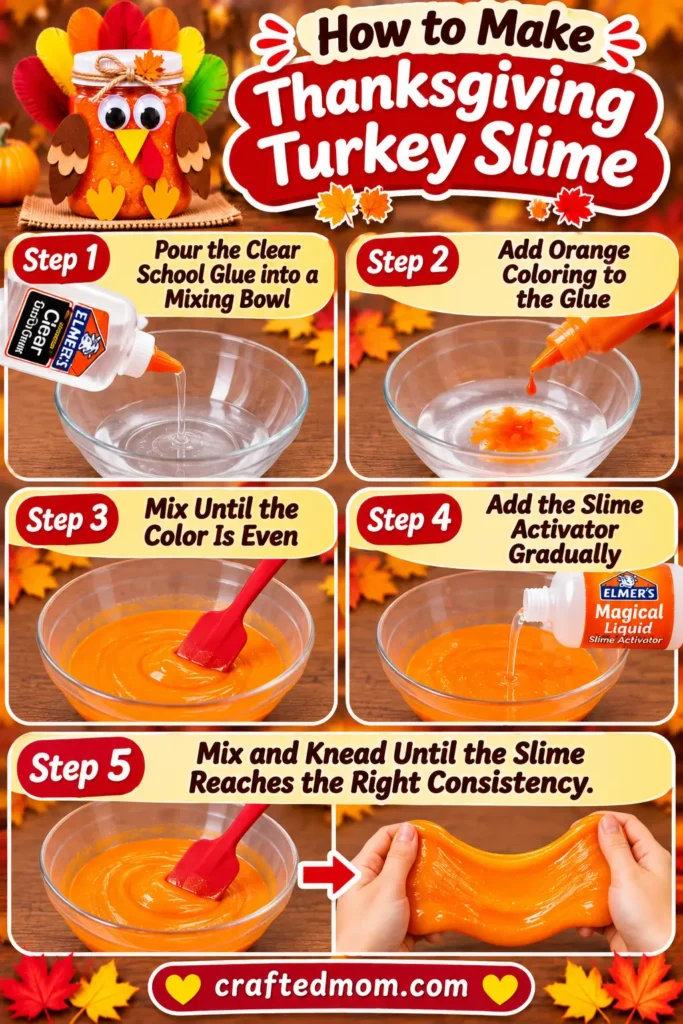
Step 1: Pour the Clear School Glue into a Mixing Bowl
Place your mixing bowl on a protected surface.
Add the amount of Elmer’s clear school glue called for by your chosen slime recipe or activator instructions.
Use a bowl with enough room for stirring and kneading without spilling over the sides.
Step 2: Add Orange Coloring to the Glue
Add a small amount of slime-compatible orange coloring to the clear glue.
Start with a little coloring rather than adding too much immediately. You can adjust the color before introducing the activator.
Choose a shade that resembles a bright Thanksgiving pumpkin or autumn leaf.
Step 3: Mix Until the Color Is Even
Use the mixing spatula to stir the glue and coloring together.
Continue until the orange color looks consistent throughout the mixture.
Scrape the sides of the bowl so any uncolored glue blends into the rest.
Step 4: Add the Slime Activator Gradually
Measure the Magical Liquid according to the instructions for your bottle and glue quantity.
Add it in the increments directed, mixing thoroughly between additions.
As the ingredients react, the mixture should begin thickening and pulling together.
Avoid pouring in extra activator simply because the slime is initially sticky.
Step 5: Mix and Knead Until the Slime Reaches the Right Consistency
Continue stirring until the slime begins forming a cohesive mass.
With adult supervision, remove it from the bowl and knead according to the product instructions.
The finished slime should hold together and stretch rather than behave like a runny liquid.
If the texture still seems wrong, consult the troubleshooting section before adding more ingredients.
Turn Your Slime Jar into a Thanksgiving Turkey
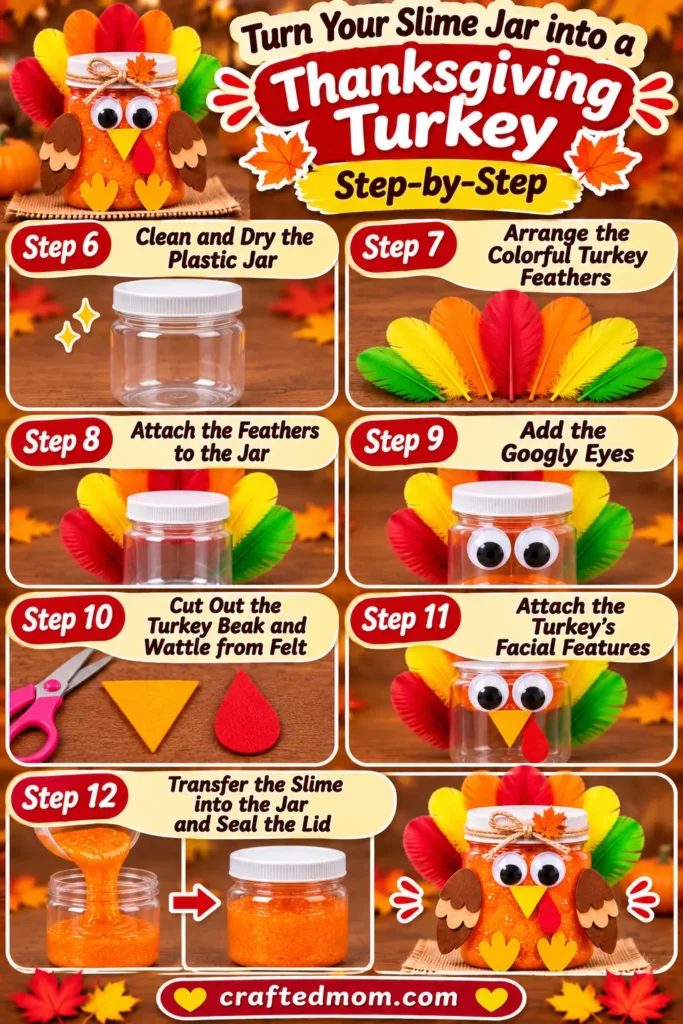
Step 6: Clean and Dry the Plastic Jar
Make sure the storage jar is completely clean and dry.
Remove any labels or residue from the outside.
Check that the lid closes securely before attaching decorations.
Step 7: Arrange the Colorful Turkey Feathers
Spread your craft feathers on the table and arrange them into a fan shape.
Try placing longer feathers in the middle and shorter ones toward the sides.
Hold the arrangement behind the jar to make sure the tail is visible without covering the opening.
Step 8: Attach the Feathers to the Jar
Apply compatible craft adhesive to the feather attachment points on the back of the plastic jar.
Position the feathers in your chosen arrangement and support them while the glue sets.
Keep glue away from the lid and threads so the jar remains easy to open.
Step 9: Add the Googly Eyes
Position two googly eyes on the front of the jar.
Leave enough space underneath for the beak and wattle.
Once you’re satisfied with their placement, attach the eyes using the appropriate adhesive.
Step 10: Cut Out the Turkey Beak and Wattle from Felt
Cut a small triangular beak from orange felt.
Next, cut a curved wattle from red felt.
Hold the pieces against the jar before attaching them to check that they fit beneath the eyes.
Step 11: Attach the Turkey’s Facial Features
Glue the orange beak below the googly eyes.
Position the red wattle beside or slightly beneath the beak, keeping both shapes visible.
Let the decorative glue dry completely before handling the jar frequently.
Step 12: Transfer the Slime into the Jar and Seal the Lid
Once the slime reaches the intended consistency, carefully place it into the plastic container.
A wide-mouth funnel may help with very soft slime, but thicker slime is usually easier to transfer with clean hands or a spatula.
Keep slime away from the jar’s lid threads, then close the container securely.
Your Thanksgiving turkey slime jar is ready!
Easy Thanksgiving Turkey Slime Jar Tips
Follow the activator directions. Elmer’s formulations vary, so don’t substitute an untested measurement for the manufacturer’s instructions.
Add coloring before activator. It’s easier to distribute the orange color while the glue is still fluid.
Keep decorations outside. Loose feathers and googly eyes can contaminate slime or become small-part hazards.
Protect clothing and furniture. Test coloring and slime on a suitable protected surface because pigments can transfer.
Check the lid before decorating. A feather tail or felt decoration shouldn’t interfere with closing the container.
Let the glue dry. Decorations attached to the outside may shift if the jar is handled before the adhesive sets.
Turkey Slime Jar Variations to Try
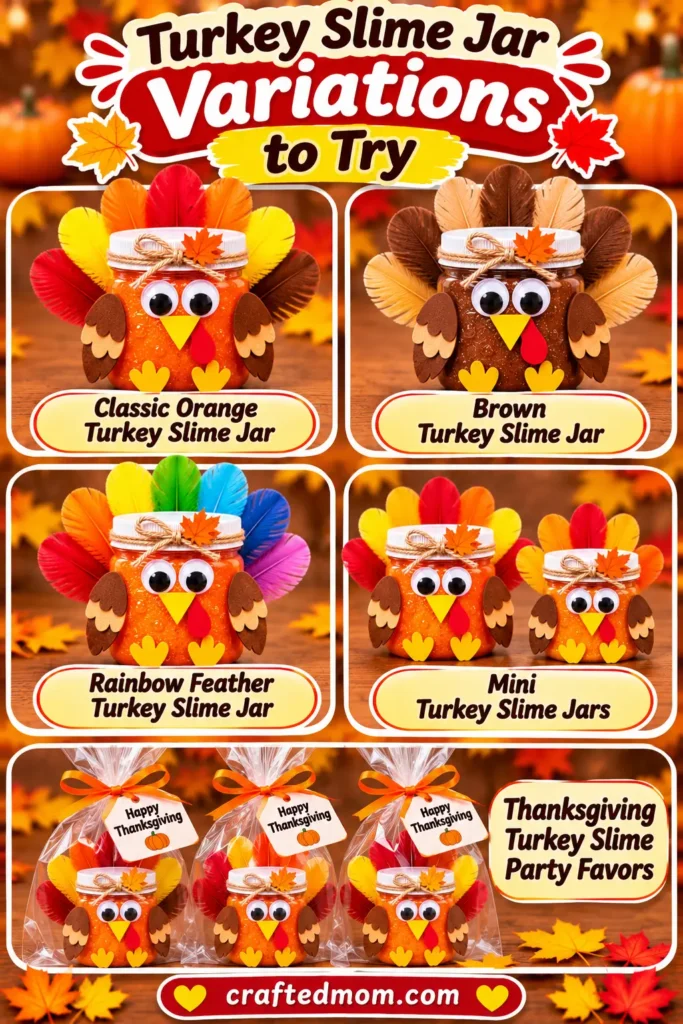
Classic Orange Turkey Slime Jar
Use bright orange slime and red, yellow, and brown craft feathers for a traditional Thanksgiving look.
Brown Turkey Slime Jar
Choose slime-compatible brown coloring instead of orange for a more earthy turkey-inspired appearance.
Rainbow Feather Turkey Slime Jar
Keep the slime orange but arrange rainbow-colored feathers around the back.
Mini Turkey Slime Jars
Use smaller leak-resistant plastic containers and scale down the feathers and facial features. Make sure they can close securely.
Thanksgiving Turkey Slime Party Favors
Prepare separate turkey containers for a supervised holiday crafting activity.
Label each container and include storage and handling instructions for the recipients.
How to Store Your Thanksgiving Turkey Slime
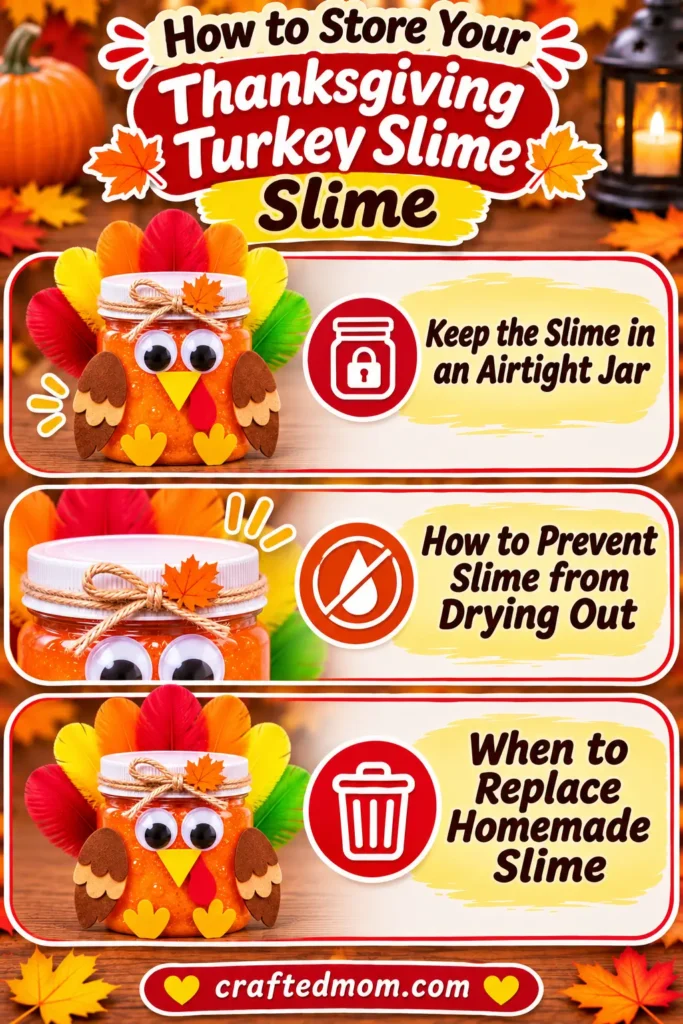
Keep the Slime in an Airtight Jar
Return the slime to its container after playtime and close the lid.
Store it in a cool, dry indoor location, following any instructions on the product labels.
How to Prevent Slime from Drying Out
Avoid leaving the slime uncovered between activities.
Keep the container’s rim clean so the lid can create a proper seal.
When to Replace Homemade Slime
Homemade slime doesn’t have a guaranteed shelf life.
Discard it if it develops an unusual odor, changes appearance unexpectedly, becomes contaminated, or has been handled with dirty hands.
Don’t attempt to rescue visibly contaminated slime by adding activator.
Thanksgiving Turkey Slime Troubleshooting
Why Is My Slime Too Sticky?
The ingredients may not be fully mixed or kneaded.
Follow the manufacturer’s directions before adding small amounts of additional activator, if recommended.
Why Is My Slime Too Hard or Rubbery?
Too much activator can make slime stiff.
Avoid adding more. Check the recipe instructions for any recommended correction, and consider making another batch if the texture cannot be restored.
Why Isn’t My Slime Forming?
Check that you used compatible Elmer’s glue and Magical Liquid, followed the appropriate proportions, and mixed thoroughly.
Different activator versions can require different amounts.
How Do I Keep the Slime from Staining Surfaces?
Use a washable protective covering and avoid carpets, upholstery, and unfinished wood.
Check coloring instructions, and clean spills promptly according to the product’s guidance.
Thanksgiving Turkey Slime Jar Safety Notes
Adult supervision is required throughout slime preparation and play.
This activity is not suitable for children younger than three, according to Elmer’s slime-making guidance.
Read the age recommendations and warnings on every ingredient. Slime is not edible and should never be placed in the mouth or near the eyes.
Wash hands before and after handling it. Stop use if skin irritation develops.
Magical Liquid replaces the need to handle separate borax powder in this recipe, but that doesn’t mean every formulation is borate-free.
Keep small googly eyes, feathers, and felt decorations securely attached and away from young children.
Can Preschoolers Make This Turkey Slime Jar Craft?
Some preschoolers can participate with close adult supervision, provided they meet the product’s age recommendations and can follow the handling instructions.
Adults should control activator measurements, manage scissors, and attach small decorations.
Children can choose feather colors, help stir when appropriate, and decide where the turkey’s eyes belong.
For classrooms, prepare one supervised mixing station rather than leaving slime ingredients available for unsupervised use.
More Thanksgiving Turkey Crafts
For a Thanksgiving turkey decoration without slime, try Turkey Mason Jar Craft.
You can also create a keepsake using a child’s painted handprint with Handprint Turkey Mason Jar Craft.
The Turkey Mason Jar Candy Craft offers another jar-based Thanksgiving project, while Thankful Turkey Mason Jar Craft with Craft Sticks focuses on gratitude messages.
For a different autumn craft, explore Popsicle Stick Pumpkin Craft.
Find more seasonal activities in Thanksgiving Crafts for Kids, your main Thanksgiving craft collection.
Final Thoughts
This Thanksgiving turkey slime jar combines a colorful sensory activity with a turkey-themed container that kids can decorate themselves.
Once the slime is mixed and the decorations are dry, store it in its sealed jar between supervised play sessions.
Frequently Asked Questions
What Ingredients Do You Need to Make Thanksgiving Turkey Slime?
You’ll need Elmer’s clear school glue, Elmer’s Magical Liquid slime activator, and slime-compatible orange coloring. The turkey container uses a plastic jar, feathers, googly eyes, and felt.
Can I Make Turkey Slime Without Borax Powder?
Yes. This version uses Elmer’s Magical Liquid instead of adding separate borax powder. However, that doesn’t necessarily make the slime borate-free.
How Much Slime Activator Should I Use?
Follow the instructions for your specific Magical Liquid formulation and glue quantity. Add the activator gradually as directed rather than guessing a universal ratio.
Can I Use White Glue Instead of Clear Glue?
Elmer’s white school glue may work with a compatible activator, but the finished slime will be more opaque. Follow the manufacturer’s directions for that glue.
