

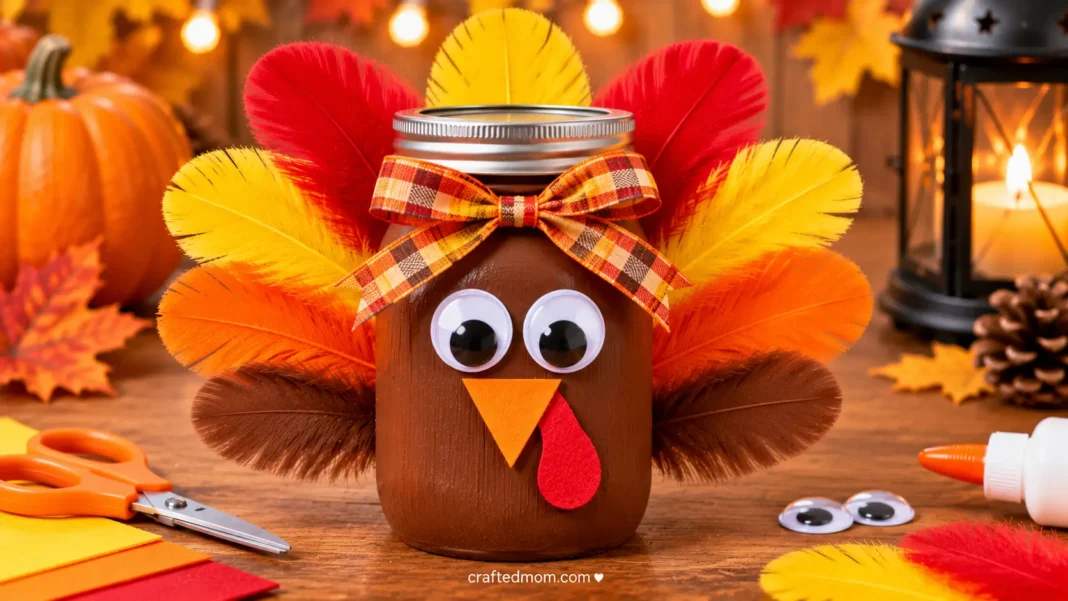
This turkey mason jar craft turns a plain plastic jar into a colorful Thanksgiving turkey with a brown body, bright feather tail, and silly googly-eyed face. The finished jar makes a cheerful table or classroom decoration.
The feathers form the tail, while cardstock creates the face. Younger children can choose colors as adults handle tricky cutting and gluing.
Why You’ll Love This Turkey Mason Jar Craft
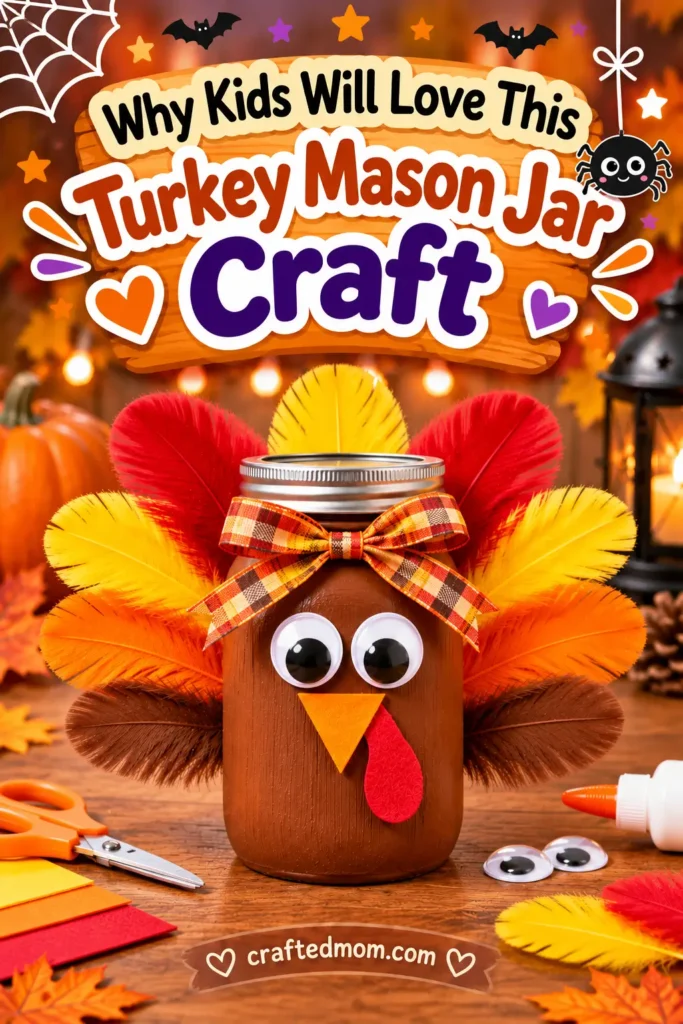
The best part is how different each turkey can look even when everyone starts with the same supplies. One child might choose bright rainbow feathers and another might stick with orange, red, and yellow. Both will still look like turkeys.
The project has three stages: paint the jar, arrange the tail, and add the face. For groups, separate painting and decorating so children aren’t handling wet paint.
Plastic avoids glass breakage, but children still need supervision.
Supplies You’ll Need

Materials
- Plastic mason jar: The turkey’s body. Check that the plastic surface is suitable for paint and glue.
- Brown acrylic paint: Creates the turkey’s brown body; look for a formula compatible with plastic.
- Colorful craft feathers: Make the fan-shaped tail behind the jar.
- Pipe cleaners: Add optional curly or colorful accents.
- Googly eyes: Give the turkey an expressive face.
- Orange cardstock: For the beak.
- Red cardstock: For the wattle, the red detail beside the beak.
- Tacky glue: Attaches feathers and facial details, provided it is appropriate for your jar’s surface.
Tools
- Paintbrush: For spreading paint over the jar.
- Safety scissors: For cutting cardstock with adult guidance.
- Pencil: For drawing the beak and wattle shapes.
Protect the work surface and leave space for drying.
Before You Start: Prepare the Mason Jar
Remove labels and residue, then clean and dry the jar.
Decide where the front will be. If the jar has a seam or raised lettering, you can place that section toward the back.
Test your paint on a small, inconspicuous spot if you’re unsure how it will adhere. Check the manufacturer’s directions before painting the entire jar.
How to Make a Turkey Mason Jar Craft
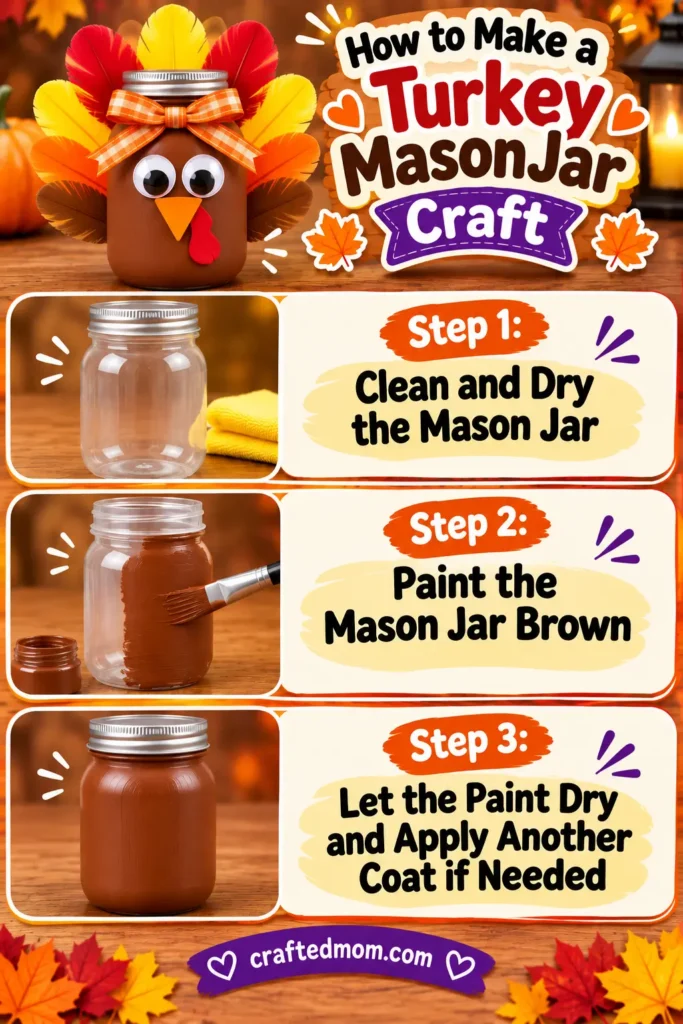
Step 1: Clean and Dry the Mason Jar
Give the outside one last check for residue and moisture. Set the jar upright on your protected work area.
Step 2: Paint the Mason Jar Brown
Brush brown acrylic paint over the outside of the jar. Work around any molded ridges with light strokes so the paint doesn’t collect in thick patches. Keep paint away from the opening and inside.
Step 3: Let the Paint Dry and Apply Another Coat if Needed
Allow the first coat to dry as directed on the paint label. If parts of the jar still show through, add another thin coat. Don’t attach decorations while the surface is tacky.
Make the Turkey’s Colorful Feather Tail
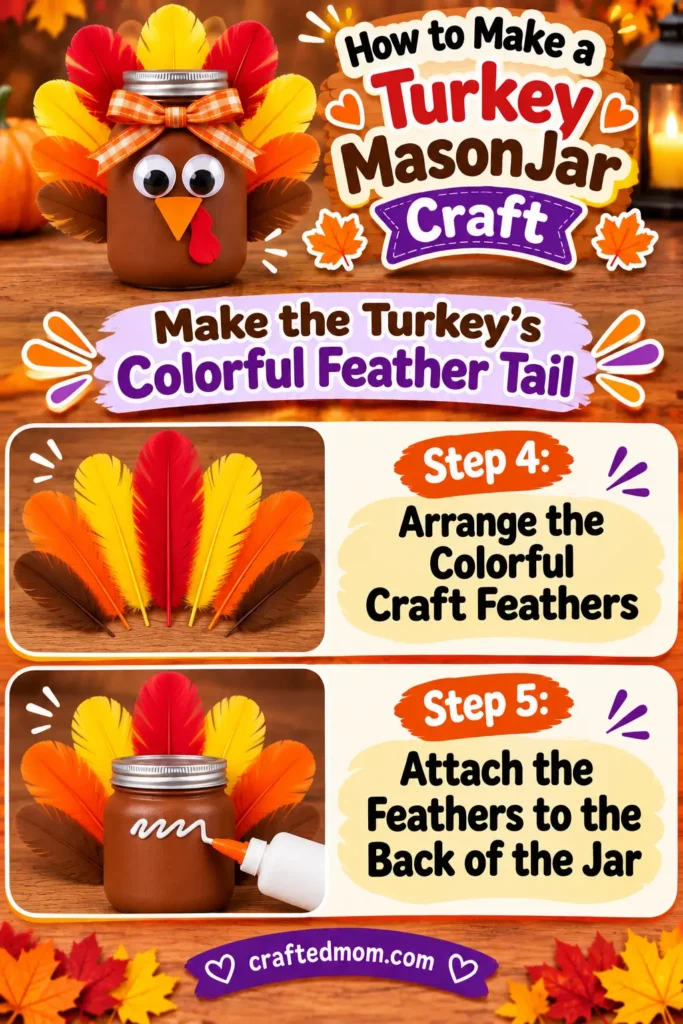
Step 4: Arrange the Colorful Craft Feathers
Lay the feathers on the table in a fan shape before reaching for the glue. Try taller feathers in the center and shorter ones at the edges. Hold the arrangement behind the jar to make sure the tail remains visible above and around the body.
Step 5: Attach the Feathers to the Back of the Jar
Turn the dry jar around. Apply tacky glue where the feather bases will rest, following the product’s instructions. Add the central feathers first, then work outward. Support feathers that spring away from the curved surface.
If the tail slides, stop and let the existing glue grip before adding more.
Design the Turkey Face and Add Finishing Touches
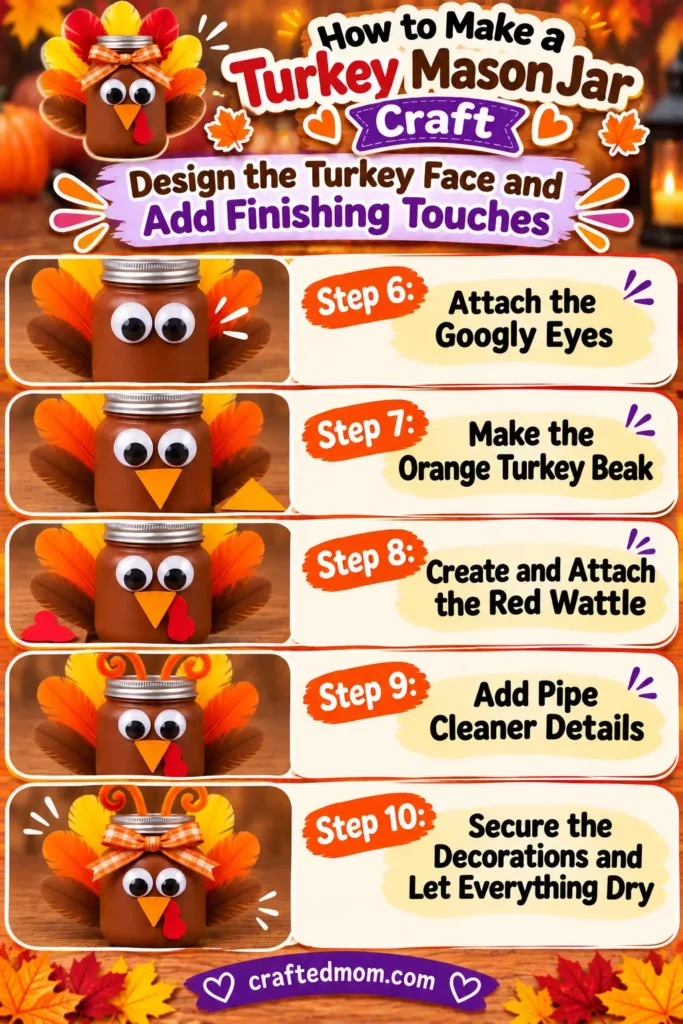
Step 6: Attach the Googly Eyes
Turn the jar back to the front and arrange the eyes without glue first. Leave enough room below them for the beak. Once positioned, glue them in place.
Step 7: Make the Orange Turkey Beak
Draw a small triangle on orange cardstock and cut it out. Hold it below the eyes to check the proportions before attaching it. Adults can pre-cut this for preschoolers.
Step 8: Create and Attach the Red Wattle
Sketch a small curved wattle on the red cardstock. Cut it out and position it beside or just below the beak. Glue it flat so both details remain visible.
Step 9: Add Pipe Cleaner Details
Bend a pipe cleaner into a simple curl or other small accent that suits your turkey. Keep the face clearly visible. Adults should help with any cutting that leaves sharp wire ends.
Step 10: Secure the Decorations and Let Everything Dry
Check the feather bases and cardstock edges for loose sections. Press down gently where needed, then let the jar dry according to your paint and glue labels.
Easy Turkey Mason Jar Craft Tips
Plan the feather arrangement first. A dry layout helps prevent an uneven tail and makes gluing less frustrating, especially with excited younger kids.
Don’t rush the paint. Even when the surface looks dry, it may not be ready to handle. Follow the drying and curing directions for the product you use.
Keep the face simple. Big eyes, one beak, and one wattle are enough. Too many extra details can make the turkey harder to recognize from across the room.
Prepare small shapes for preschoolers. Adults can cut the cardstock while children pick colors, place features, and watch their turkey take shape.
Turkey Mason Jar Craft Variations to Try
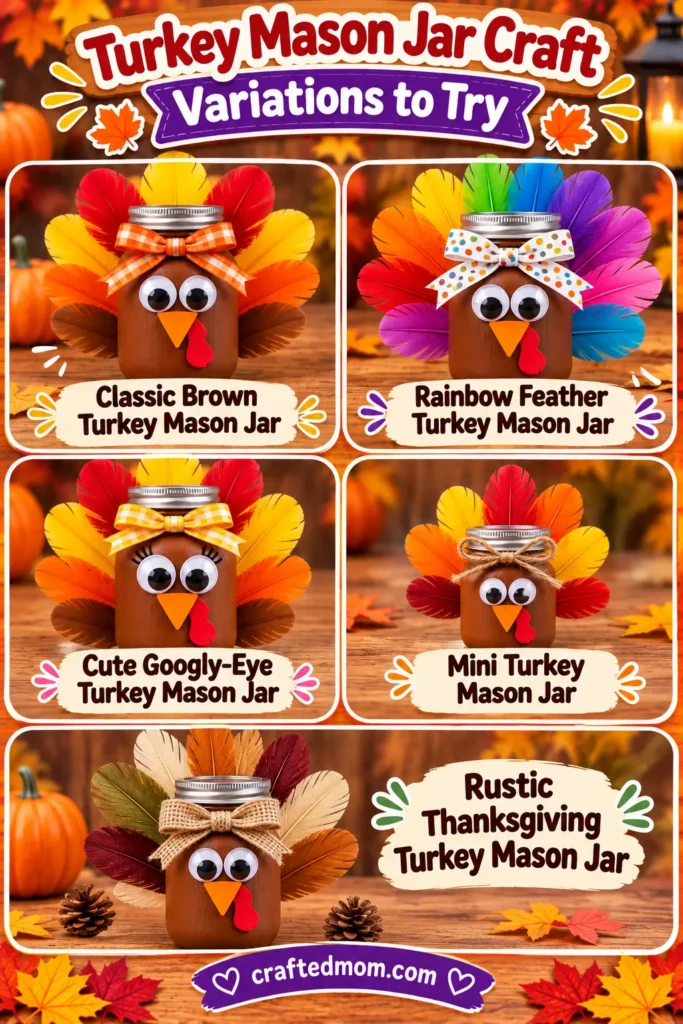
Classic Brown Turkey Mason Jar
Use traditional red, orange, and yellow feathers with the brown body.
Rainbow Feather Turkey Mason Jar
Mix bright feathers in different colors.
Cute Googly-Eye Turkey Mason Jar
Give the turkey a playful expression by changing the angle or spacing of the eyes. Keep the small cardstock beak visible underneath.
Mini Turkey Mason Jar
Choose a smaller plastic jar and adjust the size of the feathers and facial pieces.
Rustic Thanksgiving Turkey Mason Jar
Pick muted feather colors and skip most of the pipe cleaner accents. This creates a quieter look for a fall shelf or tabletop display.
Ways to Decorate With Turkey Mason Jars

Thanksgiving Table Decorations
Use the finished turkey as a decorative accent on a Thanksgiving table. Position it away from serving dishes and anything hot.
Thanksgiving Mantel and Shelf Displays
Set the jar on a sturdy indoor shelf with other fall decorations. Leave space around the feathers.
Classroom Thanksgiving Displays
Arrange finished jars together after the paint and glue have dried. Add each child’s name on a card beside the jar.
Thanksgiving Entryway Decorations
Place the turkey on a stable entryway table where guests can see it.
Turkey Mason Jar Craft Safety Notes
An adult should supervise scissors, paint, adhesives, and small googly eyes. Small parts can be choking hazards for children who still put objects in their mouths. Follow each product’s age guidance and safety directions.
Keep the jar for decoration only unless all materials and contact surfaces are specifically appropriate for another use. Never place an open flame inside or near a jar decorated with feathers, paper, paint, and glue.
More Thanksgiving Turkey Crafts
If your child enjoys turkey characters, try Handprint Turkey Mason Jar Craft for a keepsake with a paper handprint, or Thanksgiving Turkey Slime Jar Craft for a separate slime activity.
For another jar-based project, explore Turkey Mason Jar Candy Craft and Thankful Turkey Mason Jar with Craft Sticks. Both should have their own tutorials rather than repeating this painted turkey design.
Ready to switch materials? Try Turkey Popsicle Stick Craft or Toilet Paper Roll Turkey Craft, then browse the broader Thanksgiving Crafts for Kids pillar. For a related fall project that’s already available on CraftedMom, see Popsicle Stick Pumpkin Craft.
Final Thoughts
This turkey mason jar craft makes a bright Thanksgiving decoration without requiring complicated shapes or construction. Let the feather colors and the funny face reflect the child who made it, then display the finished jar once everything is fully dry.
Frequently Asked Questions
What Kind of Paint Works Best for a Turkey Mason Jar Craft?
Choose acrylic paint labeled for your particular type of plastic. Test a small area first, and follow the manufacturer’s application and drying instructions rather than assuming every craft paint will adhere.
Can I Use a Glass Mason Jar Instead of Plastic?
Yes, but use paint and adhesive suitable for glass and supervise closely. Glass jars can break, so plastic is a more practical choice for many children’s group activities.
How Do You Attach Craft Feathers to a Mason Jar?
Arrange the feathers first, then glue their bases to the back of the jar using adhesive appropriate for the surface. Hold them in place as needed until the glue starts to grip.
