


This scarecrow mason jar craft turns a plain jar into a friendly fall character with straw-like hair, a textured hat, and a smiling face. The raffia gives the scarecrow its messy harvest look, while burlap ribbon and felt make it easy to give the hat some personality.
Kids can help choose the face and arrange the hair while adults handle cutting and glass.
Why You’ll Love This Scarecrow Mason Jar Craft

The jar becomes the body, and simple felt features create the face. Changing the eyes, hat, or hair gives each scarecrow its own expression.
Paint the jars ahead for a classroom group, then let children concentrate on decorating.
Supplies You’ll Need

Materials
- Mason jar: The base of the scarecrow. Choose a jar with enough visible space for a face.
- Acrylic paint: For the painted body. Choose a color and formula appropriate for the jar surface.
- Raffia straw: Creates the scarecrow’s loose, straw-like hair.
- Burlap ribbon: Adds texture to the hat and its brim.
- Felt sheets: For the nose, hat structure, smile, and optional details.
- Googly eyes: Give the scarecrow its expression.
- Tacky glue: For assembling decorations; check that your choice bonds the jar, raffia, and fabric.
Tools
- Paintbrush: For painting the jar.
- Scissors: For trimming felt, burlap ribbon, and raffia, with adult help when needed.
- Pencil: For sketching the nose, mouth, and hat shapes before cutting.
Cut fabric to fit your jar; no measurements were provided.
Before You Start: Prepare the Mason Jar
Remove labels, clean and dry the jar, and choose the front. Turn raised lettering toward the back if possible.
Check paint compatibility and protect your table. If the lid should open, keep paint, glue, and fabric away from the threads. Lay out the felt and burlap before starting so you can compare colors and check that the hat won’t cover too much of the painted body.
How to Make a Scarecrow Mason Jar Craft
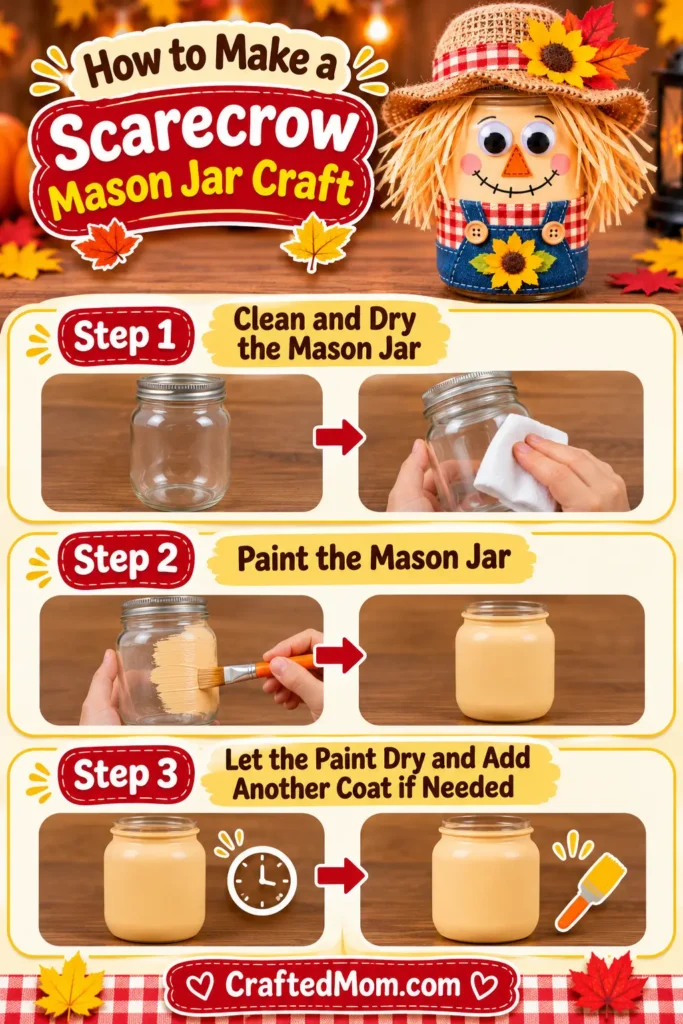
Step 1: Clean and Dry the Mason Jar
Wipe away residue and moisture. Set the jar upright, choosing the side for the face. An adult should handle glass.
Step 2: Paint the Mason Jar
Paint the outside with light strokes, avoiding thick patches around raised details. Keep paint off the rim and inside.
Step 3: Let the Paint Dry and Add Another Coat if Needed
Let the paint dry as directed. Add another thin coat if needed, and don’t attach decorations to a tacky surface.
Make the Scarecrow Face
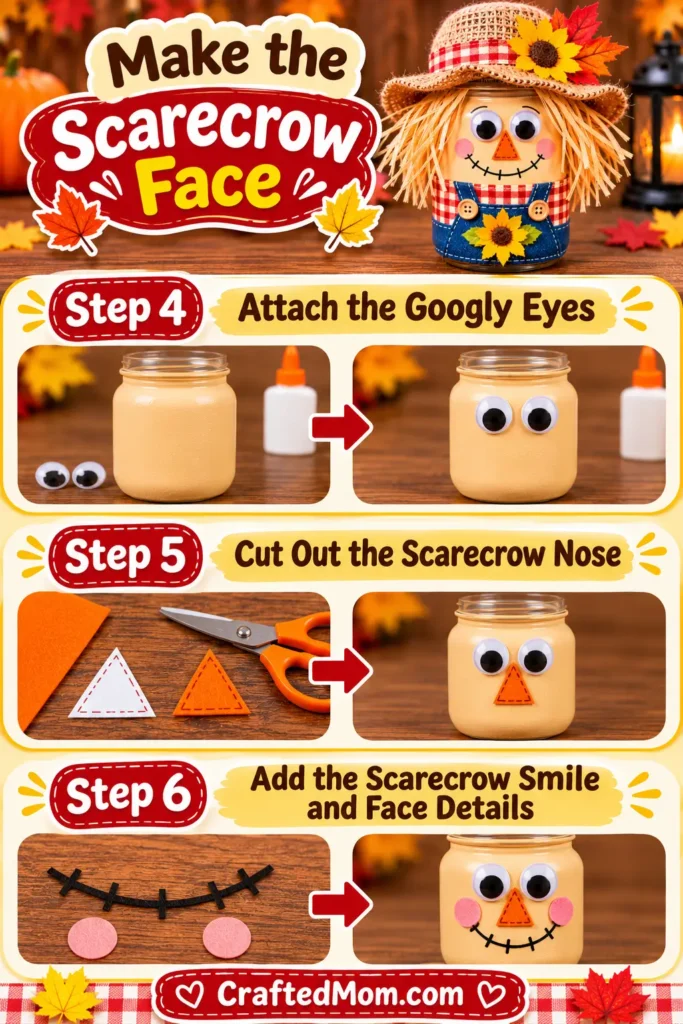
Step 4: Attach the Googly Eyes
Place the eyes on the front, leaving room below for the nose and smile. When the spacing looks right, attach them with compatible glue.
Step 5: Cut Out the Scarecrow Nose
Sketch and cut a triangular or rounded felt nose. Check its position below the eyes, then glue it on. Adults can pre-cut shapes for preschoolers. A larger triangle is easier for small hands to handle, but it shouldn’t reach all the way down to the smile.
Step 6: Add the Scarecrow Smile and Face Details
Curve a narrow felt strip into a smile beneath the nose, then glue it in place. Keep the face visible beneath the hair and hat.
Add the Hair, Hat, and Finishing Touches
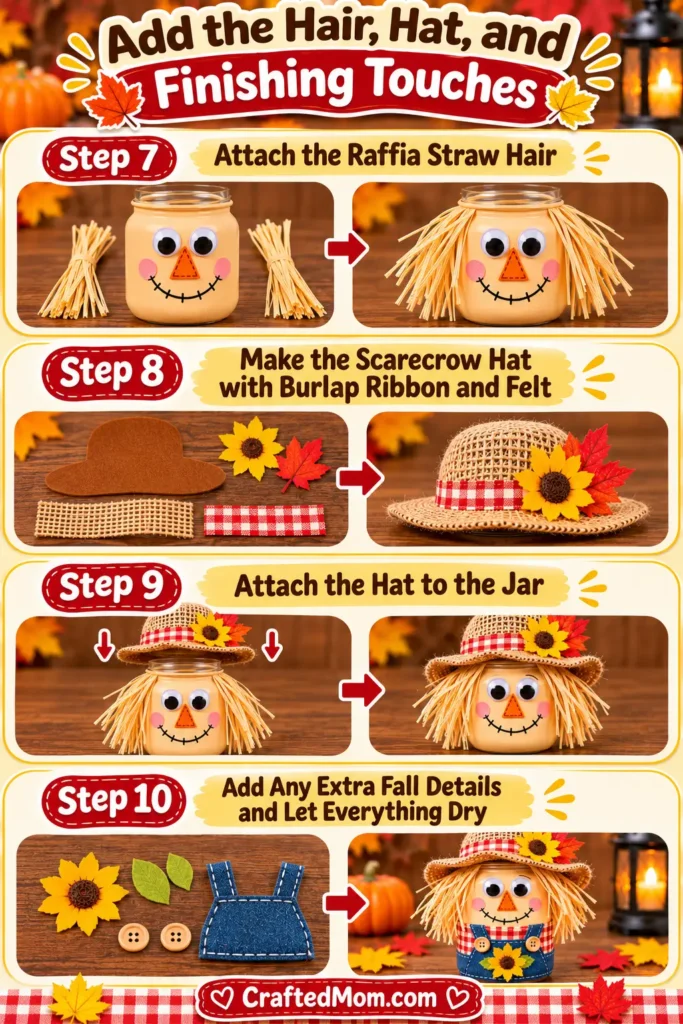
Step 7: Attach the Raffia Straw Hair
Hold raffia against each side to judge length. Trim if needed, then glue the upper ends near the top, away from the face and lid threads. Support the hair while it grips.
If some strands stick out, decide whether they add character before trimming them. Uneven hair is part of the scarecrow’s look, but strands shouldn’t cover the eyes or fall into the glue below the face.
Step 8: Make the Scarecrow Hat with Burlap Ribbon and Felt
Shape a felt hat base and lay burlap ribbon across it for a textured brim or band. Check the fit against your jar and trim gradually, leaving the eyes visible.
You can cut a broader felt piece for a soft brim and use a narrower strip of burlap across the front. Before attaching anything, hold the pieces together to see whether they will stay in place without collapsing over the face.
Step 9: Attach the Hat to the Jar
Place the hat above the face, covering the raffia attachment points if possible. Glue it securely without blocking the lid threads if the jar needs to open.
Step 10: Add Any Extra Fall Details and Let Everything Dry
Check for loose pieces, add a small felt accent if desired, and let everything dry before handling.
Easy Scarecrow Mason Jar Craft Tips

Test the surface. Check that your paint and adhesive grip the jar before decorating it.
Arrange the raffia first. Small bundles are easier to secure than one heavy clump. If the hair slips, pause and let the adhesive develop its initial hold rather than repeatedly adding more glue. For a group activity, prepare bundles ahead so everyone has a manageable amount to work with.
Cut the hat generously. Trim it gradually to cover the hair attachments without hiding the eyes.
Keep the face clear. Move the hat higher or trim raffia if the eyes are hidden. Give younger kids larger felt pieces.
Scarecrow Mason Jar Craft Variations to Try
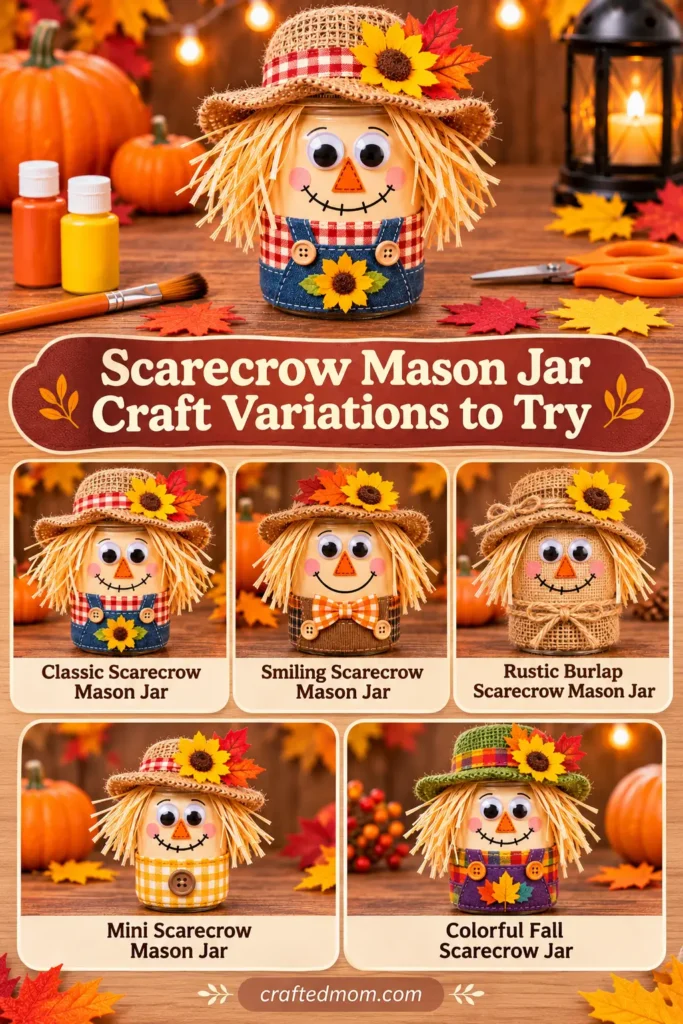
Classic Scarecrow Mason Jar
Choose a simple painted body, a triangular felt nose, a smile, and natural raffia hair. Use the burlap mainly around the hat for a familiar harvest character.
Smiling Scarecrow Mason Jar
Make the expression the main feature. Try a wider curved felt smile and a slight tilt to the eyes, while keeping the hat and hair fairly simple.
Rustic Burlap Scarecrow Mason Jar
Use a wider visible section of burlap ribbon on the hat and keep the other colors muted. The rough weave brings texture without needing many extra decorations.
Choose a hat shape that looks balanced on the jar rather than adding extra accessories for the sake of filling space.
Mini Scarecrow Mason Jar
Make the same character on a smaller jar. Shorten the raffia and scale down the hat and face so they don’t overwhelm the body.
Colorful Fall Scarecrow Jar
Choose brighter felt for the nose or hat accent. Orange, red, and yellow details can help it fit into a cheerful classroom fall display.
Ways to Decorate With Scarecrow Mason Jars
Fall Table Decorations
Set a dried scarecrow on the fall table, away from food, spills, and heat. Group different expressions together.
Autumn Mantel and Shelf Displays
Display on a stable indoor shelf, leaving space for the hair and hat. Avoid candles and heat.
Classroom Fall Craft Displays
Group dry jars with name cards beside them rather than writing on painted surfaces.
Front Porch Fall Decorations
Display on a covered porch only in dry conditions; bring it inside to protect the fabric and glue. A decorated indoor craft jar is not automatically weather-resistant, even when the jar itself is glass. Wind can also catch the loose raffia hair and move the lightweight hat.
Scarecrow Mason Jar Craft Safety Notes
Supervise glass, scissors, paint, glue, and small googly eyes. Keep small pieces away from children who may put them in their mouths, and follow product age guidance.
Raffia and burlap are combustible. Never place an open flame inside or next to the decorated jar. Keep the finished craft away from hot surfaces and don’t treat it as a food container.
Can Preschoolers Make This Scarecrow Mason Jar Craft?
Yes, with close supervision. Adults can prepaint jars, cut felt pieces, and prepare raffia. Preschoolers can choose the face and hat colors.
Use individual supply trays for groups. A compatible plastic jar may be preferable where breakage is a concern.
More Fall Mason Jar Crafts
Try Acorn Mason Jar Craft, Corn Husk Doll Mason Jar Craft, or Thanksgiving Owl Mason Jar Craft. For turkey themes, explore Turkey Mason Jar Craft, Handprint Turkey Mason Jar Craft, and Thanksgiving Crafts for Kids.
For a different mason jar character already published on CraftedMom, see Witch Mason Jar Craft. The site’s Halloween Mason Jar Crafts collection also offers more decorated-jar inspiration.
Final Thoughts
Raffia hair and a burlap hat give this painted scarecrow its harvest character. Once dry, display it alongside Acorn Mason Jar Craft.
Frequently Asked Questions
What Kind of Paint Works Best for a Scarecrow Mason Jar Craft?
Choose acrylic paint labeled for your jar material, and follow its application and drying directions.
How Do You Attach Raffia Straw to a Mason Jar?
Glue raffia bundles near the top with an adhesive suited to the materials. Avoid the lid threads and let the glue dry.
Can I Use a Plastic Jar Instead of Glass?
Yes, provided the paint and glue suit the plastic. Small parts still require supervision.
How Long Does a Scarecrow Mason Jar Take to Dry?
Drying varies by paint, glue, and conditions. Follow product instructions rather than assuming a fixed time.
