


A corn husk doll mason jar craft gives an ordinary jar the look of a little harvest doll, complete with raffia hair, paper clothing, colorful ribbons, and a painted smile. It’s suited to fall crafts at home or school.
This particular version uses raffia to suggest corn-husk hair, not actual dried corn husks. Children can help choose the outfit and ribbons while adults handle glass and cutting.
Why You’ll Love This Corn Husk Doll Mason Jar Craft

The details are simple, but they leave plenty of room for personality. Long raffia strands create messy harvest-inspired hair, while colored paper makes it easy to give every doll a different outfit. Ribbons finish the outfit.
The activity also works in stages. Paint the jar first, then add the hair, clothing, and face after the surface is dry. This helps with group projects.
Supplies You’ll Need
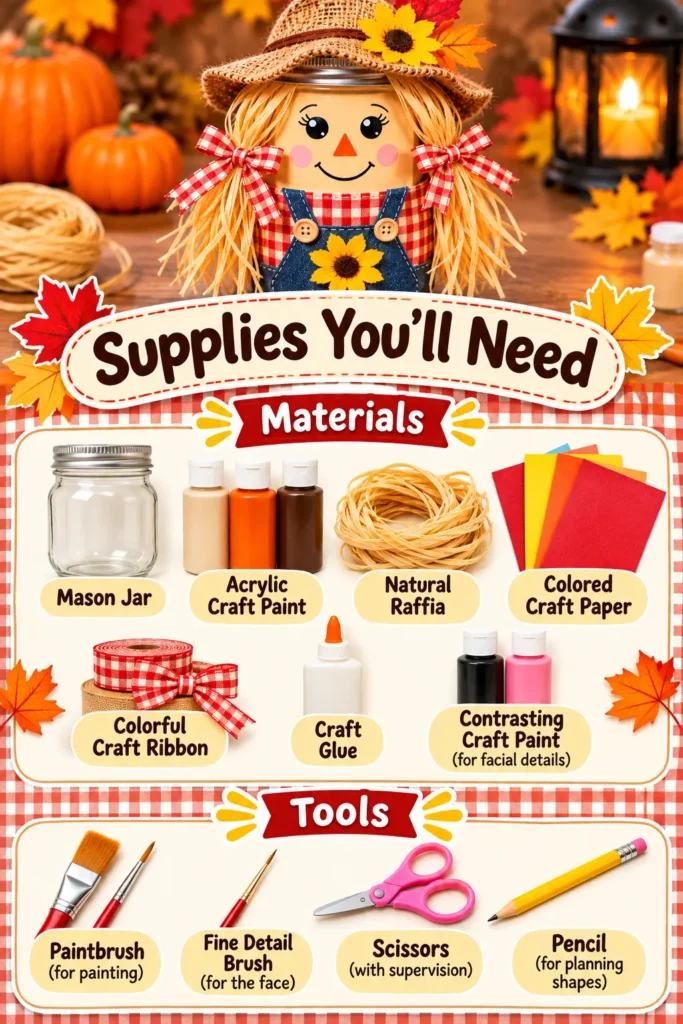
Materials
- Mason jar: The base of the doll. Choose a shape with enough space for the paper outfit and face.
- Acrylic craft paint: For the doll’s painted body; confirm compatibility with your jar.
- Natural raffia: For the loose, straw-like hair.
- Colored craft paper: For cutting the doll’s paper clothing.
- Colorful craft ribbon: For bows and outfit accents.
- Craft glue: For attaching hair, paper, and ribbon. Select adhesive suitable for the materials.
- Contrasting craft paint: For the smiling facial details, if your body color needs a darker shade.
Tools
- Paintbrush: For painting the jar.
- Fine detail brush: For painting the face.
- Scissors: For cutting the paper, ribbons, and raffia, with supervision.
- Pencil: For planning clothing shapes before cutting.
Cut the paper and raffia to suit the size of your jar.
Before You Start: Prepare the Mason Jar
Remove any labels and adhesive residue from the jar. Clean the outside and let it dry fully, paying attention to the lower edge and any raised lettering. Protect the table.
Decide which side will be the doll’s front. Leave room for the face and check the lid before attaching hair. If you want the lid to remain removable, keep glue and raffia away from its threads.
How to Make a Corn Husk Doll Mason Jar Craft
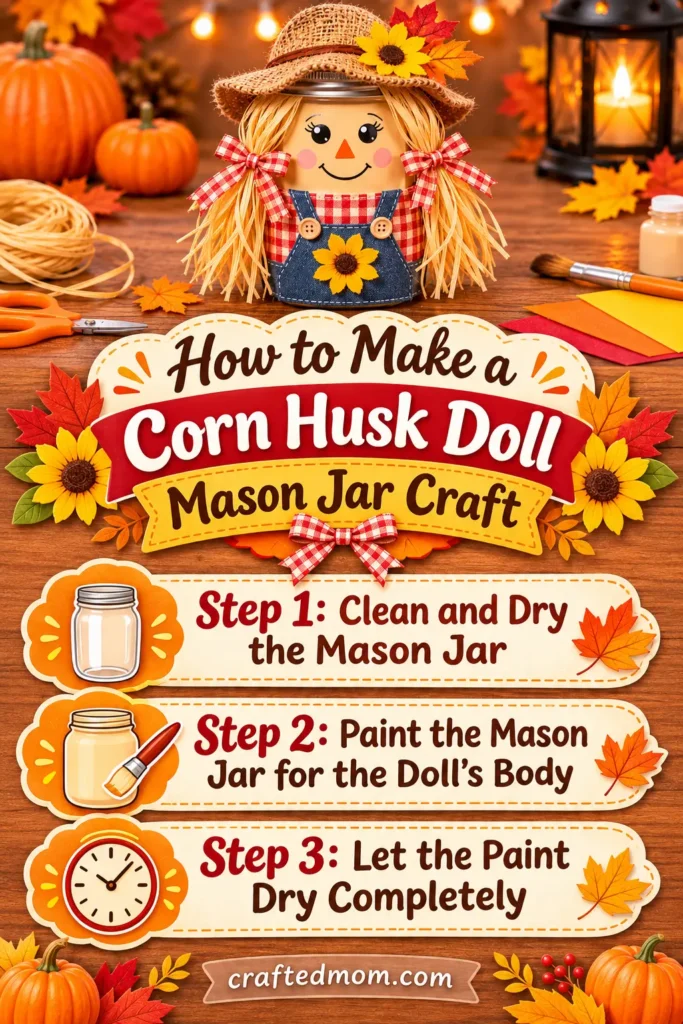
Step 1: Clean and Dry the Mason Jar
Give the outside one final check for dust or moisture. Stand it upright to paint. If you’re using glass, an adult should handle the jar when moving it.
Step 2: Paint the Mason Jar for the Doll’s Body
Brush acrylic paint onto the outside of the jar, working around the curves in light, even strokes. Choose a shade that complements the outfit. Keep paint away from the rim and inside the jar.
Step 3: Let the Paint Dry Completely
Follow the paint manufacturer’s drying directions before touching the surface. If coverage looks patchy, apply another thin coat after the first has dried. Wet paint can wrinkle paper clothing.
Make the Corn Husk Doll’s Hair and Clothing
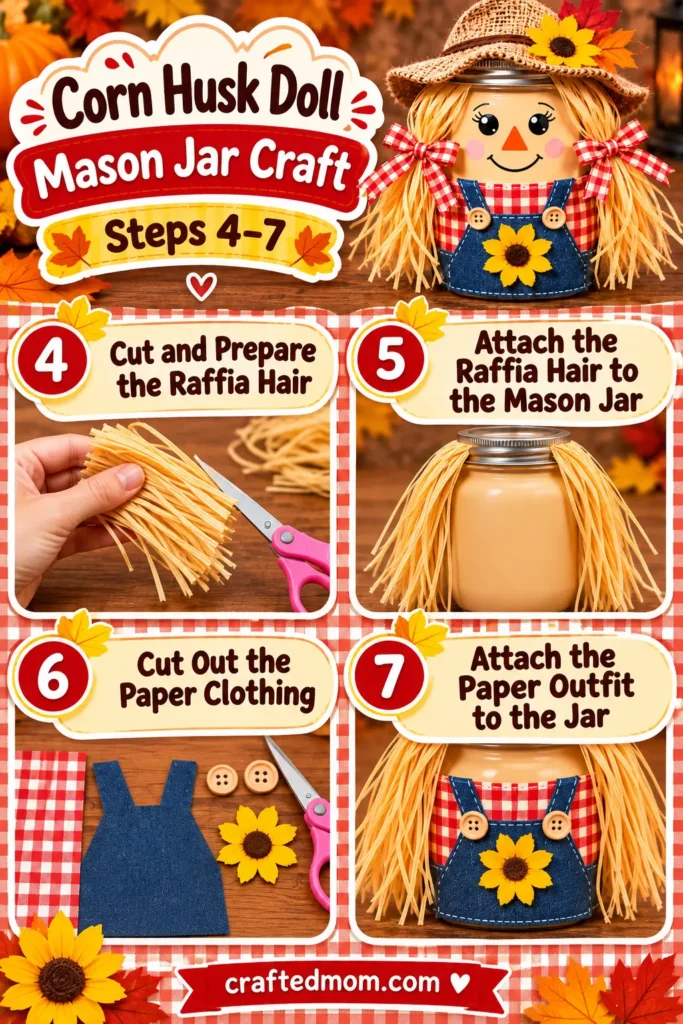
Step 4: Cut and Prepare the Raffia Hair
Gather several lengths of raffia and hold them against the jar to judge the look. Trim strands to the length you prefer. Separate tangles gently.
Step 5: Attach the Raffia Hair to the Mason Jar
Arrange the raffia near the top of the jar, with strands falling toward the sides or back. Use a suitable craft glue to secure the attachment points without covering the face area. Hold the hair in place as directed by your adhesive. Keep the lid threads clear.
Step 6: Cut Out the Doll’s Paper Clothing
Lay colored paper on the table and sketch clothing shapes that fit the front of the jar. A simple dress or tunic is easier to attach than lots of tiny pieces. Check the cutout against the jar before gluing.
Step 7: Attach the Paper Outfit to the Jar
Position the clothing on the front of the dry painted jar. Apply glue sparingly, starting with the main piece and pressing gently along the edges. Smooth the paper around the curve. Let it hold before adding ribbon details.
Design the Doll’s Face and Add Finishing Touches
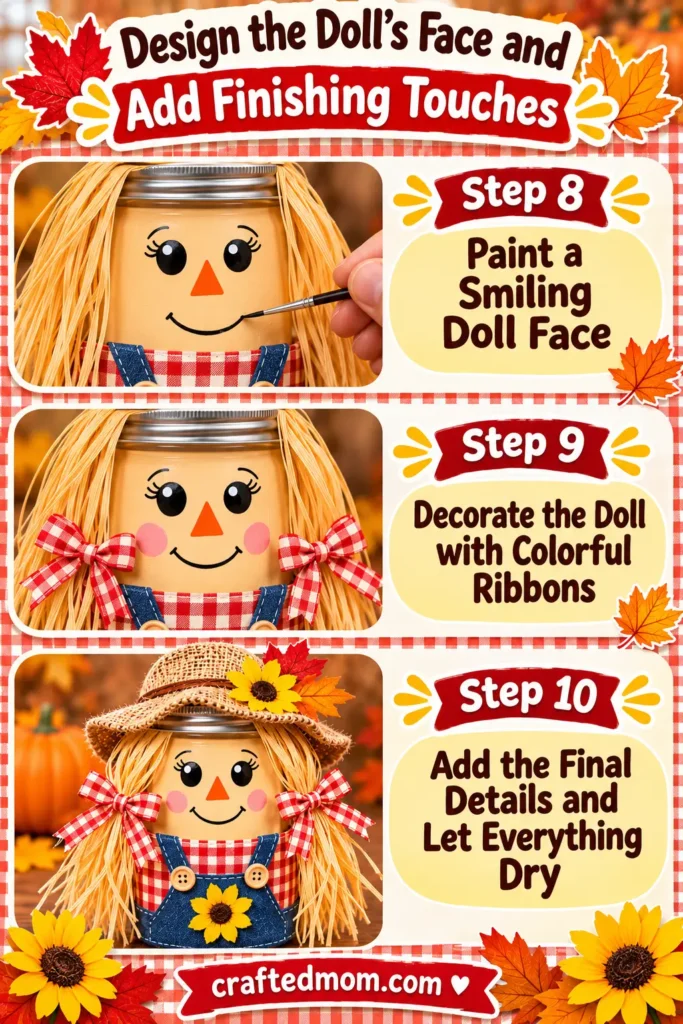
Step 8: Paint a Smiling Doll Face
Use a fine brush and contrasting paint to add a simple smile to the clear space above the outfit. Start with a small curved line; extra facial details are optional. Practice the curve on scrap paper first.
Step 9: Decorate the Doll with Colorful Ribbons
Choose ribbon that works with the paper outfit. Tie a small bow, wrap a ribbon around the dress, or add a hair accent. Don’t cover the painted smile.
Step 10: Add the Final Details and Let Everything Dry
Check for lifting paper corners, stray raffia, or loose ribbon ends. Secure them with the adhesive appropriate for each material, then leave the doll undisturbed until everything is dry. Lift it by the jar.
Easy Corn Husk Doll Mason Jar Craft Tips
Prepare the jar ahead of time. Adults can prepaint jars for group crafting.
Test the adhesive. Check glue compatibility with paper, raffia, and the jar.
Avoid an oversized paper outfit. Start with a shape slightly smaller than the visible front, then adjust it before gluing.
Keep raffia out of the face area. Position the hair first, then check where the smile will go. Secure slipping strands at their bases.
Corn Husk Doll Mason Jar Craft Variations to Try
Classic Harvest Doll Mason Jar
Choose natural raffia hair, a simple warm-colored paper dress, and a small ribbon accent. Keep it simple.
Rustic Farmhouse Corn Husk Doll Jar
Use neutral clothing colors and a subdued ribbon. Let the raffia provide texture.
Colorful Ribbon Corn Husk Doll
Pick two or three bright ribbons and use them for the doll’s waist, hair, or outfit trim. Leave the outfit visible.
Mini Corn Husk Doll Mason Jar
Use a smaller jar and scale down the paper outfit and raffia lengths. Keep the smile easy to paint.
Thanksgiving Harvest Doll Mason Jar
Choose autumn-inspired colors for the clothing and ribbons so the doll fits into a Thanksgiving table or classroom harvest display.
Ways to Decorate With Corn Husk Doll Mason Jars
Fall Table Decorations
Place a finished doll on a dry tabletop as a handmade autumn accent. Keep it away from serving dishes and hot food.
Thanksgiving Table Centerpieces
Arrange a few dolls with different ribbon colors together. Leave room around the raffia hair.
Autumn Mantel and Shelf Displays
Set the doll on a stable indoor shelf. Keep it away from heat.
Classroom Harvest Craft Displays
Display the completed jars with name cards beside them. Wait until crafts are dry before moving them.
Farmhouse Fall Decorations
For a quieter seasonal look, place the doll beside other simple harvest decorations. Natural raffia suits a rustic display.
Corn Husk Doll Mason Jar Craft Safety Notes
Adults should supervise scissors, glass jars, paint, and adhesives. Small ribbon pieces and other loose decorations should stay away from children who may put them in their mouths. Follow the product labels and age guidance.
This jar is for decoration, not a candleholder or food container. Paper, raffia, and ribbon are combustible, so never use an open flame inside or near the finished craft.
Can Preschoolers Make This Corn Husk Doll Craft?
Preschoolers can help choose paper colors, arrange pre-cut clothes, and select ribbons with close adult supervision. An adult should handle the jar, prepare difficult pieces, and manage painting or gluing that needs more control.
For a group, put the clothing shapes and raffia into small sets before the activity. Let children choose the outfit and expression.
More Fall Mason Jar Crafts
If you’d like another character made from a jar, explore Scarecrow Mason Jar Craft and Acorn Mason Jar Craft. For Thanksgiving, try Turkey Mason Jar Craft or Thanksgiving Owl Mason Jar Craft. Each has its own tutorial.
You can also browse Thanksgiving Crafts for Kids for more seasonal activities. For a fall project using a different material, see Popsicle Stick Pumpkin Craft.
Final Thoughts
The raffia hair and handmade paper outfit give this mason jar doll its distinctive harvest look. Display it once dry. Try new colors next time.
Frequently Asked Questions
What Materials Do You Need for a Corn Husk Doll Mason Jar Craft?
You need a mason jar, suitable paint, raffia for hair, paper for clothing, colorful ribbons, and adhesive compatible with the materials. You’ll also need basic tools.
Can I Use Raffia Instead of Real Corn Husks?
Yes. This specific design uses raffia to create straw-like doll hair. It’s a harvest-inspired jar doll, not a traditional corn-husk doll.
How Do You Attach Raffia Hair to a Mason Jar?
Arrange the strands near the top and secure the attachment points with glue suitable for your jar and raffia. Keep hair out of the face area and let the adhesive dry before moving the doll.
What Kind of Paper Works Best for the Doll’s Clothing?
Use paper that is sturdy enough to hold its shape when attached to the curved jar. Check how your chosen paper reacts to glue before decorating the full jar.
