

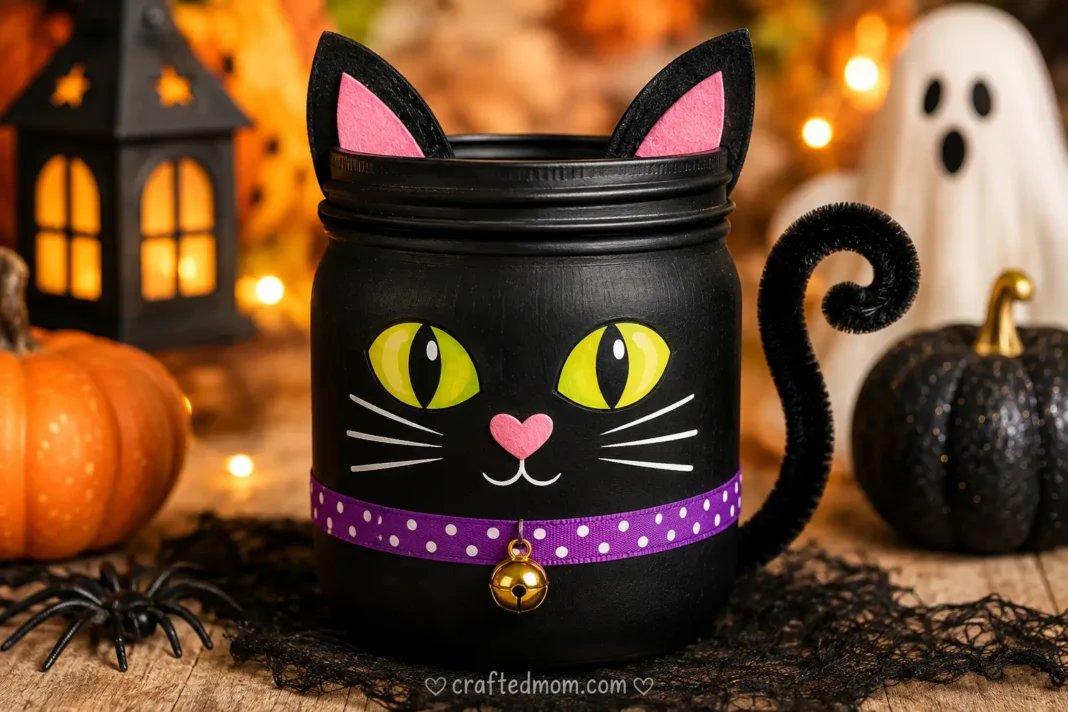
This black cat mason jar craft turns a simple glass jar into a cute Halloween cat with a dark painted body, bright eyes, pointed ears, a tiny nose, and whiskers. You can keep the design simple or dress your cat up with a colorful collar, curled tail, bow, or little witch hat.
What I especially like about this idea is that it works as an actual Halloween decoration rather than just a craft you tuck away afterward. Place your finished mason jar black cat on a mantel, shelf, entryway table, or Halloween party display. You can even add battery-powered fairy lights or a flameless LED tealight for a soft glow. The planned design specifically centers on the dark jar, bright yellow or green eyes, ears, whiskers, and an optional tail so it stays visually distinct from the other Halloween mason jar characters.
Why You’ll Love This Black Cat Mason Jar Craft
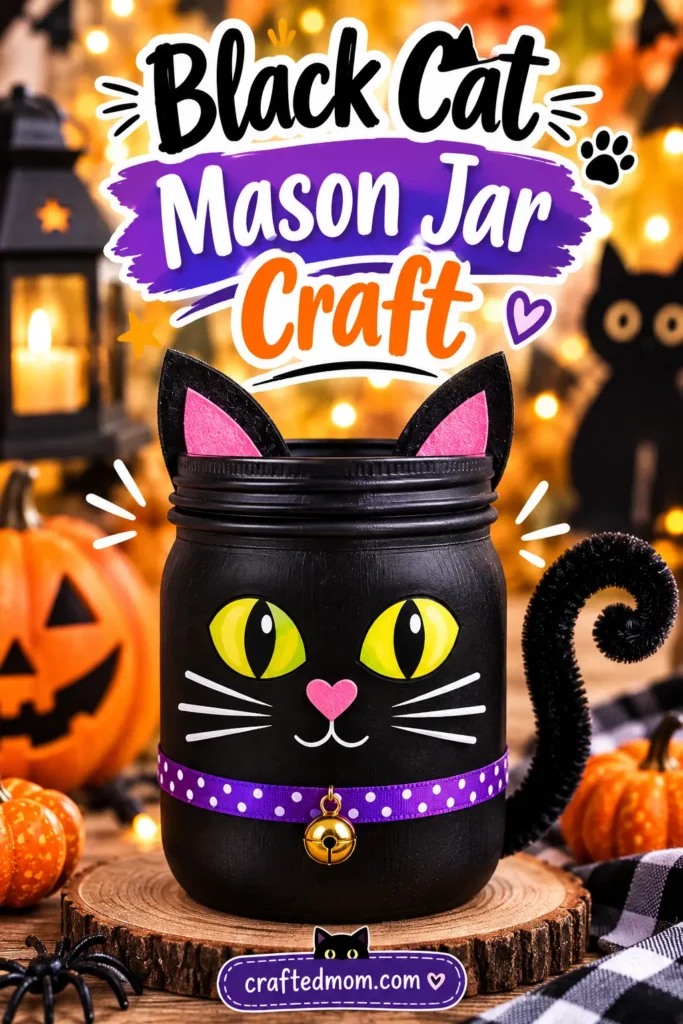
A black cat is such an easy character to recognize with only a few details. Once you have the black jar, the ears, eyes, nose, and whiskers do most of the work.
This Halloween mason jar craft is also easy to personalize. You can make your cat sweet and sleepy, wide-eyed and curious, or give it those classic bright Halloween eyes with narrow pupils.
A few reasons this project works especially well:
- It uses a simple mason jar as the base.
- You can make several cats with different expressions.
- The colors are easy to coordinate with other Halloween décor.
- A collar, bow, tail, or witch hat can completely change the personality.
- It works nicely beside pumpkins, witches, ghosts, and other Halloween characters.
- It can become a decorative luminary with flameless lighting.
- You can remove the Halloween accessories later and keep it as a simple black cat decoration.
Supplies You’ll Need
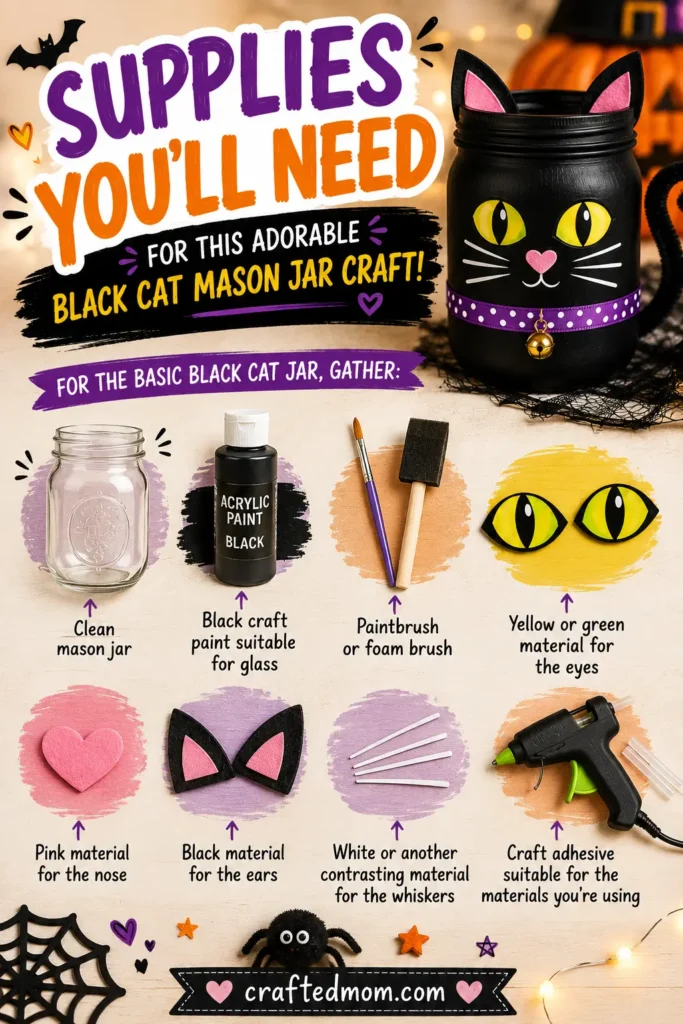
For the basic black cat jar, gather:
- Clean mason jar
- Black craft paint suitable for glass
- Paintbrush or foam brush
- Yellow or green material for the eyes
- Pink material for the nose
- Black material for the ears
- White or another contrasting material for the whiskers
- Craft adhesive suitable for the materials you’re using
Optional decorating supplies include:
- Googly eyes
- Yellow or green adhesive vinyl
- Black cardstock
- Pink cardstock
- Craft foam
- Black felt
- Pipe cleaners
- Yarn
- Ribbon
- Small decorative bell
- Halloween stickers
- Battery-operated fairy lights
- Flameless LED tealight
- Small witch hat
The exact paint and adhesive matter because different products are designed for different surfaces and drying or curing conditions. Use products suitable for your chosen materials and follow their manufacturer’s instructions rather than assuming one drying time or number of paint coats. This is also specifically required by the project plan because no particular tested paint or adhesive has been supplied.
Before You Start: Prepare the Mason Jar
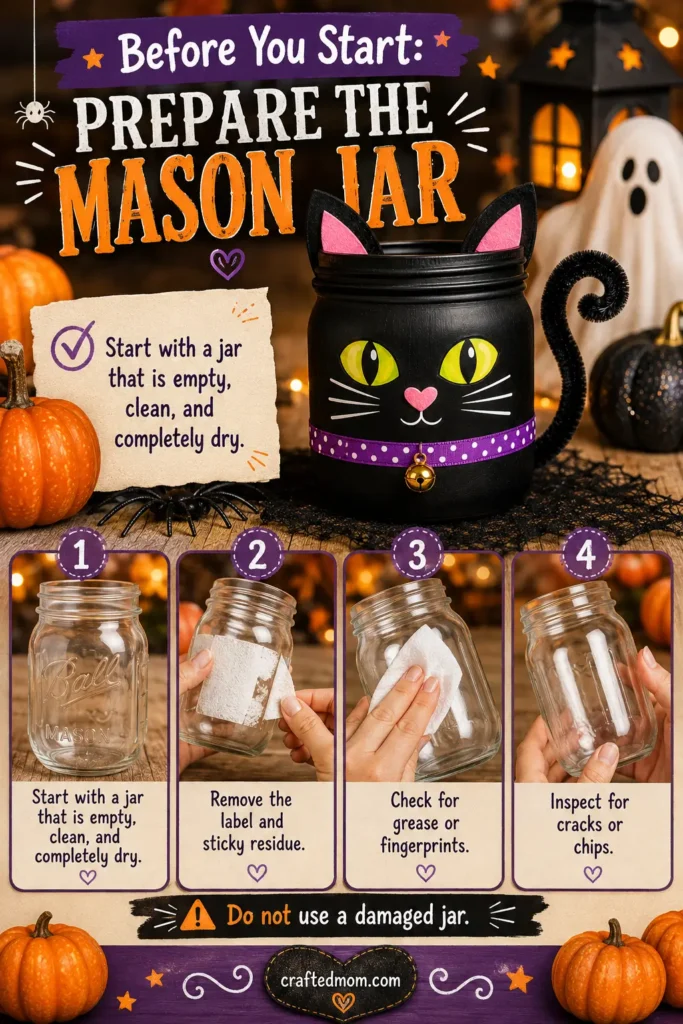
Start with a jar that is empty, clean, and completely dry.
Remove the label and any sticky residue left behind. Check the outside for grease or fingerprints too, especially where you’ll be painting.
Inspect the jar carefully for cracks or chips before using it. Because this project involves glass, don’t use a damaged jar for crafting.
How to Make a Black Cat Mason Jar Craft
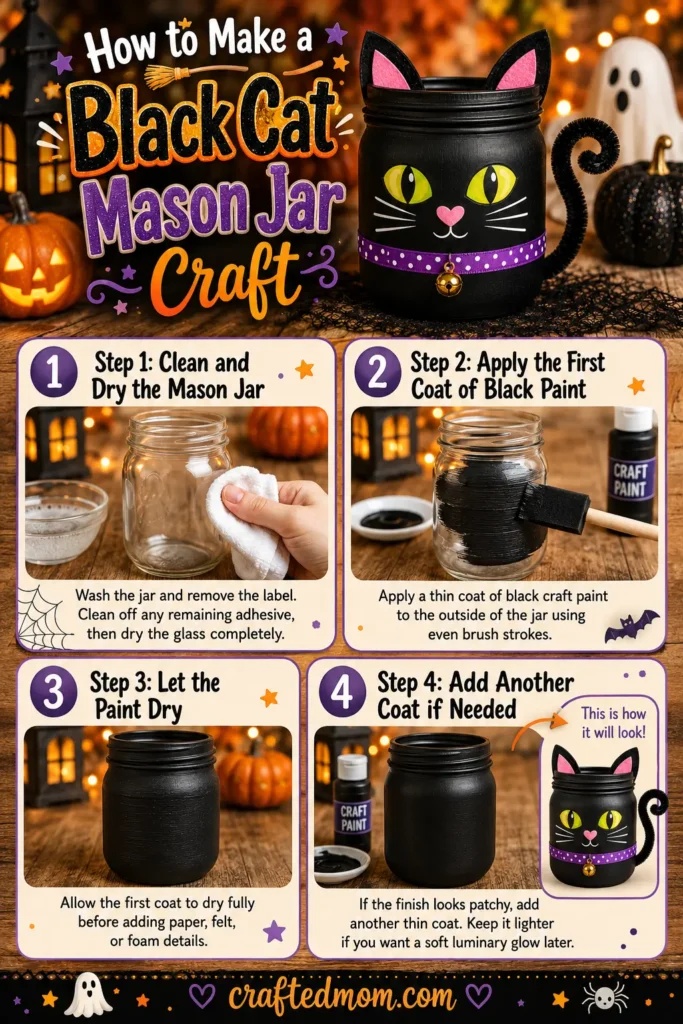
Step 1: Clean and Dry the Mason Jar
Wash the jar and remove the label.
Clean off any remaining adhesive, then dry the glass completely. Paint will be much easier to work with on a clean surface.
Step 2: Apply the First Coat of Black Paint
Apply a thin coat of black craft paint to the outside of the jar.
Work your way around the glass using relatively even brush strokes. Avoid loading on a very thick layer all at once.
Step 3: Let the Paint Dry
Allow the first coat to dry according to the directions for the paint you’re using.
Don’t attach cardstock, felt, foam, or other details while the surface is still tacky.
Step 4: Add Another Coat if Needed
Look at the dried finish from several angles.
If the glass still looks patchy or more transparent than you want, apply another thin coat. Continue only with the number of coats actually required for the paint and finish you’re using.
If you’re planning to add lights inside the jar, remember that a very opaque black finish can block most of the light. Decide whether you want a solid black cat or a slightly more translucent luminary effect before adding unnecessary extra paint.
Make the Black Cat Ears
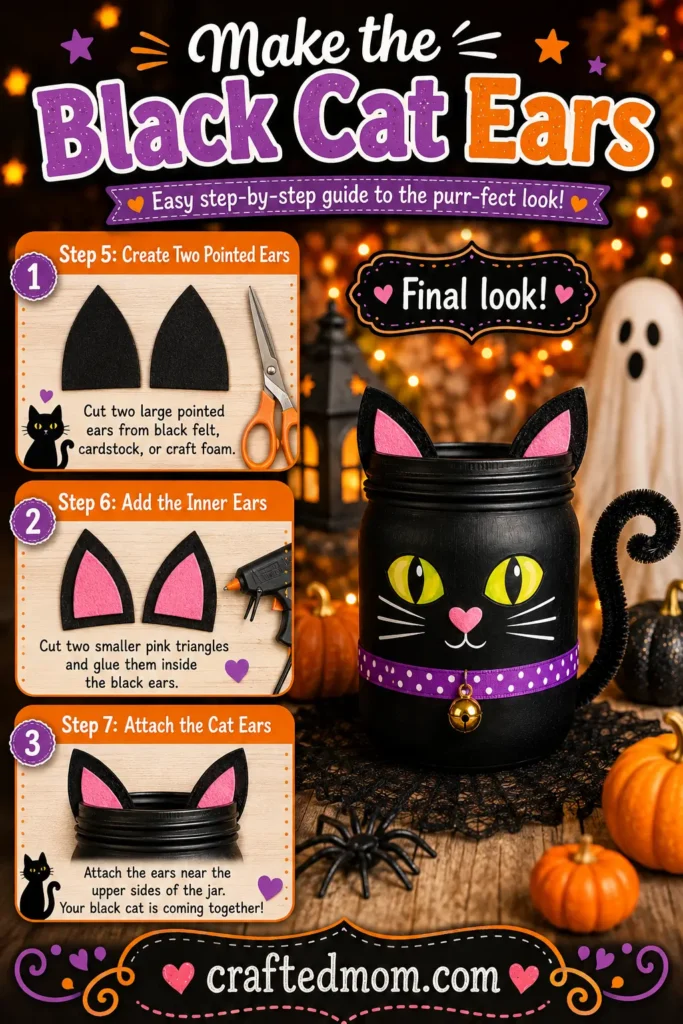
Step 5: Create Two Pointed Ears
Cut two triangular ears from black cardstock, black felt, craft foam, or another material that will hold its shape.
Keep the ears large enough that they’re clearly visible above or beside the top of the jar.
Step 6: Add the Inner Ears
For a little more detail, cut two smaller pink triangles.
Attach one pink triangle inside each black ear.
This part is optional, but the contrasting center makes the ears easier to read visually.
Step 7: Attach the Cat Ears
Position one ear near each upper side of the jar.
Before gluing, look at the cat from the front and check that both ears are visible. Once you’re happy with the placement, attach them using an adhesive appropriate for your materials.
Design the Black Cat Face
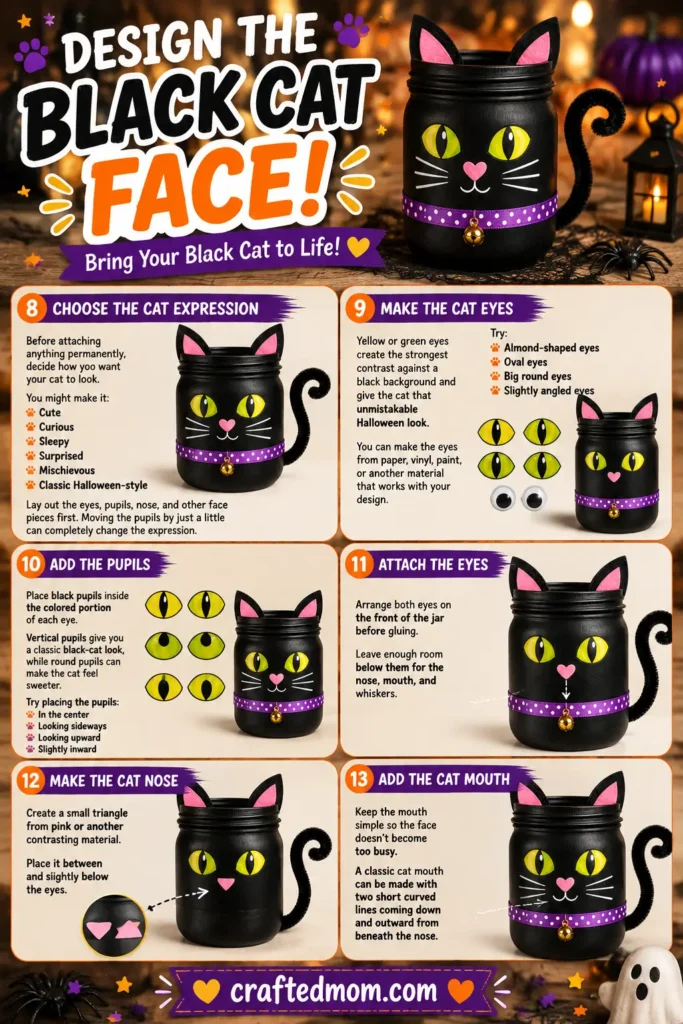
This is where your black cat jar craft starts developing its own personality.
Step 8: Choose the Cat Expression
Before attaching anything permanently, decide how you want your cat to look.
You might make it:
- Cute
- Curious
- Sleepy
- Surprised
- Mischievous
- Classic Halloween-style
Lay out the eyes, pupils, nose, and other face pieces first. Moving the pupils by just a little can completely change the expression.
Step 9: Make the Cat Eyes
Yellow or green eyes create the strongest contrast against a black background and give the cat that unmistakable Halloween look.
You can make the eyes from paper, vinyl, paint, or another material that works with your design.
Try:
- Almond-shaped eyes
- Oval eyes
- Big round eyes
- Slightly angled eyes
For a more playful version, large googly eyes are another option.
Step 10: Add the Pupils
Place black pupils inside the colored portion of each eye.
Vertical pupils give you a classic black-cat look, while round pupils can make the cat feel sweeter.
Try placing the pupils:
- In the center
- Looking sideways
- Looking upward
- Slightly inward
Step 11: Attach the Eyes
Arrange both eyes on the front of the jar before gluing.
Leave enough room below them for the nose, mouth, and whiskers.
Step 12: Make the Cat Nose
Create a small triangle from pink or another contrasting material.
Place it between and slightly below the eyes.
Step 13: Add the Cat Mouth
Keep the mouth simple so the face doesn’t become too busy.
A classic cat mouth can be made with two short curved lines coming down and outward from beneath the nose.
Add the Cat Whiskers
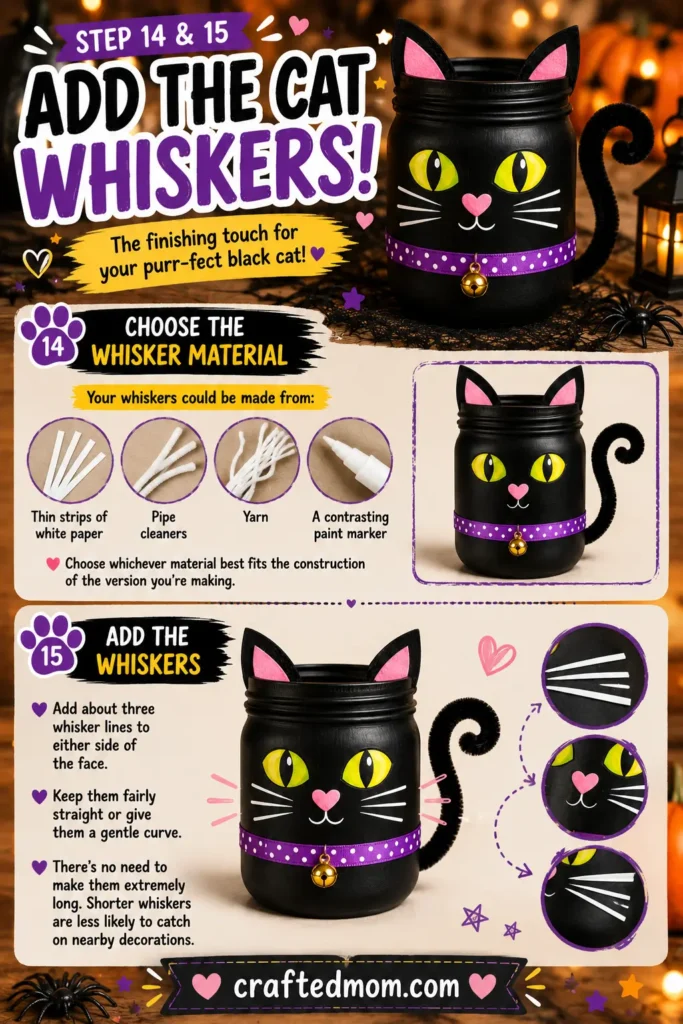
Step 14: Choose the Whisker Material
Your whiskers could be made from:
- Thin strips of white paper
- Pipe cleaners
- Yarn
- A contrasting paint marker
Choose whichever material best fits the construction of the version you’re making.
Step 15: Add the Whiskers
Add about three whisker lines to either side of the face.
Keep them fairly straight or give them a gentle curve. There’s no need to make them extremely long. Shorter whiskers are less likely to catch on nearby decorations.
Add the Tail and Accessories
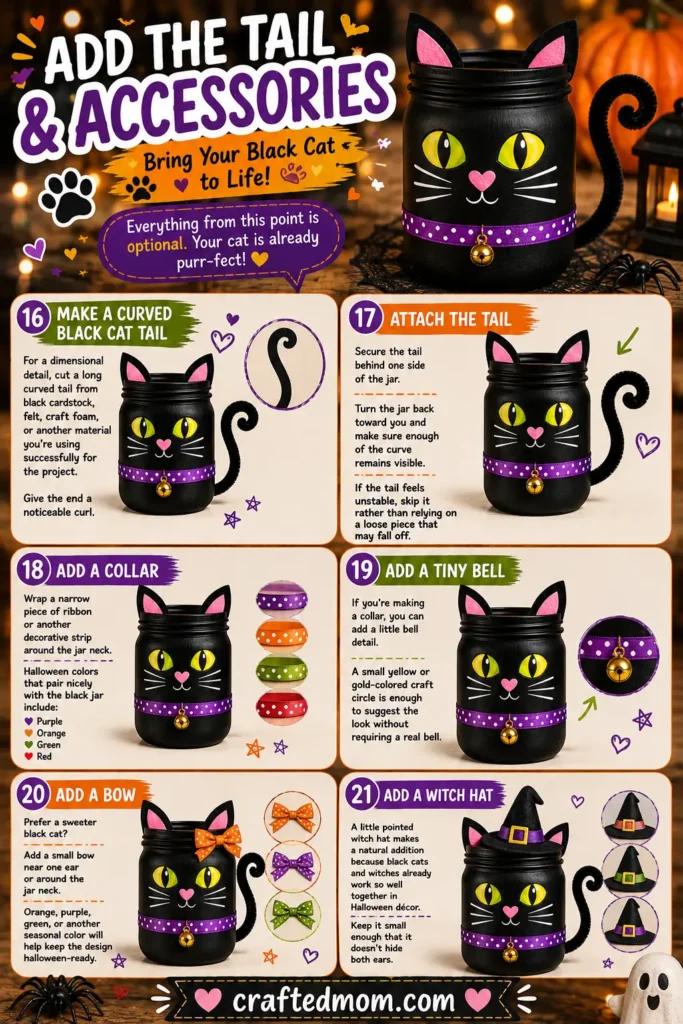
Everything from this point is optional. The cat should already be recognizable from the ears, eyes, nose, and whiskers alone.
Step 16: Make a Curved Black Cat Tail
For a dimensional detail, cut a long curved tail from black cardstock, felt, craft foam, or another material you’re using successfully for the project.
Give the end a noticeable curl.
Step 17: Attach the Tail
Secure the tail behind one side of the jar.
Turn the jar back toward you and make sure enough of the curve remains visible from the front or side.
If the tail feels unstable, skip it rather than relying on a loose piece that may fall off.
Step 18: Add a Collar
Wrap a narrow piece of ribbon or another decorative strip around the jar neck.
Halloween colors that pair nicely with the black jar include:
- Purple
- Orange
- Green
- Red
Step 19: Add a Tiny Bell
If you’re making a collar, you can add a little bell detail.
A small yellow or gold-colored craft circle is enough to suggest the look without requiring a real bell.
Step 20: Add a Bow
Prefer a sweeter black cat?
Add a small bow near one ear or around the jar neck.
Orange, purple, green, or another seasonal color will help keep the design Halloween-ready.
Step 21: Add a Witch Hat
A little pointed witch hat makes a natural addition because black cats and witches already work so well together in Halloween décor.
Keep it small enough that it doesn’t hide both ears.
Add Lighting and Final Details
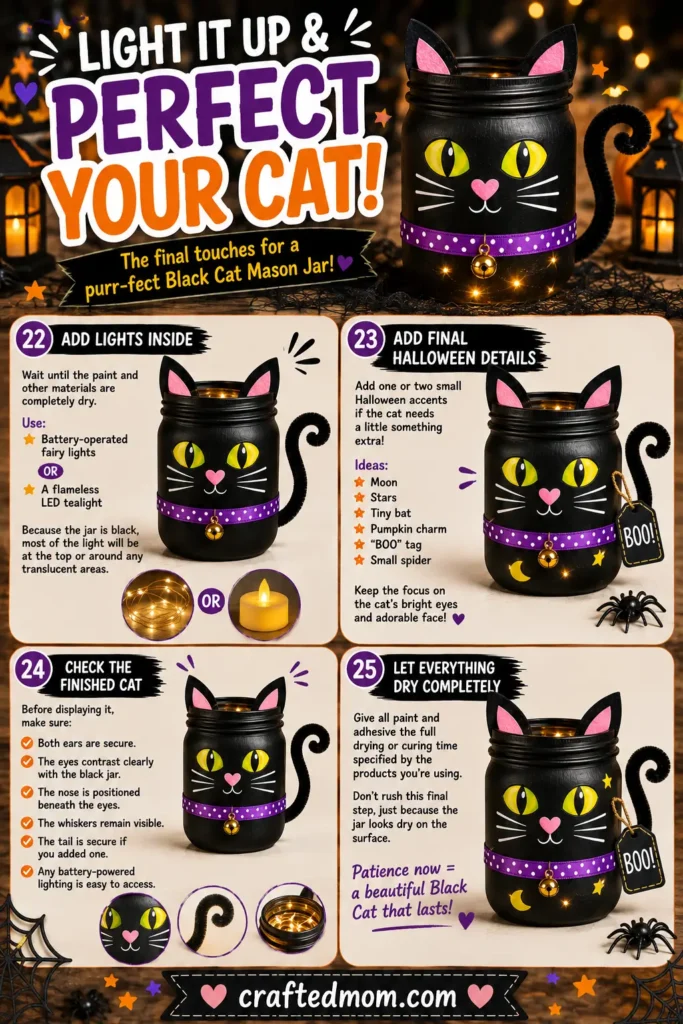
Step 22: Add Lights Inside
Wait until the paint and other materials are dry before placing lighting inside.
Use:
- Battery-operated fairy lights, or
- A flameless LED tealight
Because the jar is black, don’t expect it to glow the same way a pale ghost or mummy jar would. Depending on the paint opacity, much of the light may be concentrated around the jar opening or any intentionally translucent areas. The outline specifically warns not to claim glowing eyes unless the finished design actually creates that effect.
Step 23: Add Final Halloween Details
If the cat still feels a little plain, add one or two small Halloween accents.
Ideas include:
- Moon
- Stars
- Tiny bat
- Pumpkin charm
- “BOO” tag
- Small spider
Try not to add everything at once. The bright eyes and cat face should remain the main focus.
Step 24: Check the Finished Cat
Before displaying it, check that:
- Both ears are secure.
- The eyes contrast clearly with the black jar.
- The nose is positioned beneath the eyes.
- The whiskers remain visible.
- The tail is secure if you added one.
- Any battery-powered lighting is easy to access.
Step 25: Let Everything Dry Completely
Give all paint and adhesive the full drying or curing time specified by the products you’re using.
Don’t rush this final part just because the jar looks dry on the surface.
Easy Black Cat Mason Jar Craft Tips
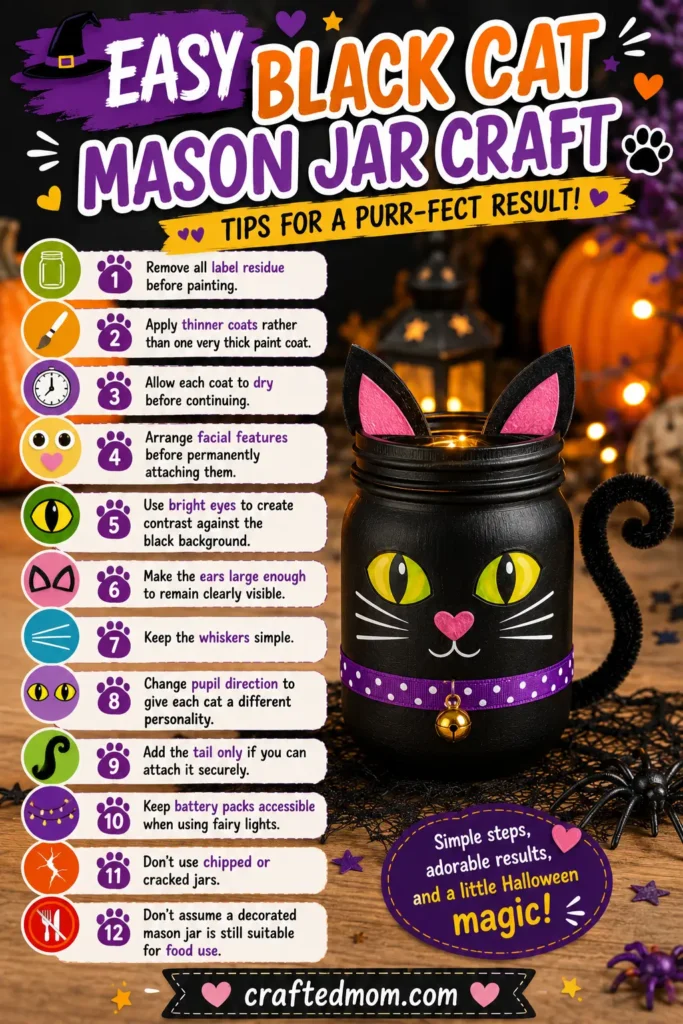
A few small details can make this project much easier:
- Remove all label residue before painting.
- Apply thinner coats rather than one very thick paint coat.
- Allow each coat to dry before continuing.
- Arrange facial features before permanently attaching them.
- Use bright eyes to create contrast against the black background.
- Make the ears large enough to remain clearly visible.
- Keep the whiskers simple.
- Change pupil direction to give each cat a different personality.
- Add the tail only if you can attach it securely.
- Keep battery packs accessible when using fairy lights.
- Don’t use chipped or cracked jars.
- Don’t assume a decorated mason jar is still suitable for food use.
Black Cat Mason Jar Face Ideas
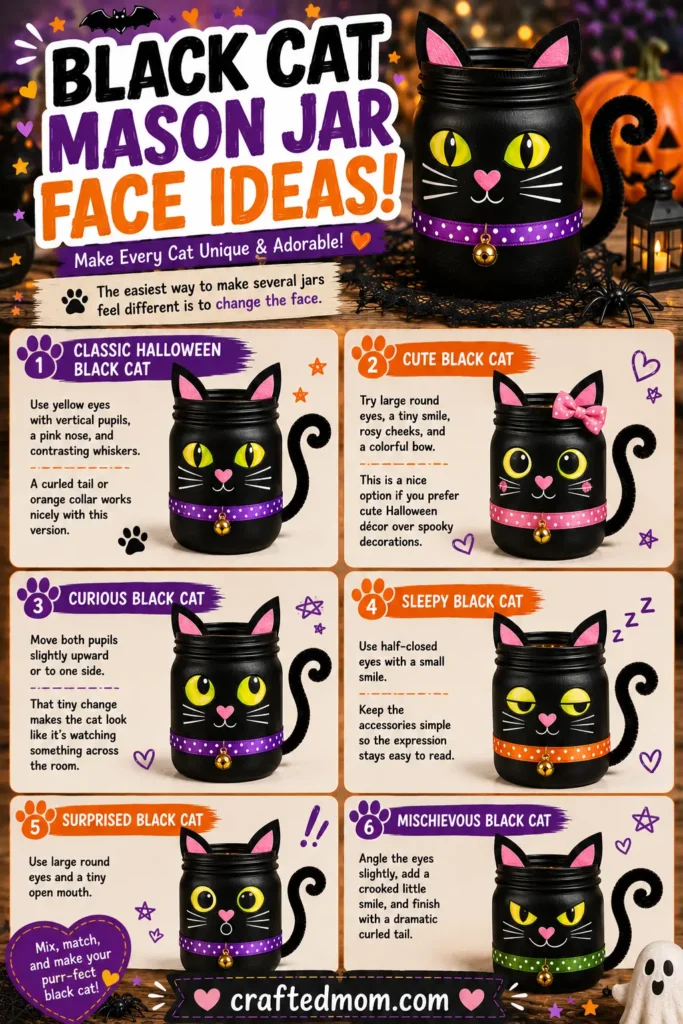
The easiest way to make several jars feel different is to change the face.
Classic Halloween Black Cat
Use yellow eyes with vertical pupils, a pink nose, and contrasting whiskers.
A curled tail or orange collar works nicely with this version.
Cute Black Cat
Try large round eyes, a tiny smile, rosy cheeks, and a colorful bow.
This is a nice option if you prefer cute Halloween décor over spooky decorations.
Curious Black Cat
Move both pupils slightly upward or to one side.
That tiny change makes the cat look like it’s watching something across the room.
Sleepy Black Cat
Use half-closed eyes with a small smile.
Keep the accessories simple so the expression stays easy to read.
Surprised Black Cat
Use large round eyes and a tiny open mouth.
Mischievous Black Cat
Angle the eyes slightly, add a crooked little smile, and finish with a dramatic curled tail.
Black Cat Mason Jar Variations to Try
Once you’ve made the basic version, there are several ways to change the look without changing the entire craft.
Classic Black Cat Mason Jar
Stick with the recognizable combination of black, yellow eyes, pointed ears, a pink nose, and whiskers.
Green-Eyed Black Cat
Swap yellow eyes for bright green ones.
They still stand out beautifully against the dark jar.
Googly-Eye Black Cat
Large googly eyes turn the project into a much sillier Halloween character.
Black Cat With a Witch Hat
Add a tiny black hat with a purple or orange band.
Black Cat With a Collar and Bell
Use a contrasting collar around the jar neck and add a small bell-shaped detail.
Curly-Tail Black Cat
Make the tail the major dimensional feature by creating a longer, more dramatic curl.
Black Cat Mason Jar Luminary
Add battery-powered fairy lights or a flameless LED light inside.
Black Cat Mason Jar Vase
Use the finished jar to hold suitable artificial fall or Halloween stems.
Black Cat Jar With Moon and Stars
Add a few moon and star details around the jar while keeping the cat face dominant.
Black Cat Mason Jar Family
Make several jars in different sizes and give each one a unique expression, eye color, collar, bow, or tail.
Cute Black Cat vs. Classic Halloween Black Cat
Both styles begin with the same black mason jar, but the facial details create two very different looks.
| Cute Black Cat | Classic Halloween Black Cat |
| Large round eyes | Yellow or green eyes |
| Rosy cheeks | Vertical pupils |
| Tiny smile | More dramatic expression |
| Colorful bow | Long whiskers |
| Softer details | Curled tail |
| Bright accent colors | Traditional Halloween colors |
If you’re decorating for younger kids or prefer cheerful Halloween décor, the cute version fits easily. For a witch-themed mantel or more traditional Halloween setup, the classic version makes more sense.
Ways to Decorate With Black Cat Mason Jars
These jars are especially useful because they’re small enough to move around as your Halloween setup changes.
Halloween Mantel
Place your cat beside orange pumpkins, bats, moons, or purple accents.
Entryway Display
Set one black cat jar beside a Halloween sign or small pumpkin arrangement.
Halloween Party Table
Make several jars with different faces and use them as character decorations across the table.
Window Display
Place an illuminated version alongside other flameless Halloween mason jar luminaries.
Shelf Decor
A black cat works nicely next to pumpkins, Halloween books, and simple seasonal signs.
Witch-Themed Display
This is one of my favorite pairings editorially because the two characters naturally belong together visually. Place the cat beside a witch jar, miniature broom, stars, moons, or a pointed hat.
Black Cat Mason Jar Centerpiece Ideas
Black Cat Trio
Group three jars of different sizes.
Give each one different eyes, expressions, or collar colors.
Black Cat and Pumpkin Centerpiece
Mix the black cats with orange pumpkin jars for strong Halloween contrast.
Witch and Black Cat Centerpiece
Pair a witch jar and cat jar with a few stars, moons, and small pumpkins.
Black and Orange Centerpiece
Keep everything mostly black and orange for a simple two-color Halloween palette.
Halloween Character Centerpiece
Build a larger display using black cat, witch, pumpkin, ghost, Frankenstein, and other character jars.
Black Cat Mason Jar Craft Safety Notes
Because the base is glass, this project needs a little more care than a paper plate or popsicle stick craft.
- Never use a cracked or chipped jar.
- Supervise children closely around glass.
- Adults should deal with broken glass.
- Follow the directions for the paint and adhesive you choose.
- Let all products dry or cure fully.
- Use battery-powered flameless lighting.
- Keep paper, foam, felt, yarn, ribbon, and similar craft materials away from heat.
- Don’t assume that a painted or decorated jar remains food-safe.
These precautions are part of the approved project plan, which specifically recommends flameless battery-powered lights rather than an open flame around the craft materials.
Can Kids Make This Black Cat Mason Jar Craft?
Yes, but adult supervision is important because the base is breakable glass.
Adults should handle or closely supervise jar inspection, difficult cutting, stronger adhesive steps, and attaching dimensional pieces such as the ears and tail.
Kids can still take part in plenty of the creative decisions. They can help choose the eye color, position the pupils, add the nose and whiskers, choose a collar color, or decorate the cat with a bow or hat.
I wouldn’t present this as an independent toddler craft. If you’re crafting with very young children, a paper plate or craft-stick version is a more age-appropriate format for independent handling.
Make a Whole Black Cat Mason Jar Family
One cat is cute, but a little group gives you much more to work with for a mantel or centerpiece.
Try making three personalities:
Tall Cat: Yellow eyes, purple collar, long curled tail.
Medium Cat: Green eyes, orange bow, curious sideways-looking pupils.
Small Cat: Large round eyes, tiny pink nose, and rosy cheeks.
Keeping the same basic black-cat features makes the group feel coordinated while the expressions stop it from looking repetitive.
Halloween Black Cat vs. Everyday Black Cat Jar
Your jar doesn’t necessarily have to disappear when Halloween ends.
For a strongly seasonal black cat, use:
- Yellow or green eyes
- Witch hat
- Orange or purple collar
- Moon and stars
- Other Halloween details
For an everyday black cat decoration, remove the Halloween symbols and use a normal collar, name-tag detail, or even a small yarn-ball accent.
Since this particular project belongs with Halloween mason jar crafts, I would keep the main version distinctly Halloween-focused.
Black Cat Mason Jar vs. Witch Mason Jar
These two decorations pair beautifully, but they should still look like completely different characters.
A black cat mason jar should be defined by:
- Pointed cat ears
- Bright eyes
- Small nose
- Whiskers
- Optional curled tail
A witch mason jar should instead focus on:
- Green face
- Long nose
- Pointed witch hat
- Hair
- Optional broom
That separation keeps both crafts recognizable while still giving you an easy way to display them together.
More Halloween Mason Jar Crafts
After your black cat is finished, you can build out a whole Halloween character collection with:
- Halloween Mason Jar Crafts
- Witch Mason Jar Craft
- Pumpkin Mason Jar Craft
- Ghost Mason Jar Craft
- Frankenstein Mason Jar Craft
- Mummy Mason Jar Craft
- Vampire Mason Jar Craft
- Monster Mason Jar Craft
- Jack-O’-Lantern Mason Jar Craft
- Spider Mason Jar Craft
- Skeleton Mason Jar Craft
- Black Cat Crafts
These are the primary parent, sibling, and cross-topic internal-link opportunities identified for this article.
Final Thoughts
This black cat mason jar craft gives you a recognizable Halloween character without requiring a complicated build. The black jar, bright eyes, pointed ears, nose, and whiskers create the basic cat, while a tail, bow, collar, witch hat, or flameless lights give you plenty of room to personalize it.
It also pairs especially well with a Witch Mason Jar Craft, making those two a natural place to continue your Halloween mason jar collection.
Frequently Asked Questions
What kind of paint should I use on a mason jar?
Use craft paint intended for glass and follow its preparation, drying, and curing instructions. The exact paint should match the version you actually make rather than assuming every craft paint behaves the same way.
How do you make a black cat from a mason jar?
Paint the outside of the jar black, then add pointed ears, bright eyes, a small contrasting nose, and whiskers. A curled tail, collar, bow, or witch hat can be added afterward.
What color eyes should a Halloween black cat have?
Yellow and green both create strong contrast against a black jar and fit the classic Halloween black-cat look.
How do you make cat ears for a mason jar?
Cut two large triangular ears from cardstock, felt, craft foam, or another suitable material. Add smaller pink inner-ear pieces if you like, then attach the ears near the upper sides of the jar.
Does the black cat mason jar need a tail?
No. The ears, eyes, nose, and whiskers are enough to make the jar recognizable as a cat. The curled tail is an optional dimensional detail.
