

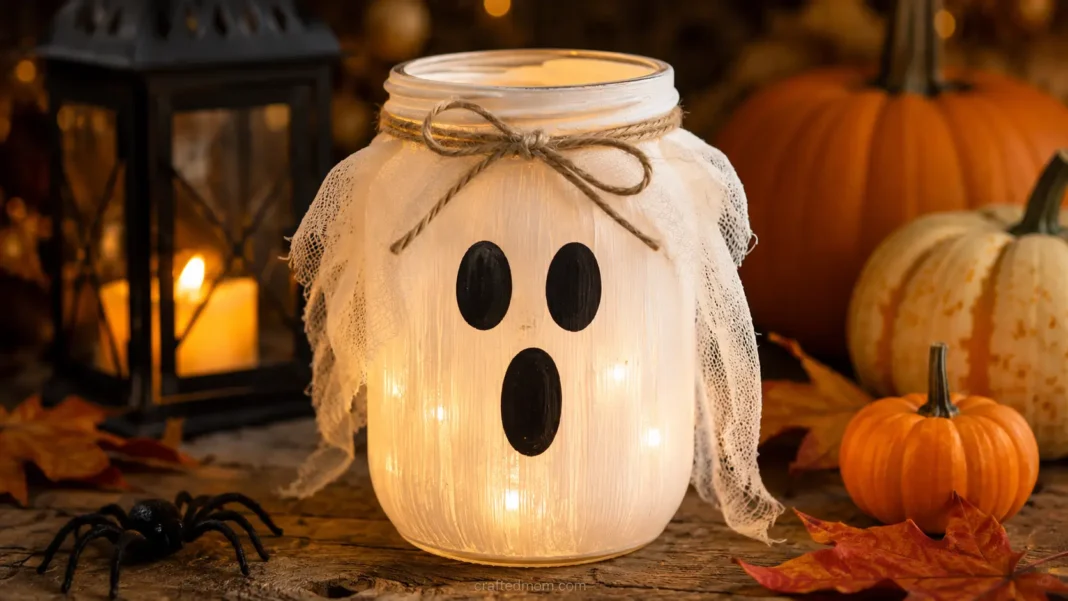
This ghost mason jar craft turns a simple glass jar into a white Halloween ghost with dark eyes, a simple mouth, and optional flameless lights for a soft glow. You can keep the face classic and spooky or make it silly, sleepy, surprised, or cute.
Unlike a flat ghost craft, this version works as actual Halloween décor. Set your mason jar ghost on a mantel, shelf, entryway table, party display, or window, or make several different faces for a glowing ghost family. The core design is intentionally simple: a white jar, large dark eyes, a recognizable ghost mouth, and optional lighting or light decorative details.
Why You’ll Love This Ghost Mason Jar Craft
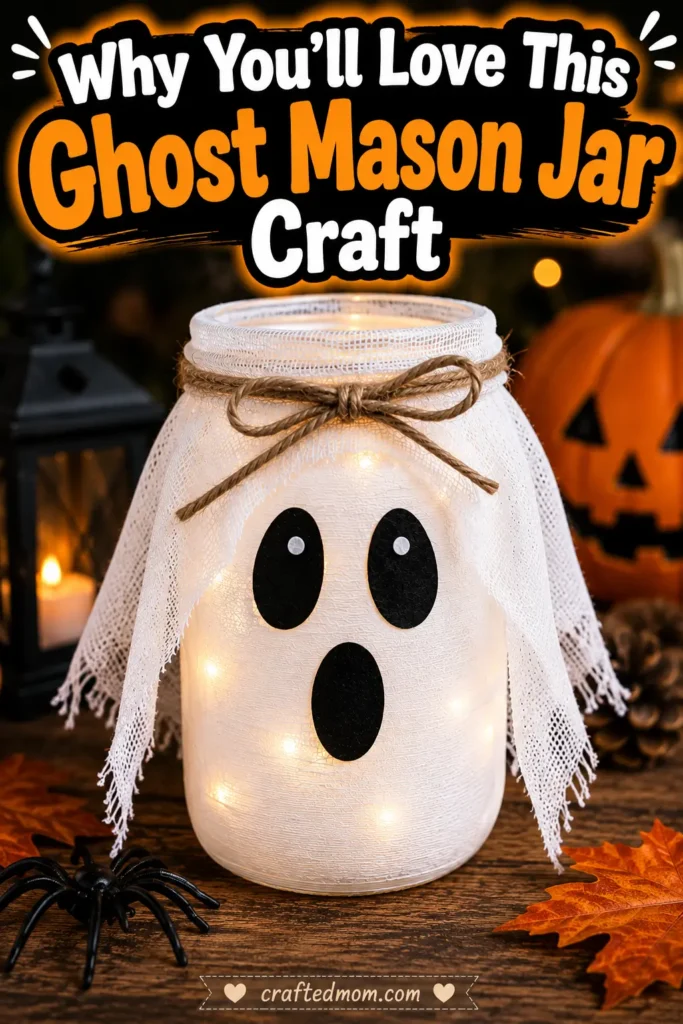
A ghost is one of the easiest Halloween characters to create on a jar because you don’t need lots of tiny pieces to make the design recognizable. A white base and a few dark facial shapes can do most of the work.
This project is also easy to customize without changing the basic construction. Change the eyes or mouth and one jar can look completely different from the next.
A few reasons this ghost jar works especially well for Halloween:
- The design is simple and recognizable.
- It uses a basic mason jar as the base.
- You can make cute or spooky versions.
- Different expressions make it easy to create a set.
- It works as shelf, mantel, table, or entryway décor.
- You can add flameless lighting for a glowing effect.
- Several ghost jars can become a centerpiece.
- The white base pairs easily with black, orange, purple, and other Halloween colors.
A group of jars with different expressions can make a stronger display than one identical ghost repeated several times.
Supplies You’ll Need
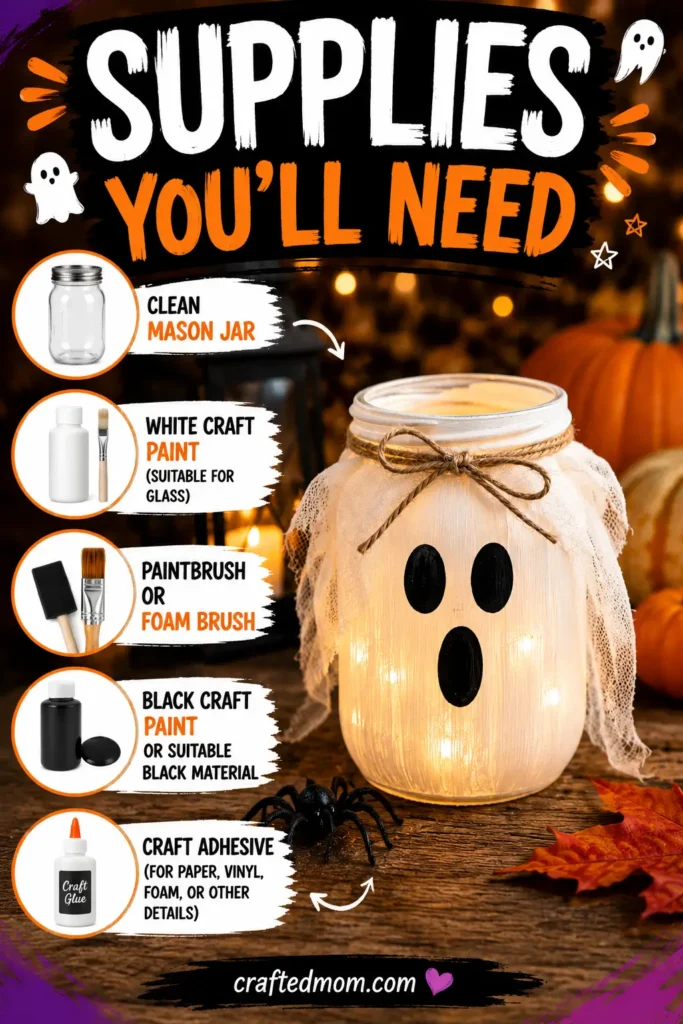
For the basic ghost jar, gather:
- Clean mason jar
- White craft paint suitable for glass
- Paintbrush or foam brush
- Black craft paint or another suitable black decorative material
- Craft adhesive if you’re attaching paper, vinyl, foam, or other details
Optional supplies include:
- Black adhesive vinyl
- Googly eyes
- White tissue paper
- Craft gauze
- Cheesecloth
- Black ribbon
- Orange ribbon
- Purple ribbon
- Jute twine
- Battery-operated fairy lights
- Flameless LED tealight
- Halloween stickers
- Small bow
- Black craft foam
Use paint made for an appropriate glass application and follow its preparation, drying, and curing directions. If you’re attaching additional materials, use an adhesive suitable for those materials rather than assuming every craft glue will work the same way on glass. The project outline specifically avoids making universal claims about paint or adhesive products that haven’t been tested.
Before You Start: Prepare the Mason Jar
Start with an empty, clean, dry jar.
Remove the label and clean away any remaining adhesive. Wipe off grease and fingerprints too, especially from the areas you’re going to paint.
Check the jar for cracks or chips before starting.
Once the surface is clean, try not to handle the outside more than necessary before painting.
How to Make a Ghost Mason Jar Craft
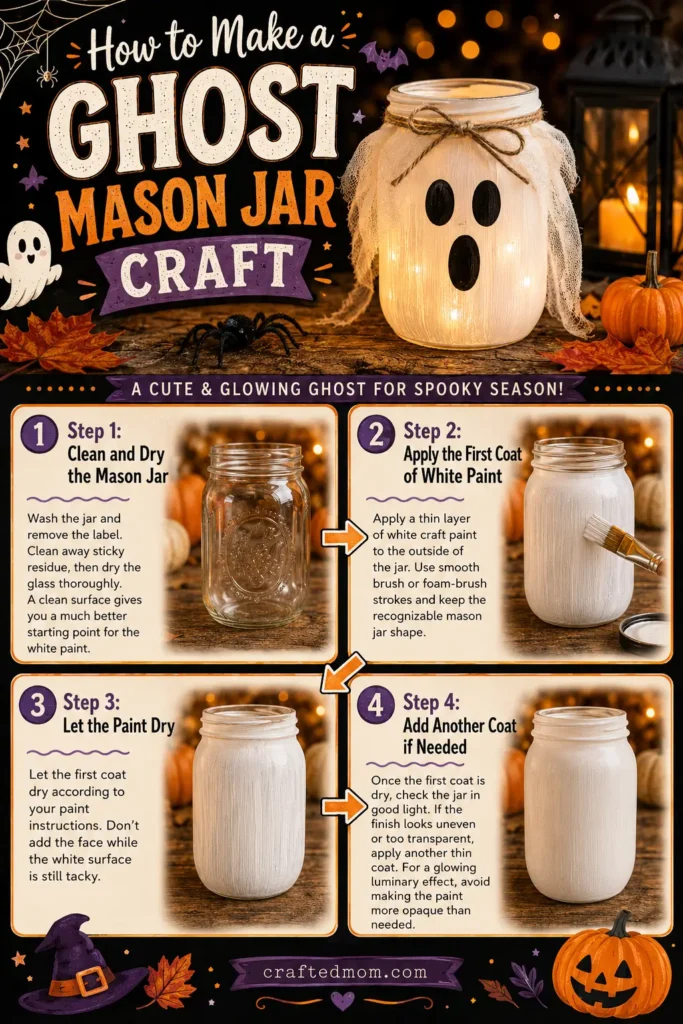
Step 1: Clean and Dry the Mason Jar
Wash the jar and remove the label.
Clean away sticky residue, then dry the glass thoroughly.
A clean surface gives you a much better starting point for the white paint.
Step 2: Apply the First Coat of White Paint
Apply a thin layer of white craft paint to the outside of the jar.
Use relatively smooth brush or foam-brush strokes as you work your way around the glass.
The goal is to create a white ghost body while still keeping the recognizable mason jar shape.
Step 3: Let the Paint Dry
Let the first coat dry according to your paint’s instructions.
Don’t start adding the face while the white surface is still tacky.
Step 4: Add Another Coat if Needed
Once the first coat is dry, check the jar in good light.
If the white finish looks uneven or more transparent than you want, apply another thin coat.
There’s no need to assume every jar needs exactly two coats. Paint opacity varies, so use whatever number works for the actual product and finish you’re using.
If you’re planning a ghost mason jar luminary, think about opacity before adding too much paint. A completely opaque surface may reduce how much light passes through, while a slightly more translucent finish may create more glow.
Design the Ghost Face
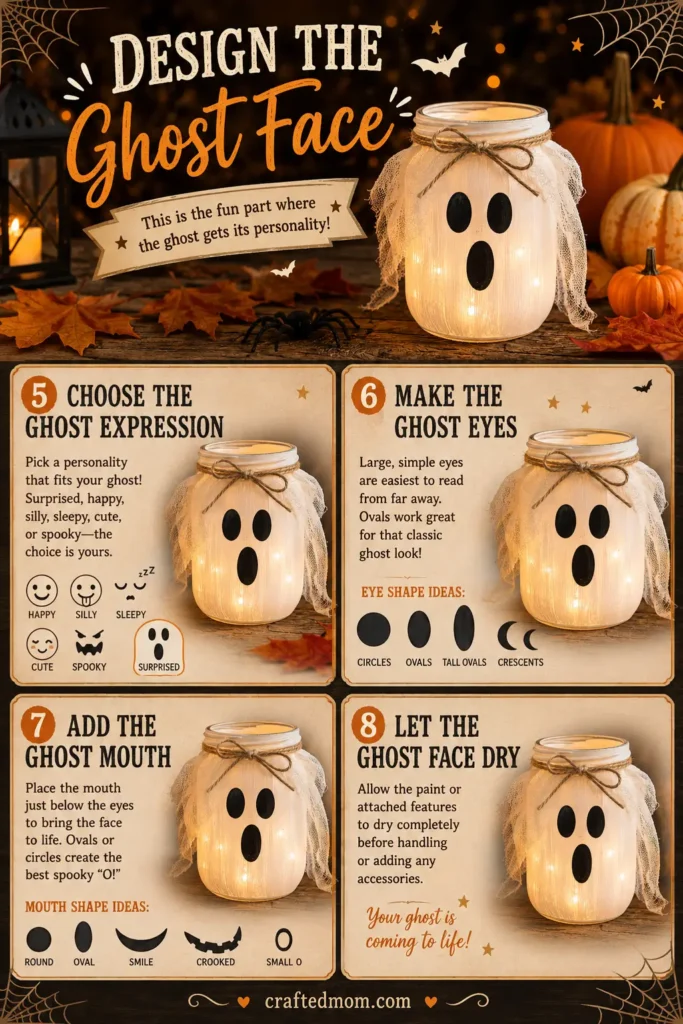
The face is the main creative part of this project, so take a minute to plan it before adding permanent details.
Step 5: Choose the Ghost Expression
Decide what kind of personality your ghost should have.
Try:
- Surprised
- Happy
- Silly
- Sleepy
- Cute
- Spooky
Arrange or lightly plan the facial shapes before painting or attaching them.
You don’t need complicated details. Large eyes and one simple mouth usually create a stronger ghost face than lots of tiny features.
Step 6: Make the Ghost Eyes
Create two dark eyes using the method you’ve chosen for your finished jar.
Possible shapes include:
- Circles
- Ovals
- Tall ovals
- Slightly uneven eyes
- Crescent-shaped eyes
Large, simple eye shapes tend to remain readable when the jar is viewed from across a room.
Step 7: Add the Ghost Mouth
Add a dark mouth underneath the eyes.
You could make a:
- Round surprised mouth
- Long oval mouth
- Tiny smile
- Crooked grin
- Small “O” shape
Keep it simple enough that the face immediately reads as a ghost.
Step 8: Let the Ghost Face Dry
If you painted the facial features, let them dry before handling the jar or adding accessories.
If you used vinyl, foam, or another decorative material, follow the appropriate adhesion or setting directions for that material.
Add Optional Ghost Details
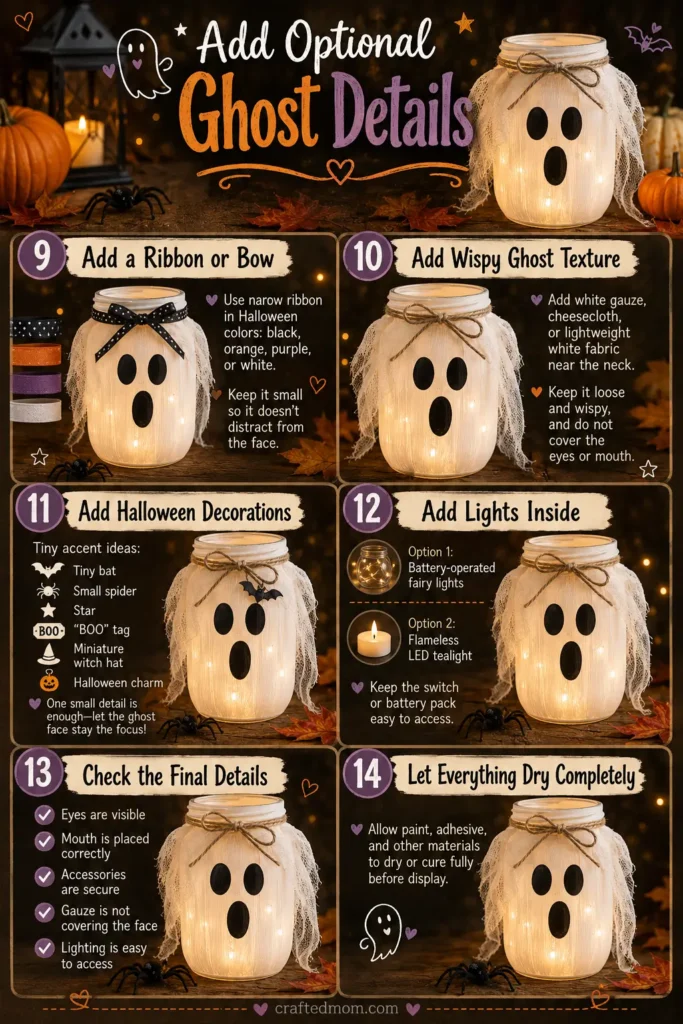
Your ghost is already recognizable at this point, so everything in this section is optional.
Step 9: Add a Ribbon or Bow
Wrap a narrow ribbon around the jar neck.
Good Halloween colors include:
- Black
- Orange
- Purple
- White
Tie it into a small bow or a simple knot.
Try not to make it so large that it distracts from the face.
Step 10: Add Wispy Ghost Texture
If you want your ghost to have a little more dimension, add a small amount of white material near the jar neck.
You could use:
- Craft gauze
- Cheesecloth
- Lightweight white fabric
Keep the material loose and wispy, but make sure it doesn’t cover the eyes or mouth.
Step 11: Add Halloween Decorations
A few tiny seasonal details can make the jar feel more Halloween-specific.
Ideas include:
- Tiny bat
- Small spider
- Star
- “BOO” tag
- Miniature witch hat
- Halloween charm
You don’t need all of these. One small detail is often enough because the simple black-and-white ghost face should remain the main feature.
Step 12: Add Lights Inside
Once the jar and decorations are dry, place:
- Battery-operated fairy lights, or
- A flameless LED tealight
inside the jar.
Keep the switch or battery pack easy to access so you don’t have to pull the entire decoration apart every time you want to turn it on.
Step 13: Check the Final Details
Before you’re done, make sure:
- Both eyes are clearly visible.
- The mouth sits appropriately beneath them.
- Ribbon or other accessories are secure.
- Gauze or decorative materials aren’t covering the face.
- Any lighting remains easy to access.
Step 14: Let Everything Dry Completely
Allow the paint, adhesive, and other materials to dry or cure fully according to their directions before moving the jar to its display spot.
Easy Ghost Mason Jar Craft Tips
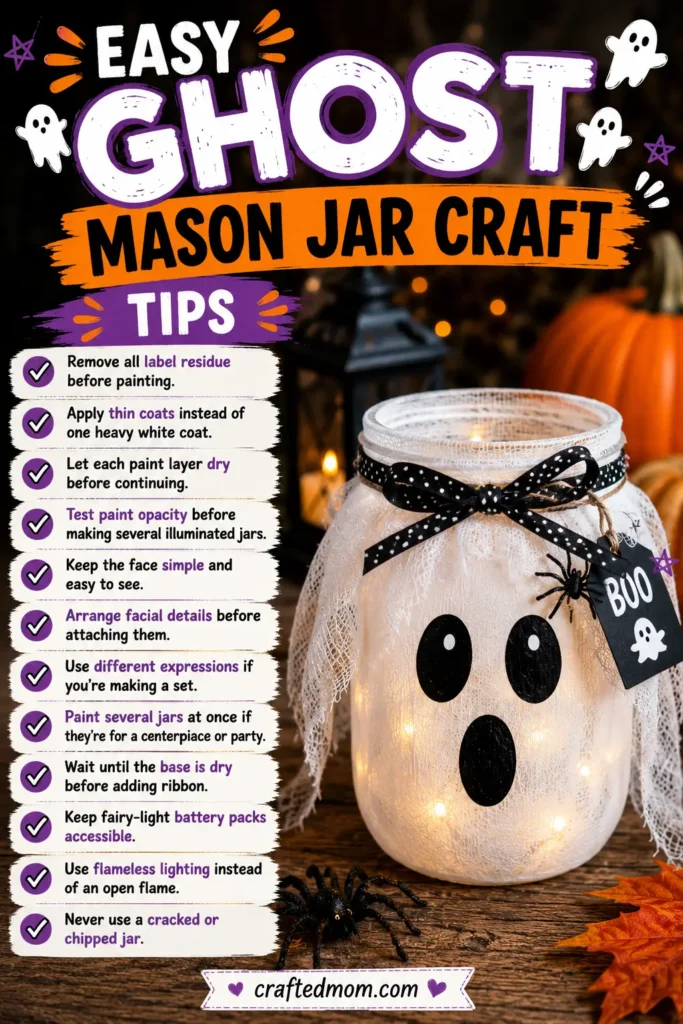
A few practical choices can make this Halloween ghost jar easier to finish cleanly:
- Remove all label residue before painting.
- Apply thin coats instead of one heavy white coat.
- Let each paint layer dry before continuing.
- Test paint opacity before making several illuminated jars.
- Keep the face simple and easy to see.
- Arrange facial details before attaching them.
- Use different expressions if you’re making a set.
- Paint several jars at once if they’re for a centerpiece or party.
- Wait until the base is dry before adding ribbon.
- Keep fairy-light battery packs accessible.
- Use flameless lighting instead of an open flame.
- Never use a cracked or chipped jar.
Ghost Mason Jar Face Ideas
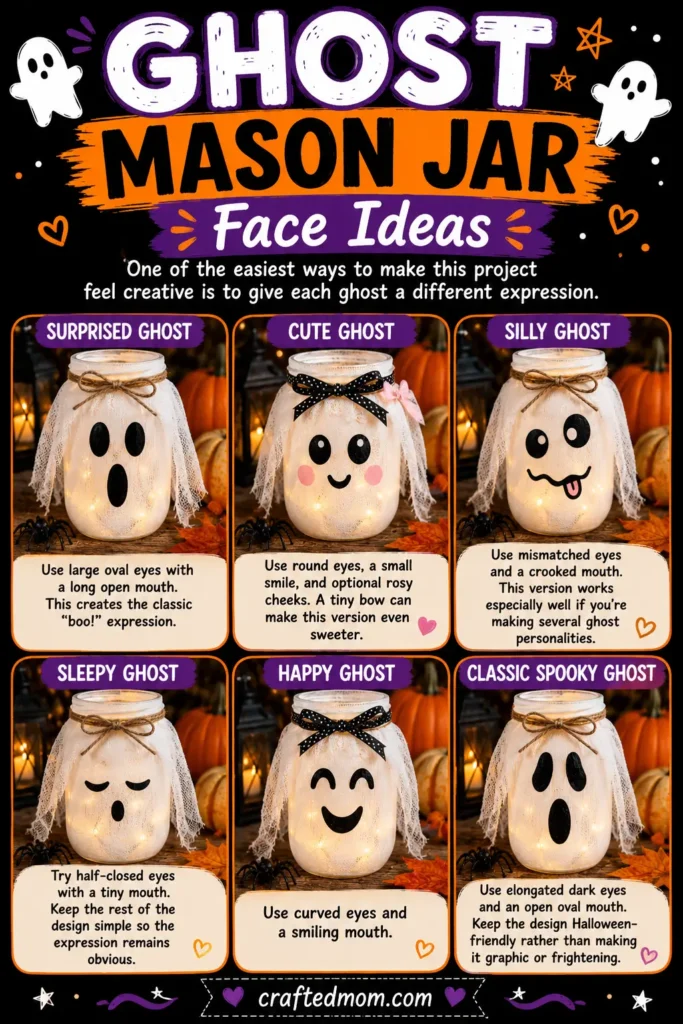
One of the easiest ways to make this project feel creative is to give each ghost a different expression.
Surprised Ghost
Use large oval eyes with a long open mouth.
This creates the classic “boo!” expression with very few details.
Cute Ghost
Use round eyes, a small smile, and optional rosy cheeks.
A tiny bow can make this version feel even sweeter.
Silly Ghost
Use mismatched eyes and a crooked mouth.
This version works especially well if you’re making several ghost personalities.
Sleepy Ghost
Try half-closed eyes with a tiny mouth.
Keep the rest of the design simple so the expression remains obvious.
Happy Ghost
Use curved eyes and a smiling mouth.
Classic Spooky Ghost
Use elongated dark eyes and an open oval mouth.
Keep the design Halloween-friendly rather than making it graphic or frightening. The approved outline intentionally keeps the ghost expressions decorative and approachable.
Ghost Mason Jar Variations to Try
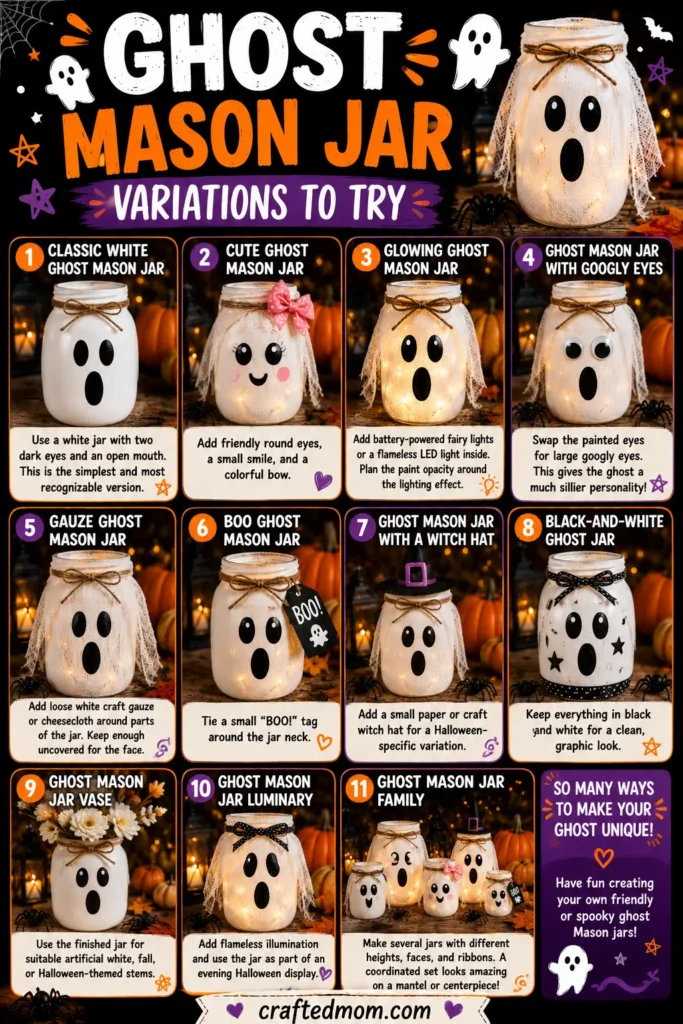
Classic White Ghost Mason Jar
Use a white jar with two dark eyes and an open mouth.
This is the simplest and most recognizable version.
Cute Ghost Mason Jar
Add friendly round eyes, a small smile, and a colorful bow.
Glowing Ghost Mason Jar
Add battery-powered fairy lights or a flameless LED light inside.
Because the ghost base is white, this variation can work especially well when you plan the paint opacity around the lighting effect.
Ghost Mason Jar With Googly Eyes
Swap the painted eyes for large googly eyes.
This gives the ghost a much sillier personality.
Gauze Ghost Mason Jar
Add loose white craft gauze or cheesecloth around parts of the jar.
Keep enough of the painted surface uncovered so the ghost face remains visible.
BOO Ghost Mason Jar
Tie a small “BOO!” tag around the jar neck.
Ghost Mason Jar With a Witch Hat
Add a small paper or craft witch hat for a Halloween-specific variation.
Black-and-White Ghost Jar
Keep everything in black and white for a clean, graphic look.
Ghost Mason Jar Vase
Use the finished jar for suitable artificial white, fall, or Halloween-themed stems.
Ghost Mason Jar Luminary
Add flameless illumination and use the jar as part of an evening Halloween display.
Ghost Mason Jar Family
Make several jars with different heights, faces, and ribbons.
A coordinated set can work especially well on a mantel or as a centerpiece.
Cute Ghost vs. Spooky Ghost Mason Jar
The same white mason jar can go in two very different directions depending on the face and accessories.
| Cute Ghost | Spooky Ghost |
| Rounded eyes | Elongated eyes |
| Tiny smile | Open oval mouth |
| Small bow | Minimal accessories |
| Softer facial features | Strong black-and-white contrast |
| Colorful accents | Dark surrounding décor |
A cute ghost works nicely when you want cheerful Halloween décor, while the spooky version fits a more traditional black-and-white display.
Neither version needs complicated details. The expression should do most of the work.
Ghost Mason Jar Lighting Ideas
The glowing ghost mason jar is one of the strongest variations of this project because the pale jar can work naturally with interior lighting.
Fairy Lights
Loosely place battery-powered fairy lights inside.
Instead of one solid source of light, they can create several small glowing points throughout the jar.
Flameless LED Tealight
Place one flameless LED light at the bottom for a simpler glow.
Color-Changing LED
A battery-powered color-changing light could create a playful effect if you actually test it with your finished jar.
Don’t promise a specific look until you know how your paint opacity and lighting work together.
For this craft, flameless battery-powered illumination should be prioritized over real candles.
Ways to Decorate With Ghost Mason Jars
Halloween Mantel
Group several ghosts with:
- Pumpkins
- Bats
- Black accents
- Battery-powered fairy lights
Different face shapes help keep the display from looking repetitive.
Entryway Display
Place a ghost jar beside a Halloween sign and a few small pumpkins.
Party Table
Make several different ghost faces and space them along a Halloween party table.
Window Display
Illuminated versions work nicely in a window where the faces can stay visible after dark.
Shelf Decor
Use one or two smaller ghost jars among your other Halloween decorations.
Halloween Centerpiece
Group different-size ghost jars with pumpkins, black decorative elements, and flameless lighting.
Ghost Mason Jar Centerpiece Ideas
Ghost Family Centerpiece
Use three different jar sizes and give each ghost its own face.
This is an easy way to make the arrangement feel planned rather than repetitive.
Black-and-White Centerpiece
Pair white ghost jars with:
- Black bats
- Black ribbon
- White pumpkins
Keeping the palette tight gives the display a more graphic look.
Ghost and Pumpkin Centerpiece
Mix white ghost jars with bright orange pumpkin jars.
The contrast makes both characters easier to notice.
Glowing Halloween Centerpiece
Add flameless lights inside several ghost jars and group them together.
Cute Halloween Centerpiece
Use smiling ghost faces with orange, purple, or other playful Halloween accents.
Ghost Mason Jar Craft Safety Notes
Because this project uses a breakable glass jar, it needs appropriate supervision and handling.
- Don’t use a cracked or chipped jar.
- Younger children need close adult supervision.
- Adults should handle broken glass.
- Follow the instructions for the paint and adhesive you’re using.
- Let finishes dry or cure completely.
- Use flameless battery-powered lighting.
- Keep gauze, ribbon, paper, adhesive, and other decorative materials away from heat sources.
- Don’t automatically assume a painted or decorated jar remains food-safe.
The CraftedMom guidelines specifically call for adult supervision with glass jars and recommend flameless battery-powered lighting when mason jar crafts include paint, glue, ribbon, gauze, foam, yarn, or similar materials.
Can Kids Make This Ghost Mason Jar Craft?
Yes, children can participate, but an adult should supervise closely because mason jars are breakable glass.
For younger kids, an adult can handle:
- Preparing and inspecting the jar
- Removing stubborn labels
- Difficult adhesive steps
- Glass handling
Kids can still take part in meaningful parts of the project, such as:
- Painting the jar
- Choosing the face
- Adding simple eyes and a mouth
- Selecting ribbon
- Adding stickers or other decorations
Because the base is glass, I wouldn’t frame this as an independent toddler craft.
Make a Whole Ghost Mason Jar Family
If you’re already painting one jar, making a small group is an easy way to create a larger Halloween display.
Try three different personalities:
Tall Ghost: Long oval eyes with a surprised mouth.
Medium Ghost: Smiling face with a simple ribbon.
Small Ghost: Large cute eyes with a tiny mouth.
You can also vary the bow, ribbon, height, or lighting while keeping the same white-and-black palette.
Display the finished jars together and each ghost will still feel connected to the group without looking identical.
More Halloween Mason Jar Crafts
Once your ghost is finished, you can continue the collection with related projects:
- Halloween Mason Jar Crafts
- Pumpkin Mason Jar Craft
- Jack-O’-Lantern Mason Jar Craft
- Witch Mason Jar Craft
- Frankenstein Mason Jar Craft
- Mummy Mason Jar Craft
- Vampire Mason Jar Craft
- Monster Mason Jar Craft
- Black Cat Mason Jar Craft
- Spider Mason Jar Craft
- Skeleton Mason Jar Craft
- Ghost Crafts
These are the main parent, sibling, and cross-topic linking opportunities identified for this article.
Final Thoughts
This ghost mason jar craft keeps the construction simple while giving you plenty of ways to change the finished look. A white jar, two dark eyes, and a simple mouth are enough for the basic ghost, then you can add a bow, gauze, different expressions, or flameless lighting to fit your Halloween display.
It also works especially well as part of the broader Halloween Mason Jar Crafts collection because the luminary angle gives this ghost jar a distinctly decorative purpose.
Frequently Asked Questions
What kind of paint should I use on a mason jar?
Use craft paint suitable for glass and follow the manufacturer’s preparation, drying, and curing directions. Use the exact paint type that works with your finished project rather than assuming all craft paints behave the same way.
Do I need to prime the mason jar first?
That depends on the specific paint you’re using. Follow the product directions rather than treating primer as a universal requirement.
How many coats of white paint do I need?
Use the number your actual paint and jar require. If you’re creating a luminary, remember that a very opaque finish may reduce the amount of light that shows through.
Can kids make ghost mason jars?
Yes, with close adult supervision because mason jars are breakable. Adults should inspect the glass and help with tasks that aren’t appropriate for the child’s age.
