

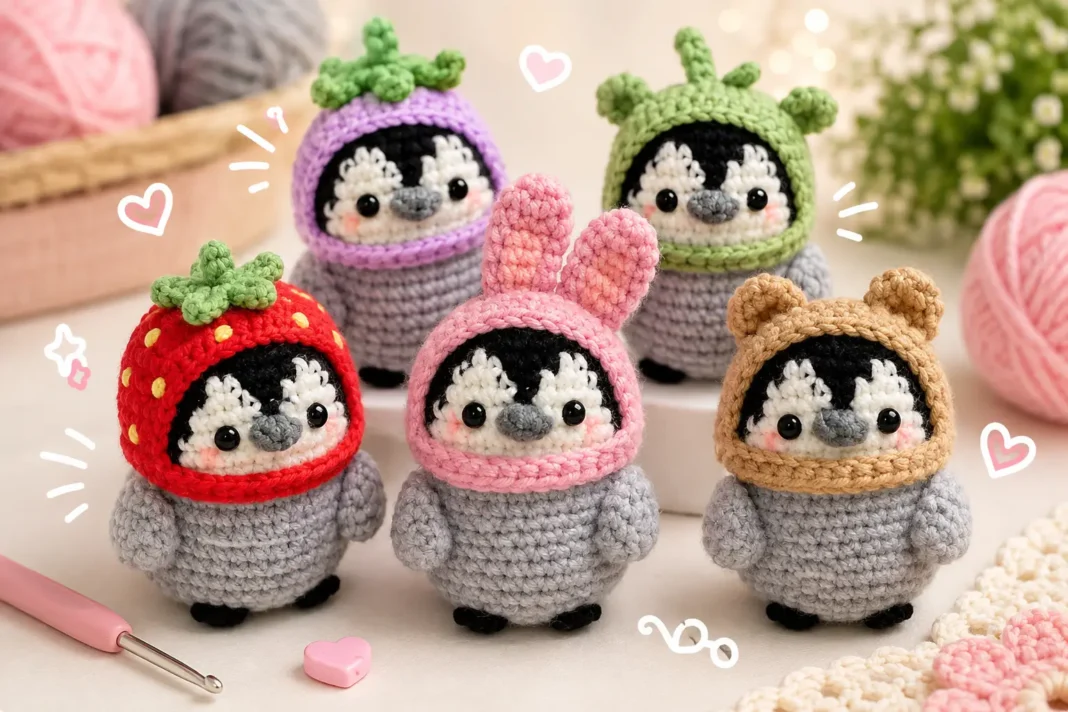
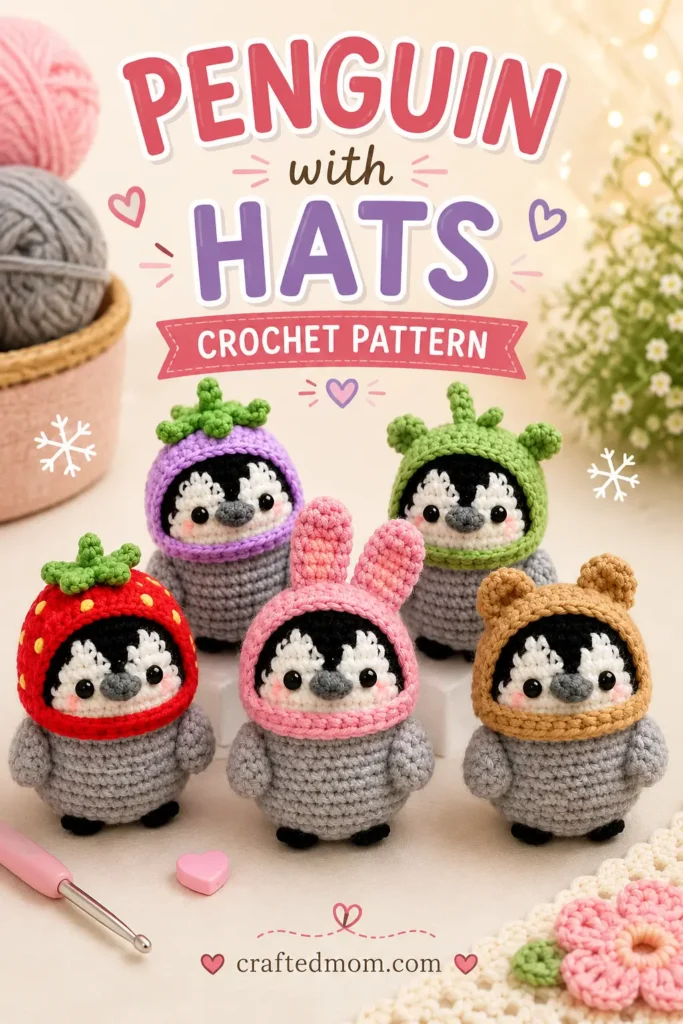
A tiny penguin is already charming, but giving it its own little wardrobe changes the whole personality. This Penguin with Hats Crochet Pattern combines a round gray penguin with a black-and-white face, tiny wings, a dark gray beak, and removable-looking character hats that can turn it into a bunny, bear, strawberry, or other playful version.
What makes this project especially interesting is that the penguin itself stays the same while the headpiece becomes the creative part. The body is worked from the top down with color changes forming the face directly into the crochet, so there is no separate white face patch to sew on afterward.
The construction uses mostly single crochet, making the individual stitches approachable. The colorwork across the face takes a little more attention, but once that section is finished, the lower body becomes a long stretch of simple single crochet rounds before decreasing and stuffing.
Penguin with Hats Crochet Pattern at a Glance
| Project Detail | Information |
| Project | Crochet penguin with character hats |
| Main Penguin Colors | Black, white, and gray |
| Additional Color | Dark gray for the beak |
| Main Stitch | Single crochet |
| Starting Method | Magic ring |
| Body Construction | Worked in continuous rounds from top to bottom |
| Maximum Body Stitch Count | 30 stitches |
| Safety Eyes | 5 mm |
| Eye Placement | Between Rounds 9 and 10 |
| Stuffing | Fiber filling or scrap yarn |
| Wings | 2, crocheted separately |
| Beak | Crocheted separately and sewn on |
| Hat Construction | Crown plus a worked panel and front chain section |
| Hat Styles | Includes bear/bunny ears and an optional fruit-style version |
| Feet | Optional |
| Sewing Required | Yes |
The penguin begins with a six-stitch magic ring and increases evenly until you reach 30 stitches. The facial colorwork begins in Round 6, with white stitches gradually creating the two light sections around the eyes.
Materials You’ll Need
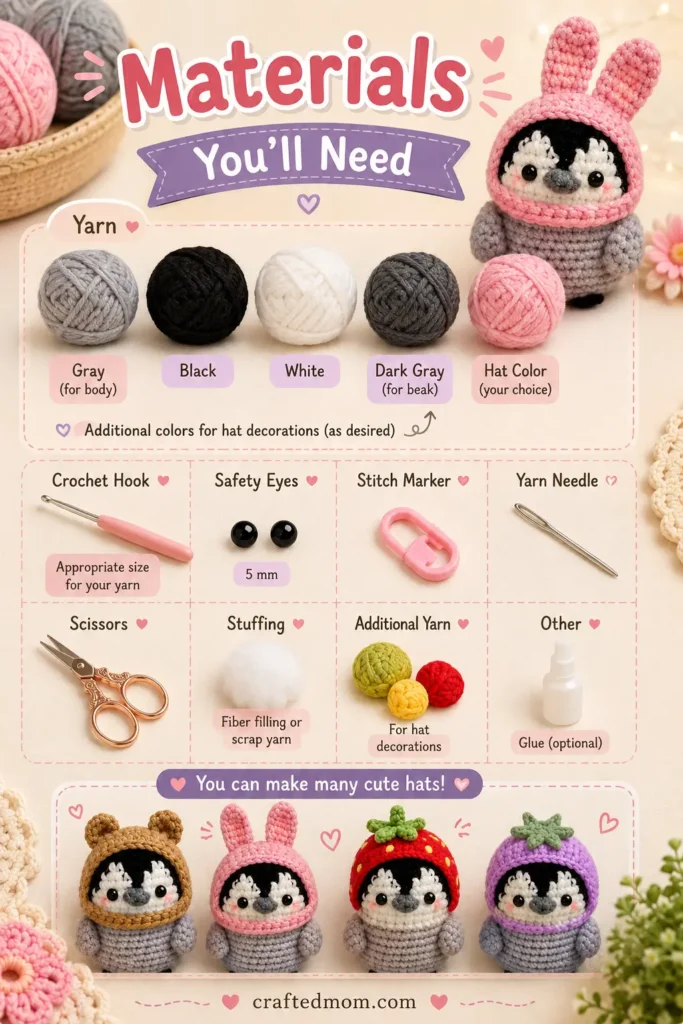
For this project, gather:
- Yarn for the penguin body in gray
- Black yarn
- White yarn
- Dark gray yarn for the beak
- Yarn in your chosen hat color
- Additional colors for optional hat decorations
- Crochet hook appropriate for your yarn
- 5 mm safety eyes
- Fiber filling or scrap yarn for stuffing
- Stitch marker
- Scissors
- Yarn needle
The exact crochet hook size and yarn weight are not specified, so I would keep those flexible rather than assigning a size that may change the proportions.
For the hat, using yarn slightly thicker than the body yarn can create a fuller, more oversized look.
Safety note: If you’re making the penguin for a baby or young child, consider embroidered eyes instead of plastic safety eyes. Small detachable pieces can be a choking hazard.
Crochet Abbreviations
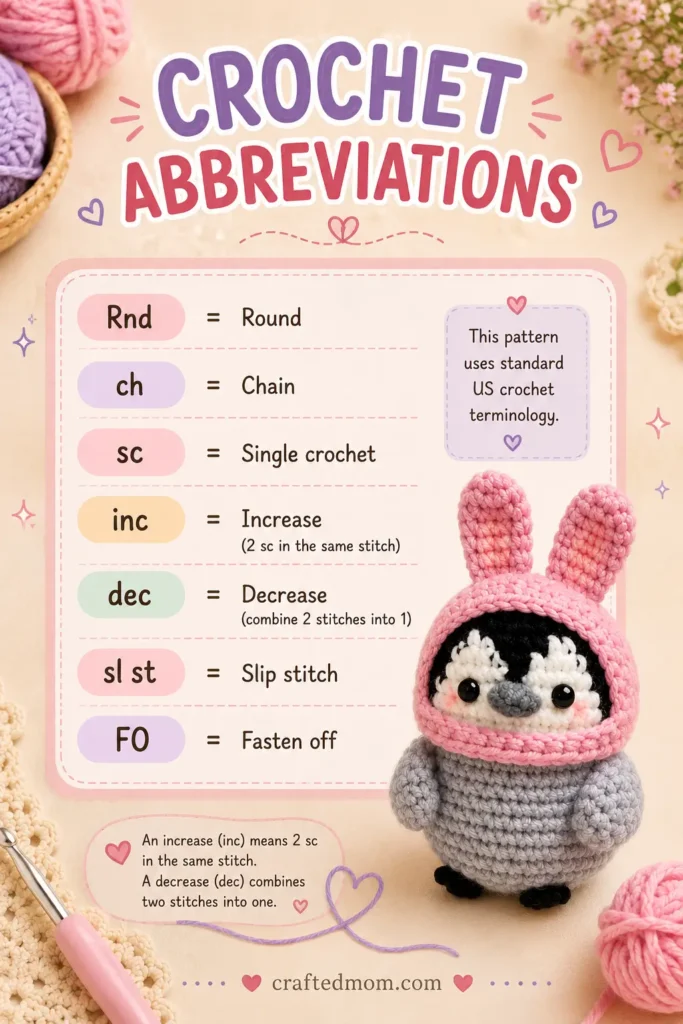
I’m using standard US crochet terminology throughout the pattern.
| Abbreviation | Meaning |
| Rnd | Round |
| ch | Chain |
| sc | Single crochet |
| inc | Increase |
| dec | Decrease |
| sl st | Slip stitch |
| FO | Fasten off |
An increase (inc) means working 2 single crochets into the same stitch.
A decrease (dec) combines two stitches into one.
Before You Start
The first five rounds create the top of the penguin and establish a 30-stitch circumference.
Rounds 6 through 11 require color changes. Keep the unused yarn relaxed behind your work. Pulling too tightly during the color changes can distort the penguin’s head and make the face pucker.
I also recommend keeping a stitch marker in the first stitch of each round. Once you’re juggling several colors, that little marker becomes much more important than it looks.
How to Crochet the Penguin Body
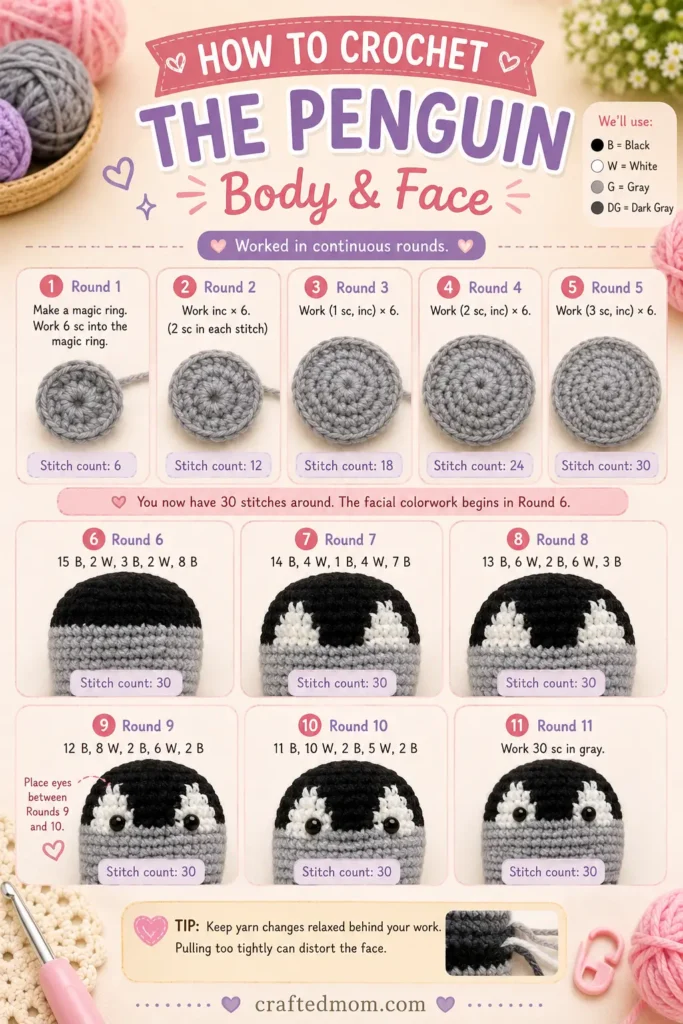
Begin with the main color used around the penguin’s face.
Round 1
Make a magic ring.
Work:
6 sc into the magic ring
Pull the yarn tail to close the center.
Stitch count: 6
Round 2
Work:
inc × 6
In other words, place 2 single crochets into every stitch from Round 1.
Stitch count: 12
Put your stitch marker into the first stitch of the round and continue moving it as you work.
Round 3
Work:
(1 sc, inc) × 6
Stitch count: 18
Round 4
Work:
(2 sc, inc) × 6
Stitch count: 24
Round 5
Work:
(3 sc, inc) × 6
Stitch count: 30
The basic increase section is now finished. You should have a neat circular top with 30 stitches around.
Crochet the Penguin’s Face
Now comes the most detailed section of the project.
For clarity, I’ll use:
- B = black
- W = white
Keep your yarn changes loose enough that the fabric doesn’t pull inward.
Round 6
Work:
15 B, 2 W, 3 B, 2 W, 8 B
Stitch count: 30
When changing colors, begin the final stitch of the old color normally but stop before the last yarn-over. Complete that stitch with the new color.
This gives you a cleaner transition.
Round 7
Work:
14 B, 4 W, 1 B, 4 W, 7 B
Stitch count: 30
The white sections are becoming wider, while one dark stitch remains between them.
Round 8
Repeat Round 7:
14 B, 4 W, 1 B, 4 W, 7 B
Stitch count: 30
At this point, you should start seeing the characteristic penguin face taking shape.
Round 9
Work:
13 B, 11 W, 6 B
Stitch count: 30
Keep the carried yarn loose during this wider white section. Tight floats can noticeably change the shape of a small amigurumi piece.
Rounds 10 and 11
Repeat Round 9:
13 B, 11 W, 6 B
Stitch count: 30 each round
At the end of Round 11, change to gray yarn for the lower body.
Crochet the Gray Body
Rounds 12 to 20
Work:
30 sc around
Repeat for 9 rounds total.
Stitch count: 30 per round
You can now cut the black and white yarn because the facial colorwork is finished.
These straight rounds give the penguin its plump, rounded body.
If you’re enjoying this little character style, the Baby Chicks and Ducks with Hats Crochet Pattern would make a particularly nice companion project because it continues the tiny animal-and-hat theme.
Add the Eyes
Before closing the body, position the eyes.
Use:
5 mm safety eyes
Place them:
Between Rounds 9 and 10
Position them within the white facial section while leaving enough room in the middle for the beak.
Secure the backs before stuffing and closing the penguin.
Shape and Close the Penguin Body
Now we’ll begin decreasing.
Round 21
Work:
(3 sc, dec) × 6
Stitch count: 24
Round 22
Work:
(2 sc, dec) × 6
Stitch count: 18
Before beginning the next round, start stuffing the body.
Use fiber filling or scrap yarn, adding it gradually and distributing it evenly.
Round 23
Work:
(1 sc, dec) × 6
Stitch count: 12
Add more stuffing now if necessary.
You want the body to hold its rounded shape without packing it so tightly that the stitches stretch apart.
Round 24
Work:
dec × 6
Stitch count: 6
Cut the yarn, leaving a tail for closing.
Thread the tail onto your yarn needle and pass it through the remaining six stitches.
Pull firmly to close the opening.
Secure the yarn and hide the tail inside the body.
The main penguin body is finished.
Crochet the Penguin Wings
You’ll need to make 2 wings.
Each wing begins with a tiny four-stitch magic ring.
Wing Round 1
Make a magic ring.
Work:
4 sc
Pull the ring closed.
Stitch count: 4
Wing Round 2
Work:
inc × 4
Stitch count: 8
Because the foundation is so small, this round can feel fiddly. Take your time finding each stitch.
Wing Round 3
Work:
8 sc
Stitch count: 8
Round 4
Work:
8 sc
Round 5
Work:
8 sc
After Round 5, fasten off and leave a long yarn tail for sewing.
Repeat the entire process for the second wing.
Sew the Wings in Place
Position one wing on each side of the gray body.
Use the long yarn tails to stitch them securely into place.
Try to position both wings at approximately the same height before you begin sewing. I like to check the penguin from the front first because even a small difference is noticeable on a tiny amigurumi.
Secure the yarn ends and hide them inside the body.
Crochet the Penguin Beak
Use dark gray yarn.
Make a magic ring.
Work:
5 sc into the magic ring
Pull the center tightly closed.
Find your first single crochet and join with:
sl st
Gently shape the stitches upward to form the small beak.
Fasten off, leaving a long tail for sewing.
Position the beak between the eyes.
Sew it securely to the white facial area, then weave the remaining yarn tail into the body.
That tiny beak makes a surprisingly big difference to the penguin’s expression.
How to Crochet the Penguin Hat
Now we get to the part that gives this Penguin with Hats Crochet Pattern so much personality.
You can use different yarn colors and ear styles to turn the same basic hat construction into several looks.
Start the Hat Crown
For the beginning of the hat, repeat Rounds 1 through 5 of the penguin body.
That gives you:
- Round 1: 6 sc
- Round 2: 12 sc
- Round 3: 18 sc
- Round 4: 24 sc
- Round 5: 30 sc
After finishing Round 5, make:
1 additional sc in the next stitch
Now identify a stitch directly across from your last stitch and place a stitch marker there.
Build the Hat Panel
Chain:
ch 1
Turn your work.
Single crochet across until you reach the stitch marker.
Chain 1 and turn again.
Continue working back and forth in single crochet rows.
Make:
8 rows total
Each row is worked from one side of the hat opening to the other.
This construction leaves part of the original Round 5 stitches at the back while creating the longer section around the rest of the hat.
Make the Front Hat Band
After completing the eight rows, chain:
ch 14
Find the corresponding stitch on the opposite side of the opening.
Join with:
sl st
Chain:
ch 1
Turn.
Starting in the second chain from the hook, work:
1 sc into each chain
When you reach the end of the chain section, make:
sl st into the next stitch
Chain 1 and fasten off.
Weave in your yarn ends.
You now have the basic penguin headpiece.
Crochet the Hat Ears
The ear shape determines whether you’re making a bear-style or bunny-style hat.
Ear Round 1
Make a magic ring.
Work:
6 sc
Pull the ring closed.
Stitch count: 6
Ear Round 2
Work:
(inc, 1 sc) × 3
Stitch count: 9
Ear Round 3
Work:
9 sc
Stitch count: 9
For Bear Ears
Stop after Round 3.
Fasten off and leave a long tail for sewing.
Make a second matching ear.
For Bunny Ears
Continue:
Rounds 4 to 6: 9 sc
Stitch count: 9 each round
Fasten off after Round 6 and leave a long tail.
Make the second ear the same way.
The extra three straight rounds create the longer shape needed for bunny ears.
Attach the Ears
Arrange the two ears on top of the hat before sewing.
For the bear version, keep the short rounded ears spaced apart.
For the bunny version, position the longer ears upright on top.
Once you’re happy with the placement, sew each ear securely to the hat and weave in the yarn tails.
This interchangeable character idea also pairs nicely with the No Sew Dress Up Leggy Frog Crochet Pattern if you enjoy crochet projects where accessories change the finished character.
Optional Fruit Hat
You can also turn the basic hat into a fruit-inspired version.
A strawberry-style hat can be made with a red base and a green leaf decoration attached to the top. Small contrasting seed details can then be added across the red section.
The specific crochet instructions for the leaf are not included in this pattern, so I wouldn’t invent a leaf pattern here.
The same basic hat construction can still serve as your starting point.
Optional Penguin Feet
Feet are optional.
One simple option is to use black felt.
Alternatively, crochet the feet using the same construction as the wings, but work them in black yarn.
Position them at the bottom of the penguin and secure them carefully.
Tips for Neater Penguin Colorwork
The face is the part of this project where patience pays off most.
Don’t tug on the unused yarn when switching between black and white. If those strands become too tight, they’ll pull the stitches together and distort the head.
Instead, leave enough slack for the crocheted fabric to keep its natural shape.
I also recommend stopping after every colorwork round and checking that you still have 30 stitches.
The stitch count does not change during Rounds 6 through 20.
Keep the Face Centered
The changing white sections are deliberately shaped across several rounds.
They progress from two small white sections to one broader white facial area:
Round 6: 2 W, dark center, 2 W
Rounds 7 to 8: 4 W, 1 dark stitch, 4 W
Rounds 9 to 11: 11 W
That gradual change creates the distinctive light penguin face directly within the body rather than requiring a separate crocheted face patch.
Stuff Gradually
Don’t wait until the six-stitch opening to try squeezing all your stuffing inside.
Start filling after Round 22 as instructed, then add more before the final closure if needed.
Push small amounts toward the top and sides first. This helps keep the body rounded instead of concentrating all the filling at the bottom.
For another rounded amigurumi project with a very different personality, try the Moo Deng Baby Hippo Crochet Pattern.
Make Several Hats
The basic penguin can stay exactly the same while the hats change.
A short pair of ears creates the bear version, while continuing the ears through Round 6 creates the bunny version.
Changing yarn colors gives you even more combinations without having to remake the penguin itself.
If character accessories are your favorite part, the Bear and Hello Kitty Glasses Holder Crochet Pattern is another playful project built around recognizable decorative details.
Your Penguin with Hats Is Finished
Once the beak and wings are attached, the little black-and-white face finally comes to life. Then the hat changes everything. Short round ears give it a bear-like look, longer pink ears create a bunny version, and a bright fruit-inspired headpiece gives the exact same penguin a completely different personality.
That versatility is what makes the Penguin with Hats Crochet Pattern such an entertaining amigurumi project. You can finish one penguin and keep experimenting with new headpieces instead of starting an entirely new character every time.
Frequently Asked Questions
What stitch is mainly used for the Penguin with Hats Crochet Pattern?
The project is worked primarily in single crochet. You’ll also use increases, decreases, chains, and slip stitches.
How many stitches are in the widest part of the penguin?
The body reaches 30 stitches at Round 5. It stays at 30 stitches through Round 20 before the decreases begin.
Where do I place the safety eyes?
Use 5 mm safety eyes and place them between Rounds 9 and 10, leaving room between them for the beak.
