

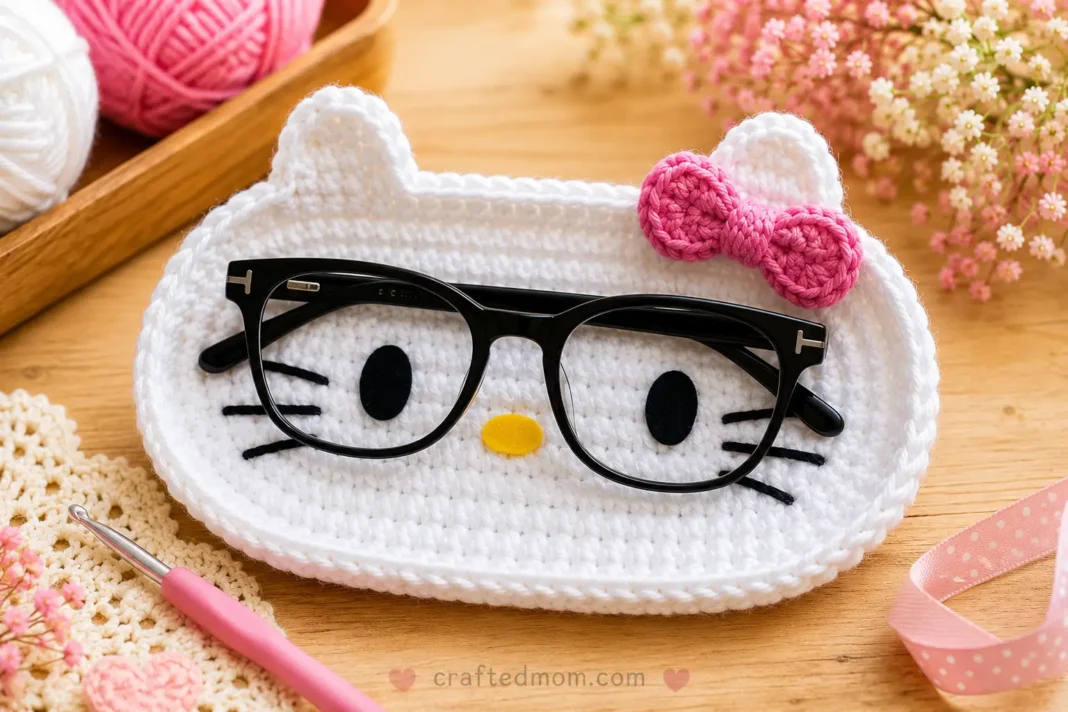
A pair of glasses can completely change the face of this little crochet project. Place black frames across the white cat version and suddenly the holder looks like part desk organizer, part character decor. Take the glasses away and the pointed ears, whiskers, yellow nose, and pink bow still make it recognizable on its own.
The Hello Kitty Glasses Holder Crochet Pattern starts with a long oval worked around both sides of a foundation chain. The main holder uses two strands of yarn held together with a 6 mm crochet hook, which gives the piece enough structure to hold its shape on a desk. The facial details and bow are added afterward using felt, glue, and a smaller hook.
The same base pattern can also be turned into a bear glasses holder by changing Round 7 and adding rounded ears instead of pointed ones. The tutorial finishes both designs as glasses holders or coasters, but this article focuses on the white cat version and its distinctive bow and felt face.
Hello Kitty Glasses Holder Crochet Pattern at a Glance
| Project Detail | Information |
| Project | Crochet cat-inspired glasses holder / desk decor |
| Main Crochet Hook | 6 mm |
| Bow Crochet Hook | 4 mm |
| Yarn | 5-ply yarn |
| Main Yarn Setup | Two strands held together |
| Bow Yarn Setup | One strand |
| Foundation Chain | 17 chains |
| Foundation Length | About 4.5 inches in the tutorial |
| Main Construction | Oval worked around both sides of the foundation chain |
| Main Rounds | 7 |
| Main Stitch | Single crochet |
| Ear Stitches | Double crochet and triple crochet |
| Face Details | Felt eyes, nose, and whiskers |
| Bow | Crocheted separately in pink yarn |
| Assembly | Glue is used in the tutorial |
| Finished Use | Glasses holder, coaster, or desk decor |
The tutorial begins with a 17-chain foundation measuring about 4.5 inches, then builds the oval through a series of increases around the rounded ends.
Materials You’ll Need
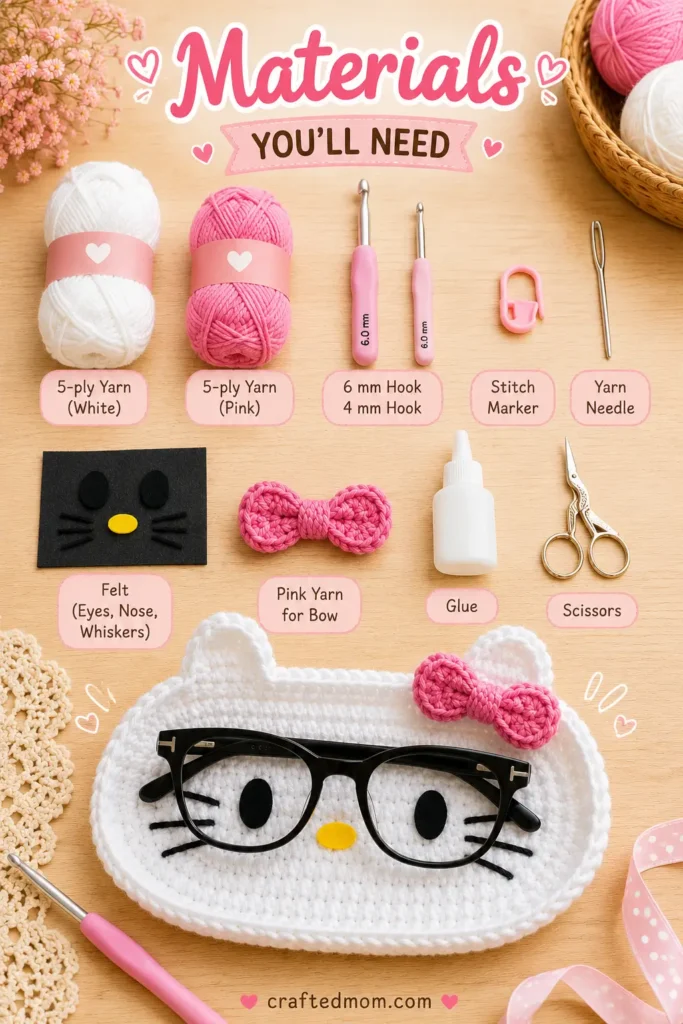
For this project, gather:
- 5-ply yarn
- White yarn for the main cat holder
- Pink yarn for the bow
- 6 mm crochet hook
- 4 mm crochet hook
- Stitch marker
- Felt
- Scissors
- Glue
- Yarn needle
The reference materials also show pink-handled crochet hooks, stitch markers, ribbon, and a needle arranged inside the finished holder, which gives a good idea of how the project can double as a small desk organizer.
The cat’s eyes, nose, and whiskers are cut from felt and glued onto the finished crochet base rather than embroidered.
A Quick Safety Note
Glue, scissors, and small felt pieces all need a little care during assembly. If a child is helping with this project, an adult should handle cutting and gluing.
Crochet Abbreviations
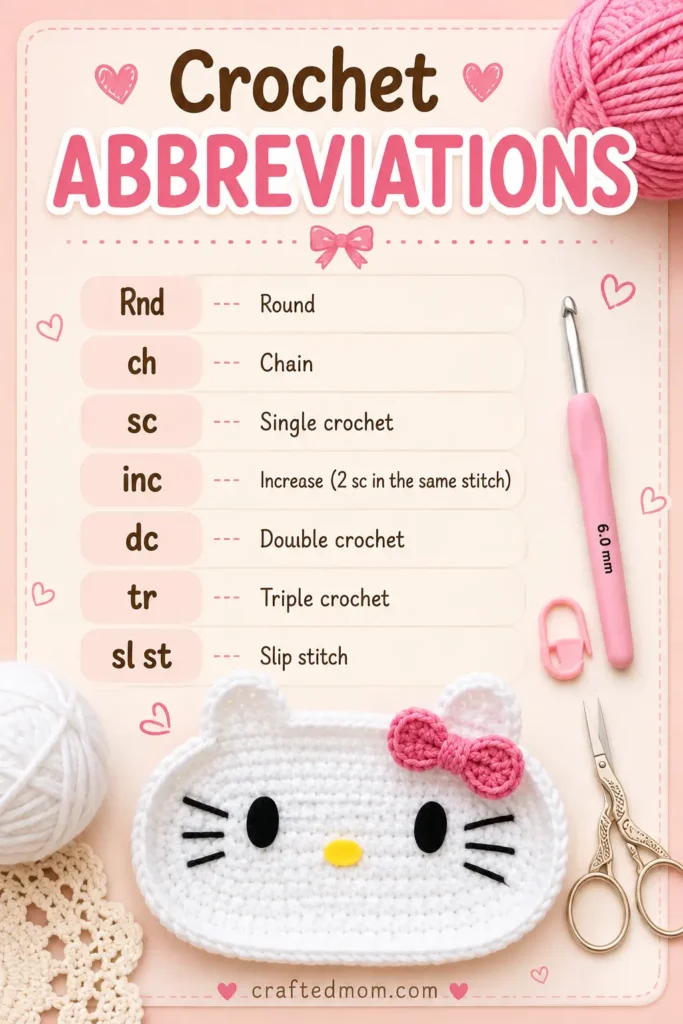
This pattern uses standard US crochet terminology.
| Abbreviation | Meaning |
| Rnd | Round |
| ch | Chain |
| sc | Single crochet |
| inc | Increase |
| dc | Double crochet |
| tr | Triple crochet |
| sl st | Slip stitch |
An increase means working 2 single crochets into the same stitch.
Before You Start
The main holder is worked with two strands of yarn held together. This is important because it creates a thicker fabric than you would get from one strand alone.
The entire shape begins with a chain, not a magic ring.
You’ll crochet down one side of the chain, place several stitches into the final chain to turn the corner, then continue along the opposite side.
That creates the long oval shape.
Keep a stitch marker in the first stitch or beginning chain of each round so you can easily identify where the round ends.
One more important detail: the slip stitch used to join the previous round does not count as a stitch to crochet into during the next round. The creator specifically points this out in Round 2.
How to Crochet the Main Glasses Holder
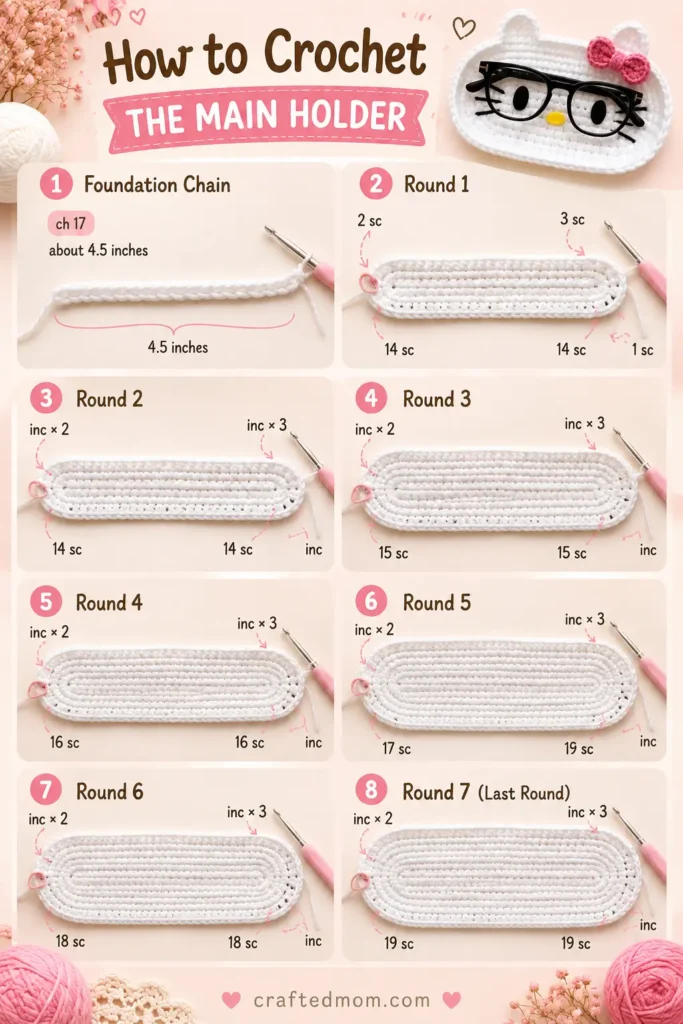
Hold two strands of yarn together and use the 6 mm crochet hook.
Foundation Chain
Make a slip knot.
Then work:
ch 17
The tutorial’s chain measures approximately:
4.5 inches
Your measurement may vary slightly depending on your yarn and tension, but the important pattern instruction is the 17-chain foundation.
Round 1
Skip the first chain.
In the second chain from your hook, work:
2 sc
Place a stitch marker in the first single crochet.
Now work:
14 sc
There should be one chain remaining.
Into that final chain, work:
3 sc
This curves the crochet around the end of the foundation.
Now continue along the opposite side of the foundation chain.
Work:
14 sc
The tutorial carries the starting tail along the stitches here so it becomes trapped inside the crochet rather than needing to be woven in separately.
In the final stitch, work:
1 sc
Join with:
sl st into the first sc
Round 1 is complete.
Round 2
Start with:
ch 1
Place the stitch marker on that chain.
Work:
inc × 2
Then:
14 sc
At the opposite rounded end, work:
inc × 3
Continue:
14 sc
Finish with:
inc
You may notice what looks like another stitch remaining. The tutorial explains that this is the slip stitch from the previous round and should be ignored.
Join with:
sl st into the first sc or ch-1 space.
Round 3
Start:
ch 1
Move your stitch marker.
At the first rounded end, work:
(1 sc, inc) × 2
Then:
14 sc
At the opposite end:
(1 sc, inc) × 3
Continue along the long side:
14 sc
Finish the remaining end section with:
1 sc, inc
The tutorial again notes that there may appear to be an extra stitch. Ignore it and join into the beginning chain space.
Finish with:
sl st into the ch-1 space.
Round 4
Start:
ch 1
Work:
(2 sc, inc) × 2
Then:
14 sc
At the opposite end:
(2 sc, inc) × 3
Continue:
14 sc
Finish with:
2 sc, inc
Join with:
sl st into the ch-1 space
At this point, the oval should be noticeably wider around both ends.
Round 5
Begin:
ch 1
Work:
(3 sc, inc) × 2
Then:
14 sc
At the other rounded end:
(3 sc, inc) × 3
Continue:
14 sc
Finish with:
3 sc, inc
Join with:
sl st into the ch-1 space.
Round 6
Chain:
ch 1
Now work:
1 sc in every stitch around
There are no increases in this round.
Join with:
sl st into the ch-1 space
The tutorial notes that the oval may start folding inward slightly at this point. That’s normal and part of the shape forming.
The next round creates the cat ears.
Round 7: Crochet the Pointed Cat Ears
Start:
ch 1
Then work:
40 sc
Now we’re ready for the first ear.
In the next stitch, work all of the following into the same stitch:
1 dc
1 tr
ch 1
1 tr
ch 1
1 tr
1 dc
The mix of taller triple crochets and small chain spaces creates the pointed ear shape.
Now work:
12 sl st
In the next stitch, repeat the ear:
1 dc, 1 tr, ch 1, 1 tr, ch 1, 1 tr, 1 dc
The creator gives one important shaping tip here: gently pull the middle triple crochet upward so the ear looks more pointed.
Finish the remaining section with:
4 sc
Then:
sl st into the ch-1 space
Finish with:
ch 1
Cut your yarn and weave in the end.
The main cat holder is now complete.
Check the Shape Before Decorating
Before adding the face, lay the crochet piece flat and look at both ears.
If one ear looks more rounded than the other, gently pull the middle triple crochet upward again.
The overall shape should be an elongated oval with two pointed ears rising from one long edge.
This is also a good time to place your glasses across the holder and see where the facial details will be most visible.
How to Crochet the Pink Bow
The bow is worked separately using one strand of pink yarn and the 4 mm crochet hook.
Make a slip knot.
Then:
ch 10
Skip the first three chains.
Starting in the fourth chain from the hook, work:
7 tr
That means one triple crochet into each remaining chain.
After the seven triple crochets:
ch 3
Then:
sl st into the same stitch
Cut the yarn, but leave a long tail.
Shape the Bow
Use your crochet hook to bring the long tail toward the center of the crocheted piece.
Wrap the tail around the middle several times.
As you wrap, the rectangular crochet piece pinches inward and begins forming a bow.
When the bow has the shape you want, bring the tail to the back, secure it, and weave in the end.
The reference image places the pink bow near one of the pointed ears.
Before gluing it down, position it first and check the overall balance.
For another small wearable-style crochet detail, the Button Headband Crochet Pattern would make a nice related project.
Make the Felt Face
The tutorial uses felt for the face rather than crocheting or embroidering these pieces.
You’ll need to cut:
- Two black oval eyes
- One small yellow oval nose
- Black whisker strips
Draw the shapes onto the felt first if that helps you keep them even.
Then cut them out carefully.
The finished reference image shows:
- Two vertical black oval eyes
- One small yellow oval nose in the center
- Three short black whiskers on each side
Arrange all the felt pieces on the holder before applying glue.
Once the spacing looks right, glue them into place.
Attach the Bow
Place the pink crochet bow near the ear as shown in the reference images.
Glue it securely.
Once the face and bow are attached, allow the glue to dry before handling the holder heavily.
Turn It Into a Glasses Holder
Now place a pair of glasses across the finished face.
The frame becomes part of the character’s expression, which is what makes this project especially fun as desk decor.
The tutorial also refers to the finished pieces as glasses holders or coasters, so you don’t have to use it only for eyewear.
You could also use the shallow oval shape for lightweight desk items such as crochet hooks, stitch markers, or needles.
If you enjoy practical crochet projects that double as decor, the Frog and Bear Wallet Crochet Pattern and Magic Pouch Net Bag Crochet Pattern are good internal-link companions.
Optional Bear Variation
The transcript includes a second Round 7 for a bear version using the same main oval base.
Instead of pointed cat ears, each bear ear is made in one stitch with:
1 dc, 3 tr, 1 dc
Then the pattern uses:
12 sl st
before making the second ear.
The bear also receives a separate crochet muzzle and 10 mm flat-backed facial pieces.
Because your focus keyword is specifically the Hello Kitty Glasses Holder Crochet Pattern, I would keep the cat version as the main article focus and treat the bear as an optional variation rather than giving it equal SEO weight.
Tips for a Neater Finished Glasses Holder
The most important thing is keeping the foundation chain relaxed. If those first 17 chains are too tight, the center of your oval can pull inward while the outer rounds expand.
Move your stitch marker every round. The pattern contains several increase groups around the ends, and it becomes much harder to track them if you lose the starting point.
Also remember to ignore the previous joining slip stitch when the tutorial tells you to. Crocheting into it can gradually add unwanted stitches and distort the oval.
When you reach Round 6, don’t worry about the slight inward fold. The creator specifically says that this curling is normal.
Finally, shape the pointed ears before attaching the bow. Pulling the center triple crochet upward gives you a cleaner cat-ear silhouette.
More Small Crochet Projects to Try
If you like compact crochet pieces that are practical enough to use around the house, try the Apple Pouch Water Bottle Holder Crochet Pattern or the Pufferfish Drawstring Pouch Crochet Pattern next.
For more small character projects, the Baby Chicks and Ducks with Hats Crochet Pattern, Mini Miffy Crochet Pattern, and Moo Deng Baby Hippo Crochet Pattern would fit nicely in the same collection.
The Dress Up Leggy Frog Bag Friend Crochet Pattern is another option if you enjoy crochet characters with extra accessories and personality.
The Glasses Finish the Face
Set the finished crochet piece on your desk without glasses and it already has plenty of character: two pointed ears, a pink bow, black whiskers, oval eyes, and that tiny yellow nose.
Then put your glasses across it.
Suddenly the frames look like they belong there.
That visual trick is what makes the Hello Kitty Glasses Holder Crochet Pattern more interesting than a simple flat coaster. The oval crochet construction gives you something practical, while the face and bow turn an everyday place to set your glasses into playful desk decor.
Frequently Asked Questions
What size crochet hook do I need for the Hello Kitty Glasses Holder Crochet Pattern?
Use a 6 mm crochet hook with two strands of yarn held together for the main holder. The pink bow is made with one strand of yarn and a 4 mm hook.
How many chains do I make for the main glasses holder?
Start with 17 chains. In the tutorial, that foundation measures about 4.5 inches long.
Why is the glasses holder crocheted with two strands of yarn?
The tutorial specifically works the main holder with two yarn strands together. This creates the thicker crochet fabric used for the finished holder.
