

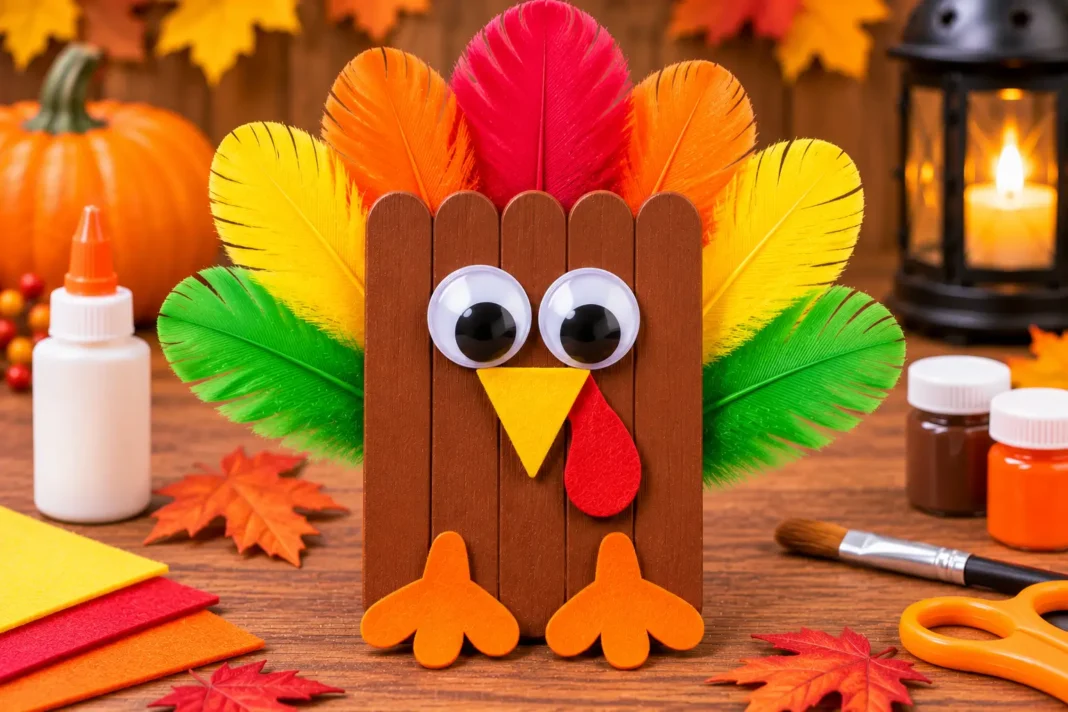
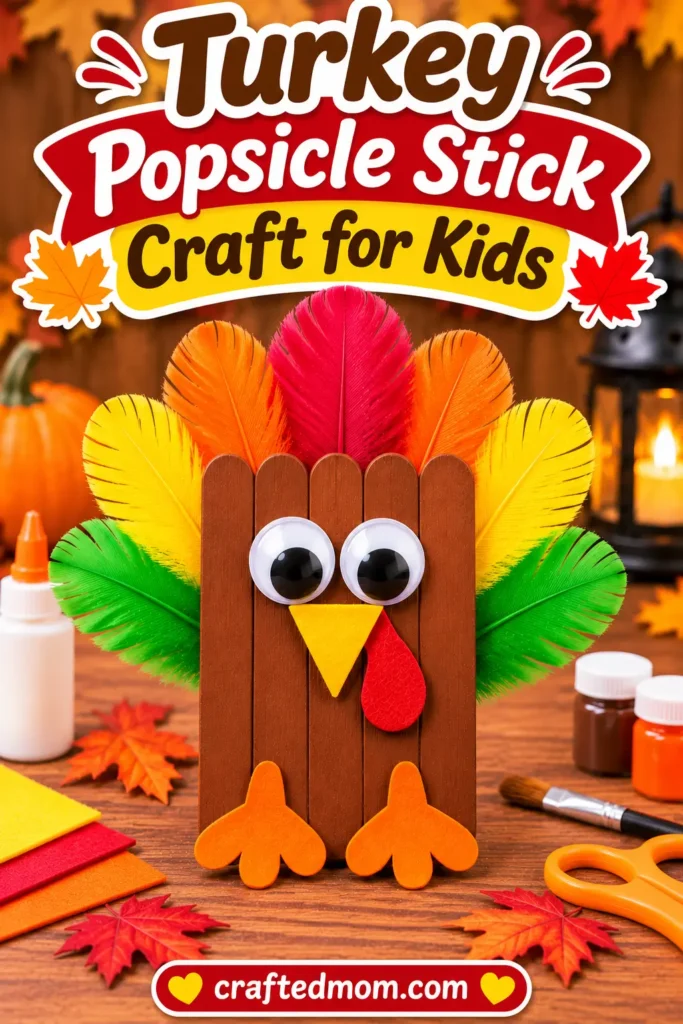
This turkey popsicle stick craft turns simple wooden craft sticks into a colorful Thanksgiving turkey with a brown body, bright feathers, googly eyes, and a cute felt face.
Using five jumbo popsicle sticks for the main body, kids can create a cheerful turkey to display at home or in the classroom. The colorful feathers form the tail, while orange, yellow, and red felt add the finishing touches.
It’s an affordable Thanksgiving craft that works well for family activities, preschool classrooms, and fall crafting afternoons.
Why You’ll Love This Turkey Popsicle Stick Craft
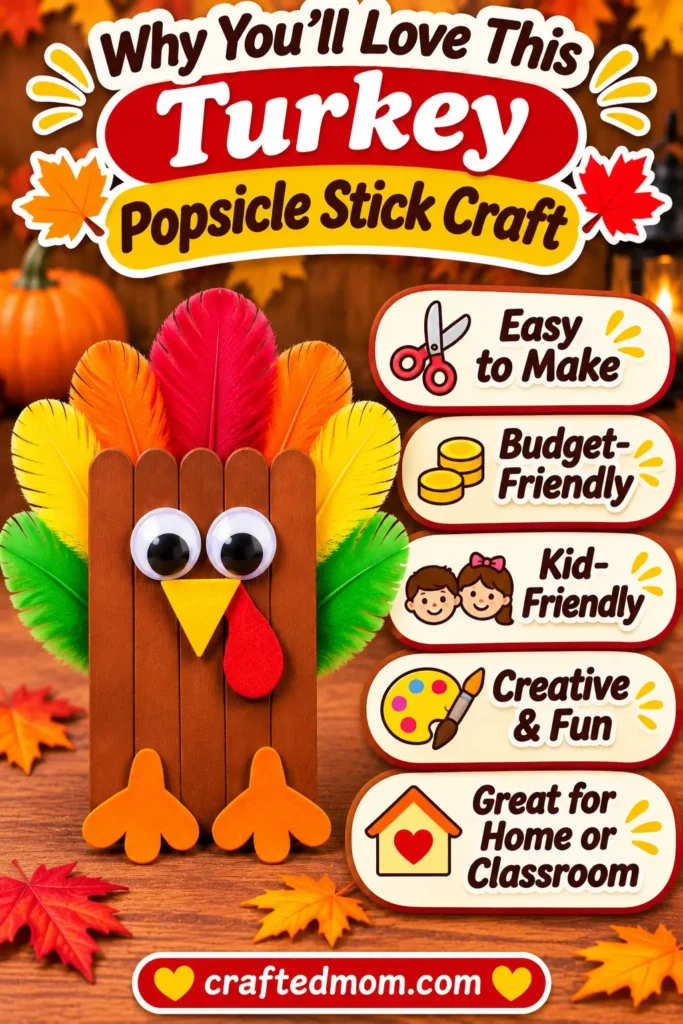
One of the nicest things about this project is how easily children can make their turkeys look different.
They can choose their favorite feather colors, arrange the tail in different patterns, and experiment with facial expressions.
The materials are also easy to find at craft stores and dollar stores.
For younger children, adults can prepare the wooden base beforehand. Older kids can help with painting, arranging feathers, and cutting simple felt shapes.
Supplies You’ll Need
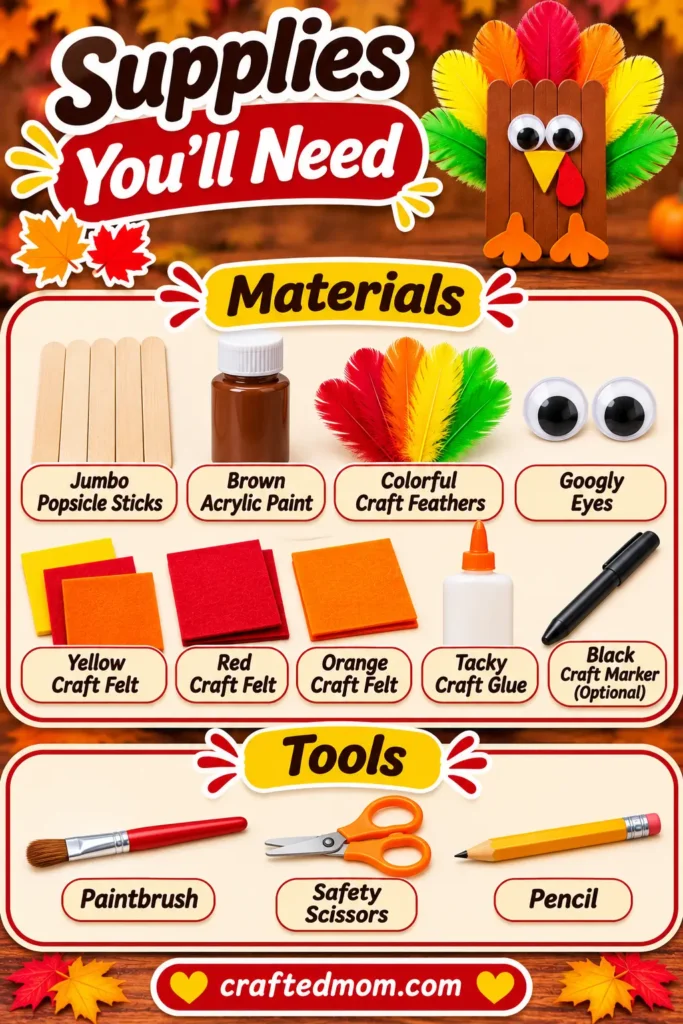
Materials
- Jumbo Wooden Popsicle Sticks: Five sticks form the turkey’s main body, with additional pieces used to support the back.
- Brown Acrylic Craft Paint: For painting the turkey’s wooden body.
- Colorful Craft Feathers: Create the turkey’s bright, fan-shaped tail.
- Googly Eyes: Two eyes give the turkey its playful expression.
- Yellow Craft Felt: For the triangular turkey beak.
- Red Craft Felt: For the turkey’s wattle.
- Orange Craft Felt: For the turkey’s feet.
- Tacky Craft Glue: For joining the wooden sticks and attaching decorations. Check compatibility with each material.
- Black Craft Marker (optional): For adding a name, year, or small decorative details.
Tools
- Paintbrush: For applying brown paint.
- Safety Scissors: For cutting felt shapes with supervision.
- Pencil: For sketching the beak, wattle, and feet.
Adults can prepare shorter wooden support pieces using suitable tools before craft time. Children’s safety scissors should not be used to forcefully cut thick wooden sticks.
Before You Start: Prepare the Popsicle Sticks
Choose a flat workspace and protect it from paint and glue.
Check each wooden stick for rough edges or splinters.
Arrange five jumbo sticks side by side to see how the turkey’s body will look. Set aside additional wooden pieces to secure the structure from behind.
For preschoolers, consider assembling the wooden body ahead of time so they can focus on painting and decorating.
How to Make a Turkey Popsicle Stick Craft
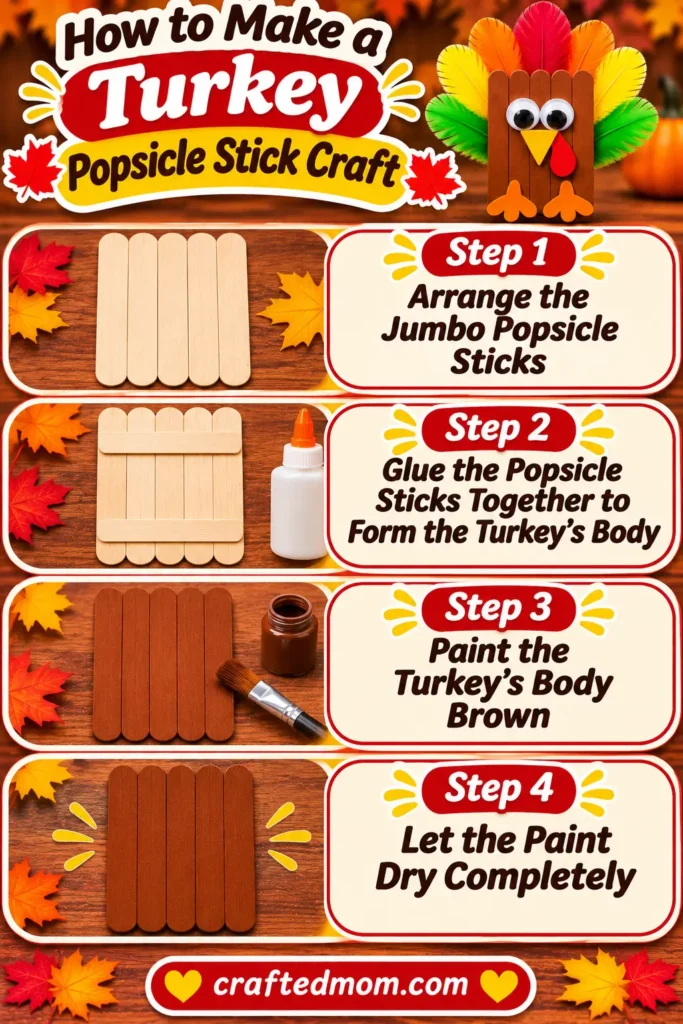
Step 1: Arrange the Jumbo Popsicle Sticks
Lay five jumbo wooden craft sticks vertically next to one another.
Keep their long edges together, forming a flat rectangular body.
Straighten the sticks before adding glue. The upper section will hold the eyes and beak, while the lower section will have the turkey’s feet.
Step 2: Glue the Popsicle Sticks Together to Form the Turkey’s Body
Carefully secure the five sticks using additional wooden support pieces across the back.
Apply glue where the supports meet the body sticks.
Press the pieces together and allow the adhesive to set before lifting the structure. Follow your glue’s drying directions.
Step 3: Paint the Turkey’s Body Brown
Use a paintbrush to cover the front of the assembled wooden body with brown acrylic craft paint.
Work along the grain of the wood, using light, even coats.
Don’t worry if a little natural wood texture remains visible. It can give the finished turkey a handmade look.
Step 4: Let the Paint Dry Completely
Place the painted body on a protected surface.
Allow the paint to dry according to its label.
If the wood still shows through and you want fuller coverage, apply another thin coat after the first has dried.
Make the Turkey’s Face
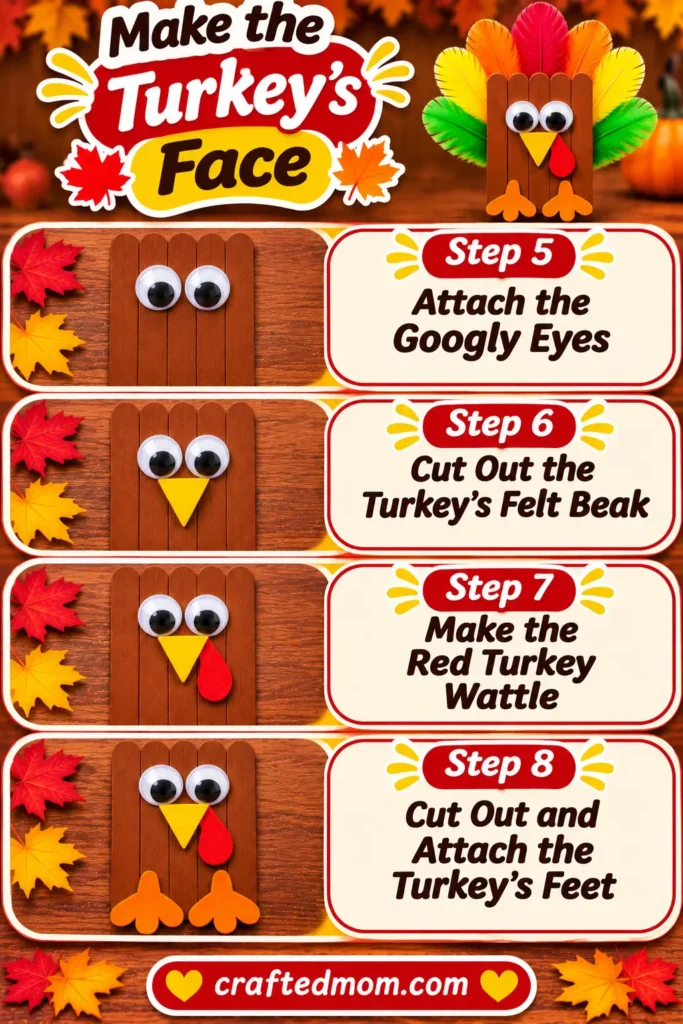
Step 5: Attach the Googly Eyes
Position two googly eyes near the upper section of the brown wooden body.
Move them around before gluing to find an expression you like.
Attach the eyes using adhesive suitable for the painted wood and their backing.
Step 6: Cut Out the Turkey’s Felt Beak
Draw a small triangle on yellow craft felt.
Cut out the shape and position it beneath the googly eyes.
Check that the beak looks proportional to the body before gluing it into place.
Step 7: Make the Red Turkey Wattle
Draw a small curved wattle on red felt.
Cut it out and position it beside or slightly beneath the yellow beak.
Attach it carefully so both felt pieces remain visible.
Step 8: Cut Out and Attach the Turkey’s Feet
Draw two simple turkey feet on orange felt.
Cut them out and arrange them beneath the lower edge of the wooden body.
Glue their upper portions to the back so the feet extend below the turkey.
Add the Colorful Turkey Feathers and Finishing Touches
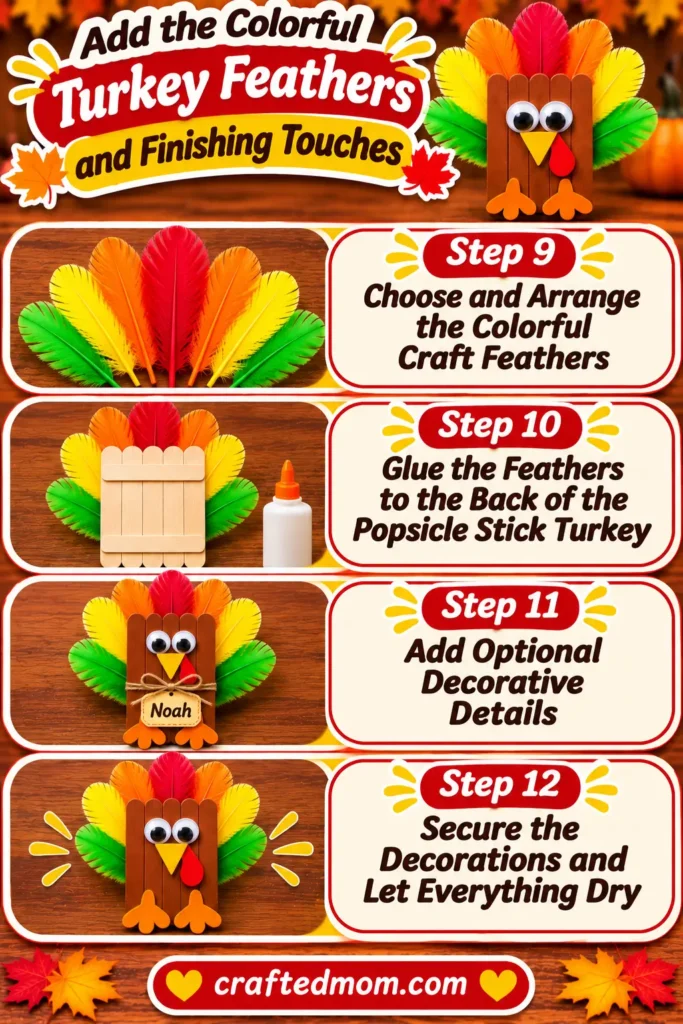
Step 9: Choose and Arrange the Colorful Craft Feathers
Spread your feathers across the table and arrange them into a fan shape.
Try placing taller feathers near the center and shorter feathers toward the edges.
Hold the arrangement behind the wooden body to check that the colors remain visible around the top and sides.
Step 10: Glue the Feathers to the Back of the Popsicle Stick Turkey
Turn the wooden turkey over.
Apply suitable glue to the feather attachment points on the back.
Start with the center feathers, then work outward. Support them while the glue develops its hold.
Keep the feathers away from the feet so the finished shape stays recognizable.
Step 11: Add Optional Decorative Details
If you’d like to personalize the turkey, write the child’s name or the year on the back using a compatible marker.
You can also add a small decorative accent, provided it doesn’t hide the face or colorful feather tail.
Step 12: Secure the Decorations and Let Everything Dry
Check the eyes, felt pieces, feathers, and wooden supports.
Gently secure any loose edges.
Let everything dry according to the adhesive instructions before moving or displaying your finished Thanksgiving turkey.
Easy Turkey Popsicle Stick Craft Tips
Prepare the wooden base first. A securely assembled body makes painting and decorating easier, especially for preschoolers.
Use suitable glue. Choose an adhesive that bonds wood, felt, and feather bases. Liquid craft glue may require longer drying time than an adult-applied hot glue alternative.
Arrange feathers before attaching them. This helps create a balanced tail without repeatedly repositioning glued feathers.
Keep facial features simple. Two eyes, a yellow beak, and a red wattle are enough to make the turkey recognizable.
Choose felt shapes that are easy to handle. Larger pieces are usually easier for young children to position and attach.
For classroom groups, prepare individual supply trays and label each turkey on the back.
Turkey Popsicle Stick Craft Variations to Try
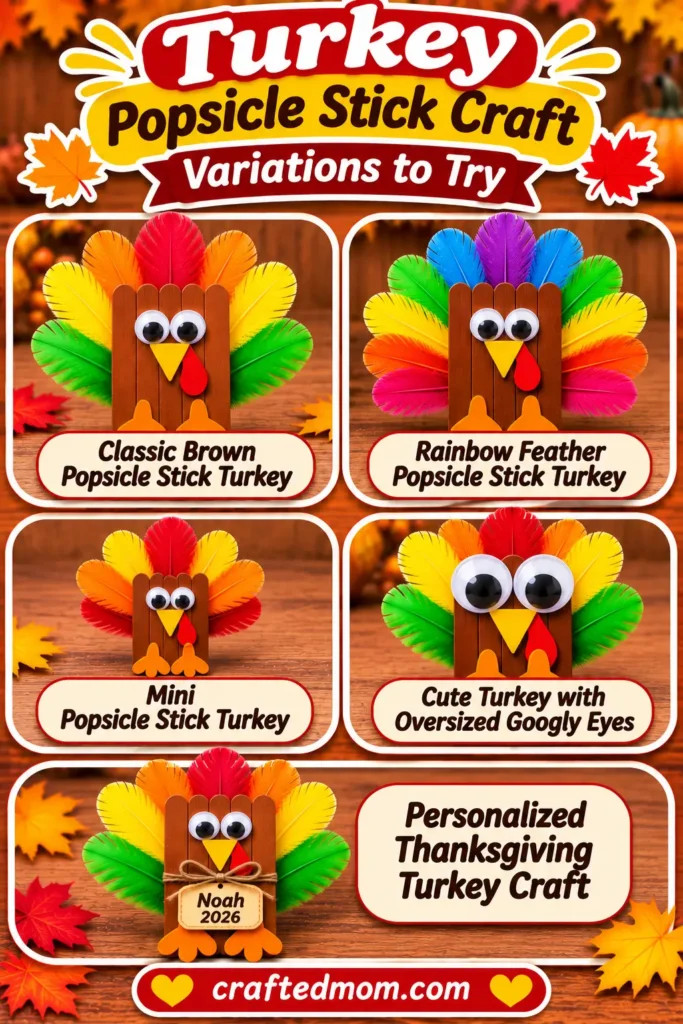
Classic Brown Popsicle Stick Turkey
Use brown paint, yellow felt for the beak, red felt for the wattle, and orange feet.
Choose traditional red, yellow, and orange feathers for the tail.
Rainbow Feather Popsicle Stick Turkey
Create a bright feather tail using assorted rainbow colors.
Keep the brown body and felt facial features so the turkey remains recognizable.
Mini Popsicle Stick Turkey
Use smaller wooden craft sticks and adjust the size of the felt pieces and feathers.
The same construction idea works on a smaller scale, although the support arrangement may need adjusting.
Cute Turkey with Oversized Googly Eyes
Choose larger googly eyes to give the turkey a funny expression.
Keep the felt beak and wattle small enough to fit comfortably beneath the eyes.
Personalized Thanksgiving Turkey Craft
Add the child’s name and year to the back of the finished turkey.
You can also choose feather colors that match your Thanksgiving decorations.
Ways to Use Popsicle Stick Turkeys for Thanksgiving
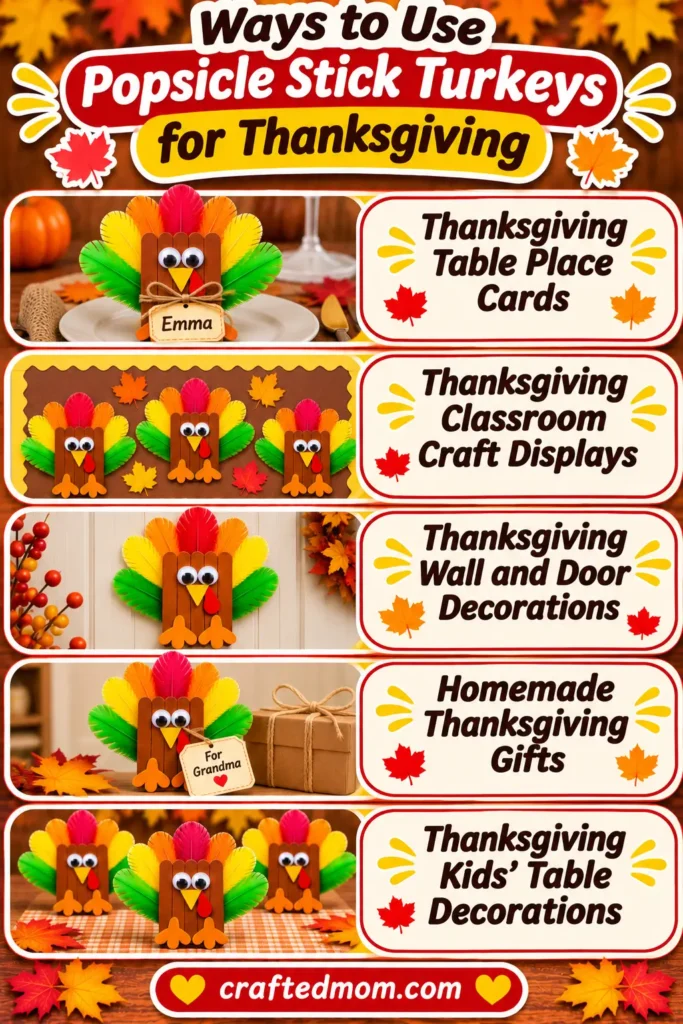
Thanksgiving Table Place Cards
Add a small name card to a completed turkey and use it as a decoration at a Thanksgiving place setting.
Keep the craft away from food and hot dishes.
Thanksgiving Classroom Craft Displays
Arrange finished turkeys together on a classroom bulletin board.
Each child’s different feather arrangement creates a colorful group display.
Thanksgiving Wall and Door Decorations
Attach dried turkeys to an indoor wall or seasonal classroom display using an appropriate mounting method.
Keep them away from moving doors that might damage the feathers.
Homemade Thanksgiving Gifts
Kids can give their finished turkey crafts to grandparents, teachers, or family members.
Include a handwritten note for a personal touch.
Thanksgiving Kids’ Table Decorations
Display several finished turkeys together on the children’s table, away from drinks and food.
They make cheerful decorations without needing additional painting or construction.
Turkey Popsicle Stick Craft Safety Notes
Adults should supervise scissors, paint, glue, and small decorations.
Inspect wooden sticks for splinters before starting. Googly eyes and small felt pieces may pose choking hazards for children who put objects in their mouths.
If using a hot glue gun, adults should handle it because of burn risks.
Keep completed wooden crafts away from open flames and hot surfaces.
Can Preschoolers Make This Turkey Popsicle Stick Craft?
Yes, preschoolers can participate with close adult supervision and some preparation.
Adults can assemble the wooden body, prepare the support pieces, and pre-cut the felt beak, wattle, and feet.
Children can help paint the turkey brown, choose their favorite feathers, arrange the face, and decorate the finished body.
For children who aren’t ready for independent cutting, providing prepared felt shapes keeps the activity manageable while preserving their creative choices.
More Thanksgiving Popsicle Stick Crafts
If your child enjoys making turkey characters, try Thankful Turkey Popsicle Stick Craft, which uses paper feathers with handwritten gratitude messages.
For more harvest-inspired projects, explore Scarecrow Popsicle Stick Craft and Corn Popsicle Stick Craft.
You can also make a Toilet Paper Roll Turkey Craft using recycled cardboard materials.
For another seasonal project already published on CraftedMom, try Popsicle Stick Pumpkin Craft. Leaving the Halloween face off makes it suitable for fall and Thanksgiving decorating.
Browse more seasonal ideas in Thanksgiving Crafts for Kids, your main collection of Thanksgiving craft tutorials.
Final Thoughts
This turkey popsicle stick craft turns ordinary wooden sticks, felt, and colorful feathers into a cheerful Thanksgiving decoration.
Once everything is dry, display your finished turkey or make another using a different feather arrangement.
Frequently Asked Questions
How Many Popsicle Sticks Do You Need to Make a Turkey?
This design uses five jumbo popsicle sticks for the main body, plus additional wooden pieces to support the back. The exact total depends on how you construct the supports.
Can I Use Regular Popsicle Sticks Instead of Jumbo Craft Sticks?
Yes. Regular sticks can make a smaller turkey. Adjust the felt shapes and feather sizes to match the body.
What Kind of Paint Works Best on Popsicle Sticks?
Acrylic craft paint suitable for wood works well. Follow the product’s age recommendations and drying instructions.
How Do You Glue Popsicle Sticks Together?
Arrange the sticks side by side and attach support pieces across the back using wood-compatible craft glue. Allow the adhesive to set before painting or handling.
