

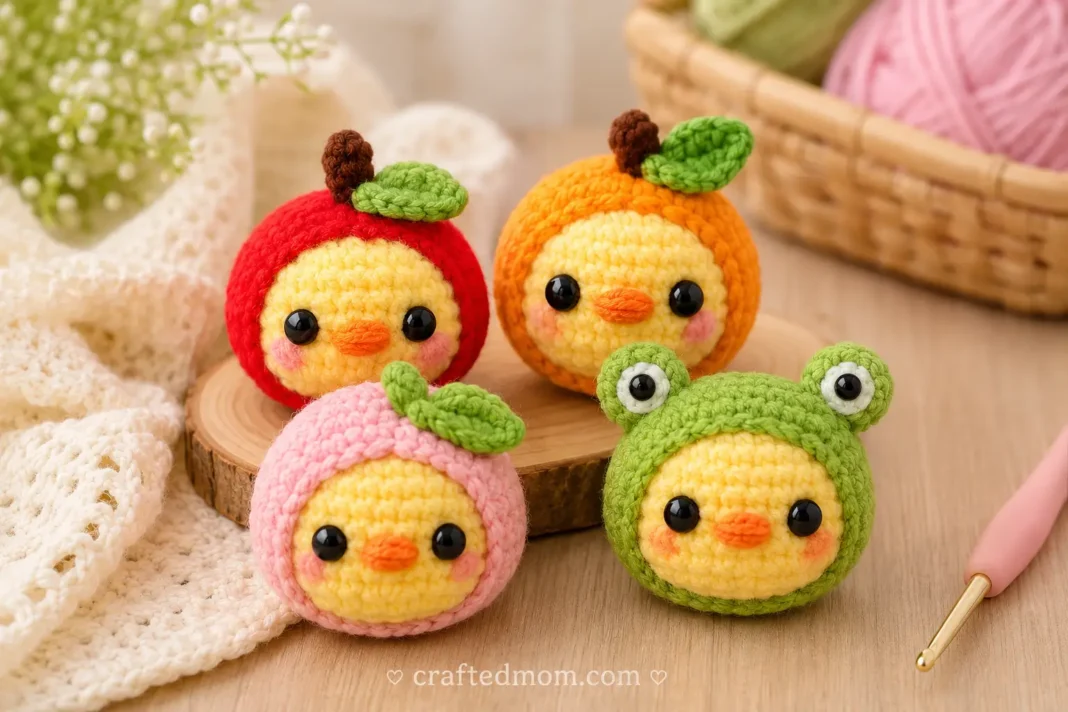
Tiny hats change everything. The little yellow chick in this pattern is already cute on its own, but once you start adding a red apple hood, orange fruit hat, pink peach version, or those rounded green frog ears, the same simple base suddenly turns into a whole collection of tiny characters.
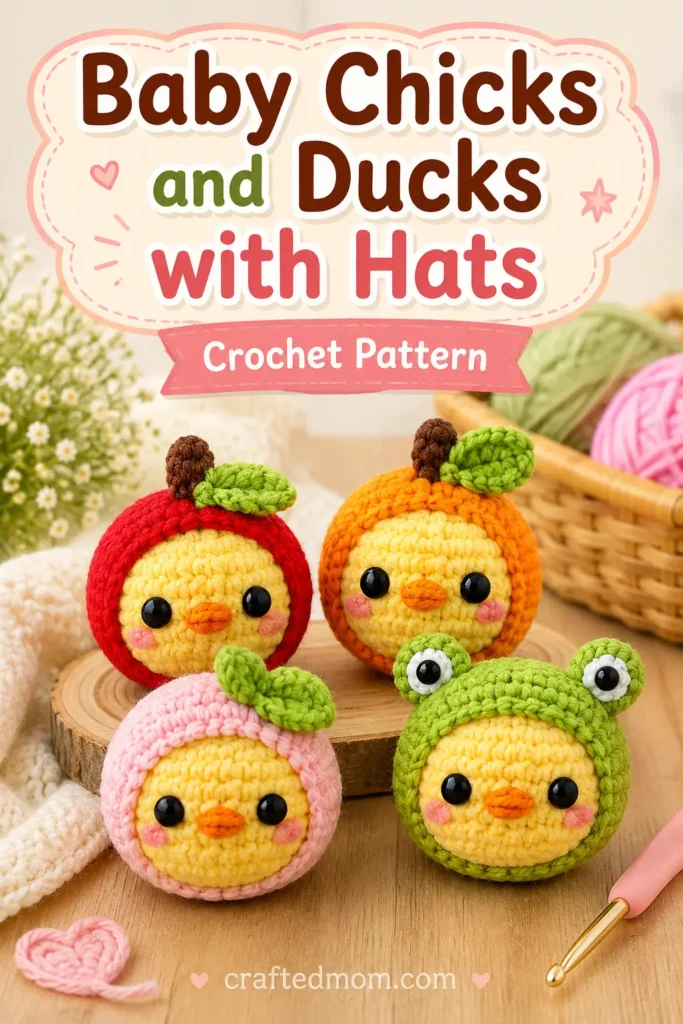
The Baby Chicks and Ducks with Hats Crochet Pattern is built around one small stuffed chick head, then dressed up with a slightly larger crochet hat and miniature decorations. The tutorial specifically shows apple, orange, peach, and frog versions, all using the same basic chick underneath.
The main chick stays fairly straightforward: magic ring, single crochet, increases, a few even rounds, then decreases to close. The fun starts after that, when you crochet the outer hat and decide what personality your chick is getting.
Baby Chicks and Ducks with Hats Crochet Pattern at a Glance
| Project Detail | Information |
| Project | Mini baby chick or duck with decorative crochet hat |
| Crochet Hook | 3.5 mm |
| Yarn | 5-ply yarn |
| Main Chick Color | Yellow |
| Hat Styles Shown | Apple, orange, peach, frog |
| Main Stitch | Single crochet |
| Starting Method | Magic ring |
| Chick Rounds | 10 |
| Hat Rounds | 9 |
| Eyes | 5 mm eyes or embroidered eyes |
| Eye Placement | Between Rounds 6 and 7 |
| Eye Spacing | 4 stitches apart |
| Stuffing | Fiber filling |
| Decorations | Stem, leaf, frog ears, star-shaped leaf |
| Face Details | Beak, eyes, blush |
| Assembly | Small decorations can be sewn or glued |
The reference material shows 5-ply yarn, a 3.5 mm hook, stuffing, needle, stitch marker, scissors, 5 mm eyes, and glue. The transcript later confirms the eye placement and the use of fiber filling.
Materials You’ll Need
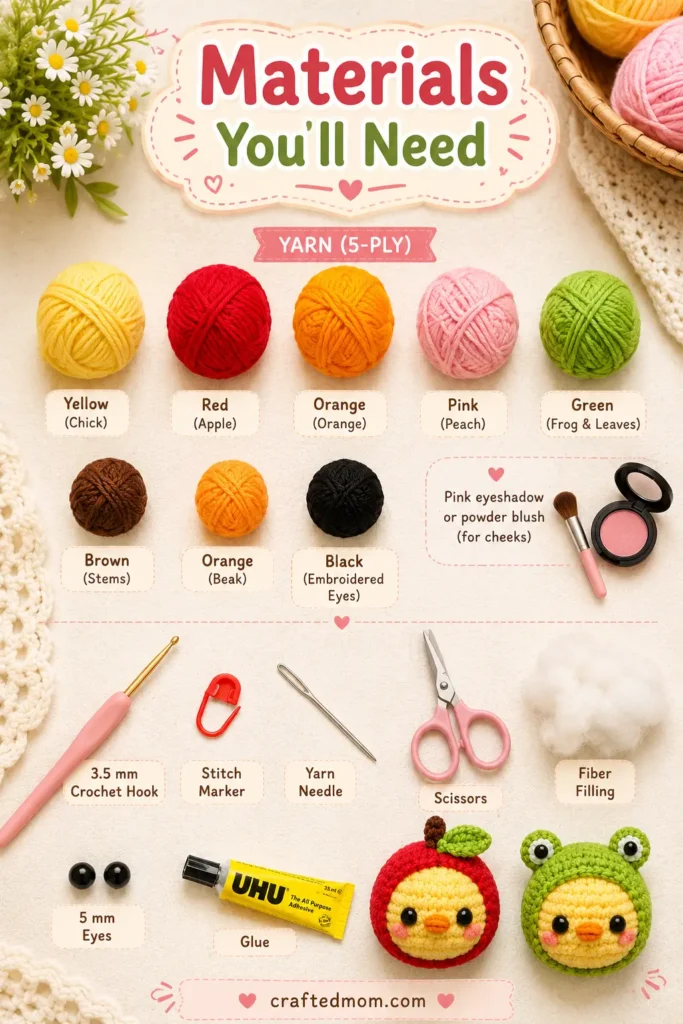
Gather:
- 5-ply yarn
- Yellow for the chick
- Red for the apple version
- Orange for the orange version
- Pink for the peach version
- Green for the frog version and leaves
- Brown for stems
- Orange yarn for the beak
- Black yarn if embroidering the eyes
- 3.5 mm crochet hook
- 5 mm eyes, if using plastic eyes
- Fiber filling
- Stitch marker
- Yarn needle
- Scissors
- Glue, if you prefer attaching the small decorations instead of sewing them
- Pink eyeshadow or powder blush for the cheeks
The blush is not just a styling idea added afterward. The creator actually uses pink eyeshadow or powder blush and applies it with a brush or fingertip.
If this project is being made for a baby or very young child, embroidered eyes are a safer choice than small plastic parts.
Crochet Abbreviations
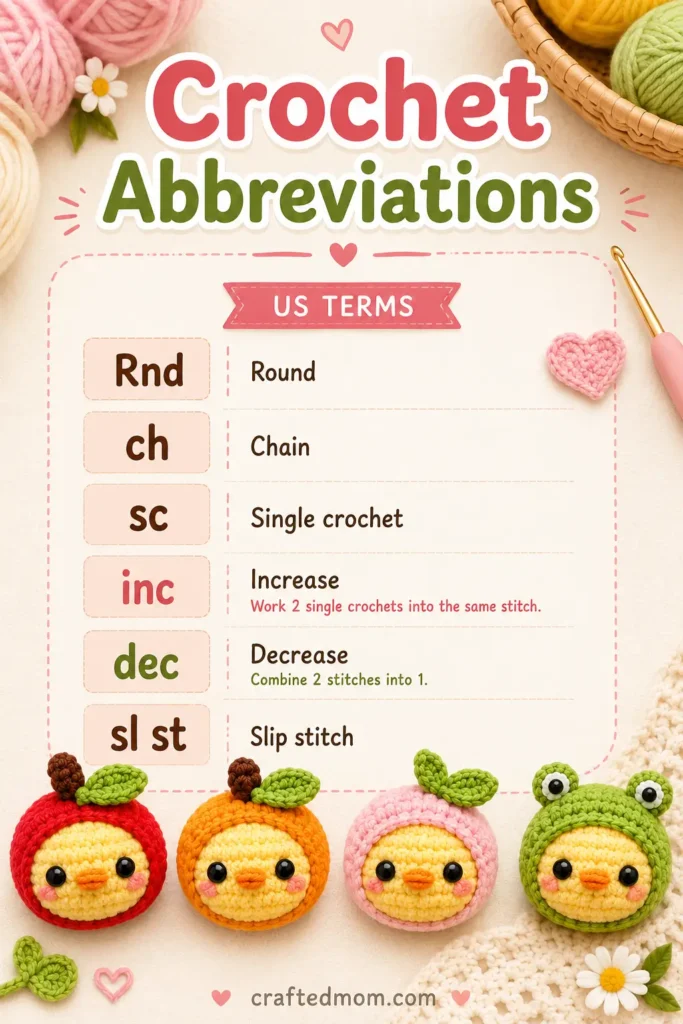
This pattern uses standard US crochet terminology.
| Abbreviation | Meaning |
| Rnd | Round |
| ch | Chain |
| sc | Single crochet |
| inc | Increase |
| dec | Decrease |
| sl st | Slip stitch |
An increase means working 2 single crochets into the same stitch.
A decrease combines 2 stitches into 1.
How the Project Is Built
There are two main crochet pieces.
First, you make the stuffed yellow chick.
Then you crochet a slightly larger outer piece that becomes the apple, orange, peach, or frog hat.
The chick body reaches 24 stitches, stays at that stitch count for several rounds, and then decreases.
The hat follows the same first four rounds, but continues increasing to 30 stitches before the sides are worked evenly and then decreased back to 24.
That small difference is what gives the hat enough room to fit around the finished chick.
How to Crochet the Baby Chick
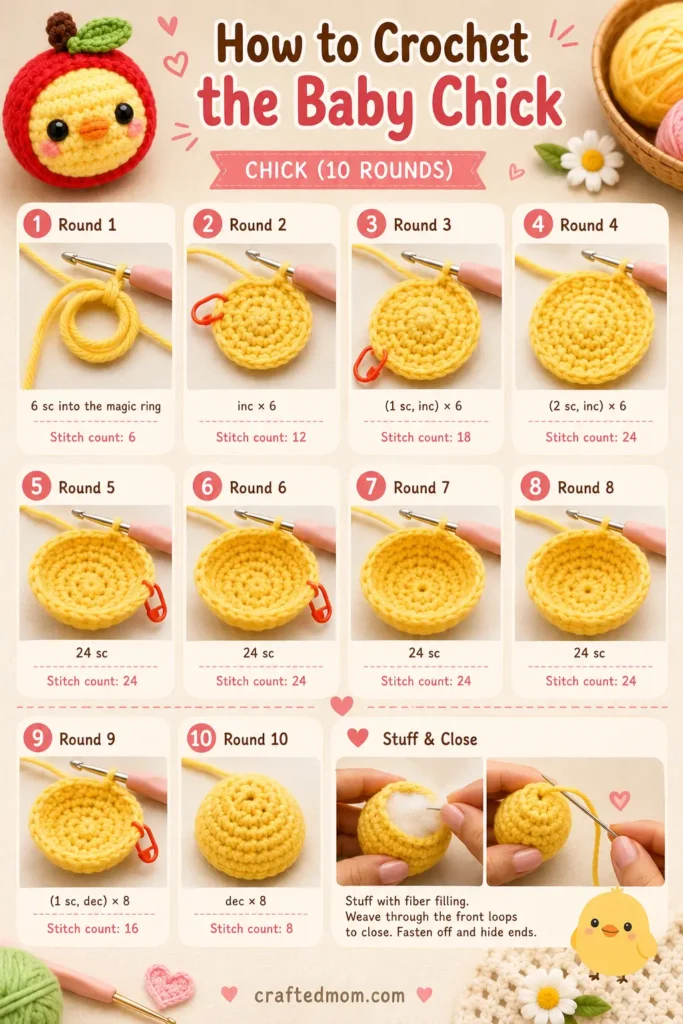
Use yellow yarn.
Start with a magic ring.
Round 1
Work:
6 sc into the magic ring
Pull the yarn tail to close the center.
Stitch count: 6
Round 2
Work:
inc × 6
This means 2 single crochets into every stitch.
Place your stitch marker in the first stitch.
Stitch count: 12
Round 3
Work:
(1 sc, inc) × 6
Repeat the sequence all the way around.
Stitch count: 18
Round 4
Work:
(2 sc, inc) × 6
That gives:
Stitch count: 24
The transcript confirms the progression from 6 stitches to 12, then 18, then 24 through the first four rounds.
Round 5
Work:
24 sc
Stitch count: 24
No increases this time.
Round 6
Work:
24 sc
Stitch count: 24
Round 7
Work:
24 sc
Stitch count: 24
Round 8
Work:
24 sc
Stitch count: 24
Rounds 5 through 8 are identical. Work one single crochet into every stitch for all four rounds.
The piece should now look more like a small rounded cup rather than a flat circle.
Round 9
Now we begin shaping the bottom.
Work:
(1 sc, dec) × 8
Stitch count: 16
To make the decrease demonstrated in the tutorial, insert your hook into the next stitch and pull up a loop. Insert your hook into the following stitch and pull up another loop.
You should have three loops on your hook.
Yarn over and pull through all three.
Repeat the sequence until you have completed all eight decreases.
Stuff the Chick
After Round 9, add your fiber filling.
Shape the chick into a small round form without packing the stuffing so tightly that it stretches the stitches.
If you’re using safety eyes, this is also the time to insert them.
Eye Placement
Place the eyes:
Between Rounds 6 and 7
Leave:
4 stitches between the eyes
That spacing leaves room for the tiny beak in the middle.
Round 10
Work:
dec × 8
Stitch count: 8
After finishing the eight decreases:
ch 1
Cut the yarn and leave a long tail for sewing.
Do not close the opening yet. The tutorial adds the facial details first.
Add the Chick’s Face
You have more than one option for the eyes.
Option 1: Use 5 mm Eyes
Insert the eyes between Rounds 6 and 7, four stitches apart.
Option 2: Embroider the Eyes
Use black yarn.
Embroider the eyes in the same location:
Between Rounds 6 and 7
Keep:
4 stitches between them
The tutorial also shows a sleeping-eye variation and explains that adding another small line changes the expression.
Add the Beak
Use orange yarn.
Embroider a tiny beak between the eyes.
Keep the shape compact. The little beak sits in the four-stitch space you left between the eyes.
Close the Chick
Now thread the long yarn tail from Round 10 onto your needle.
Sew in and out through the remaining stitches.
Pull the yarn firmly to cinch the opening closed.
Secure the yarn and hide the tail inside the chick.
The basic chick is done.
If you like making small animal projects, the Mini Miffy Crochet Pattern and Moo Deng Baby Hippo Crochet Pattern would fit nicely alongside this one.
How to Crochet the Fruit or Frog Hat
Now we make the outer piece.
Choose your hat color:
- Red for apple
- Orange for orange
- Pink for peach
- Green for frog
The first four rounds repeat the beginning of the chick.
Hat Round 1
Make a magic ring.
Work:
6 sc
Stitch count: 6
Hat Round 2
Work:
inc × 6
Stitch count: 12
Hat Round 3
Work:
(1 sc, inc) × 6
Stitch count: 18
Hat Round 4
Work:
(2 sc, inc) × 6
Stitch count: 24
At this point, the hat matches the size of the chick’s Round 4.
Now we make it larger.
Hat Round 5
Work:
(3 sc, inc) × 6
Stitch count: 30
The transcript specifically increases from 24 to 30 stitches here.
Hat Round 6
Work:
30 sc
Stitch count: 30
Hat Round 7
Work:
30 sc
Stitch count: 30
Hat Round 8
Work:
30 sc
Stitch count: 30
These three rounds are worked evenly with no increases.
Hat Round 9
Work:
(3 sc, dec) × 6
Stitch count: 24
The tutorial demonstrates a front-loop decrease here.
Insert the hook through the front loop of the next stitch, then through the front loop of the following stitch. Complete the decrease.
If you prefer the decrease method used earlier on the chick, the tutorial says that’s okay too.
Finish with:
1 sl st into the next stitch
Then:
ch 1
Cut the yarn and weave in the ends.
The basic hat is finished.
Now it just needs the decoration that tells everyone whether it’s a frog, apple, orange, or peach.
Crochet the Frog Ears
The frog version uses two small rounded ears.
For each ear:
Make a magic ring.
Work:
5 sc into the magic ring
Pull the yarn tail to close.
Leave a long yarn tail for sewing.
Make the second ear the same way.
Sew both ears to the green hat.
If you enjoy animal hats as much as the chick itself, the Penguin with Hats Crochet Pattern is another good match for this type of project.
Crochet the Star-Shaped Frog Detail
The tutorial also includes a small star-shaped green piece.
Make a magic ring.
Start with:
ch 3
Skip the first chain.
Make:
1 sl st in the second chain
Then:
1 sc in the third chain
Finish that point with:
1 sl st into the magic ring
Repeat the same sequence until you have 5 points total:
ch 3, skip 1, sl st, sc, sl st into the magic ring
Pull the magic ring closed.
Leave a long tail if you plan to sew the piece on.
The tutorial also gives glue as an option.
Crochet the Apple or Orange Stem
Use brown yarn.
Make a slip knot.
Work:
ch 3
Skip the first chain.
Make:
1 sl st in the second chain
Then:
1 sc in the next chain
Leave a long tail for sewing.
This tiny piece becomes the stem for the apple or orange.
Crochet the Tiny Leaf
Repeat the same construction using green yarn.
Work:
ch 3
Skip the first chain.
Then:
1 sl st in the second chain
1 sc in the next chain
Leave a tail for sewing.
Place this green piece beside the brown stem.
You can sew the leaf and stem onto the hat or glue them in place.
Apple Version
Use:
- Red hat
- Brown stem
- Green leaf
Fit the hat over the yellow chick so the face peeks through the front.
Orange Version
Use:
- Orange hat
- Brown stem
- Green leaf
The basic construction is the same as the apple variation, but the color changes the entire look.
Peach Version
Use a pink hat.
The reference image shows this version with the same yellow chick face framed by the soft pink outer piece.
Frog Version
Use a green hat.
Add the two rounded ears.
The frog version immediately looks different from the fruit hats even though the main hat construction stays the same.
That reuse is one of the nicest parts of this pattern. Once you’ve made one hat, you already understand almost everything needed to make the next variation.
Add the Rosy Cheeks
The tutorial finishes the faces with pink blush.
Use:
- Pink eyeshadow
- Powder blush
Apply lightly using a brush or fingertip.
Start with just a little. You can always build the color gradually.
This works especially well with the tiny black eyes and orange beak because it softens the whole expression.
Helpful Tips for This Baby Chicks and Ducks with Hats Crochet Pattern
Keep your stitch marker in place through the chick and hat rounds. The rounds are small, and it’s easy to lose track of where one ends.
Also, remember that the chick and hat do not have the same maximum stitch count.
The chick reaches:
24 stitches
The hat reaches:
30 stitches
That difference is intentional and gives the hat enough room to fit over the stuffed chick.
When making the face, I recommend placing both eyes before permanently securing anything. Small differences in spacing can change the expression a lot.
And if you’re making several versions, finish one full chick first before starting the next. Once you’ve made the first one, the repeated structure becomes much easier to remember.
If you want something no-sew, the No Sew Octopus and Jellyfish Crochet Pattern is another compact option.
A Whole Tiny Chick Collection From One Pattern
The fun part begins once the first yellow chick is finished.
One red hat turns it into an apple. Switch to orange and add the same little stem and leaf, and the whole character changes. Use green, sew on two rounded ears, and suddenly the chick looks like it’s wearing a frog costume.
That mix-and-match feeling is exactly what makes the Baby Chicks and Ducks with Hats Crochet Pattern so satisfying. The chick stays simple, the hat construction repeats, and the tiny finishing details do most of the character work.
Make one, and you’ll probably already be thinking about which hat comes next.
Frequently Asked Questions
What yarn is used for the Baby Chicks and Ducks with Hats Crochet Pattern?
The reference materials show 5-ply yarn. Yellow is used for the chick, while red, orange, pink, and green are used for the hat variations.
What size crochet hook do I need?
The project uses a 3.5 mm crochet hook.
Where should I place the eyes?
Place the eyes between Rounds 6 and 7, leaving 4 stitches between them.
Can I glue the decorations instead of sewing them?
Yes. The tutorial allows the small leaf and decorative pieces to be glued instead of sewn.
