

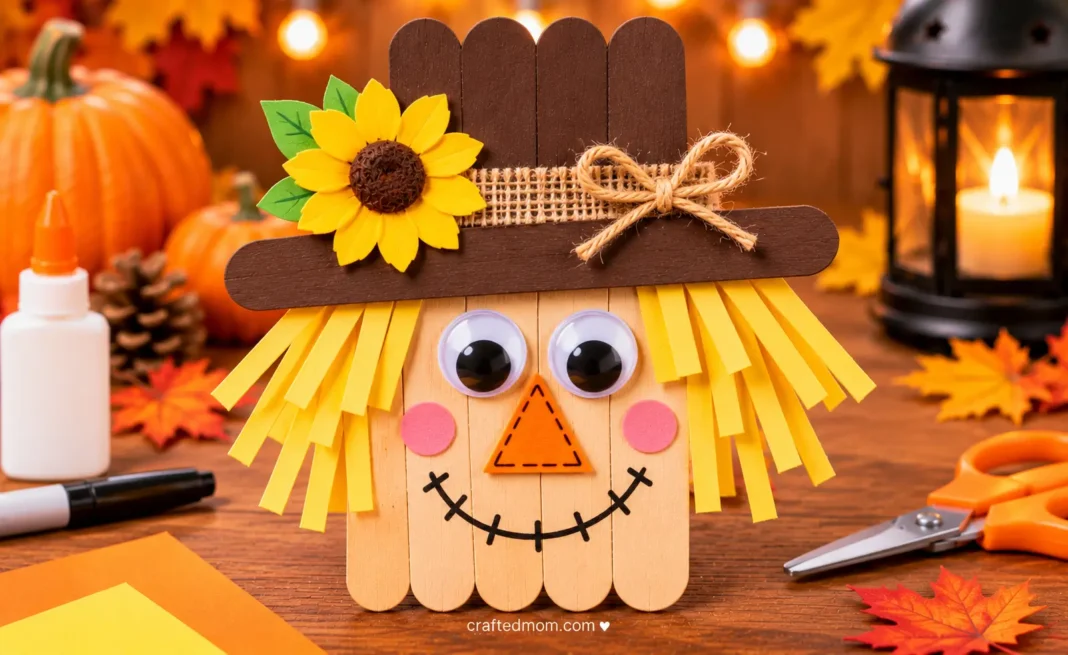
This scarecrow popsicle stick craft turns a handful of wooden craft sticks into a cheerful fall character with a brown hat, bright paper straw hair, googly eyes, and a little sunflower decoration.
Using seven jumbo popsicle sticks, kids can build a simple scarecrow face and decorate it with construction paper and paint. It’s a great project for autumn afternoons, classroom harvest activities, and Thanksgiving crafting.
Younger children can help decorate a prepared wooden base, while older kids can participate in assembling the scarecrow.
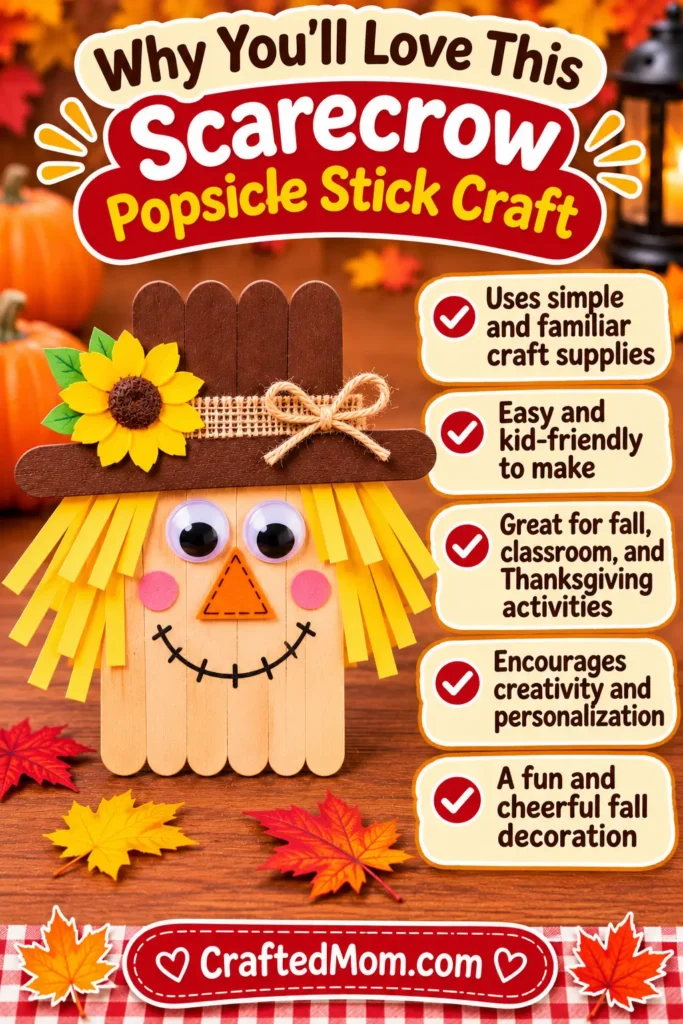
Why You’ll Love This Scarecrow Popsicle Stick Craft
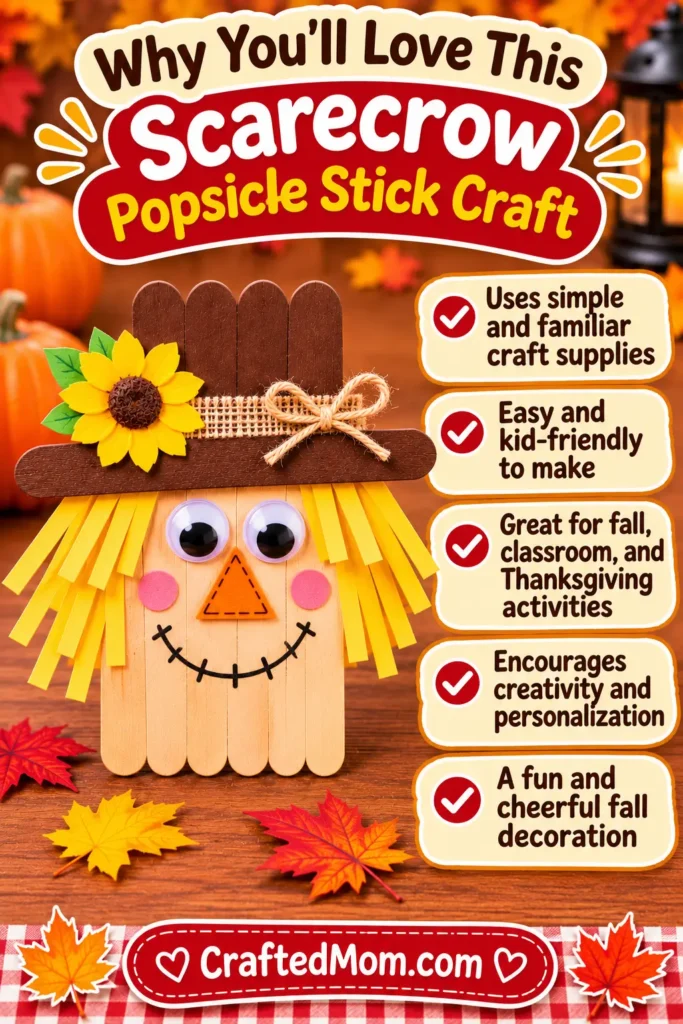
This project uses familiar craft supplies and doesn’t require complicated cutting or patterns. The wooden sticks form the scarecrow’s face, while yellow construction paper creates the straw-like hair.
The sunflower is a particularly cute detail. It adds a little color to the brown hat without requiring children to make a complicated decoration.
Kids can also customize the expression, hair length, and hat colors, so every finished scarecrow looks different.
Supplies You’ll Need
Materials
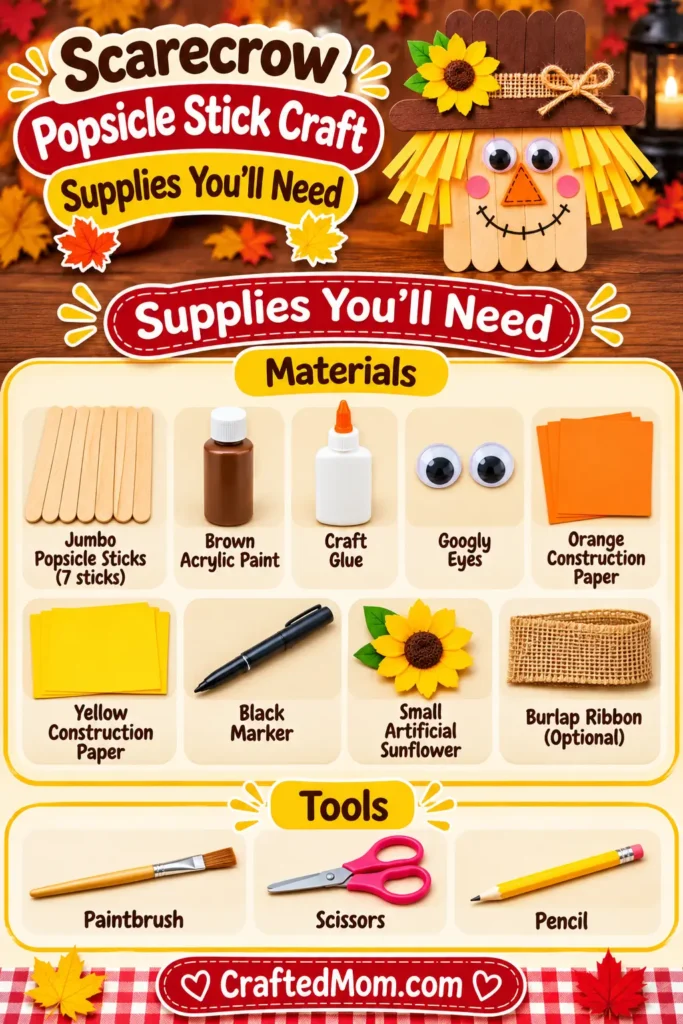
- Jumbo Popsicle Sticks: Seven jumbo sticks for the scarecrow’s face, back support, and hat brim.
- Brown Acrylic Paint: For painting the scarecrow’s hat.
- Craft Glue: For attaching wooden sticks and decorations. Choose one appropriate for the materials.
- Googly Eyes: Two eyes for the scarecrow’s face.
- Orange Construction Paper: For making the triangular nose.
- Yellow Construction Paper: For creating the scarecrow’s straw hair.
- Black Marker: For drawing the scarecrow’s smile.
- Small Artificial Sunflowers: For decorating the hat.
Tools
- Paintbrush: For painting the wooden hat.
- Scissors: For cutting construction paper.
- Pencil: For drawing the nose and smile before finishing them.
Set out the supplies before starting, and protect your work surface from paint and glue.
Before You Start: Prepare the Popsicle Sticks
Check that the wooden sticks are smooth and free of splinters.
Arrange five sticks side by side to form the scarecrow’s face. Set aside one stick for securing the back and another for making the hat brim.
It’s helpful to decide where the hat will sit before gluing anything together. Leave enough room below the brim for the eyes, nose, and smile.
For preschoolers, adults can assemble the wooden base beforehand so children can focus on decorating.
How to Make a Scarecrow Popsicle Stick Craft
Step 1: Arrange the Popsicle Sticks Side by Side
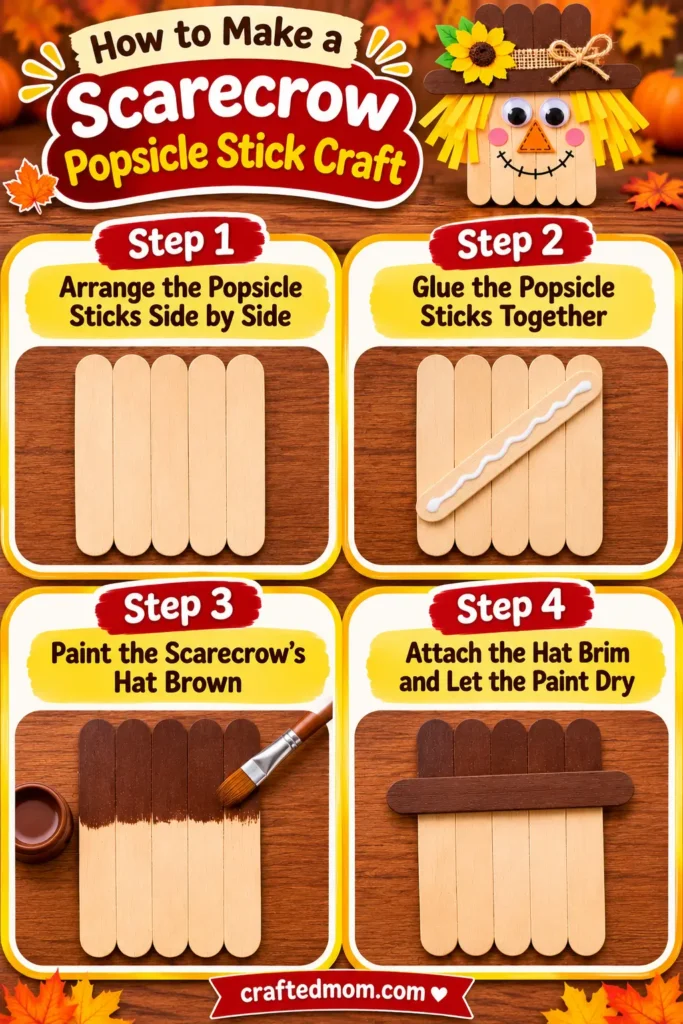
Place five jumbo popsicle sticks vertically on your work surface.
Line them up so their long edges touch, forming a flat rectangular base.
Try to keep the tops and bottoms reasonably even. This will become the scarecrow’s face, so check that the sticks aren’t spreading apart before moving on.
Step 2: Glue the Popsicle Sticks Together
Carefully turn the arranged sticks over while keeping their positions.
Apply craft glue to the sixth popsicle stick and place it diagonally across the back of the five-stick base.
Press gently to secure the structure.
Leave the wooden base flat until the glue has dried sufficiently to hold everything together.
Step 3: Paint the Scarecrow’s Hat Brown
Take the remaining popsicle stick and paint it brown. This will become the hat brim.
Paint the upper portion of the scarecrow’s wooden face brown as well to create the main hat area.
Keep the lower portion unpainted so the facial features remain easy to see.
Step 4: Attach the Hat Brim and Let the Paint Dry
Position the painted seventh popsicle stick across the front, separating the brown hat from the face.
Tilt it slightly for a playful scarecrow look.
Glue it securely, then allow the paint and adhesive to dry before attaching the facial decorations.
Make the Scarecrow’s Face
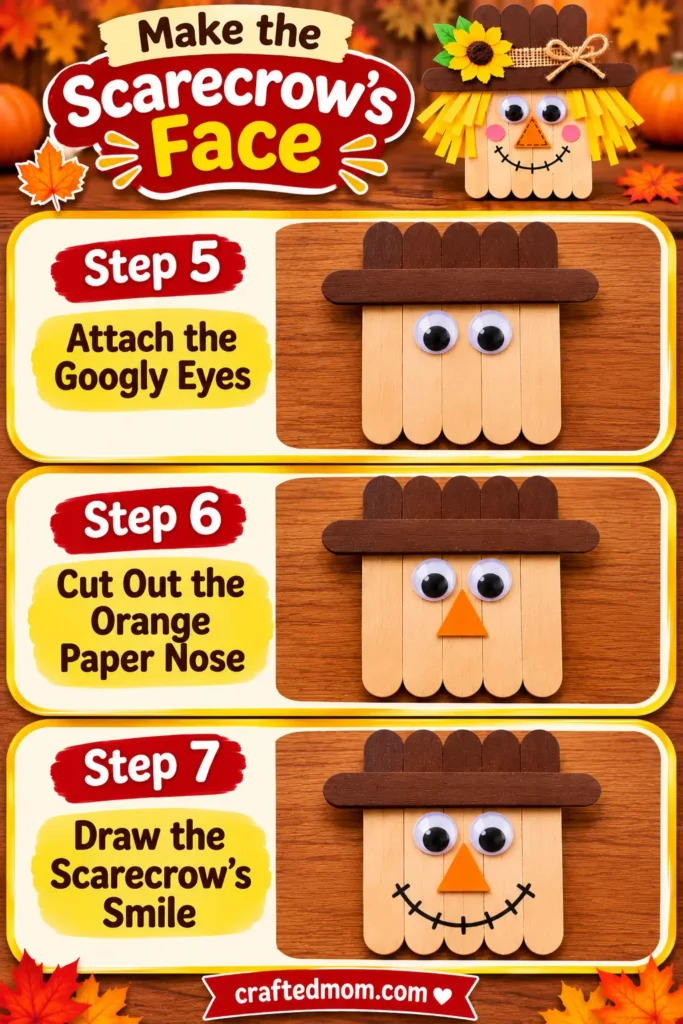
Step 5: Attach the Googly Eyes
Place two googly eyes below the hat brim.
Before gluing, move them around to see which expression you prefer. Eyes placed close together create a different look from eyes positioned farther apart.
Once you’re happy with their placement, attach them using a suitable craft adhesive.
Step 6: Cut Out the Orange Paper Nose
Draw a small triangle on orange construction paper.
Cut it out and position it beneath the eyes.
Check that the triangle fits comfortably between the eyes and the space reserved for the mouth.
Glue the nose onto the wooden base.
Step 7: Draw the Scarecrow’s Smile
Use your pencil to sketch a curved smile beneath the nose.
Once the shape looks right, trace over it with the black marker.
A simple curved mouth is enough, although older children can experiment with a crooked or wider smile.
Add the Scarecrow’s Straw Hair and Finishing Touches
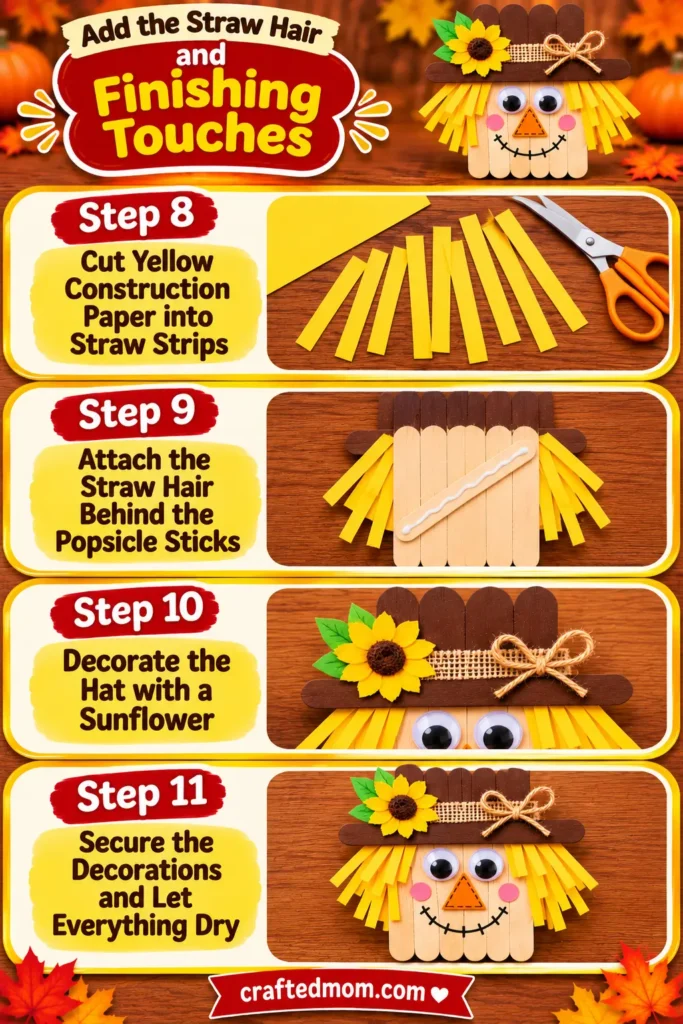
Step 8: Cut Yellow Construction Paper into Straw Strips
Cut yellow construction paper into thin strips to resemble straw.
The pieces don’t need to be identical. Slightly different lengths create the messy hairstyle associated with scarecrows.
Prepare enough strips to extend from both sides of the hat.
Step 9: Attach the Straw Hair Behind the Popsicle Sticks
Turn the scarecrow over and arrange the yellow strips near the upper sides of the wooden base.
Position them so they stick out beneath the hat when viewed from the front.
Glue the strips to the back, then check that they don’t cover the eyes or nose.
Step 10: Decorate the Hat with a Sunflower
Choose a small artificial sunflower that fits the hat.
Position it toward one side of the brown brim, leaving most of the hat visible.
Attach it with glue suitable for the flower’s backing and the wooden surface.
Step 11: Secure the Decorations and Let Everything Dry
Check that the eyes, nose, straw hair, sunflower, and hat brim are securely attached.
Press down any loose paper edges and allow the glue to dry according to its instructions.
Once everything is dry, your scarecrow is ready to display.
Easy Scarecrow Popsicle Stick Craft Tips
Prepare the wooden base first. If you’re crafting with preschoolers, assembling the sticks ahead of time makes the decorating process easier.
Use glue suitable for wood. Ordinary school glue may not hold a craft-stick structure securely, particularly if the finished scarecrow will be handled frequently.
Keep the straw hair uneven. Slight differences in length help create a natural-looking scarecrow hairstyle.
Position the hat before adding the face. This prevents the brim from covering the googly eyes.
Choose a small sunflower. An oversized flower can overwhelm the hat or make the decoration difficult to secure.
Let the glue dry fully. Moving the scarecrow too early can cause the support stick or decorations to shift.
For classroom groups, prepare individual supply sets to make distributing the materials easier.
Scarecrow Popsicle Stick Craft Variations to Try
Classic Farm Scarecrow Popsicle Stick Craft
Use a brown hat, yellow straw hair, an orange nose, and a simple smile.
Add a small sunflower to complete the traditional harvest look.
Cute Smiling Scarecrow Craft
Give your scarecrow a wide smile and slightly tilted googly eyes.
Keep the straw hair short so the expression remains the main feature.
Colorful Scarecrow Popsicle Stick Craft
Experiment with different hat colors or use several shades of yellow and orange for the paper hair.
Keep the wooden face and basic construction unchanged.
Mini Scarecrow Popsicle Stick Craft
Use smaller craft sticks to create a miniature scarecrow.
Adjust the size of the paper nose, eyes, and sunflower to suit the smaller base.
Rustic Fall Scarecrow Craft
Choose muted brown paint and simple paper details.
Keep the hat decoration understated for a more traditional farmhouse-inspired appearance.
Ways to Use Popsicle Stick Scarecrows for Fall
Fall Classroom Craft Displays
Arrange the finished scarecrows together on a bulletin board.
Because every child can choose a different expression or hairstyle, the display can feature a whole collection of unique characters.
Thanksgiving Table Place Cards
Use the scarecrows as handmade decorations for children’s Thanksgiving place settings.
Adults can add a separate name label to each finished craft.
Fall Wall and Door Decorations
Attach the dried scarecrow to an indoor fall display or classroom door.
Choose a location where the paper hair won’t be crushed when the door moves.
Scarecrow Refrigerator Magnets
An adult can attach a suitable magnetic backing to the finished craft for refrigerator display.
Loose or detachable magnets are dangerous if swallowed, so skip this variation for young children and keep magnetic components securely attached.
Homemade Fall Gifts
Kids can give their completed scarecrows to grandparents, teachers, or family members.
A handwritten note alongside the craft makes the gift more personal.
Scarecrow Popsicle Stick Craft Safety Notes
Adults should supervise scissors, paint, adhesives, and small decorations.
Check wooden sticks for splinters before starting. Googly eyes and miniature artificial flowers may contain small parts that pose choking hazards for young children.
If using hot glue for stronger assembly, an adult should handle the glue gun. For younger children, choose an age-appropriate adhesive suitable for the materials.
Allow all paint and glue to dry before handling or displaying the finished project.
Can Preschoolers Make This Scarecrow Craft?
Yes, preschoolers can participate with preparation and adult supervision.
An adult can assemble the wooden base, paint the hat, and pre-cut the paper nose and straw hair.
Children can choose the eye placement, arrange the yellow paper strips, and decide where the sunflower belongs.
For kindergarten-aged children, you can gradually introduce more independent cutting and decorating.
The goal is to let children make meaningful creative choices without expecting them to handle every construction step.
More Thanksgiving Popsicle Stick Crafts
If your child enjoys making characters from wooden craft sticks, try Turkey Popsicle Stick Craft for another Thanksgiving project.
The Thankful Turkey Popsicle Stick Craft adds a gratitude activity using colorful paper feathers.
You can also explore Corn Popsicle Stick Craft and Scarecrow Mason Jar Craft for different fall-inspired designs.
For another project that works throughout autumn, try Popsicle Stick Pumpkin Craft. Leave off the Halloween face for a simple harvest decoration.
Find additional seasonal projects in Thanksgiving Crafts for Kids, the main Thanksgiving craft collection on CraftedMom.
Final Thoughts
This scarecrow popsicle stick craft turns seven wooden sticks into a cheerful harvest character with paper straw hair and a sunflower hat.
Once the paint and glue have dried, display it alongside other fall creations or try making a different character with the same basic wooden construction.
Frequently Asked Questions
How Many Popsicle Sticks Do You Need to Make a Scarecrow?
This design uses seven jumbo popsicle sticks. Five form the face, one secures the back, and one becomes the hat brim.
Can I Use Regular Popsicle Sticks Instead of Jumbo Craft Sticks?
Yes. Regular sticks can create a smaller scarecrow. Adjust the paper decorations and googly eyes to match the wooden base.
What Kind of Glue Works Best for Popsicle Stick Scarecrows?
Choose craft glue suitable for bonding wood and paper. Follow its drying instructions. Adults may use hot glue when stronger assembly is needed.
How Do You Make a Scarecrow Hat with Popsicle Sticks?
Paint the upper portion of the wooden base brown, then attach a separately painted craft stick across the front to create the hat brim.
