

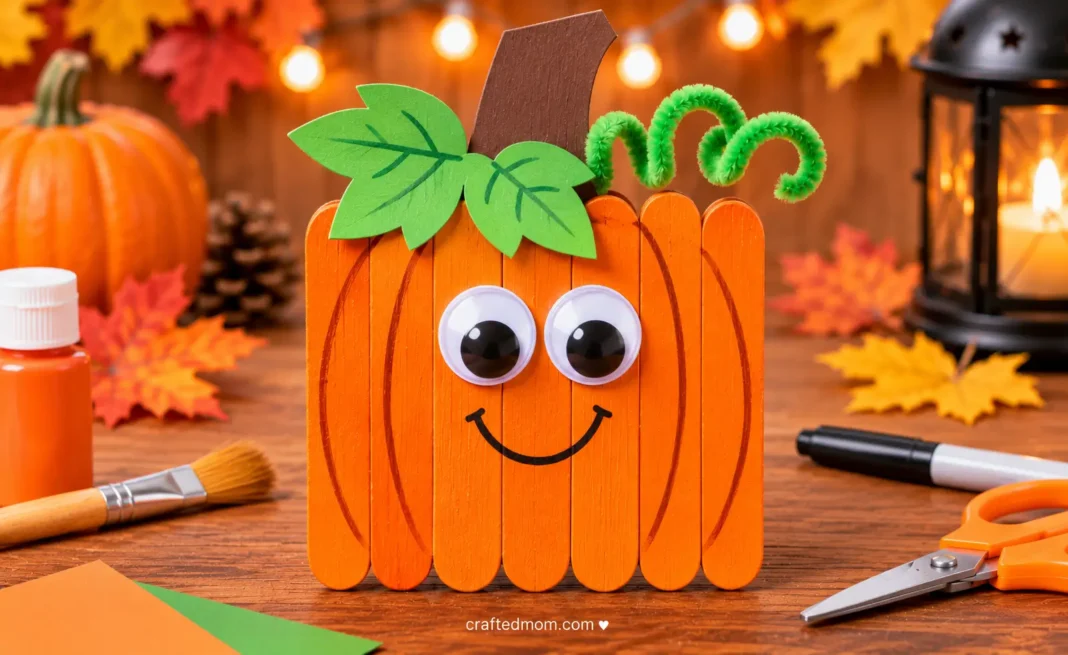
A pumpkin popsicle stick craft is a simple way to turn ordinary wooden craft sticks into a little orange pumpkin for fall. The sticks form the body, while a paper stem, green leaves, and a curly vine bring it to life. You don’t need to make a jack-o’-lantern face for the pumpkin to look finished.
It works for fall classrooms and Thanksgiving crafting. Younger kids can decorate a prepared base; older children can build it.
Why You’ll Love This Pumpkin Popsicle Stick Craft
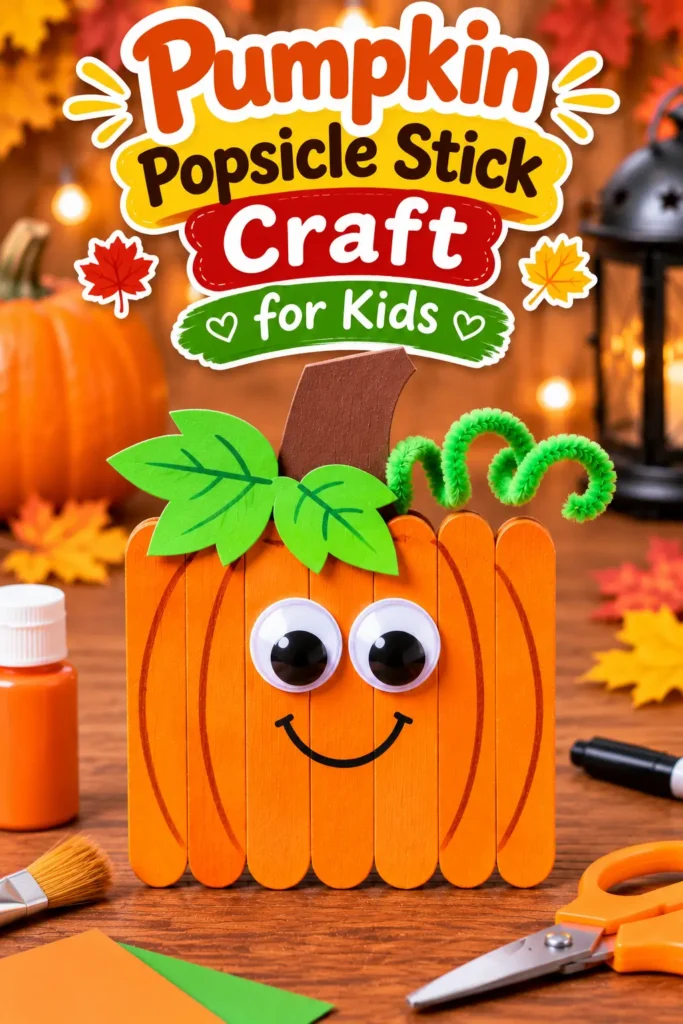
The wooden base gives kids something sturdy to paint. Paper stems, leaves, and vines allow each pumpkin to look different.
Build the base in one session, then paint and decorate once the glue holds.
Supplies You’ll Need
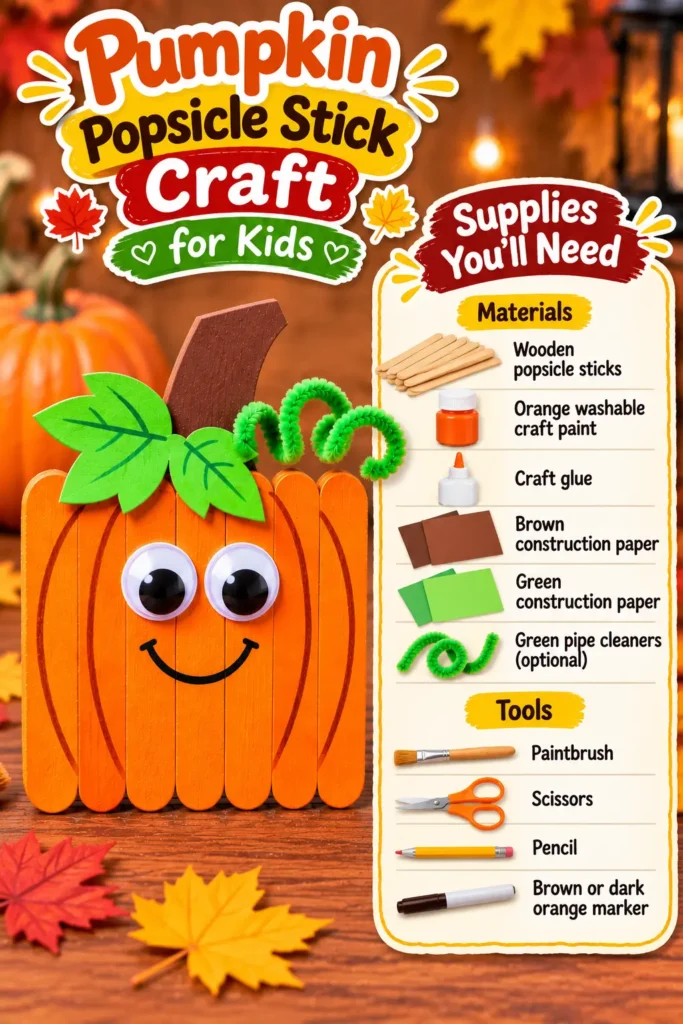
Materials
- Wooden popsicle sticks: For the pumpkin body and support pieces.
- Orange washable craft paint: For coloring the wooden pumpkin; check the product’s age and surface directions.
- Craft glue: Choose a product intended for wood and paper.
- Brown construction paper: For the pumpkin stem.
- Green construction paper: For the pumpkin leaves and, if preferred, a paper vine.
- Green pipe cleaners (optional): For a curled vine instead of a paper one.
Tools
- Paintbrush: For painting the assembled craft sticks.
- Scissors: For cutting paper shapes with supervision.
- Pencil: For drawing stem and leaf outlines and curling the vine.
- Brown or dark orange marker: For the pumpkin’s curved lines.
You won’t need a fixed number of sticks. Use enough to create the pumpkin shape shown in your finished project, plus pieces to support it from behind.
Before You Start: Prepare the Popsicle Sticks
Check sticks for splinters and protect the work surface.
Decide on the pumpkin’s width before painting. A slightly rounded arrangement makes it recognizable. Adults can prepare bases for preschoolers.
How to Make a Pumpkin Popsicle Stick Craft
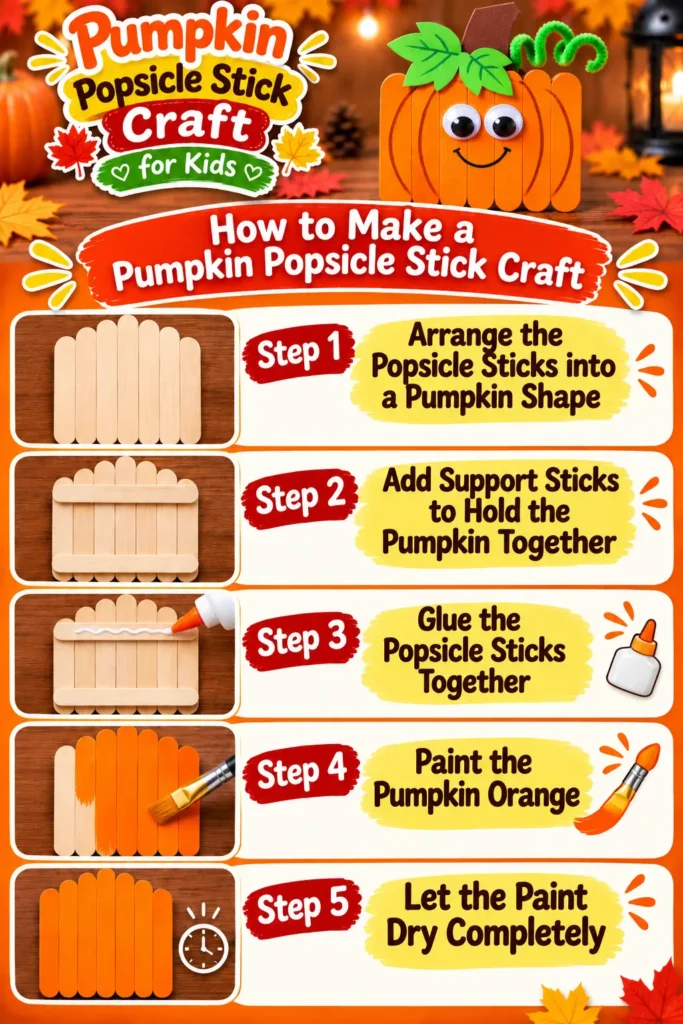
Step 1: Arrange the Popsicle Sticks into a Pumpkin Shape
Place sticks vertically and close together. Raise the middle sticks slightly for a rounded top. Check for large gaps before gluing. If the edges look too square, move the outer sticks down a little. Keep a photo of the layout before taking it apart to add supports.
Step 2: Add Support Sticks to Hold the Pumpkin Together
Place extra sticks horizontally across the back, connecting the vertical pieces. Keep their ends within the pumpkin outline. A support near the top and another near the bottom can help the assembled shape resist twisting when it is lifted.
Step 3: Glue the Popsicle Sticks Together
Glue where the supports meet the vertical sticks. Press gently and leave the base flat until secure, following the product directions. Check that no vertical stick has slipped sideways while the glue is wet. Don’t handle the base by a single stick.
Step 4: Paint the Pumpkin Orange
Paint the front orange using light coats to avoid pooling between sticks. Visible wood texture is fine. Brush along the grain and check the edges as you work. If you’re crafting with several kids, give each base its own drying spot before the next stage.
Step 5: Let the Paint Dry Completely
Let the paint dry as directed. Add another thin coat if needed, and wait before gluing paper decorations. Paint can feel dry on the top while remaining soft between sticks. Don’t test by rubbing the entire surface with your fingers.
Make the Pumpkin Stem and Leaves
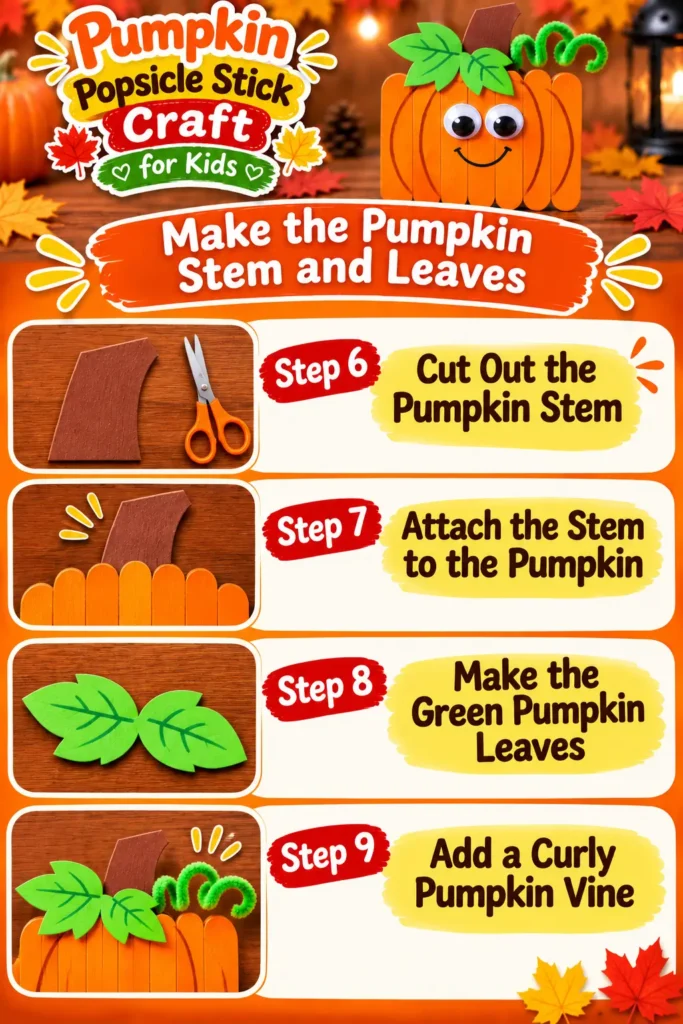
Step 6: Cut Out the Pumpkin Stem
Draw and cut a short brown paper stem. Hold it behind the upper center to check the size. A slightly crooked top makes it look less like a rectangle, but keep the bottom wide enough to glue securely.
Step 7: Attach the Stem to the Pumpkin
Glue the stem behind the upper sticks, leaving its top visible. Hold until secure. Position the stem before adding the leaves so you can see how much room remains for greenery around it.
Step 8: Make the Green Pumpkin Leaves
Cut green paper leaves. Simple pointed ovals are easy for younger kids and won’t hide the pumpkin. Try one leaf first, then add a second only if the top of the pumpkin still looks balanced.
Step 9: Add a Curly Pumpkin Vine
Curl a thin green paper strip around a pencil, or spiral a pipe cleaner with adult help around wire ends. Attach the vine and leaves beside the stem. Hold the curl against the pumpkin first to check that it doesn’t cover the stem. Paper vines may loosen if the strip is pulled too tightly.
Add the Pumpkin Details and Finishing Touches
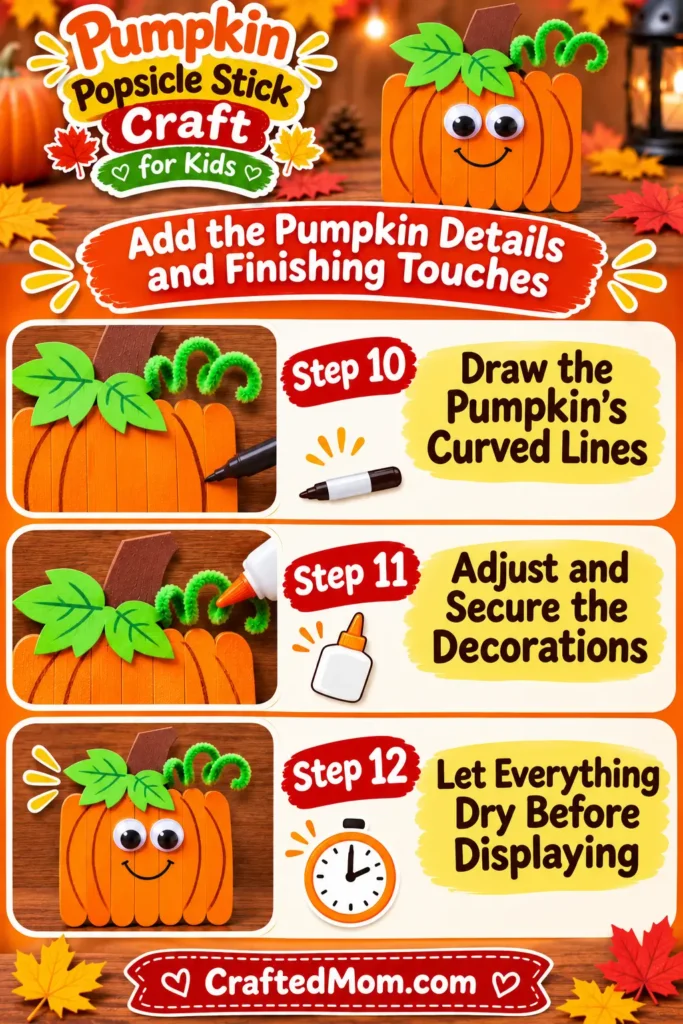
Step 10: Draw the Pumpkin’s Curved Lines
When dry, draw a few curved vertical lines with a darker marker, following some spaces between sticks. Start lightly, then darken a line if needed. The orange paint and rounded silhouette should remain more noticeable than the marker details.
Step 11: Adjust and Secure the Decorations
Check the stem, leaves, and vine. Glue down lifting edges and straighten shifted pieces. If a decoration keeps falling forward, let its adhesive set while the pumpkin lies flat rather than trying to stand it upright.
Step 12: Let Everything Dry Before Displaying
Let everything dry completely. Lift by the wooden base, not the stem or vine. Check both the front and back before displaying, because the support sticks must be secure as well as the paper details.
Easy Pumpkin Popsicle Stick Craft Tips
Check the wooden base first. If it bends or separates when gently moved, give the glue more time before painting.
Prepare paper pieces for small hands. Children who aren’t ready for detailed cutting can still choose the stem, position a leaf, and paint the orange body.
Use less paint at first. Thick paint can settle between sticks and take longer to dry. Add another light coat only if needed.
Keep the vine simple. One curved green strip is enough. A large coil can make the top look crowded or pull at the paper stem. If you’re using a pipe cleaner, bend the end inward so there isn’t a sharp wire tip near the child’s fingers.
For groups, write names on the backs and reserve drying space.
Pumpkin Popsicle Stick Craft Variations to Try
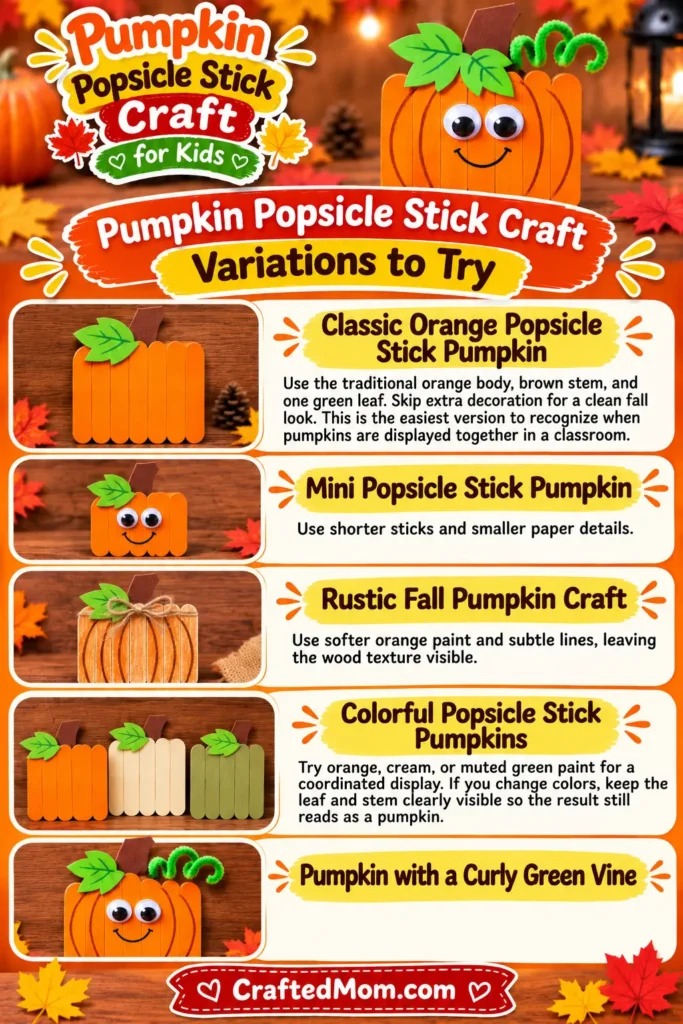
Classic Orange Popsicle Stick Pumpkin
Use the traditional orange body, brown stem, and one green leaf. Skip extra decoration for a clean fall look. This is the easiest version to recognize when pumpkins are displayed together in a classroom.
Mini Popsicle Stick Pumpkin
Use shorter sticks and smaller paper details.
Rustic Fall Pumpkin Craft
Use softer orange paint and subtle lines, leaving the wood texture visible.
Colorful Popsicle Stick Pumpkins
Try orange, cream, or muted green paint for a coordinated display. If you change colors, keep the leaf and stem clearly visible so the result still reads as a pumpkin.
Pumpkin with a Curly Green Vine
Curl a longer vine, securing it without pulling the stem loose.
Ways to Use Popsicle Stick Pumpkins for Fall
Thanksgiving Table Decorations
Use a dry pumpkin as a place-setting accent, away from food and heat.
Fall Classroom Craft Displays
Group pumpkins into a classroom patch, with name cards beside each one.
Autumn Wall and Door Decorations
Mount indoors, away from moving doors that might crush the paper details.
Pumpkin Refrigerator Magnets
Adults may add a securely attached craft magnet, but magnets pose a serious ingestion hazard to young children.
Fall Garland and Hanging Decorations
Adults can add ribbon loops to dry pumpkins for hanging, away from heat.
Pumpkin Popsicle Stick Craft Safety Notes
Supervise scissors, paint, glue, and pipe cleaner ends. Check for splinters and keep magnets or other small parts away from young children.
Wood and paper are flammable, so keep the finished pumpkins away from open flames and hot surfaces.
Can Preschoolers Make This Pumpkin Craft?
Yes, with supervision. Adults can pre-glue the base and pre-cut paper while children paint and position decorations.
Older kids can assemble sticks and cut leaves with appropriate help.
More Thanksgiving Popsicle Stick Crafts
For more harvest projects, explore Turkey Popsicle Stick Craft, Scarecrow Popsicle Stick Craft, Corn Popsicle Stick Craft, and Thankful Turkey Popsicle Stick Craft.
The wider Thanksgiving Crafts for Kids collection can connect these tutorials. For an October alternative, browse Popsicle Stick Halloween Crafts. That collection includes character crafts such as Popsicle Stick Candy Corn Craft.
Final Thoughts
Display this wooden pumpkin throughout fall, or adapt the base for a separate Halloween jack-o’-lantern project.
Frequently Asked Questions
How Many Popsicle Sticks Do You Need to Make a Pumpkin?
Use enough sticks to form the pumpkin, plus back supports. The total depends on its size.
Can I Use Regular Popsicle Sticks Instead of Jumbo Craft Sticks?
Yes. Regular sticks make a smaller pumpkin; plan the layout before gluing.
What Kind of Paint Works Best on Popsicle Sticks?
Choose age-appropriate paint suitable for wood and follow its drying directions.
What Glue Works Best for Popsicle Stick Pumpkin Crafts?
Choose glue labeled for wood and paper, and let the supports dry securely.
Can You Make a Pumpkin Popsicle Stick Craft Without Paint?
Yes. Use orange pre-colored craft sticks if they suit the construction you’re making, or leave the wood natural for a different fall look.
