

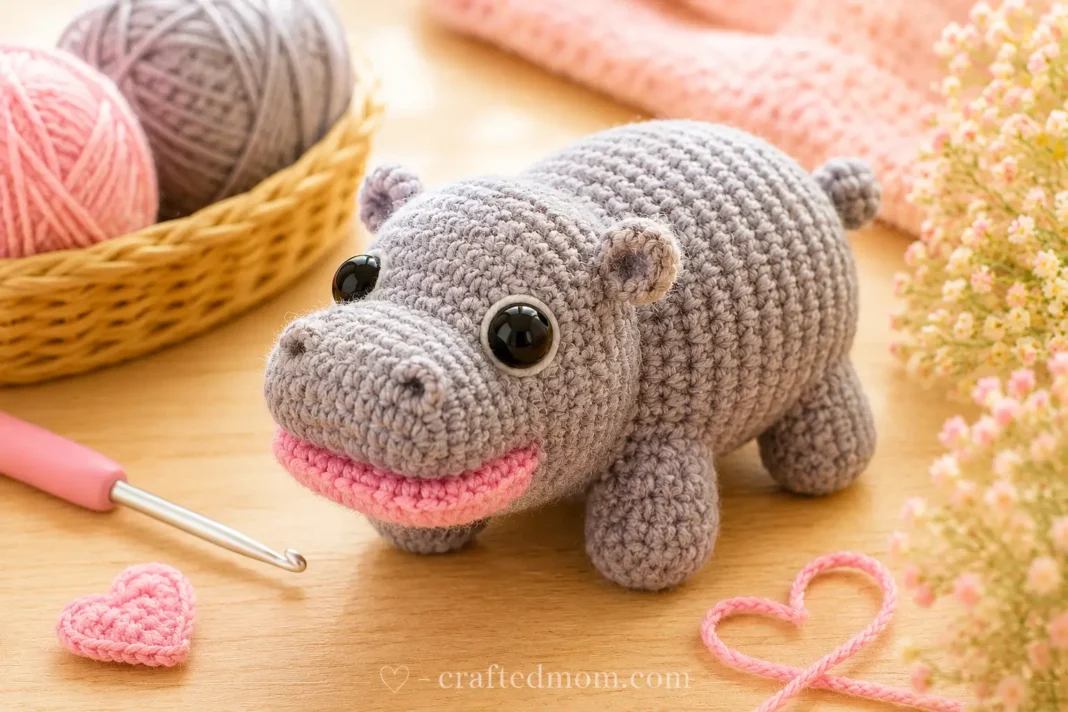
The face starts changing before the body is even finished. A strip of pink crochet grows right through the gray head, then becomes the wide mouth that gives this little hippo its unmistakable expression. Add four chunky legs, tiny ears, a stubby tail, big black eyes, and a carefully shaped muzzle, and the Moo Deng Baby Hippo Crochet Pattern turns a fairly simple amigurumi body into a surprisingly expressive little character.
What makes the construction especially interesting is that the body and head are worked continuously rather than crocheted as two completely separate stuffed pieces. The body begins with a basic magic ring, grows to 30 stitches, and stays there for several rounds. After decreasing at the top, the head expands directly from those remaining stitches using front-loop increases and carefully placed gray and pink color changes.
The mouth is then built directly onto the pink section before the muzzle is completed, so there is less facial assembly than you might expect. Once the head is closed, the four legs, tiny ears, and tail are added separately.
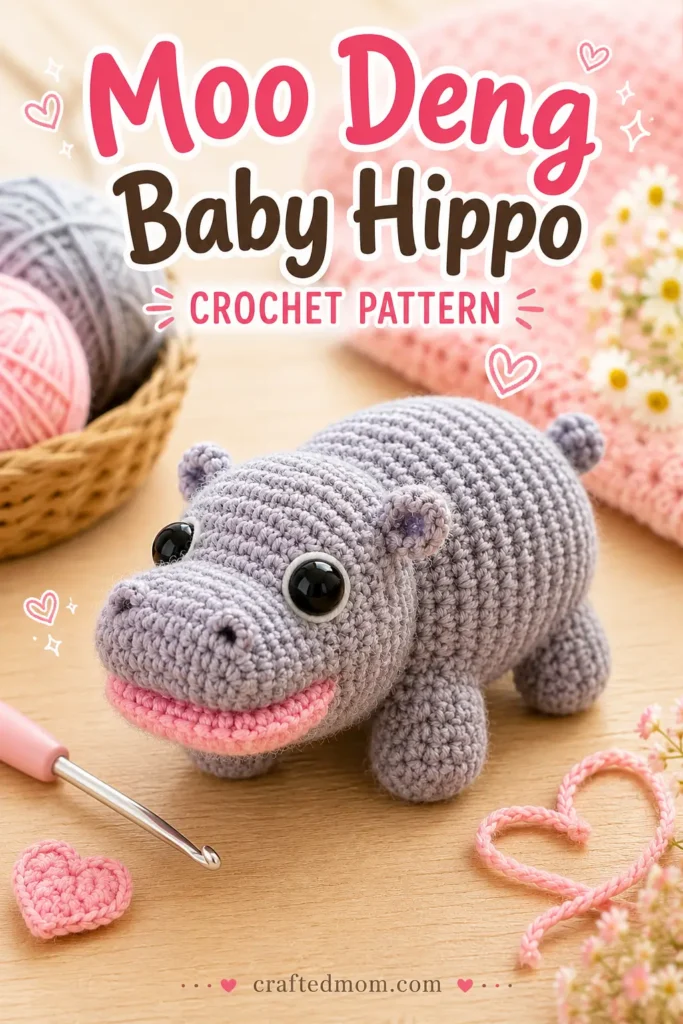
Moo Deng Baby Hippo Crochet Pattern at a Glance
| Project Detail | Information |
| Project | Mini crochet baby hippo / Moo Deng amigurumi |
| Yarn | 4-ply milk cotton yarn |
| Crochet Hook | 3.5 mm |
| Main Color | Gray |
| Accent Color | Pink |
| Face Details | Black and white yarn |
| Eyes | 8 mm eyes |
| Starting Method | Magic ring |
| Main Stitch | Single crochet |
| Main Body Maximum | 30 stitches |
| Body Rounds | 15 rounds before beginning the head |
| Head Construction | Worked directly from the body |
| Legs | 4 separately crocheted pieces |
| Ears | 2 |
| Tail | 1 |
| Stuffing | Fiberfill |
| Sewing Required | Yes |
| Optional Adhesive | Glue or hot glue gun for non-safety eyes |
The body increases from 6 to 30 stitches during the first five rounds, stays at 30 stitches through Round 14, and then decreases to 15 stitches before the head begins.
Materials You’ll Need
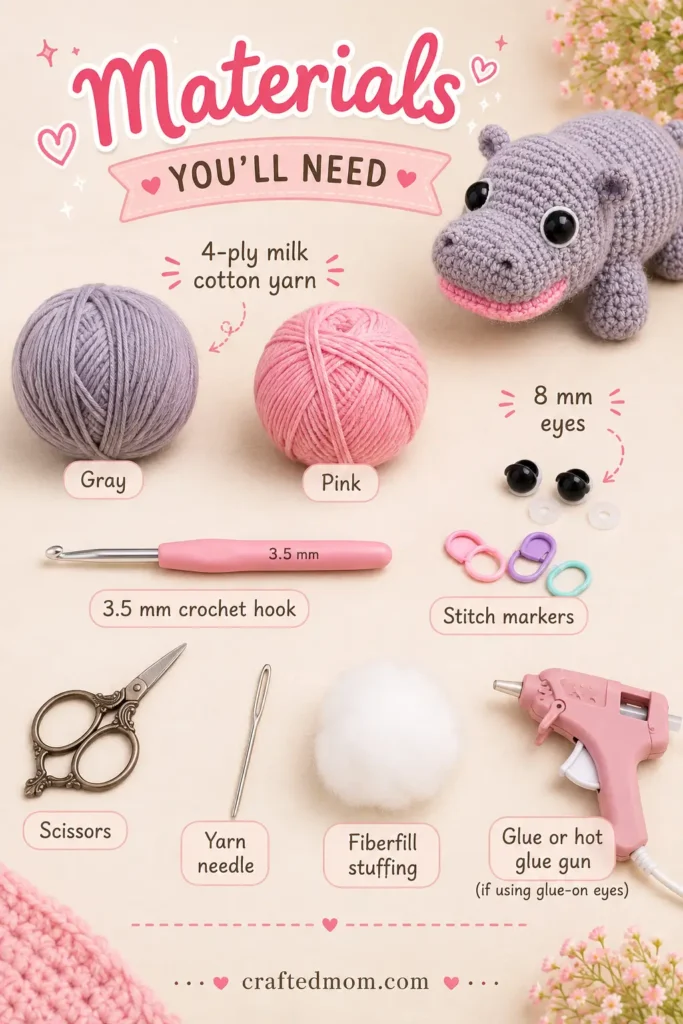
Gather:
- 4-ply milk cotton yarn
- 3.5 mm crochet hook
- 8 mm eyes
- Stitch markers
- Scissors
- Yarn needle
- Fiberfill stuffing
- Glue or hot glue gun if using glue-on eyes
The 8 mm eyes are positioned around Head Rounds 4 through 6, about three stitches above the pink section.
If you’re making this for a very young child, embroidered eyes are a safer option than glued plastic eyes or other small detachable parts.
Crochet Abbreviations
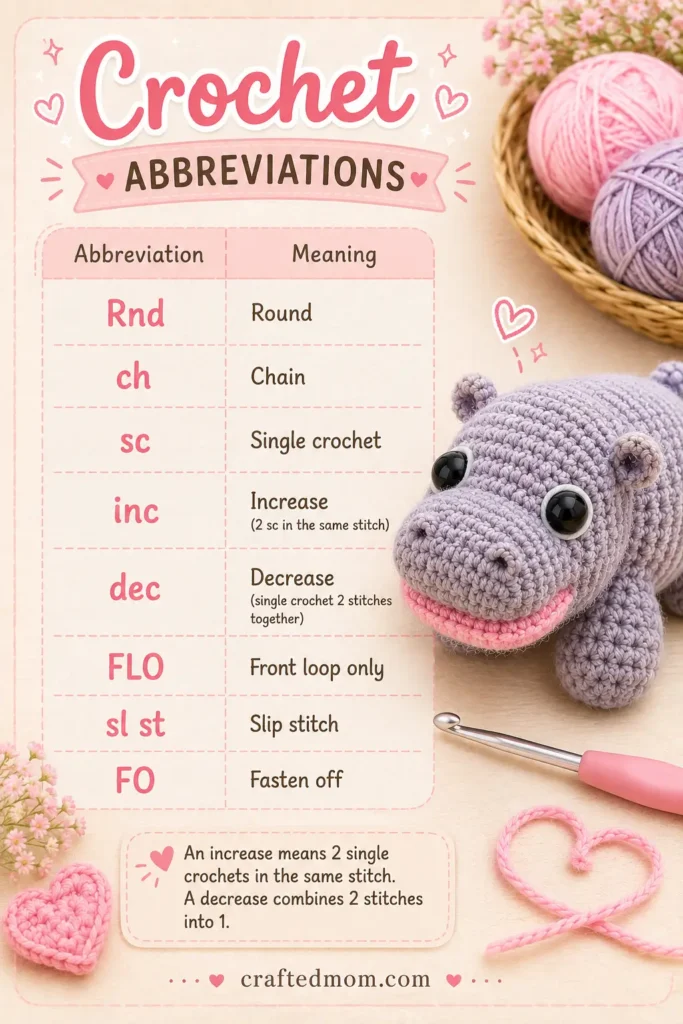
| Abbreviation | Meaning |
| Rnd | Round |
| ch | Chain |
| sc | Single crochet |
| inc | Increase |
| dec | Decrease |
| FLO | Front loop only |
| sl st | Slip stitch |
| FO | Fasten off |
An increase means:
2 sc in the same stitch
A decrease combines two stitches into one. The decreases in this pattern are worked through the front loops of the next two stitches.
Before You Begin
The project is easier to follow if you think of it as four stages:
- Crochet the body.
- Continue directly into the head with gray and pink color changes.
- Build the mouth and muzzle as part of the head.
- Crochet and attach four legs, two ears, and one tail.
The unusual part is the transition from body to head. After Body Round 15 leaves you with 15 stitches, the first head round doubles those stitches through front-loop increases.
That returns the head to:
30 stitches
The color pattern then creates the broad pink mouth section across the front.
How to Crochet the Moo Deng Baby Hippo Crochet Pattern
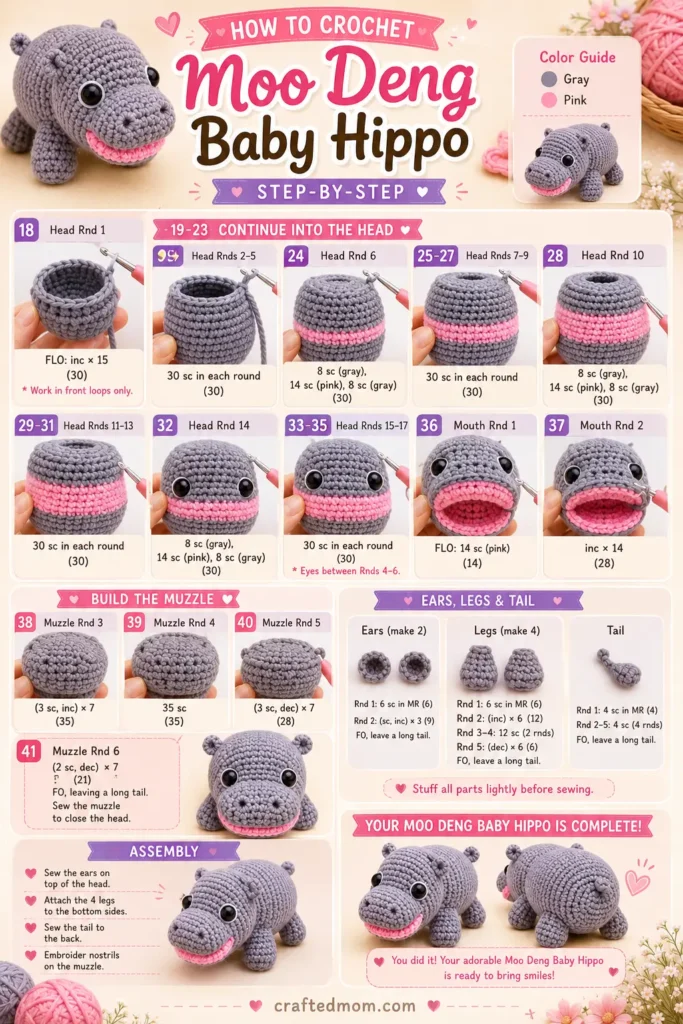
Use gray yarn.
We begin with the body.
Body Round 1
Make a magic ring.
Work:
6 sc into the magic ring
Pull the yarn tail tightly to close the center.
Stitch count: 6
Body Round 2
Work:
inc × 6
Place your stitch marker in the first stitch of the round.
Stitch count: 12
Body Round 3
Work:
(1 sc, inc) × 6
Repeat all the way around.
Stitch count: 18
Body Round 4
Work:
(2 sc, inc) × 6
Stitch count: 24
Body Round 5
Work:
(3 sc, inc) × 6
Stitch count: 30
These first five rounds create the rounded bottom and width of the hippo’s body.
Build the Hippo Body
Body Rounds 6 to 14
Work:
30 sc
in every round.
Repeat for:
9 rounds total
That includes:
- Round 6
- Round 7
- Round 8
- Round 9
- Round 10
- Round 11
- Round 12
- Round 13
- Round 14
Stitch count each round: 30
Keep moving your stitch marker upward as you work.
These plain rounds create most of the hippo’s barrel-shaped torso.
Body Round 15
Now begin decreasing.
Work:
dec × 15
For each decrease, insert the hook through the front loops of the next two stitches and complete one single crochet through them.
Stitch count: 15
You can begin stuffing the body now, or add stuffing gradually while working the head.
I would add at least some fiberfill before moving too far upward because the body opening gets more awkward to reach later.
Begin the Hippo Head
The head starts immediately from the 15 stitches remaining after Body Round 15.
Keep the gray yarn attached.
Head Round 1
This entire round is worked in the front loops only.
You will make:
inc × 15
but the color placement is important.
Work:
5 gray inc
Change to pink.
Work:
5 pink inc
Change back to gray.
Work:
5 gray inc
Stitch count: 30
The pink section begins creating the wide mouth area across the front of the head.
When changing colors, stop before completing the final stitch with the old color, then use the new color to finish that stitch.
Head Rounds 2 to 5
The next four rounds use the same color arrangement.
For each round, work:
10 gray sc
then:
10 pink sc
then:
10 gray sc
Stitch count: 30
Repeat this sequence for:
- Head Round 2
- Head Round 3
- Head Round 4
- Head Round 5
Because you’re carrying and switching between two yarn colors, extra yarn can begin floating across the inside of the head.
Trim unnecessary floating yarn as you work so it doesn’t pull the head inward or interfere with stuffing.
The center pink band should now be clearly visible across the front.
Shape the Head
Head Round 6
Work the decrease sequence carefully because the colors still matter.
With gray yarn, work:
(3 sc, dec) × 2
Change to pink during the decrease.
With pink yarn:
(3 sc, dec) × 2
Change back to gray during the second pink decrease.
With gray yarn:
(3 sc, dec) × 2
Stitch count: 24
The head now begins narrowing while preserving the central pink facial area.
Cut the pink yarn after completing this round.
If you haven’t stuffed the body yet, add fiberfill now.
Crochet the Pink Mouth
The mouth is worked directly onto the pink section.
Use pink yarn.
Make a slip knot and attach the yarn to one of the pink stitches.
Chain:
ch 6
Then make:
1 sl st into the next pink stitch
Now:
ch 1
Turn your work.
Across the chain, work:
6 sc
Continue working single crochet across the available pink stitches until you return to the beginning.
At the end of this first mouth round, you should have:
14 sc
Mouth Round 2
Work:
14 sc
Place a stitch marker in the first stitch.
When you return to the beginning, make:
1 sl st
Leave a long tail for sewing.
Use the tail to sew the mouth neatly into position.
Once secure, hide the yarn inside the mouth area.
The mouth should now project forward rather than sitting completely flat against the head.
Continue the Gray Muzzle
Now return to gray yarn.
The next head round is counted as:
Head Round 7
Work single crochet around the entire head, including across the newly created mouth section.
Work enough stitches across the mouth section to maintain the correct total.
You need:
8 sc across the mouth area
Continue working around until the round contains:
24 sc total
The mouth began with six chains, but you still need to distribute 8 sc across that section so the head remains at 24 stitches.
That stitch total matters more than treating each original chain as exactly one stitch.
Head Round 8
Work:
24 sc
Stitch count: 24
After completing Round 8, add more stuffing to the head.
Gently press and shape the muzzle with your fingers while stuffing so it develops the broad hippo profile.
Add the Eyes
If you’re using 8 mm safety eyes, position them around:
Head Rounds 4 to 6
Place each eye approximately:
3 stitches above the pink section
Check the expression from the front before securing them.
If you’re using glue-on eyes, you can finish the head first and attach them afterward.
The wide eye spacing combined with the broad pink mouth is what gives the finished hippo so much personality.
If you like this character but want something functional instead of a stuffed amigurumi, the Moo Deng Hippo Pouch Crochet Pattern turns the hippo face into a small hanging pouch.
Finish Shaping the Head
Head Round 9
Work:
(1 sc, dec) × 8
Stitch count: 16
Head Round 10
Work:
16 sc
Stitch count: 16
Head Round 11
Work:
dec × 8
Stitch count: 8
Leave a long yarn tail for closing.
Before closing the opening, add any final stuffing the head needs.
Try to distribute it evenly around the cheeks and muzzle.
Close the Head
Thread the remaining yarn tail onto your needle.
Pass the needle through the remaining stitches around the opening.
Pull the yarn firmly.
The opening should draw closed.
Secure the yarn and hide the tail inside the body.
Do not cut the remaining yarn too quickly because it can also help shape the muzzle.
Shape the Hippo Nose
Use the gray yarn to create a tightening line through the center of the muzzle.
Pass the needle through the center area and pull firmly.
Repeat the same line once more.
Pulling this yarn tight helps divide and define the broad nose rather than leaving the muzzle as one plain rounded section.
Secure the yarn and hide the tail.
Later, you can also embroider:
2 small black nostril lines
onto the front of the nose.
Crochet the Hippo Legs
You need:
4 identical legs
Use gray yarn.
Leg Round 1
Make a magic ring.
Work:
10 sc
Pull the ring closed.
Stitch count: 10
Leg Rounds 2 to 5
Work:
10 sc
in every round.
Repeat through:
- Round 2
- Round 3
- Round 4
- Round 5
Stitch count each round: 10
After Round 5:
FO, leaving a long tail for sewing
Add fiberfill to the leg.
Repeat until you have:
4 legs total
The legs are fairly chunky compared with the tiny ears and tail, which helps give the finished hippo its squat, sturdy shape.
Attach the Four Legs
Position the legs underneath the body.
Two should sit toward the front and two toward the back.
Before sewing permanently, I recommend holding all four in place and checking the hippo from the side.
You want it to rest naturally rather than tipping onto its nose or tail.
Sew each leg securely using the long yarn tails.
Tie off and hide all ends inside the legs or body.
For another small animal project with a very different silhouette, the Mini Miffy Crochet Pattern is built around long ears and a removable dress rather than four stuffed legs.
Crochet the Ears and Tail
Here’s a nice shortcut: the ears and tail use the same pattern.
You need:
- 2 ears
- 1 tail
So make:
3 identical pieces
Ear and Tail Pattern
Make a slip knot.
Chain:
ch 3
Skip the first chain.
In the second chain, work:
2 sc
In the final chain, work:
1 sl st
Leave a long tail for sewing.
That’s it.
These pieces are tiny, so you do not need complicated shaping.
Attach the Ears
Position one ear on each side of the head.
The ears sit fairly high and slightly outward.
Use the yarn tails to secure them.
Tie the ends and hide them inside the head.
Attach the Tail
Sew the third identical piece to the rear of the body.
Keep the tail small and slightly raised rather than stretching it flat against the body.
Hide the remaining yarn ends once secure.
Add Eye Highlights
Use white yarn to add a tiny highlight to each black eye.
A small white stitch or dot is enough.
The contrast makes the eyes look shinier and helps them stand out against the gray yarn.
Secure the white yarn and hide the tails inside the head.
Add the Nostrils
Use black yarn.
Embroider:
2 short black lines
onto the front of the nose.
Keep them small.
The nostrils are only a finishing detail and shouldn’t overpower the eye or mouth features.
If the muzzle still feels too round, you can repeat the gray shaping stitches and pull them more firmly to deepen the center division.
Tips for a Cleaner Moo Deng Baby Hippo
Keep the Body at 30 Stitches
Rounds 6 through 14 should all contain:
30 sc
If the body begins narrowing or expanding during those rounds, stop and check your stitch count before continuing.
Watch the First Head Round Carefully
The first head round uses:
15 increases in FLO
but they are divided into:
5 gray, 5 pink, 5 gray
Missing the color placement here shifts the entire mouth section.
Cut Long Floating Yarn Inside the Head
The gray and pink colors create strands across the inside.
Leaving those strands too tight can distort the head, so trim unnecessary floats while working the color-change rounds.
Do Not Forget the 8 Mouth Stitches
Head Round 7 needs:
24 stitches total
That includes:
8 sc worked across the mouth area
even though the mouth originally began with only six chains.
Stuff Before the Head Gets Too Small
Round 9 reduces the head to 16 stitches.
By Round 11, only 8 remain.
Add most of your stuffing before the final decreases so you aren’t trying to force fiberfill through a tiny opening.
Shape Before You Secure the Nose Yarn
The muzzle is one of the defining features.
Pull the shaping yarn gradually, check the face, then tighten it more if needed.
Ideas for Displaying Your Finished Hippo
The finished hippo works nicely as a small desk companion, shelf decoration, crochet collection piece, or handmade gift.
Because the design has a compact body and short legs, it can sit among other mini amigurumi without taking up much room.
You could also make several versions by changing the main body color while keeping the pink mouth.
For another animal with a very different personality, the Penguin with Hats Crochet Pattern uses interchangeable headwear to create several variations from one base character.
And if you’re building a whole collection of tiny characters, the Baby Chicks and Ducks with Hats Crochet Pattern is another project based around one body with multiple finishing options.
The Little Details Make the Hippo
The four stubby legs give it the shape, but the face is what really finishes this Moo Deng Baby Hippo Crochet Pattern. That wide pink mouth, the pinched center of the gray muzzle, tiny black nostrils, round eyes, and miniature ears all work together to turn a simple gray amigurumi into a character with a very specific expression.
Take your time with the color changes and facial shaping. Once those are in place, the four identical legs and three tiny ear-and-tail pieces are wonderfully straightforward, and the little hippo is ready to join the rest of your crochet collection.
Frequently Asked Questions
What yarn is used for the Moo Deng Baby Hippo Crochet Pattern?
Use 4-ply milk cotton yarn. Gray is the main color, with pink for the mouth and black and white for facial details.
What crochet hook size do I need?
Use a 3.5 mm crochet hook.
Where should I place the eyes?
Place the eyes around Head Rounds 4 to 6, approximately three stitches above the pink mouth section.
Are the ears and tail different patterns?
No. The two ears and one tail use the same simple ch 3 pattern, so you make three identical pieces.
Why does Head Round 7 use eight stitches across a six-chain mouth?
The round must return to 24 stitches total, so distribute 8 sc across the mouth section rather than limiting yourself to one stitch per original chain.
