

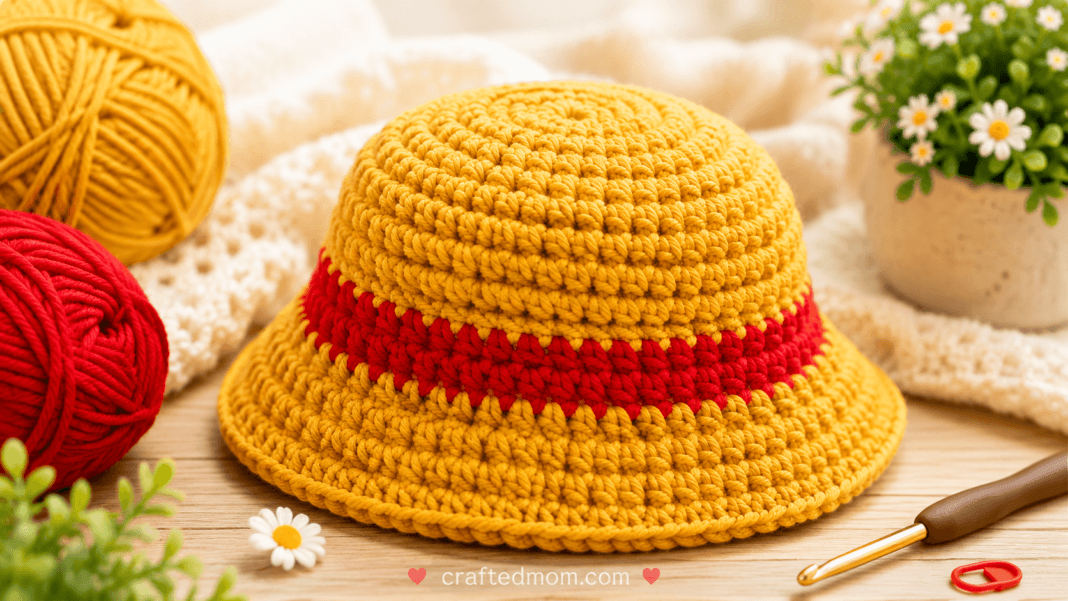
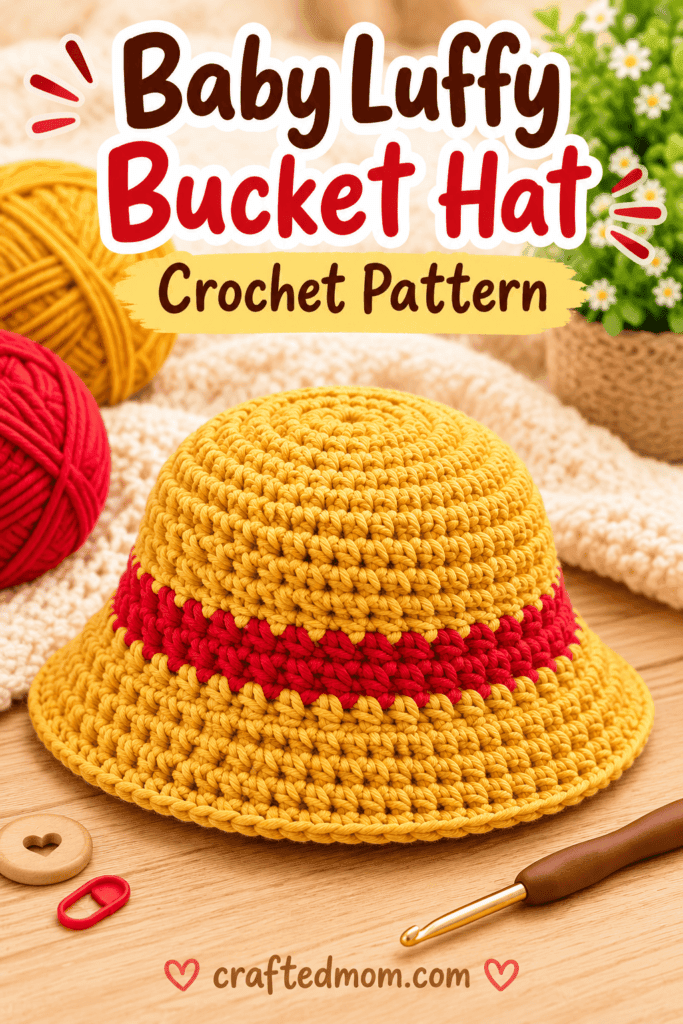
That mustard-gold crown with its bold red band instantly gives this little hat its recognizable adventure-ready look. The Baby Luffy Bucket Hat Crochet Pattern is worked almost entirely in half double crochet, starting from a magic circle and expanding into a rounded crown before the red stripe and flared brim are added.
The color blocking does most of the visual work here, so you get a very recognizable finished hat without complicated appliqués or extra pieces.
The hat is worked primarily in continuous rounds, which keeps the crown smooth and avoids an obvious seam through most of the construction. Once the top reaches its full width, the stitch count stays steady while the sides are built downward.
The final three brim rounds introduce increases again. Those increases gradually flare the bottom outward and give the project its classic bucket-hat silhouette.
Baby Luffy Bucket Hat Crochet Pattern at a Glance
| Project Detail | Information |
| Project | Baby Luffy-inspired crochet bucket hat |
| Yarn Weight | Weight 4 yarn |
| Main Yarn Color | Mustard yellow |
| Accent Color | Red |
| Crochet Hook | 6 mm |
| Starting Method | Magic circle |
| Main Stitch | Half double crochet |
| Other Stitches | Single crochet, double crochet, slip stitch |
| Construction | Worked from the crown downward |
| Top Increase Rounds | Rounds 1 to 5 |
| Hat Length | Rounds 6 to 10 |
| Red Band | Rounds 9 and 10 |
| Brim | 3 rounds |
| Working Method | Mostly continuous rounds |
| Assembly | No separate pieces to sew on |
| Finishing | Fasten off and weave in yarn ends |
Materials You’ll Need
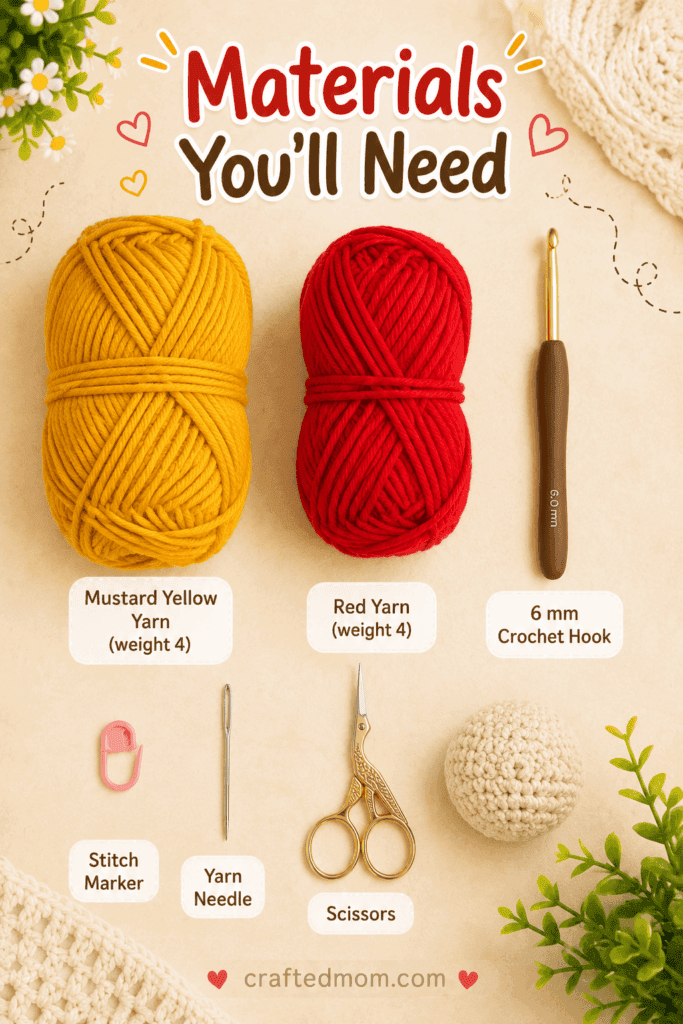
Gather these supplies before starting:
The mustard yarn forms the crown, most of the sides, and the entire brim.
The red yarn is only used for the two-round stripe around the lower part of the hat, so you won’t need nearly as much red as mustard.
Crochet Abbreviations
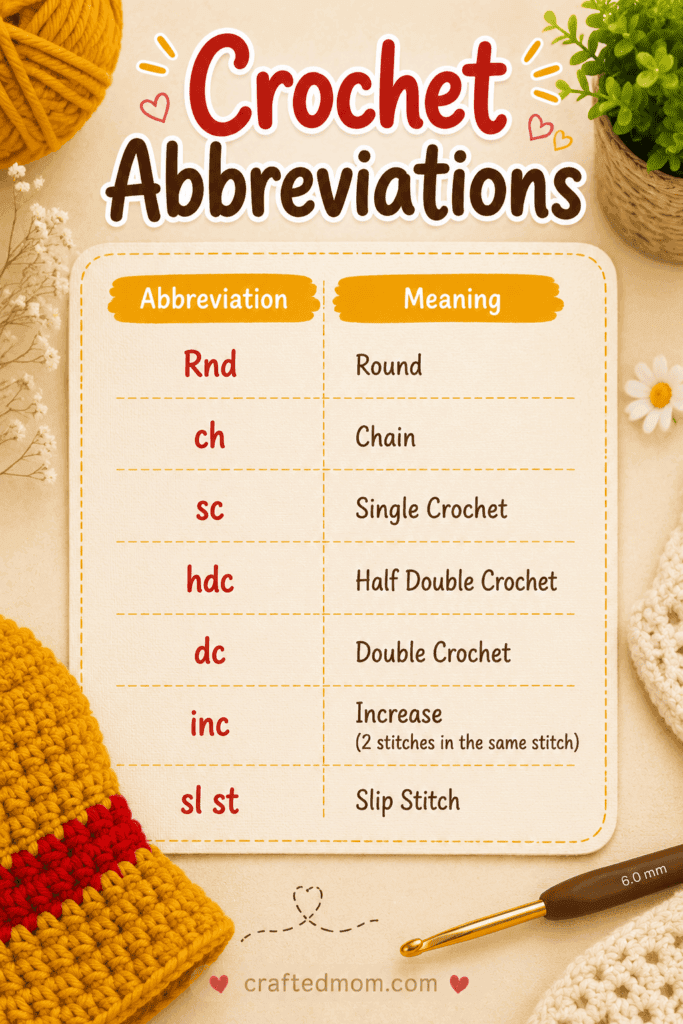
This pattern uses standard US crochet terminology.
| Abbreviation | Meaning |
| Rnd | Round |
| ch | Chain |
| sc | Single crochet |
| hdc | Half double crochet |
| dc | Double crochet |
| inc | Increase |
| sl st | Slip stitch |
An hdc increase means working 2 half double crochets into the same stitch.
A dc increase means working 2 double crochets into the same stitch.
Pattern Notes Before You Begin
The crown begins with 8 half double crochets in a magic circle.
Most of the hat is worked in continuous rounds, so a stitch marker is especially helpful. Move the marker into the first stitch of each new round so you always know where the round begins.
There is one stitch-count inconsistency worth noting in the early crown section.
Round 1 contains 8 hdc, and Round 2 instructs you to work 2 hdc into every stitch. Mathematically, that produces 16 stitches, even though a larger stitch total is stated for that round. The later increase sequence confirms the progression continues to 24 stitches in Round 3, 32 stitches in Round 4, and 40 stitches in Round 5. Keep the increase sequence consistent as written.
That gives us a logical crown progression:
8 → 16 → 24 → 32 → 40 stitches
Once you reach 40 stitches, the increases stop temporarily.
How to Crochet the Baby Luffy Bucket Hat Crochet Pattern
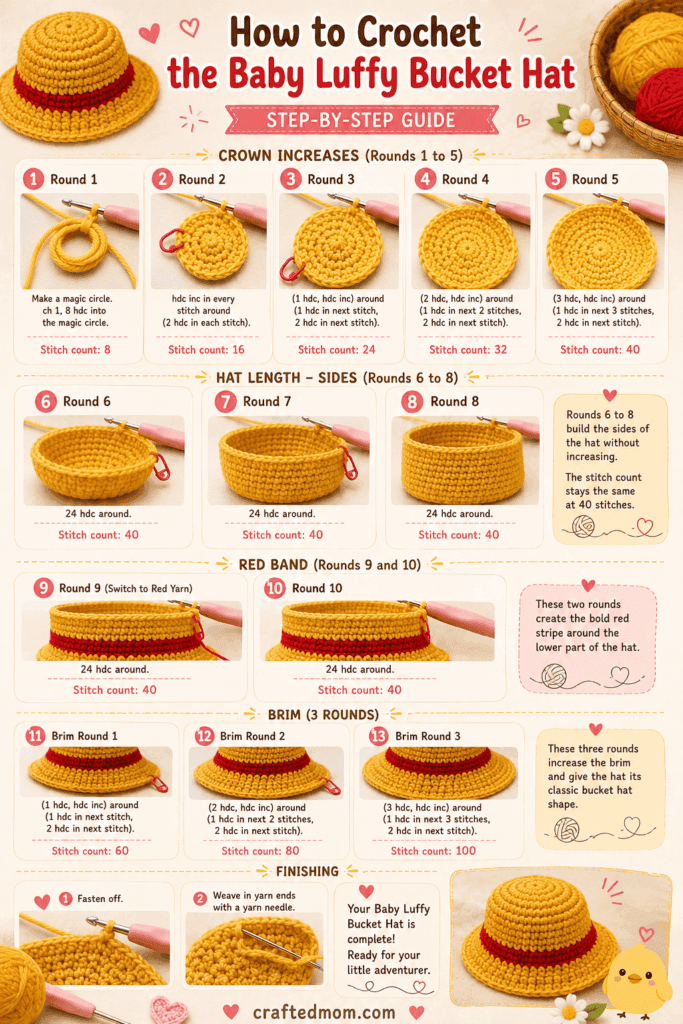
Start with your mustard-colored yarn and 6 mm crochet hook.
Round 1: Start the Crown
Make a magic circle.
Chain:
ch 1
Work into the magic circle:
8 hdc
Pull the center tail firmly to close the ring.
Secure the starting tail at the back if needed.
Stitch count: 8
The center should form a small, compact circle.
Round 2
Work:
hdc inc in every stitch around
In other words:
2 hdc in each stitch
Place your stitch marker into the first half double crochet of the round.
Continue all the way around.
Stitch count: 16
This round doubles the number of stitches and begins widening the top of the hat.
Round 3
Work the following repeat:
(1 hdc, hdc inc) around
That means:
- 1 hdc in the next stitch
- 2 hdc in the following stitch
Repeat the sequence around.
Move your stitch marker to the first stitch of the round.
Stitch count: 24
This is the first round where the increases are separated by regular stitches.
Round 4
Work:
(2 hdc, hdc inc) around
That means:
- 1 hdc in the next stitch
- 1 hdc in the next stitch
- 2 hdc in the following stitch
Repeat all the way around.
Stitch count: 32
The crown should now look noticeably wider and flatter.
Round 5
This is the final increase round for the top of the hat.
Work:
(3 hdc, hdc inc) around
That means:
- 1 hdc in each of the next 3 stitches
- 2 hdc in the following stitch
Repeat around.
Stitch count: 40
At the end of Round 5, the crown has reached its full stitch count before the sides are worked downward.
Check the Crown Before Continuing
At this stage, you should have a rounded crochet circle with:
40 stitches
I recommend counting now.
It is much easier to fix an extra or missing stitch at this point than after several straight rounds have been added.
From here through Round 10, the hat keeps those 40 stitches.
Crochet the Sides of the Hat
The length portion covers Rounds 6 through 10.
Rounds 6 to 8 stay mustard yellow.
Rounds 9 and 10 create the red band.
Round 6
Work:
1 hdc in every stitch around
Stitch count: 40
Move your stitch marker to the first stitch.
Round 7
Work:
1 hdc in every stitch around
Stitch count: 40
Round 8
Work:
1 hdc in every stitch around
Stitch count: 40
By the end of Round 8, the hat should have a clearly defined crown and straight sides.
The mustard section is now ready for the red stripe.
Change to Red Yarn
Before changing colors, work a short transition in the mustard yarn.
Work:
1 sc in next stitch
1 sc in next stitch
Then:
1 sl st in next stitch
Chain:
ch 1
Cut the mustard yarn.
Now count back 6 stitches from this point.
Attach the red yarn there.
Pull the red yarn through and:
ch 1
Secure the yarn tail at the back.
This slightly offset restart helps manage the transition into the contrasting stripe.
Crochet the Red Hat Band
Round 9
With red yarn, work:
1 hdc in every stitch around
Make sure you work into each real stitch around the transition area. That section can look a little unusual because of the earlier slip stitch and color change, but you still want to maintain the same stitch total.
Stitch count: 40
Join with:
sl st into the first stitch
The first red round is complete.
Round 10
Chain:
ch 1
Work:
1 hdc in every stitch around
Stitch count: 40
At the end, insert your hook into the first stitch but do not finish with the red yarn.
We are switching back to mustard for the brim.
Change Back to Mustard Yarn
With the hook inserted into the first stitch, pull the mustard yarn through.
Adjust the tension.
Tie the mustard and red yarn tails securely together on the wrong side.
You can tie them twice for a little extra security.
Cut the red yarn.
The red band is now finished.
The rest of the hat is worked in mustard.
Crochet the Bucket Hat Brim
The brim contains 3 rounds.
The first two use half double crochet.
The final round switches to double crochet for a slightly longer, more pronounced edge.
The increases are staggered from round to round so they don’t stack directly on top of one another. That helps prevent obvious points or corners from forming in the brim.
Brim Round 1
Chain:
ch 1
Work:
(3 hdc, hdc inc) around
So the repeat is:
- 1 hdc in each of the next 3 stitches
- 2 hdc in the next stitch
Repeat around.
Starting from 40 stitches, this increase pattern adds 10 stitches.
Stitch count: 50
Join with:
sl st into the first stitch
The brim should now begin curving outward instead of hanging straight down.
Brim Round 2
Chain:
ch 1
This round increases approximately every fifth stitch, but the first increase is shifted so it does not sit directly above an increase from the previous round.
Begin:
1 hdc in first stitch
hdc inc in next stitch
Then continue with the repeating rhythm:
4 hdc, hdc inc
Repeat around as the stitches allow.
If you have stitches left at the end that do not complete another full repeat, work:
1 hdc in each remaining stitch
Join with:
sl st into first stitch
The most important detail here is the staggered increase placement. You don’t want every increase from Round 2 sitting directly over the increases from Round 1 because that can make the brim look angular instead of smoothly flared.
Brim Round 3
This final round is worked in double crochet.
Chain:
ch 1
Work:
5 dc, dc inc
Repeat the sequence around:
- 1 dc in each of the next 5 stitches
- 2 dc in the next stitch
Continue around.
In other words, you are increasing approximately every sixth stitch.
Join with:
sl st into the first stitch
Chain:
ch 1
Cut the yarn.
Fasten off.
Your bucket-hat shape is complete.
Finish the Baby Luffy Bucket Hat
Thread each loose yarn tail onto your yarn needle.
Weave the tails through several stitches on the wrong side of the hat.
For the color-change areas, make sure the red and mustard ends are especially secure because those sections experience some tension when the hat is stretched during wear.
Trim any excess yarn after weaving.
Gently shape the hat with your hands.
The crown should remain rounded, the red band should sit horizontally around the lower sides, and the mustard brim should flare outward.
There are no separate appliqués, straps, or sewn-on decorations to attach, which makes the finishing stage pleasantly quick.
Why the Brim Increases Are Staggered
This is one of the most useful construction details in the pattern.
If every increase were placed directly above an increase from the previous round, the brim could develop visible lines or points.
Instead, the increase positions move.
The first brim round uses:
3 hdc, inc
The next one shifts where that increase falls.
The final round expands again using double crochet and increases approximately every sixth stitch.
That combination creates a progressively wider edge without making the brim look like a polygon.
Getting a Clean Red Stripe
The red stripe is only two rounds tall, so uneven tension becomes noticeable quickly.
Try to maintain the same tension you used with the mustard yarn.
If your red yarn is the same brand and weight but feels slightly thinner or thicker, focus on keeping your stitch height consistent rather than pulling harder to compensate.
The stripe should sit neatly between the mustard crown section and mustard brim.
For another crochet project that uses a bold accessory to change the character of the finished piece, you might also like the Penguin with Hats Crochet Pattern.
Keeping the Crown Smooth
The crown depends on evenly spaced increases.
The progression is:
Round 1: 8
Round 2: 16
Round 3: 24
Round 4: 32
Round 5: 40
Each new increase round adds another regular half double crochet between increases.
That steady progression is what creates the circular top.
If your crown starts ruffling, check for accidental extra increases.
If it starts curling into a bowl much earlier than expected, check whether an increase was skipped.
Why a Stitch Marker Matters
Because the early rounds are worked continuously, you don’t have a visible join marking the start of each round.
Place the marker into the first stitch of every new round.
When you reach it again, remove it, work the stitch as instructed, and move the marker into the new first stitch.
This is especially important during Rounds 3 to 5, when accidentally shifting the repeat can change the crown shape.
Working the Straight Side Rounds
Rounds 6 through 10 contain no intentional shaping increases or decreases.
That means you should maintain:
40 stitches
The repetition is useful because it gives the hat enough height before the brim begins.
Rounds 6 through 8 remain mustard.
Rounds 9 and 10 become the red accent band.
That simple color placement is what gives this Baby Luffy Bucket Hat Crochet Pattern its distinctive look without requiring any additional decorative pieces.
Yarn Color Ideas
Mustard yellow and red give the hat its recognizable color combination.
If you’re making the project purely as a bucket hat rather than as a character-inspired piece, the construction could also work visually with other color pairings.
For example, you could choose one main color and one contrasting two-round stripe.
Just keep in mind that changing the colors changes the character-inspired appearance, even though the crochet construction remains the same.
If you like wearable crochet projects, the Button Headband Crochet Pattern is another compact accessory project that works up quite differently from a hat.
Tips for Neater Color Changes
Color changes can leave small steps in crocheted rounds.
Here, the mustard section is finished with two single crochets and a slip stitch before the red yarn begins from an offset point.
When you reach that transition again, pay attention to the actual stitches rather than the visual gap.
The stitch count should remain:
40 stitches
during both red rounds.
Once the red band is complete, pull the mustard yarn through the first stitch to begin the brim.
Secure the yarn tails at the back before trimming.
Frequently Asked Questions
What yarn is used for the Baby Luffy Bucket Hat Crochet Pattern?
Use weight 4 yarn in mustard yellow and red.
What stitch is used most often?
The main stitch is the half double crochet. Single crochet and slip stitch are used around the color transition, while double crochet is used for the last brim round.
Why are the brim increases shifted?
Staggering the increases helps prevent them from stacking directly above one another, which can make the brim develop visible points instead of a smoother curve.
