

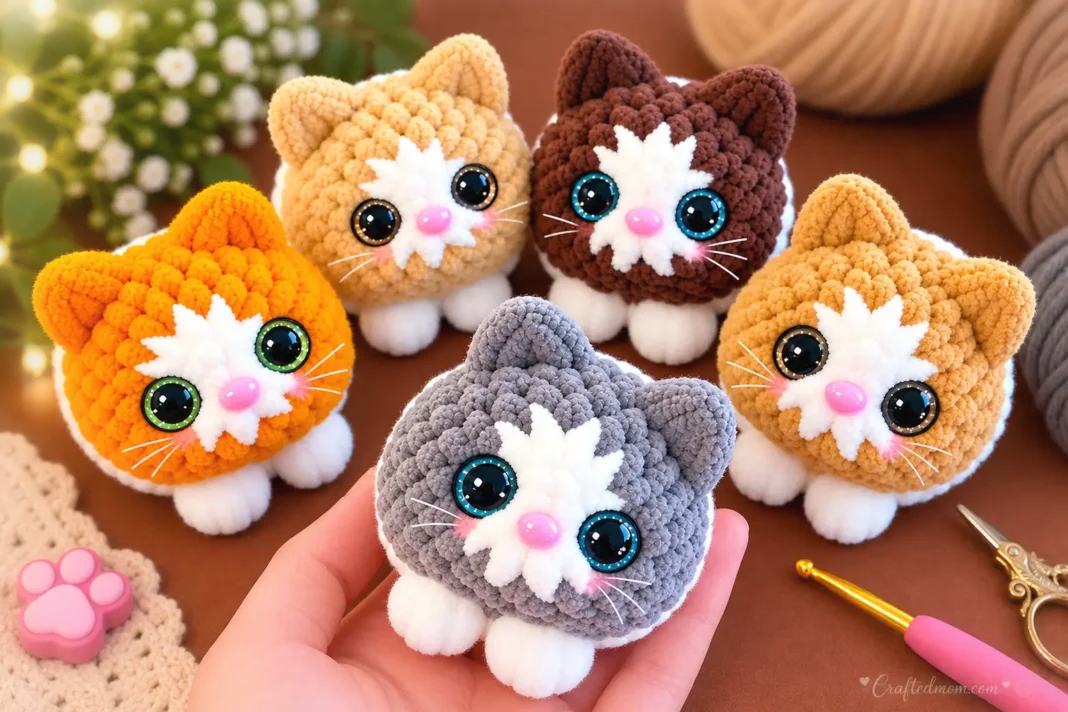
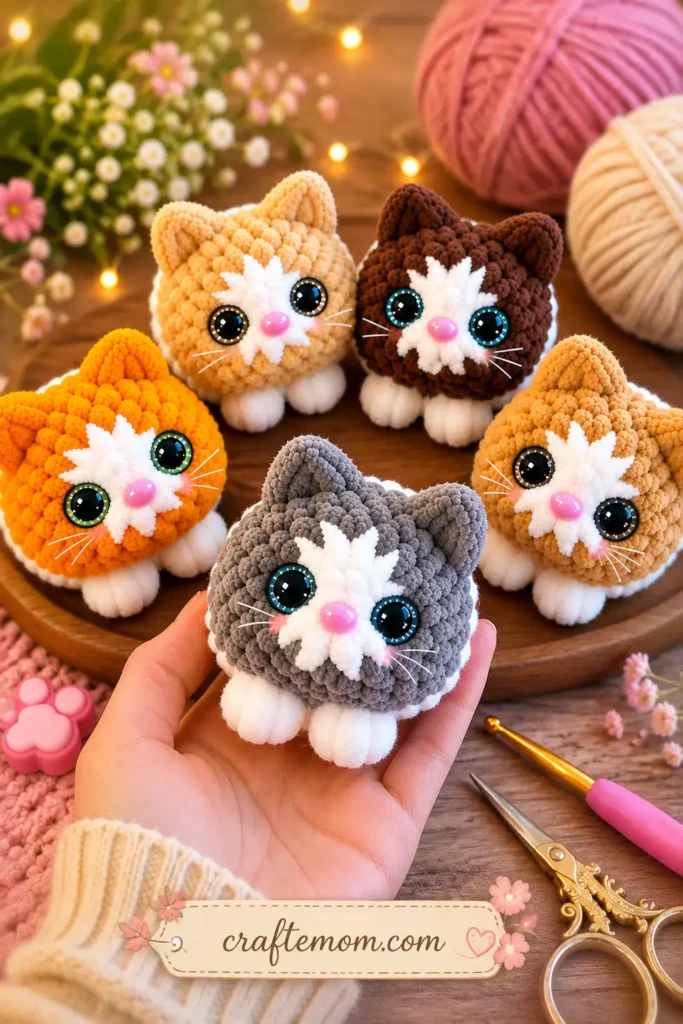
If you love tiny crochet projects, this mini cat crochet pattern is an adorable project to add to your list. These little amigurumi cats have tiny ears, four puff-stitch paws, a crocheted tail, big safety eyes, and a cute nose.
They’re small enough to make as gifts, crochet market items, desk decorations, or little handmade keepsakes. You can also change the yarn colors to create orange cats, gray cats, brown cats, tuxedo cats, or colors inspired by a favorite pet.
This tutorial is worked mostly in continuous rounds using single crochet stitches. The ears are crocheted directly into the body, while the legs are formed with puff stitches, so there are very few separate pieces to attach.
Important: Keep the stitch counts and measurements below exactly as written. The pattern uses 12 mm safety eyes, a 6 × 8 mm nose, and a 3.75 mm crochet hook.
Mini Crochet Cat Pattern at a Glance
| Project Detail | Information |
| Project | Mini Crochet Cat / Amigurumi Cat |
| Difficulty | Easy to Intermediate |
| Estimated Time | About 1–2 hours |
| Crochet Hook | 3.75 mm |
| Yarn Colors | 2 colors |
| Safety Eyes | 12 mm |
| Nose | 6 × 8 mm |
| Main Stitch | Single crochet |
| Construction | Worked mainly in continuous rounds |
| Starting Method | Chain-2 method or magic ring |
| Stuffing | Polyester fiberfill |
| Age Group | Adults/teens for crafting; finished toy is not suitable for young children if safety eyes or a glued nose are used |
| Approximate Cost | About $3–$8 depending on materials already owned |
| Best For | Gifts, craft markets, decorations, amigurumi collections |
| Skills Needed | Single crochet, increase, decrease, slip stitch, half double crochet, double crochet, chains, color changes, puff stitch |
Materials You’ll Need
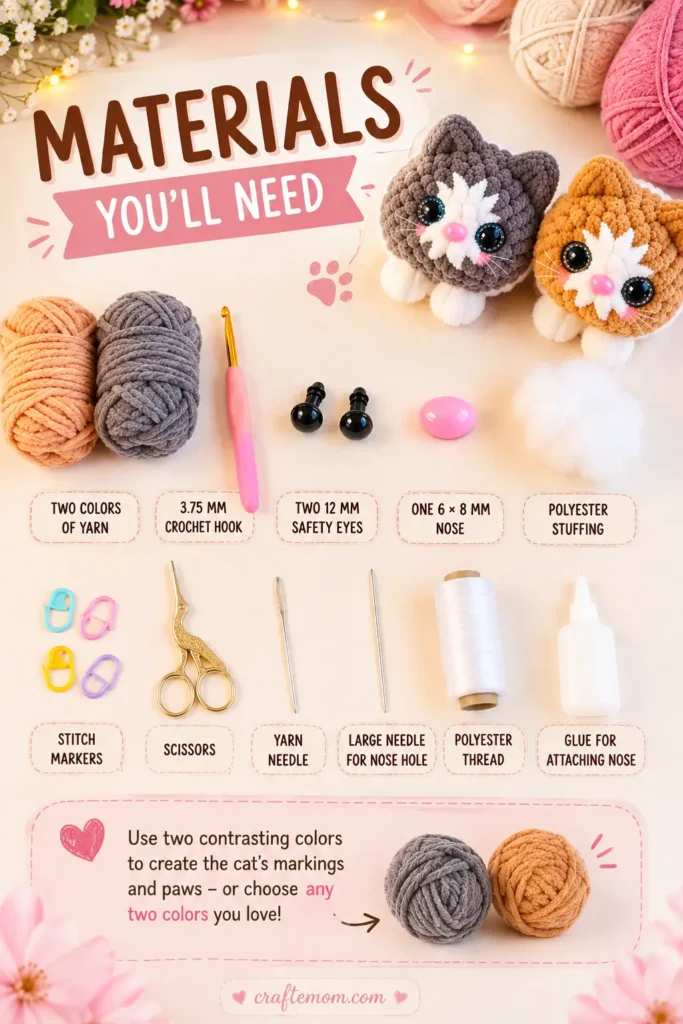
Gather all your materials before starting. You will need:
- Two colors of yarn
- 3.75 mm crochet hook
- Two 12 mm safety eyes
- One 6 × 8 mm nose
- Polyester stuffing
- Stitch markers
- Scissors
- Yarn needle
- Large needle for creating the nose placement hole
- Regular polyester thread in several plies for shaping
- Suitable glue for attaching the nose
The original project uses contrasting yarn colors to create the cat’s markings and paws, but you can choose any two colors you like.
Crochet Abbreviations Used
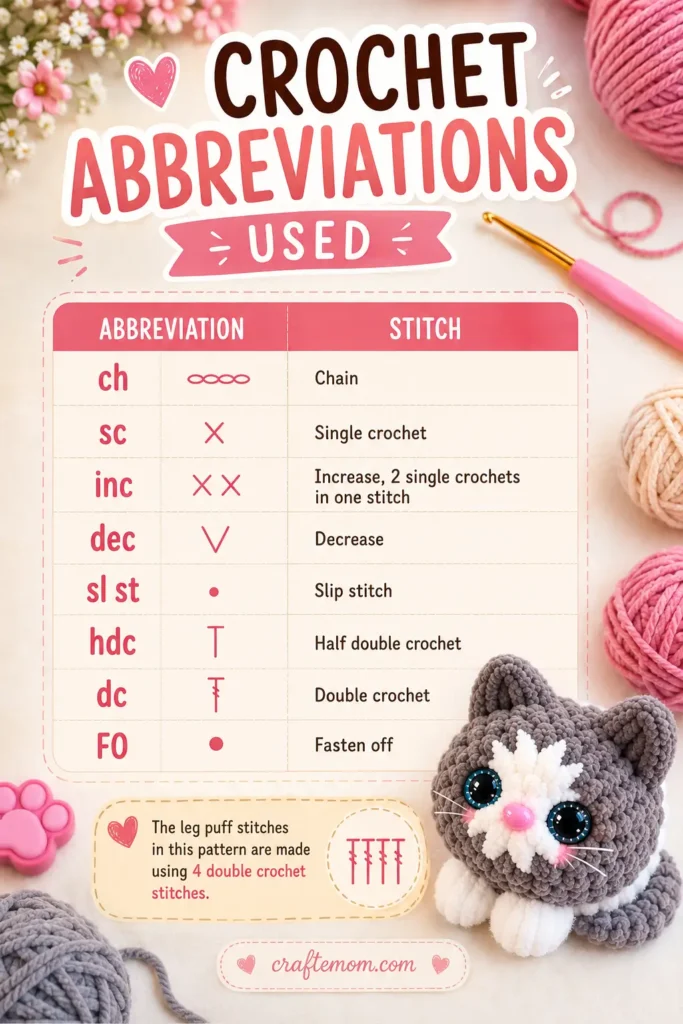
To make the instructions easier to follow, I’ll use these standard crochet abbreviations:
| Abbreviation | Stitch |
| ch | Chain |
| sc | Single crochet |
| inc | Increase, 2 single crochets in one stitch |
| dec | Decrease |
| sl st | Slip stitch |
| hdc | Half double crochet |
| dc | Double crochet |
| FO | Fasten off |
The leg puff stitches in this pattern are made using 4 double crochet stitches.
How to Crochet a Mini Cat step by step
Round 1: Start the Body
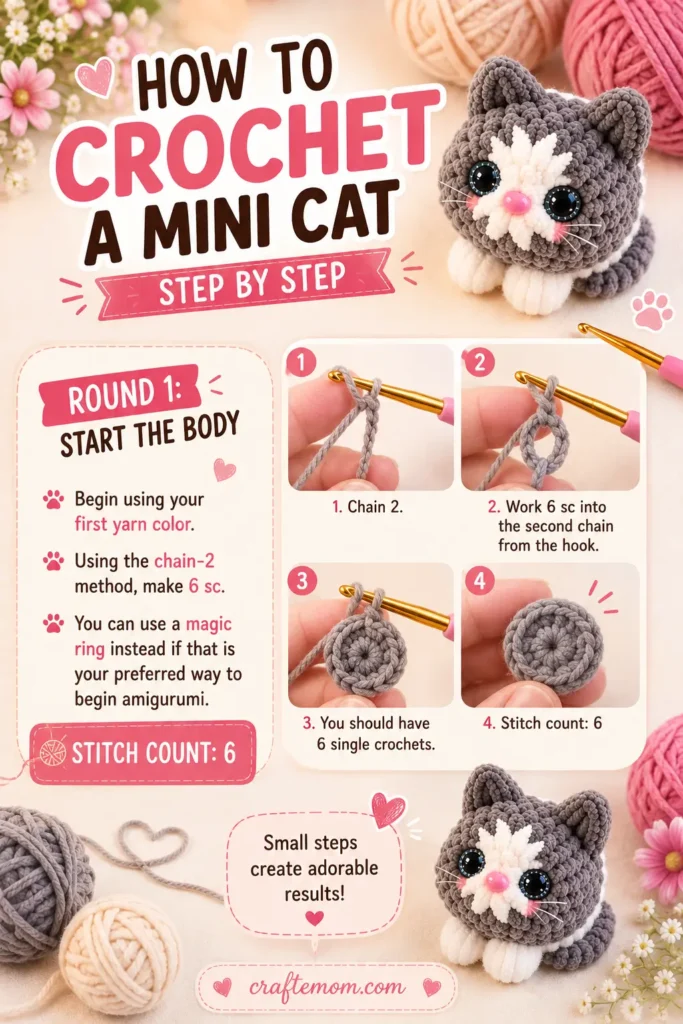
Begin using your first yarn color.
Using the chain-2 method, make 6 sc.
You can use a magic ring instead if that is your preferred way to begin amigurumi.
Stitch count: 6
Round 2: Increase Around
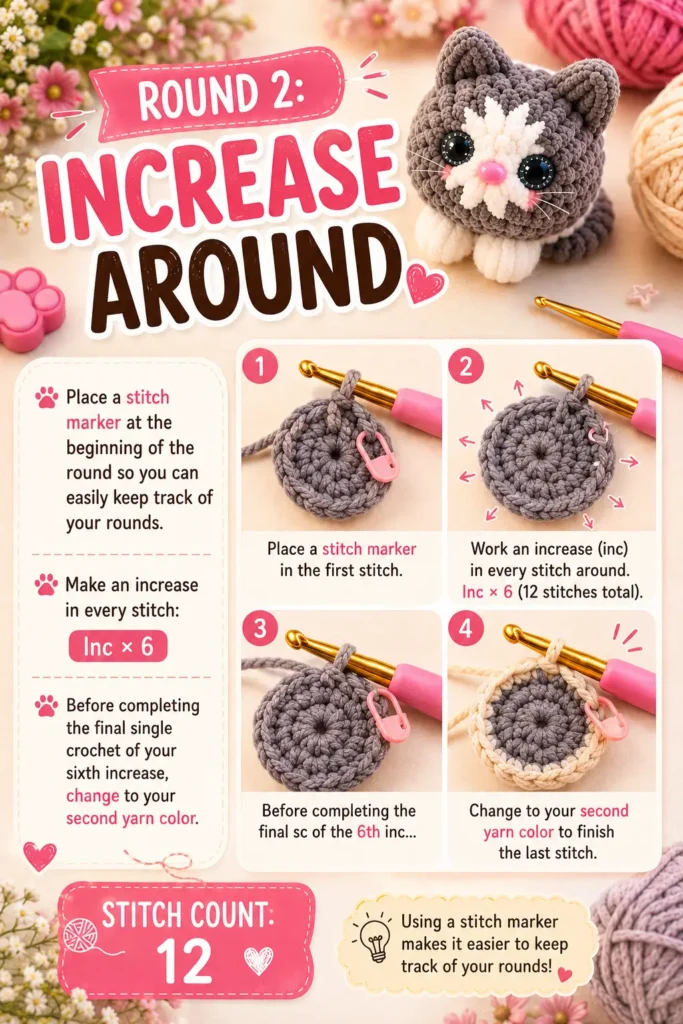
Place a stitch marker at the beginning of the round so you can easily keep track of your rounds.
Make an increase in every stitch:
Inc × 6
Before completing the final single crochet of your sixth increase, change to your second yarn color.
Stitch count: 12
Round 3
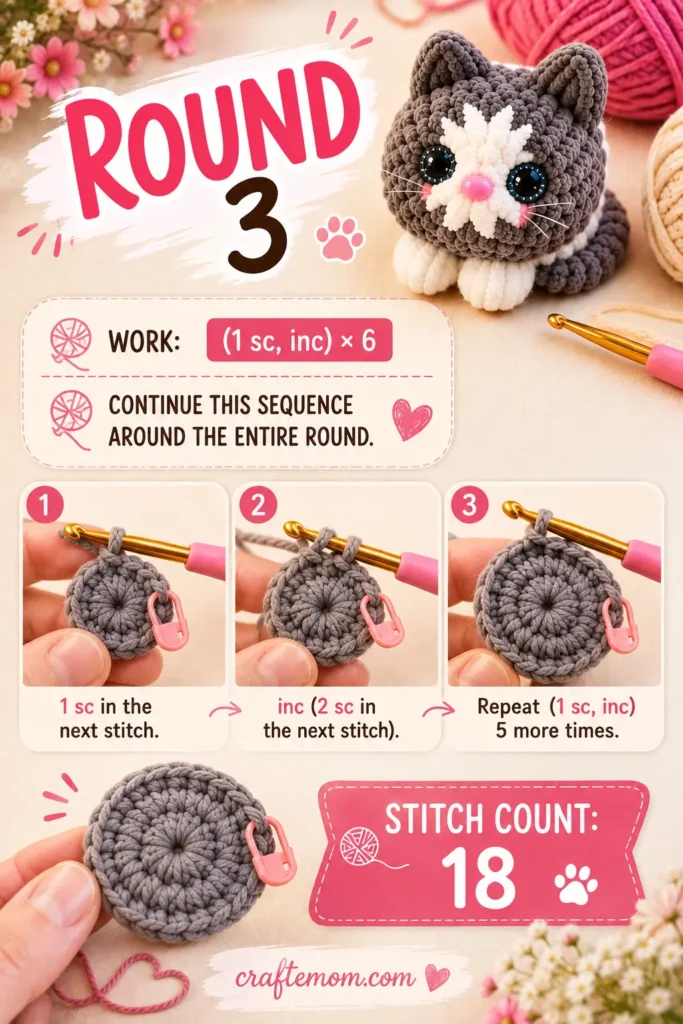
Work:
(1 sc, inc) × 6
Continue this sequence around the entire round.
Stitch count: 18
Round 4
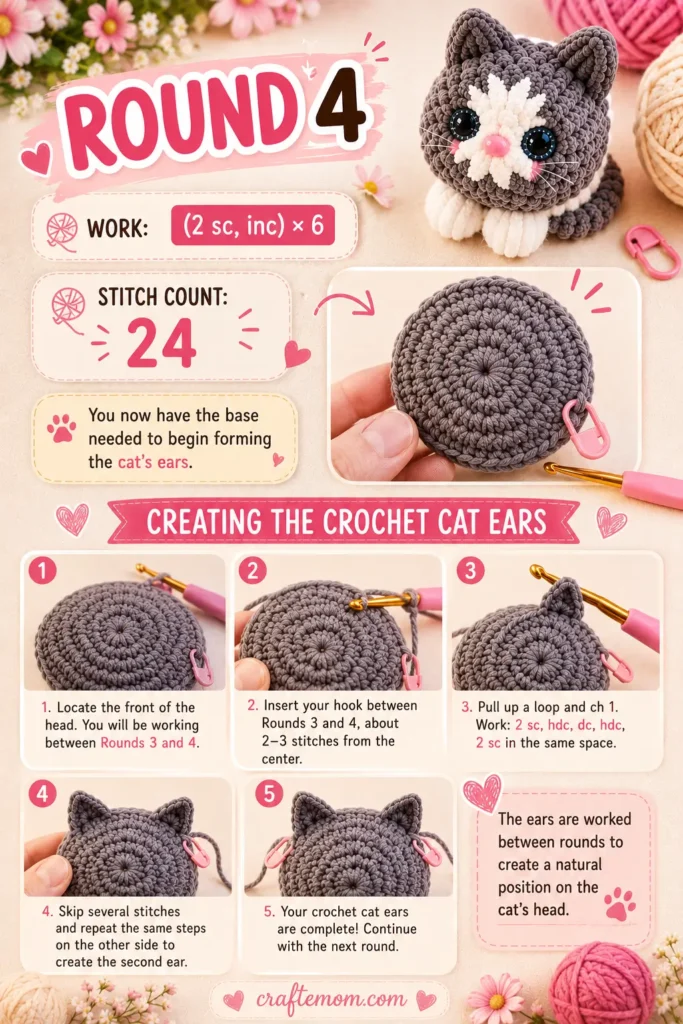
Work:
(2 sc, inc) × 6
Stitch count: 24
You now have the base needed to begin forming the cat’s ears.
Creating the Crochet Cat Ears
Round 5: Make Both Ears
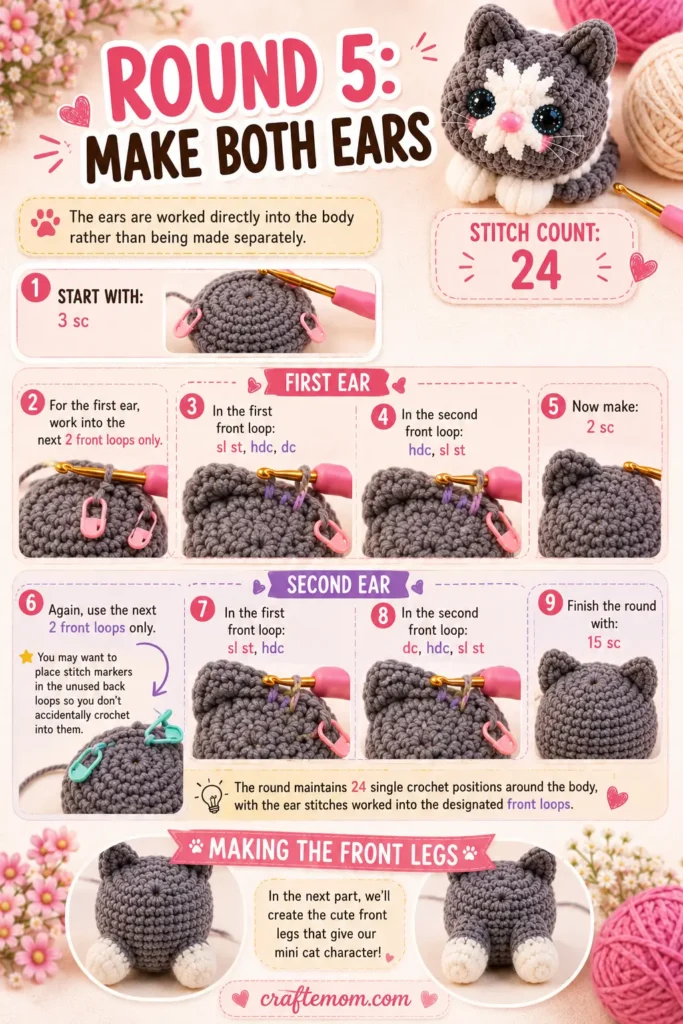
The ears are worked directly into the body rather than being made separately.
Start with:
3 sc
For the first ear, work into the next 2 front loops only.
First Ear
In the first front loop:
sl st, hdc, dc
In the second front loop:
hdc, sl st
Now make:
2 sc
Second Ear
Again, use the next 2 front loops only.
You may want to place stitch markers in the unused back loops so you don’t accidentally crochet into them.
In the first front loop:
sl st, hdc
In the second front loop:
dc, hdc, sl st
Finish the round with:
15 sc
The round maintains 24 single crochet positions around the body, with the ear stitches worked into the designated front loops.
Making the Front Legs
Round 6
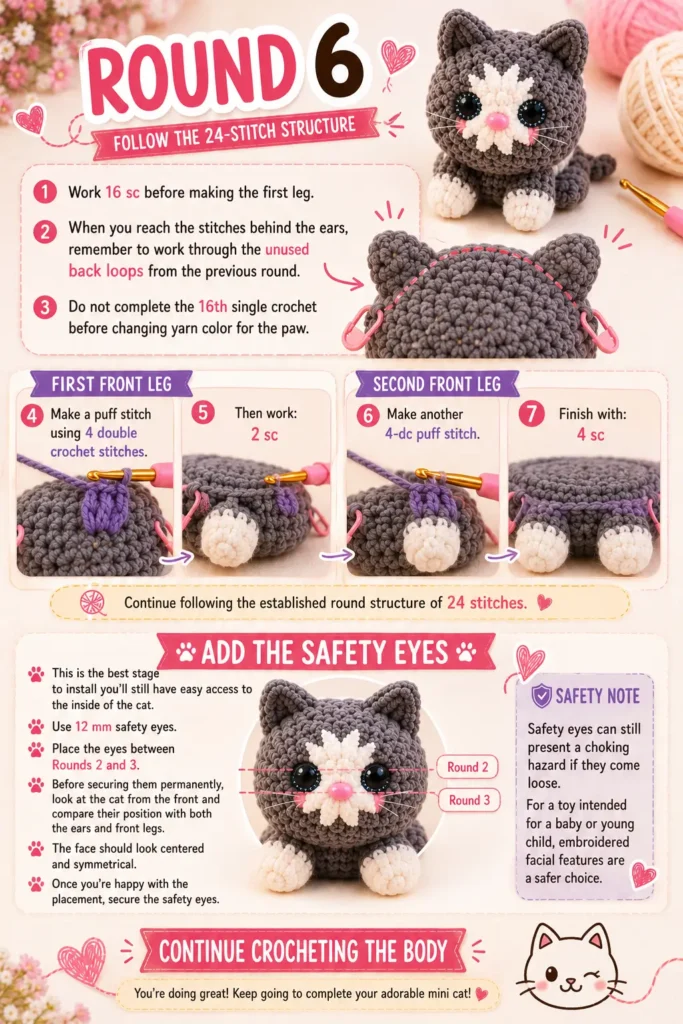
Work 16 sc before making the first leg.
When you reach the stitches behind the ears, remember to work through the unused back loops from the previous round.
Do not complete the 16th single crochet before changing yarn color for the paw.
First Front Leg
Make a puff stitch using 4 double crochet stitches.
Then work:
2 sc
Second Front Leg
Make another 4-dc puff stitch.
Finish with:
4 sc
Continue following the established round structure of 24 stitches.
Add the Safety Eyes
This is the best stage to install the eyes because you’ll still have easy access to the inside of the cat.
Use 12 mm safety eyes.
Place the eyes between Rounds 2 and 3.
Before securing them permanently, look at the cat from the front and compare their position with both the ears and front legs.
The face should look centered and symmetrical.
Once you’re happy with the placement, secure the safety eyes.
Safety note: Safety eyes can still present a choking hazard if they come loose. For a toy intended for a baby or young child, embroidered facial features are a safer choice.
Continue Crocheting the Body
Round 7
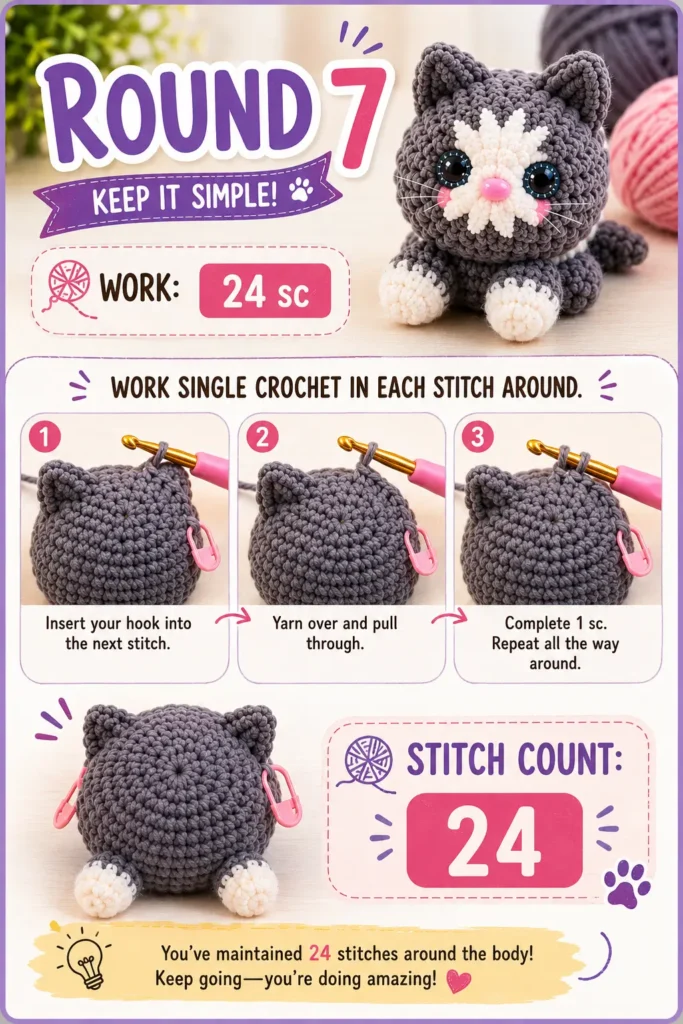
Work:
24 sc
Stitch count: 24
Round 8
Work the following sequence:
5 sc, inc, 5 sc, inc, 11 sc, inc
Stitch count: 27
Round 9: Add the Color Change
Work the first 20 sc using the current color.
Begin the next stitch, but don’t finish it. Change to your contrasting yarn color before completing the stitch.
Continue until you have completed the round.
Stitch count: 27
Crochet the Back Legs
Round 10
Start with:
17 sc
In the next stitch, make the first back leg using the same 4-dc puff stitch technique used for the front legs.
Then make:
6 sc
In the next stitch, make the second 4-dc puff stitch.
Finish with:
2 sc
After completing this section, cut the white/contrasting yarn and securely tie the ends.
Round 11
Work:
27 sc
Stitch count: 27
Shaping the Bottom of the Cat
Round 12
Now begin decreasing.
Work:
(1 sc, dec) × 9
Stitch count: 18
The body will start closing toward the bottom.
Crochet the Cat’s Tail
Round 13
Start with:
3 dec
Now you’ll create the tail directly from the body.
Make the Tail
Chain:
ch 5
Starting in the second chain from the hook, work:
4 sc
Don’t worry if the tail initially looks slightly off-center. Once the remaining decreases are completed, its position will become centered.
After making the tail, complete:
6 dec
Stuff the Mini Cat
Now it’s time to stuff your crochet cat.
Add polyester fiberfill through the remaining opening. The original project is stuffed very firmly so the finished cat holds its compact shape.
Add the stuffing gradually, making sure it reaches the corners and fills the body evenly.
Avoid leaving empty areas around the legs, ears, or sides.
Close the Opening
Cut the working yarn, leaving a tail long enough for sewing.
Thread the yarn onto your needle.
Pass the needle through the front loops only of the remaining stitches around the opening.
Pull carefully to close the opening.
Secure the yarn and hide the yarn end inside the body.
Shape the Cat’s Face
This little step helps create the distinctive cute expression.
Use regular polyester thread in several plies.
Skip one round above the legs and insert your needle.
Bring the needle out at the corner of one eye. Move to the lower corner of that eye, then bring the needle out near the lower corner of the second eye.
Continue to the upper corner of the second eye and return through a stitch near your original starting point.
Pull carefully to create the desired shaping around the eyes.
Tie the thread securely and hide the ends inside the cat.
Adjust the eyes and ears until everything looks neat and symmetrical.
Add the 6 × 8 mm Nose
The final facial detail is the nose.
Use a 6 × 8 mm nose and position it:
- In line with the eyes
- Directly in the center of the face
You can make a small placement hole with a large needle first if needed.
Once you’re satisfied with its position, attach the nose securely according to the glue manufacturer’s instructions and allow it to cure completely.
Your Mini Crochet Cat Is Finished!
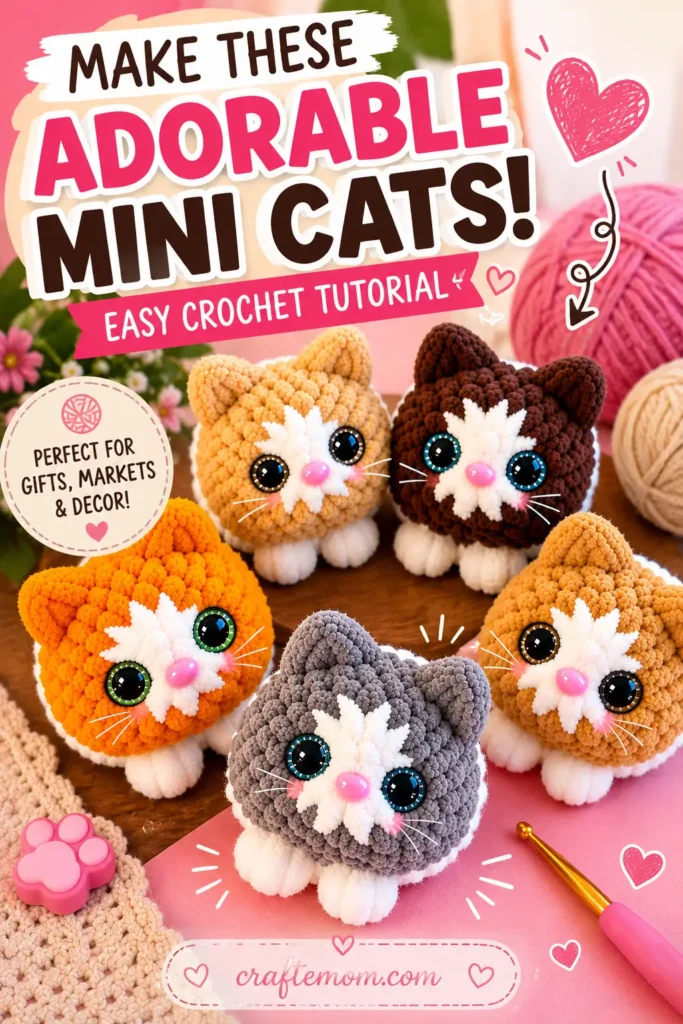
Your tiny amigurumi cat is complete. Because the basic construction stays the same, you can make an entire collection simply by changing the yarn colors.
Try gray and white, orange and white, brown and cream, black and white, or other combinations to give every little cat its own personality.
Tips for Making Your Mini Cats Look Neat
Consistent tension makes a big difference with such a small amigurumi project. Keep your single crochet stitches tight enough that the stuffing doesn’t show through, but don’t crochet so tightly that inserting your hook becomes difficult.
Pay particular attention to the placement of the 12 mm eyes. Check their position against the ears and legs before securing them because even a small difference can change the expression.
When stuffing, use small amounts at a time and stuff firmly. This helps maintain the compact shape of the finished cat.
Finally, use stitch markers whenever you’re unsure about the beginning of a round or the unused back loops behind the ears.
Mini Cat Crochet Pattern: Quick Round Reference
| Round | Instructions | Stitch Count |
| R1 | 6 sc | 6 |
| R2 | inc × 6; change color before completing final stitch | 12 |
| R3 | (1 sc, inc) × 6 | 18 |
| R4 | (2 sc, inc) × 6 | 24 |
| R5 | 3 sc, first ear, 2 sc, second ear, 15 sc | 24 base sts |
| R6 | 16 sc, front leg, 2 sc, front leg, 4 sc | 24 |
| R7 | 24 sc | 24 |
| R8 | 5 sc, inc, 5 sc, inc, 11 sc, inc | 27 |
| R9 | 27 sc with color change after first 20 sc | 27 |
| R10 | 17 sc, back leg, 6 sc, back leg, 2 sc | 27 |
| R11 | 27 sc | 27 |
| R12 | (1 sc, dec) × 9 | 18 |
| R13 | 3 dec, ch 5 + 4 sc for tail, 6 dec | 9 remaining before closure |
Mini cat crochet pattern: Final Thoughts
This mini cat crochet pattern is a fun way to create an adorable amigurumi cat using just two yarn colors and a few basic crochet techniques. With its tiny ears, puff-stitch legs, little tail, and cute face, it makes a lovely handmade gift, craft market item, or addition to your crochet collection.
Once you understand the basic pattern, try experimenting with different yarn colors and markings to create your own collection of mini crochet cats. Most importantly, take your time with the eye placement, stuffing, and shaping, as these finishing touches give each little cat its personality.
Frequently Asked Questions
Is this mini cat crochet pattern suitable for beginners?
Yes. Confident beginners who know basic stitches, increases, decreases, and simple color changes should be able to follow it.
What size crochet hook do I need for this Mini Cat crochet
This pattern uses a 3.75 mm crochet hook.
How long does it take to crochet a mini cat?
Most crocheters can complete one in approximately 1–2 hours, depending on experience and crochet speed.
